

Did you guys have a great weekend? We had a pretty decent one. The engagement party for my sister went well. The little man won one out of two basketball games, I got some shopping in on Saturday and we had a lazy Sunday finishing up a few things around the house. The kitchen didn't get touched other than to cook, but I'm ok with it. We will get there eventually.
Ok, so I know you are happy to not see an ornament post today, right? =) Well, I do have one more 'crafty' project for you before I take a much needed break from crafty projects. I'm actually pretty in love with how this one turned out. My best friend, Stacey, is having her second little one in December and it's a boy. Her and her husband are super excited. Her husband is a HUGE baseball fan (Cubs to be exact!) and they decided to have a "baseball-themed" nursery. A few weeks ago, we headed over to help paint the baseball on the wall. It's funny, but my real-life friends (are non-blog readers) and non-DIY'ers. I find it pretty hilarious. In a good way, you know. But, back to the story. We Luke painted a baseball on the wall and it totally looks adorable. You can see the progress shot that I posted on IG.
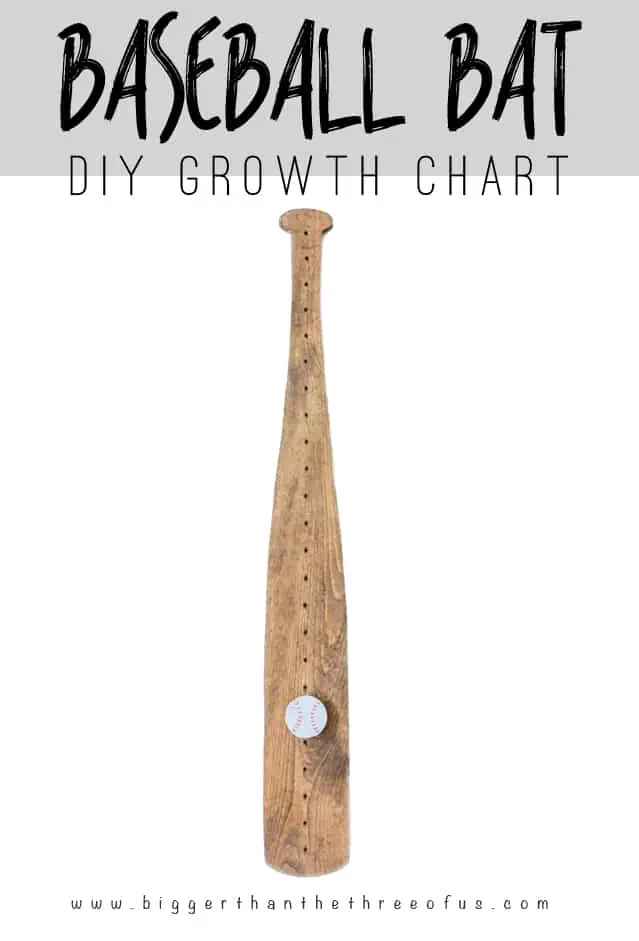
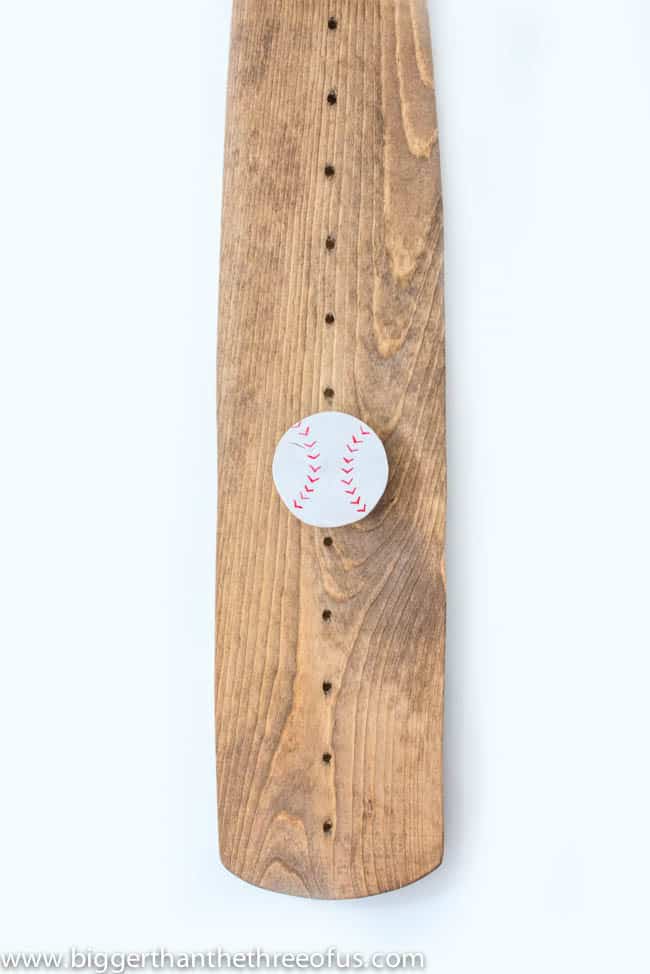
Stacey really wanted a baseball bat growth chart. She saw one on Etsy via Pinterest and just fell in love. The original Etsy store closed up shop, so I told her I would just make her one. It turned out pretty adorable and would be a cute little present for any little one for Christmas (given they love baseball of course!).
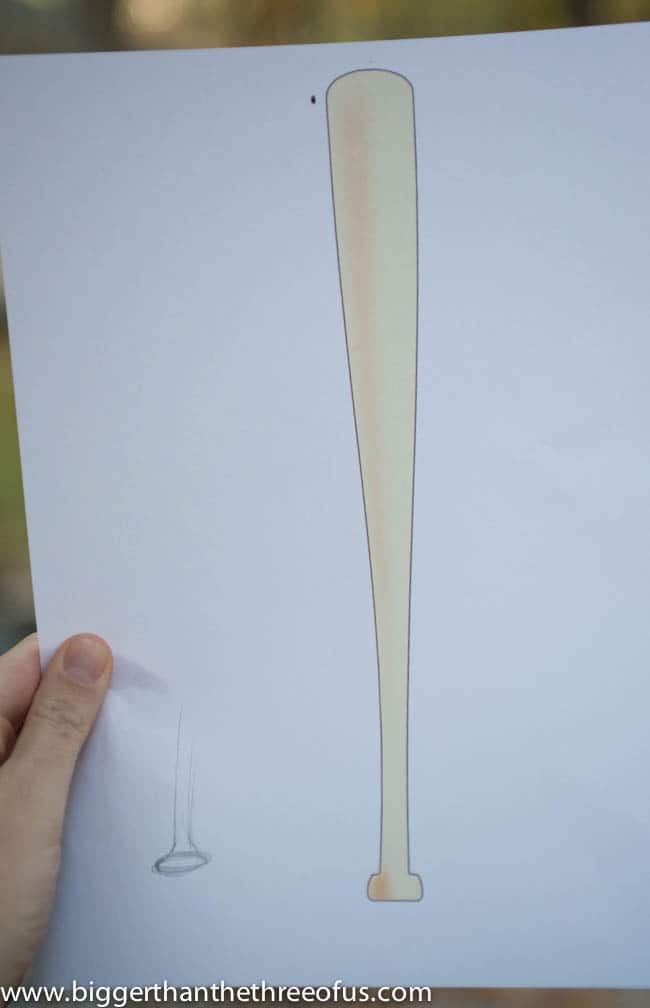
First thing I did was to print out an image of a baseball bat. The key to this project was picking a bat that was simple enough to cut out with a jigsaw.
After that, I gathered/bought supplies. I bought a piece of hardwood at the hardware store. I believe it was white oak and it cost me about $8. I also picked up a thin dowel rod and red paint. I already had white paint and a small piece of thin plywood.
Luke drew the bat on the wood (about 4 ft) by hand but you could enlarge the bat, print it and copy it on the wood that way. After that, I used a jigsaw and cut the bat out. We have a few recent jigsaw projects that explain this process in more detail. Check those out here and here if you would like.
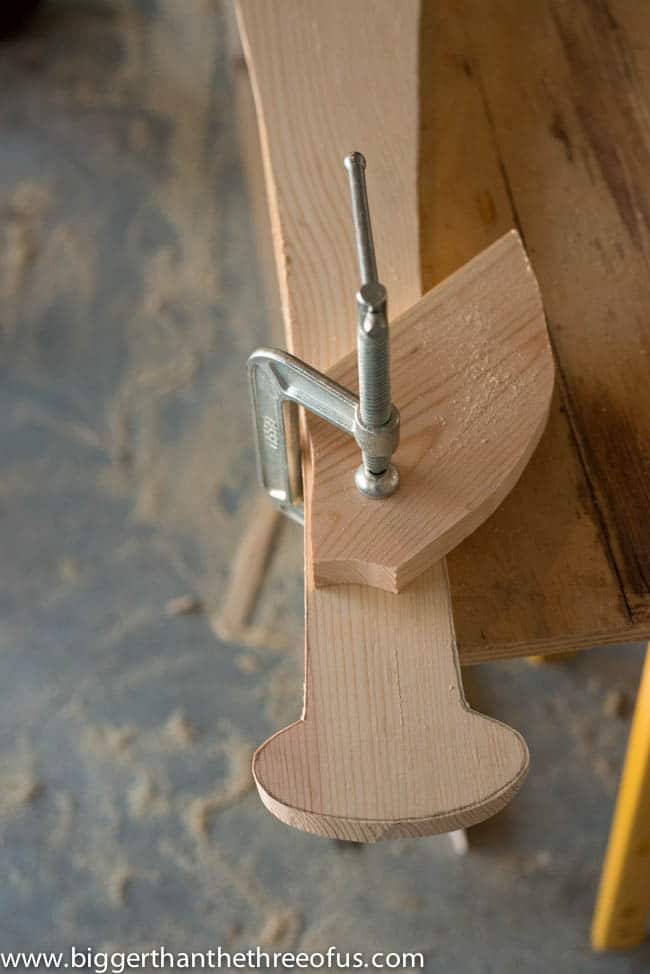
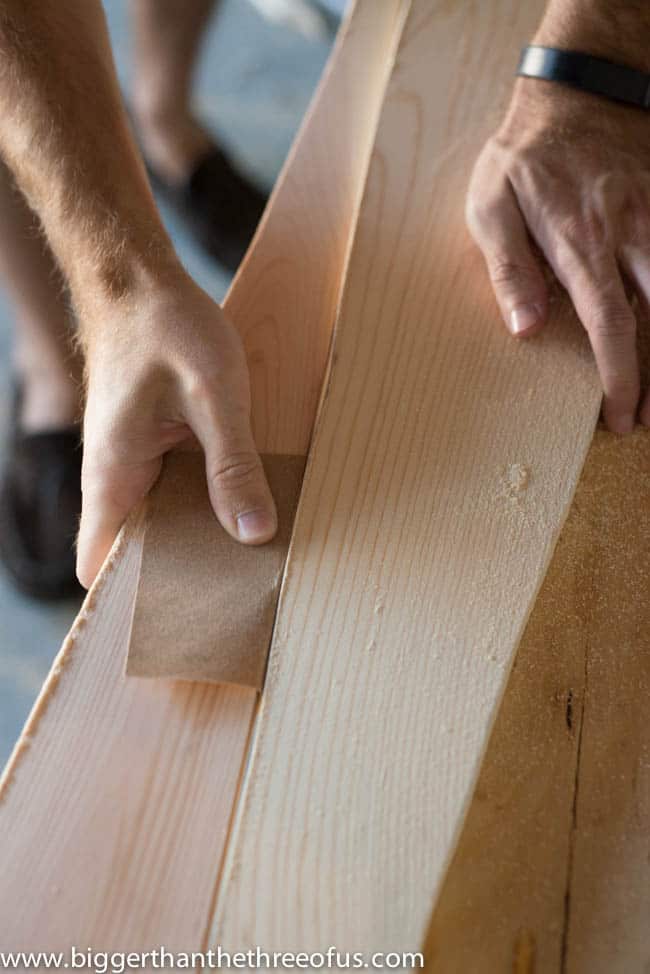
From there, we clamped the wood to a table (making sure to use an extra piece of wood to clamp to first so you don't indent your project). Then we started sanding. We used an orbital first all over and on the sides.
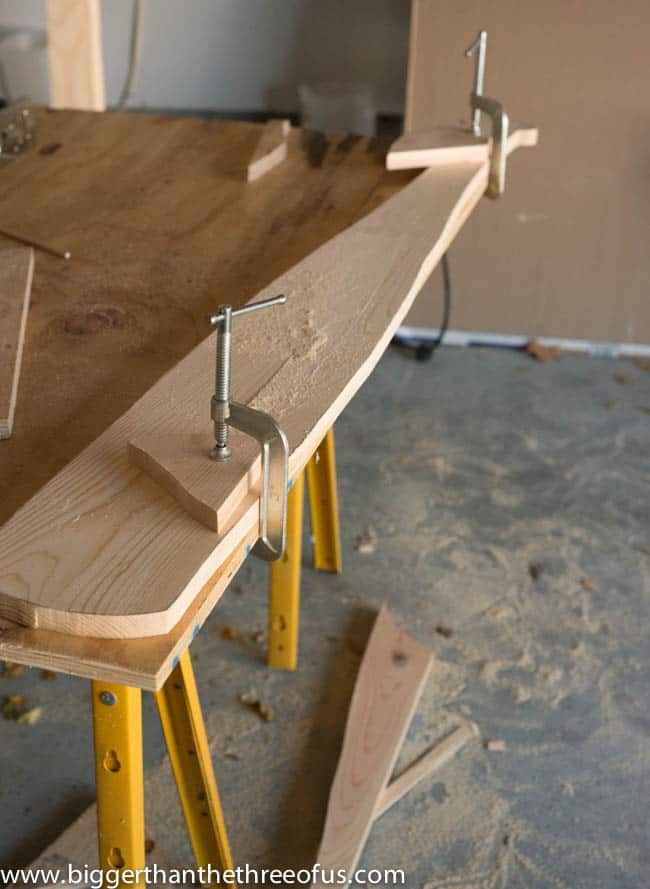
The orbital couldn't get everywhere, so we switched to a sanding pad for the sides.
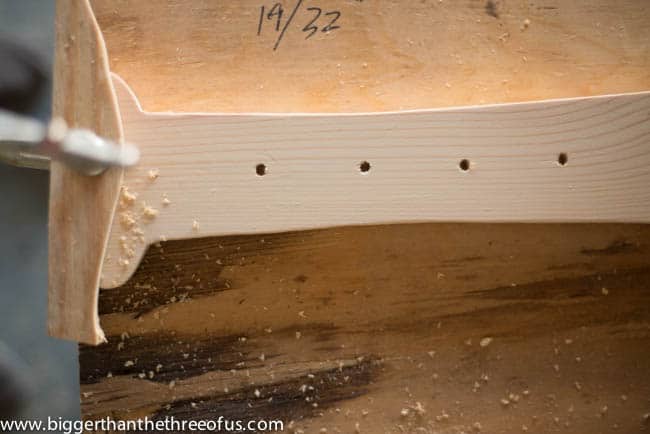
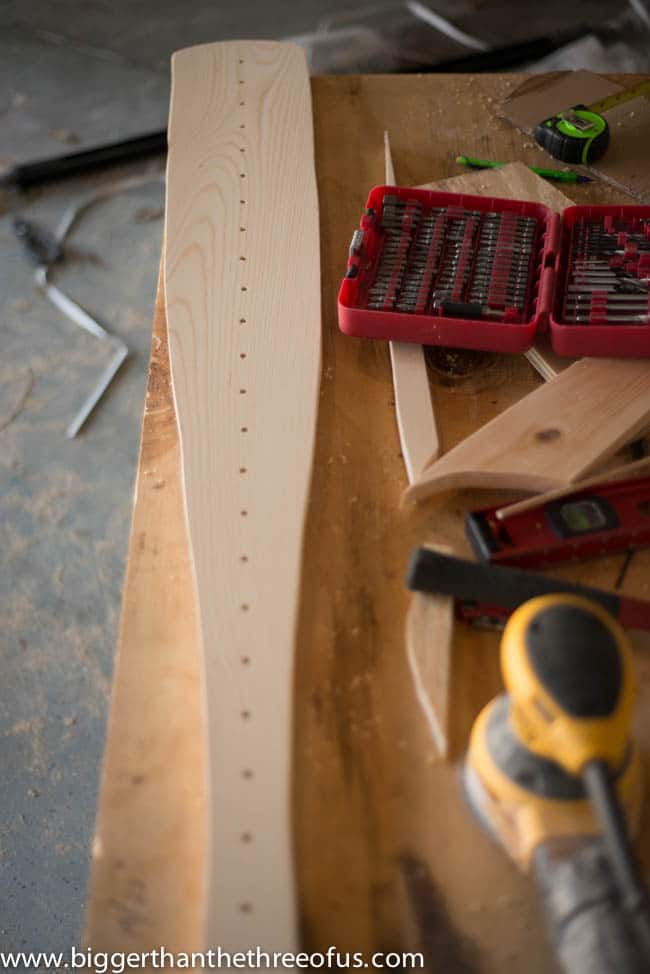
After the sanding was completed, we went to the next step which was figuring out the holes for the baseball to move up on. We decided to make our holes every two inches so we just marked every two inches from the bottom to the top (centered).

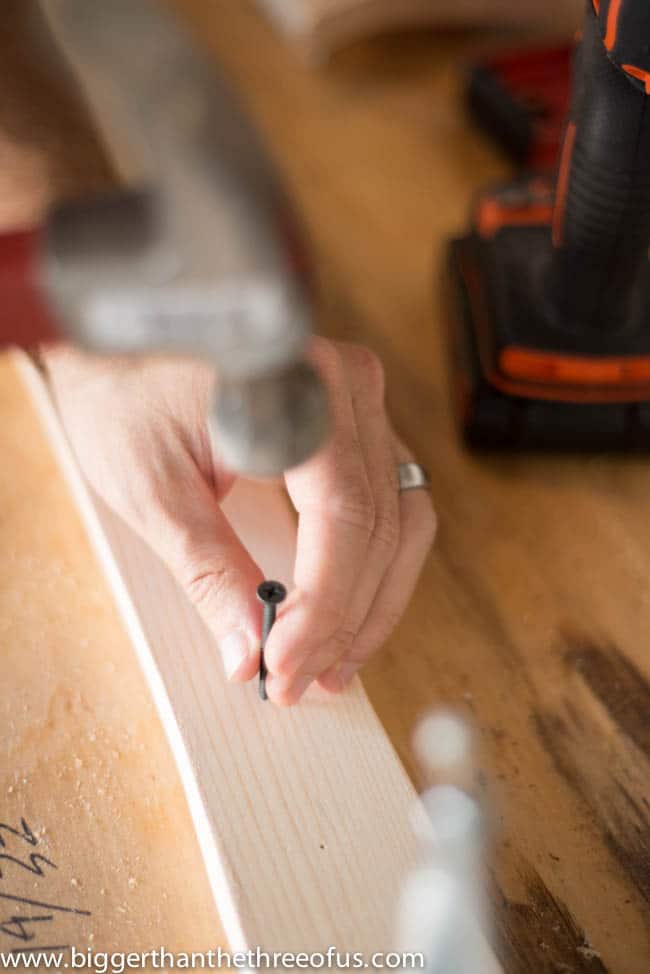
When you are trying to be exact, sometimes a drill can be a bit tricky. To be more exact with the holes, we hammered a nail (just to give it an indent) in all the holes.
Then we drilled the holes (using a drill stopper), making sure not to go all the way through the bat. Since we bought a ¼" dowel rod we knew to use a ¼" drill bit. Just to be sure, we tested a hole out on a spare piece of wood first.
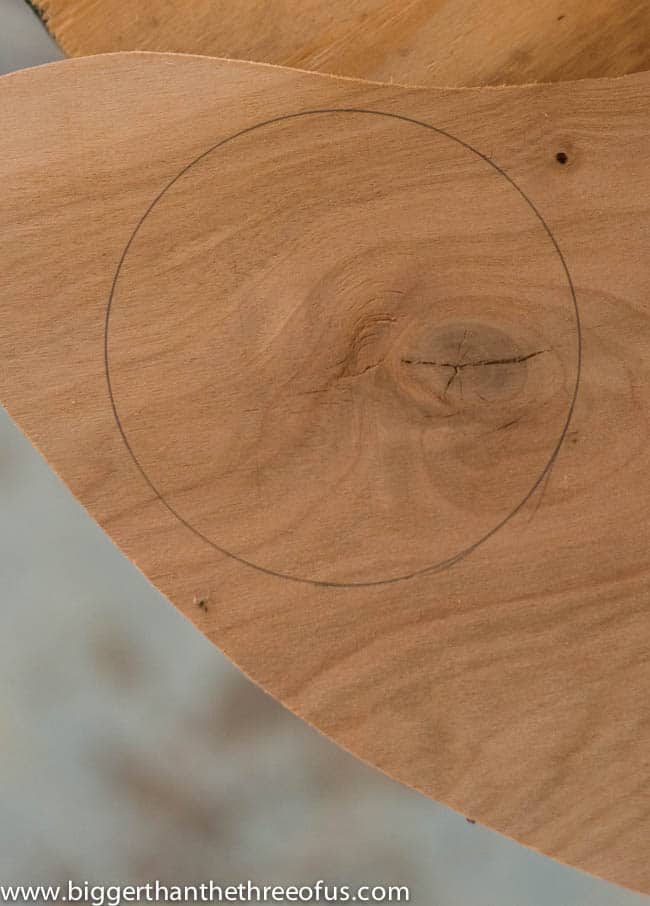
Using a circle form (I used a salsa jar lid), draw your circle on a piece of plywood. This is going to make your baseball.
Using a jigsaw, cut it out and try to do a better job than I did! I had to do lots of sanding on this little bugger!
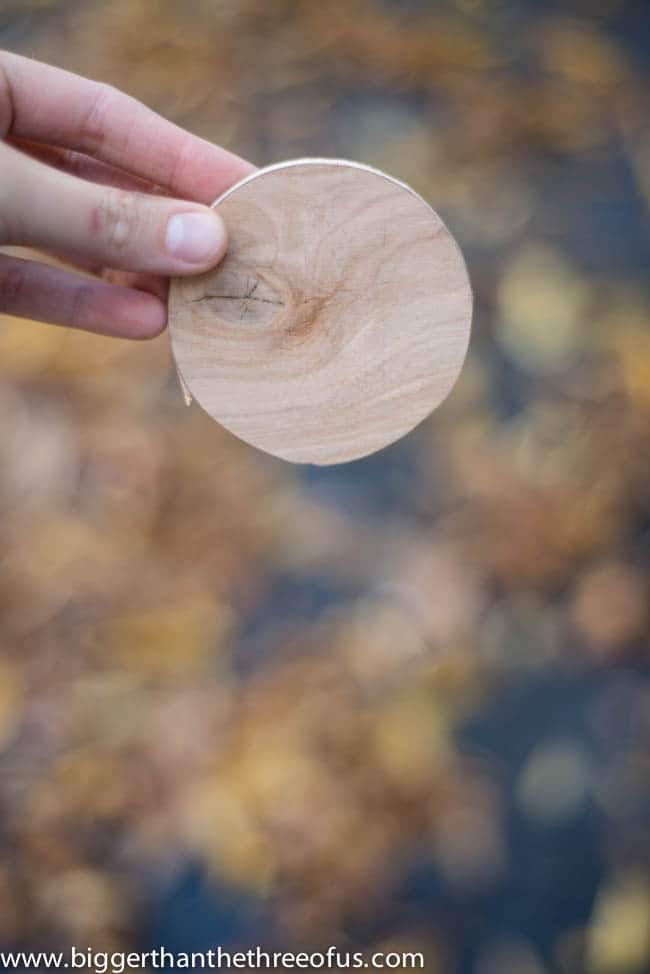
Sand and paint your baseball.
Cut your dowel stick to however long you want it to stick out of your growth chart.
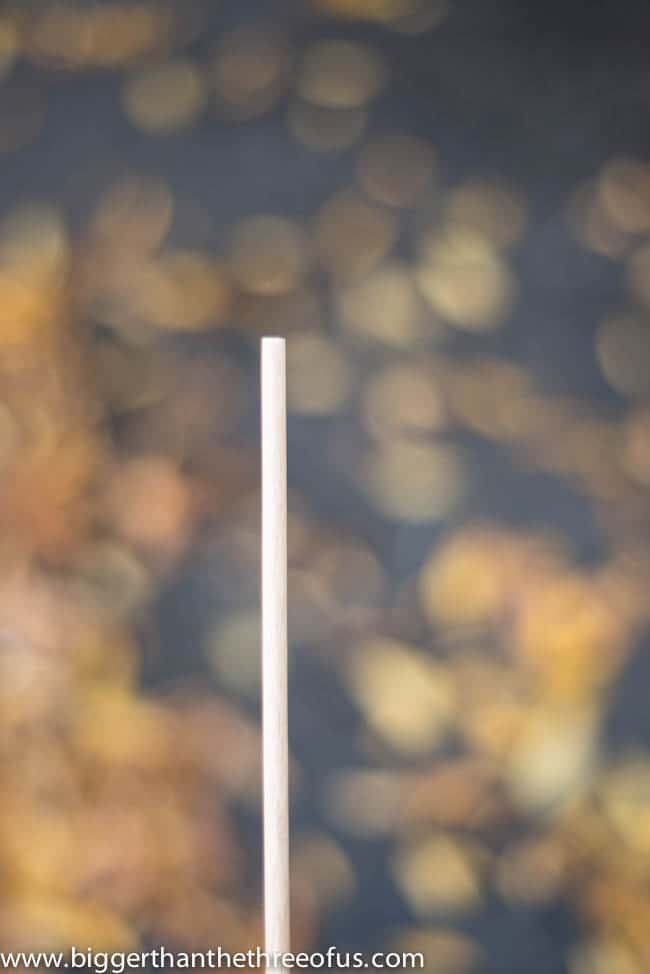
Glue your baseball on your dowel stick.
Stain your bat and you're done. =)


Julia@Cuckoo4Design
So cute and it could make such a great gift too.
Ashley Mayes
Thanks Julia! I think so too!
Laura Irion // Avery Street Design
This is adorable! Totally sending this post to my bestie for her son's room. Her hubby is baseball obsessed so it'll be perfect. Love!
Ashley Mayes
Thanks Laura!
Kim @Hunt & Host
What a super idea, love this project! thanks for sharing
Ashley Mayes
Thanks Kim!