

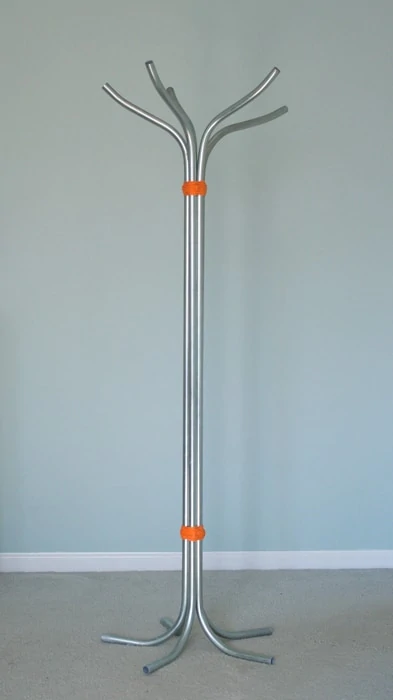
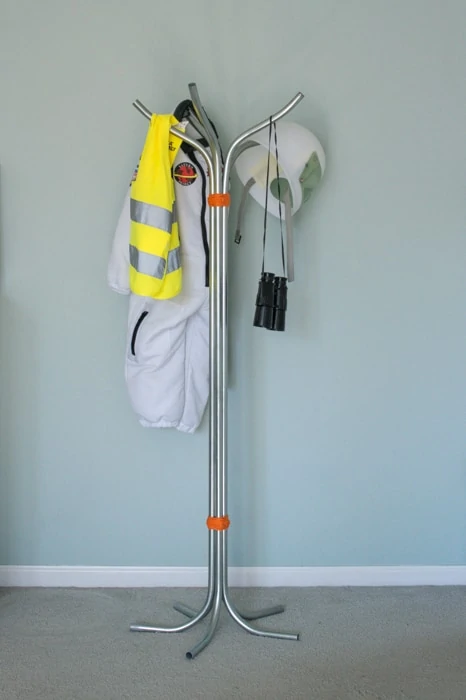
Say what? Yep, we finally made a DIY Coat Rack for dress-up clothes and get this....FOR UNDER $7.00! Crazy, right? The little-man now has a place to hang all of his dress-up gear (did you know that boys can amass quite a bit of that stuff?). Let me show you some pretties first, and then we will get down to the nitty-gritty of how.

Alright, so now on to the how.
1. Gather your supplies.
Supplies needed:
5 Conduit pipes (we used 5ft ones)
Pipe Bender (we borrowed this from my Dad)
2 Zip Ties
Colored Yarn/String
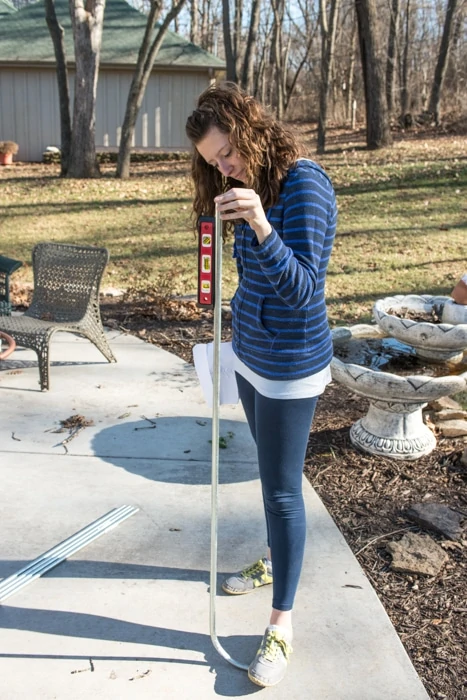
Measuring Tape
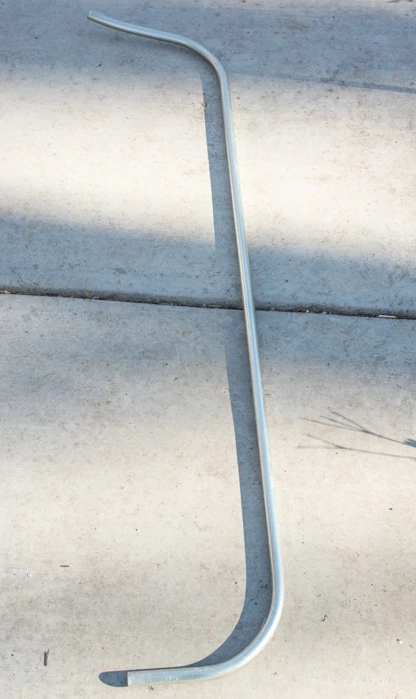
2. Decide at what angle you want your base to be.
At this point, use a marker and make a mark on all the pipes (we marked at 3 inches for the base - the bend adds another 5 inches). We wanted a 90 degree bend.
3. Line up your marked line and bend the pipe until you arrive at the desired bend (90 degrees).
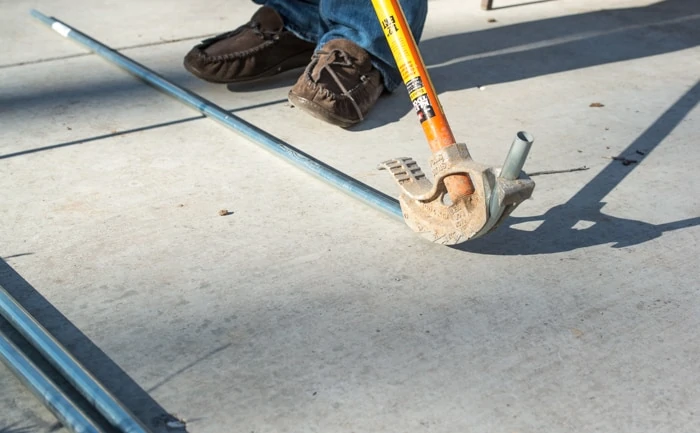
4. Double-check to make sure your pipe is going to be level.
5. Continue until you have bent the bottom of all five pipes.
You are now done with the bottom of the three.
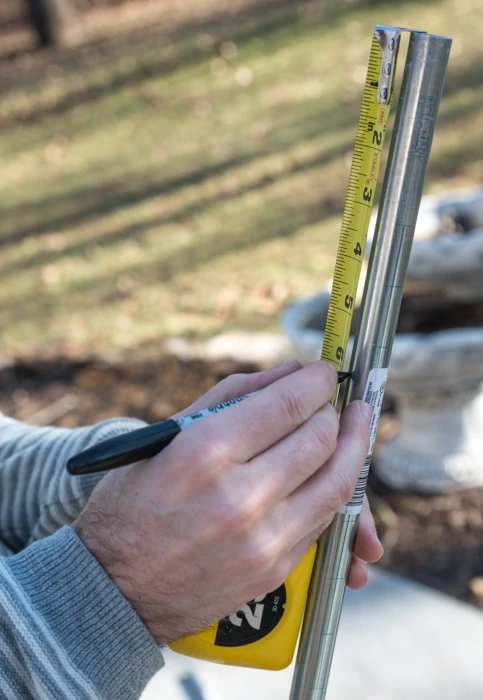
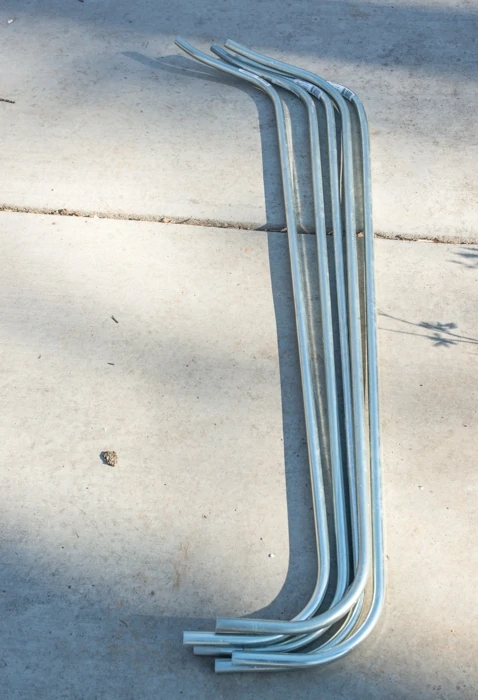
6. Decide and mark where you want your bend for the top
(we marked at 6 inches - another 90 degree bend adds 5 more inches).
7. Bend about two inches in about 45 degrees and then go to the six inch mark and bend to 90 degrees.
This part was a bit tricky. We wanted the pipe to curve left and up so we played around with the bends on the first one until we got what we were looking for.
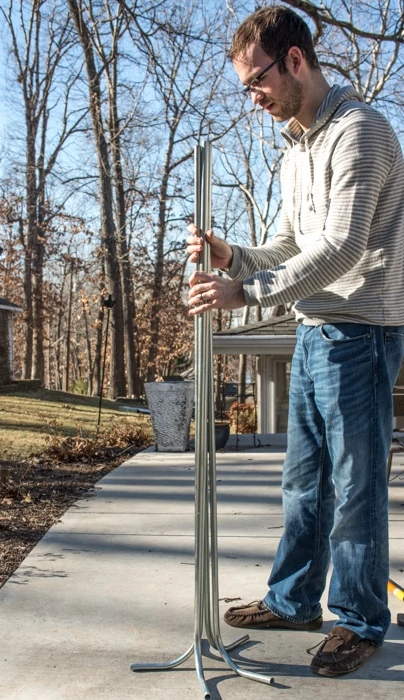
(Above picture: Top of picture is the top and bottom of picture is the tree base)
8. Continue to bend all 5 top parts.
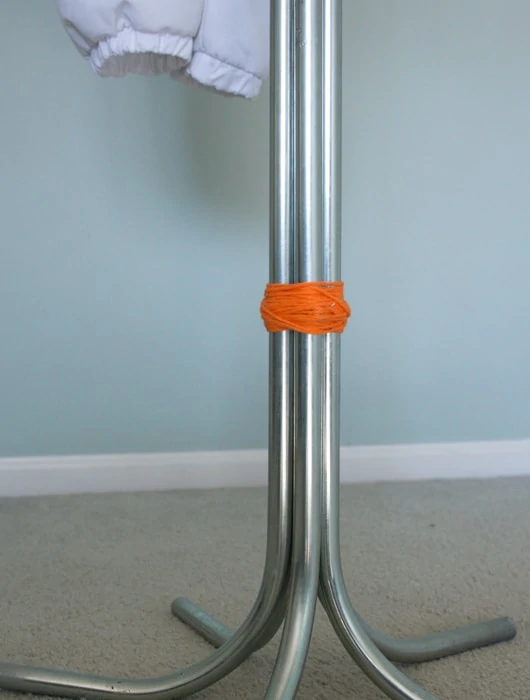
9. Put your tree together using zip ties.
Use one on the top and one closer to the bottom (we had to chain zip tie's together to make them large enough).
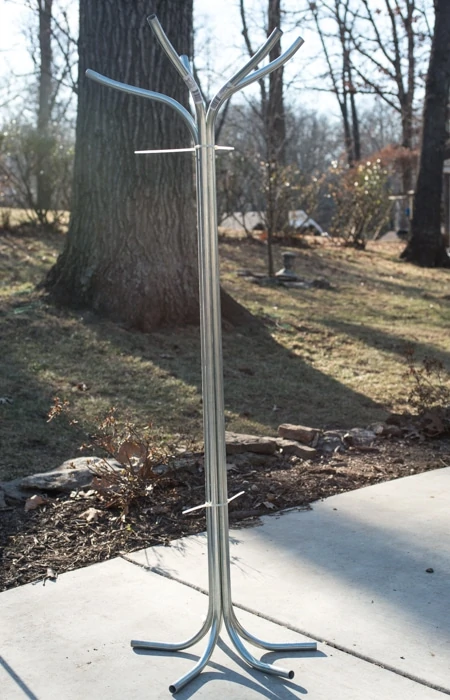
10. Wrap yarn around the zip ties to cover.
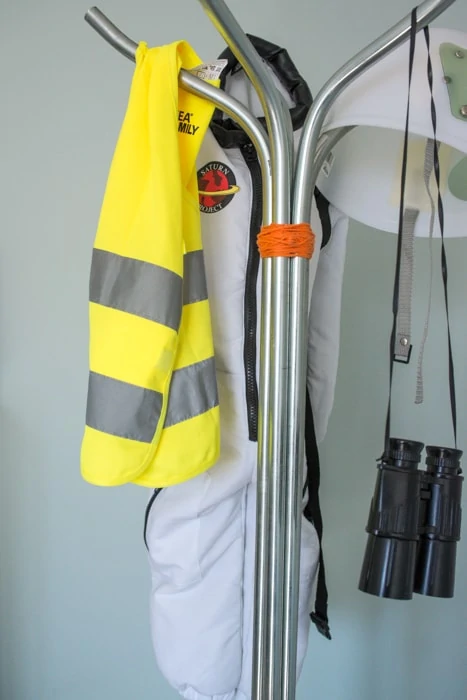
Super easy and perfect for a little boy's room.
Linking up to:
Julia@Cuckoo4Design
Great Idea, pinned!
Ashley Mayes
Thanks Julia!
Brynne@TheGatheredHome
What a genius idea! Love it! Pinning to my Awesome DIY ideas board 🙂
Ashley Mayes
Thank you! We love how it keeps all the play clothes off the floor! =)
Julie
Very clever. I love that you borrowed the pipe bender thingy from your Dad - handy!
Am I reading it right, the cable ties are still there, you've just wrapped the bright yarn over to cover them?
Ashley Mayes
Thanks Julie! Yes, the zip ties are still there, but for safety and aesthetics we covered them completely with yarn. =)