

Hey Hey Hey! I thought I'd be extra peppy today since it's Monday. Are you all watching the Olympics? We watched quite a bit of swimming and beach volleyball over the weekend. I love watching as many different sports as I can but my favorites have to be beach volleyball and women's gymnastics. Greyson doesn't remember the Olympics at all so it's been fun sharing the games with him. I think he's going to really love the diving competitions. Did you come here this morning to hear me yap about the Olympics? =)
I actually came here today to share a super simple project with you... a DIY Triangle Mirror. I really love how this project turned out and think it would be so simple to customize into other shapes or other dimensions in general.
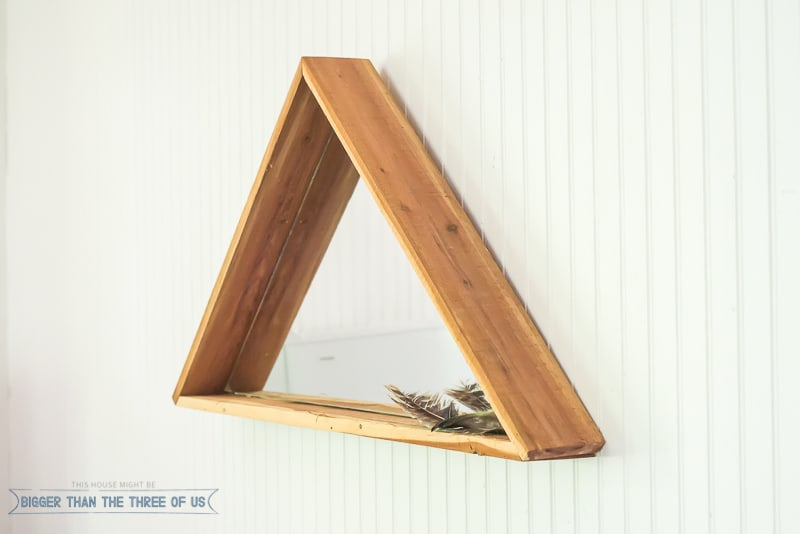
Pretty cute, right? It's especially cute when you hear how much I paid for the supplies... $0! I'll share how I made it for nothing but I'll also share tips and tricks for you to get what you need to make one as well.
Let's get to it!
Step 1: Gather Your Supplies
One Mirror
Glass Cutter
Scrap wood
Plywood
Construction Adhesive
Jigsaw
Miter Saw
Nail Gun and Air Compressor* (You could use a hammer and small nails if you'd rather)
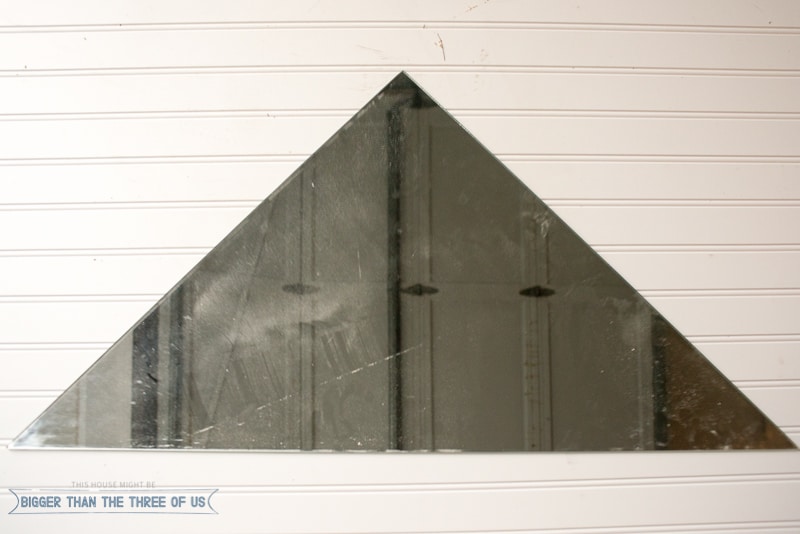
Step 2: Decide On Your Shape and Cut
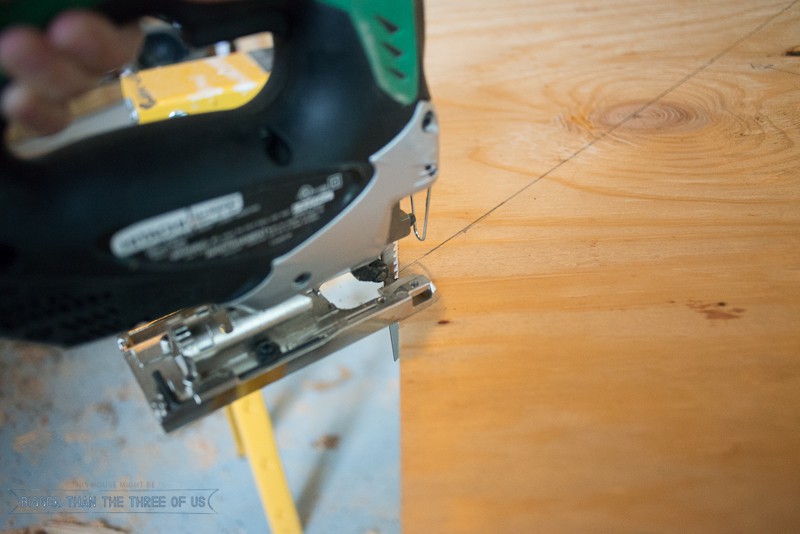
I randomly had a triangle mirror. I'm working on updating a corner built-in in our living room and it had a few mirrors in it that are shaped like triangles. So, I had a shortcut. BUT, you can totally do this. Here's how: Pick up a mirror (go to Habitat Restore or grab one at a garage sale). You can find larger one's at both places for just a few dollars. Then, pick up a glass cutter. You can get these online for about $3! Mark your lines on your glass and cut following the instructions on the glass cutter.
Or, use this tutorial for a piece of glass that you already have (whether that be a square piece or another shape).
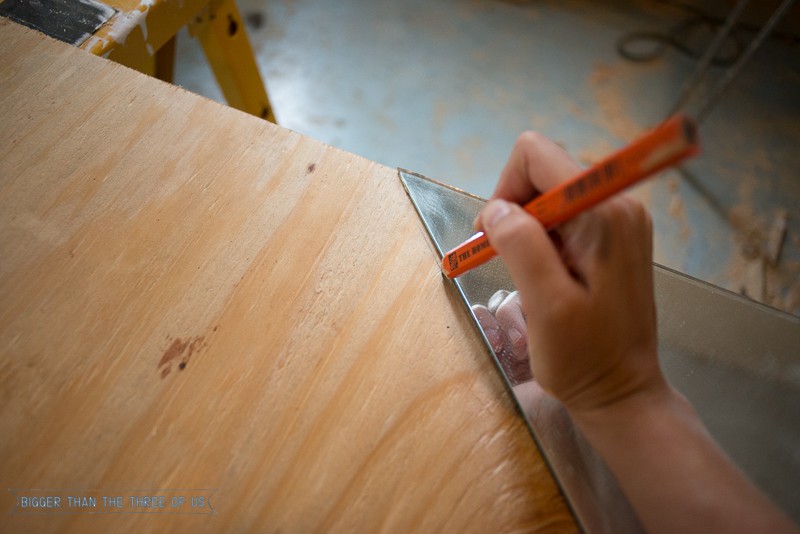
Step 3: Cut Plywood Backing
Lay your mirror on your plywood. You want the plywood to mimic the shape of your mirror.
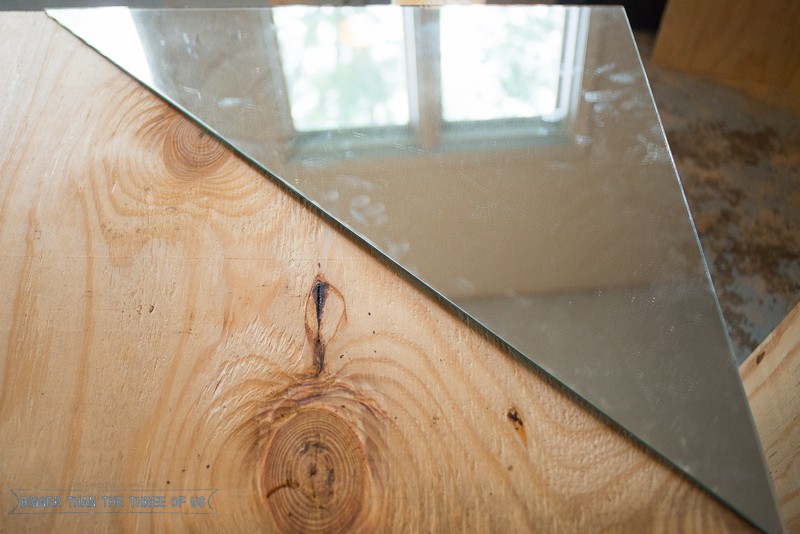
Draw a line on the plywood for where you need to cut.

Use a jigsaw to cut your shape out of the plywood.
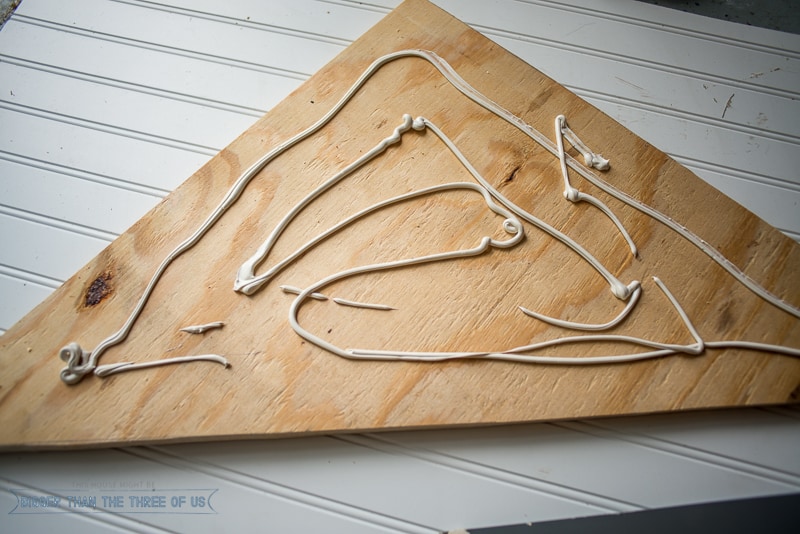
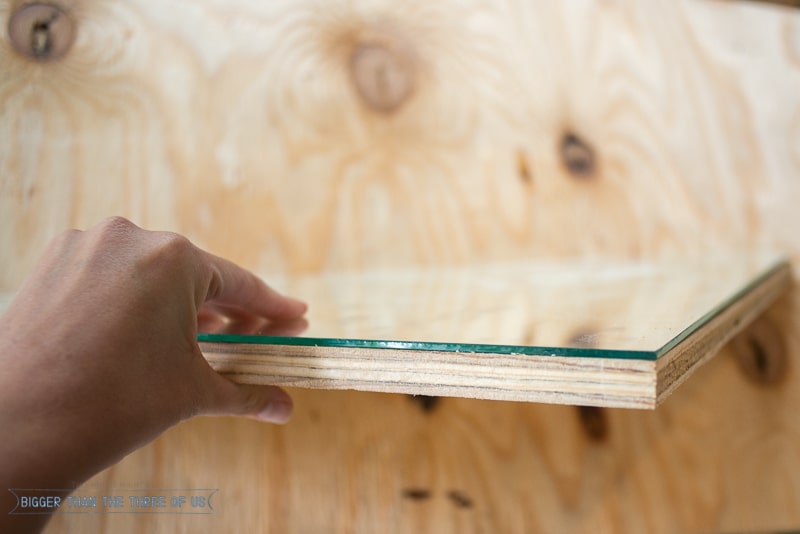
Step 4: Attach Plywood to Mirror
Apply construction adhesive to the plywood and then place mirror on top. Let dry.
Step 5: Make Frame
Grab your scrap wood to make your frame. I used rustic cedar. I think you could go with lots of different options here, so just pick an option that works with your decor style.
I like to start on the bottom of the triangle. I cut a 45 degree angle on one side and then take the board to the mirror/plywood piece and use a pin to mark where my next 45 degree cut should be. Basically, you want the cuts to be lined up with the mirror.
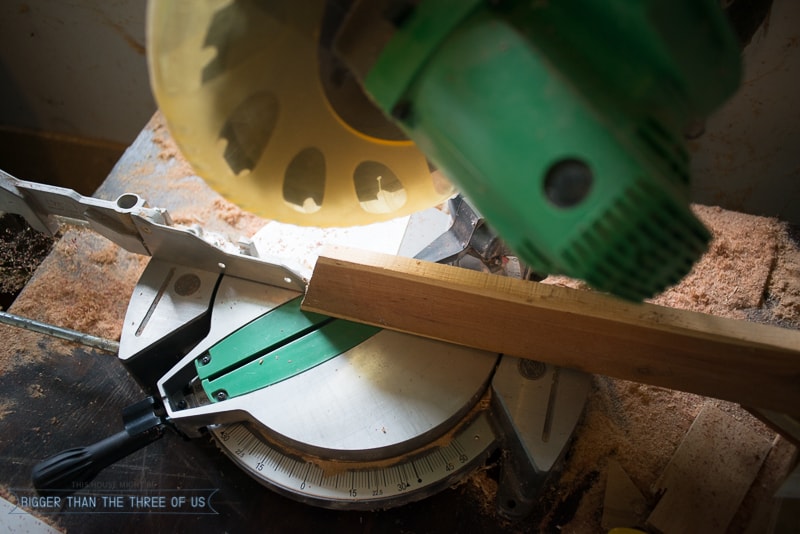
My bottom piece had 45 degree cuts on both sides. The top side pieces had straight cuts on the the bottom (where it matched with the 45 degree cut).
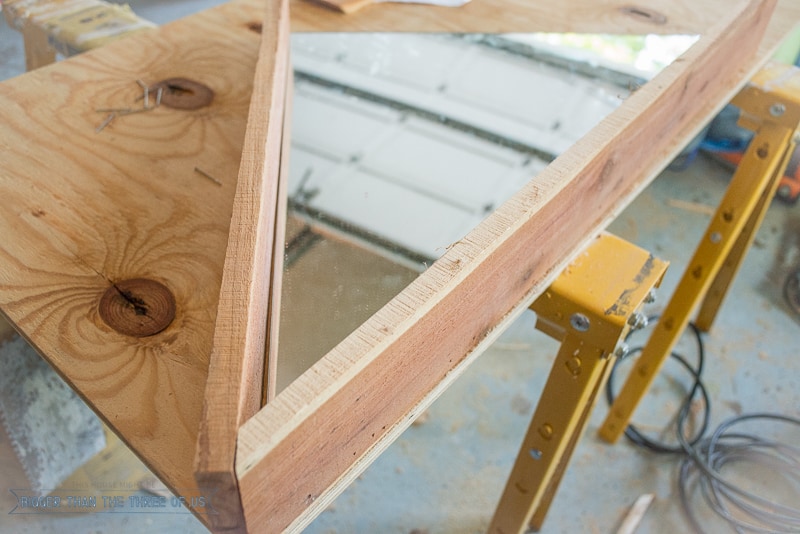
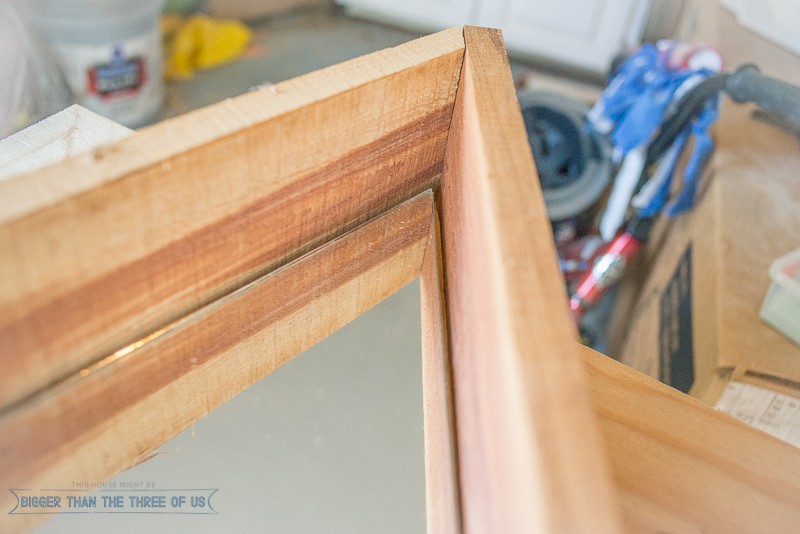
The top side of both pieces have 45 degree cuts so that they come together.
Step 6: nail Together
Nail in the frame to the plywood to create the triangle. Attach a picture hanger on the back and you are good to go!
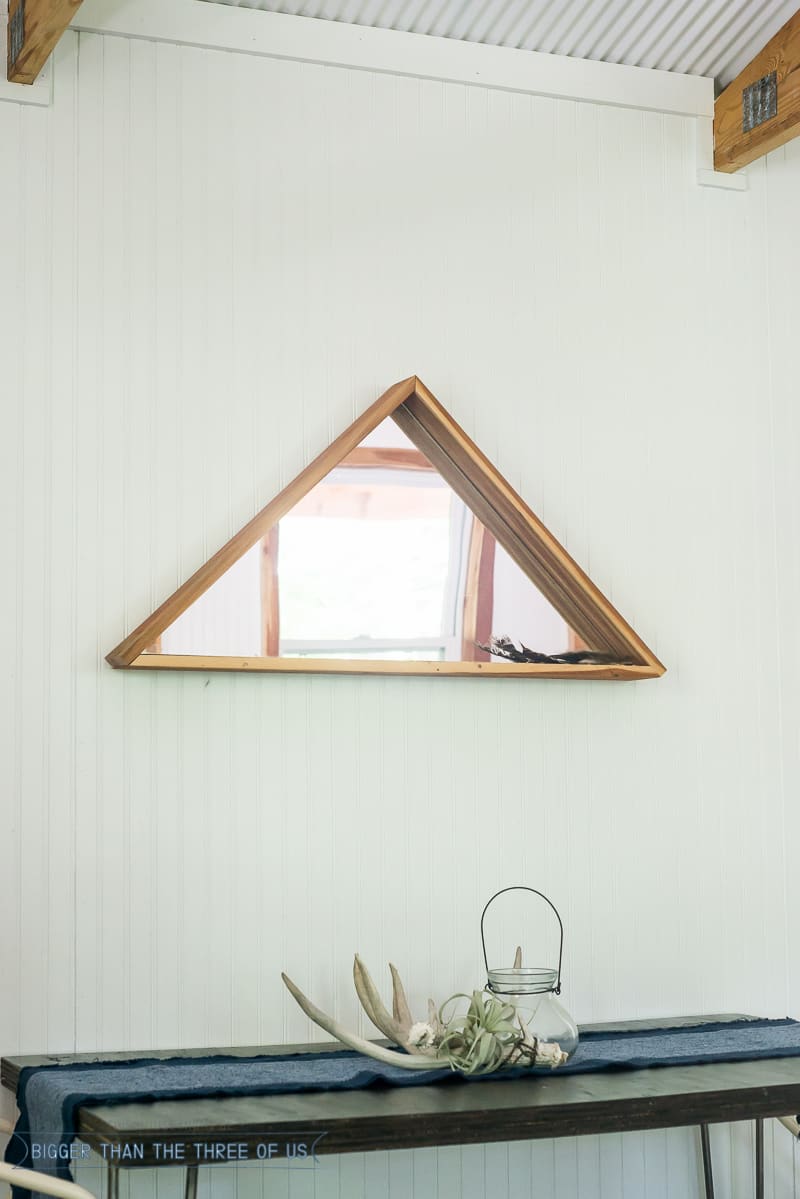
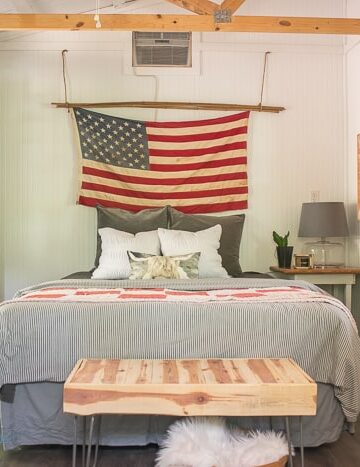
I think this turned out so cute! It's a bit too rustic for my house but my house was never the intended location.
Can you guess where it's at?
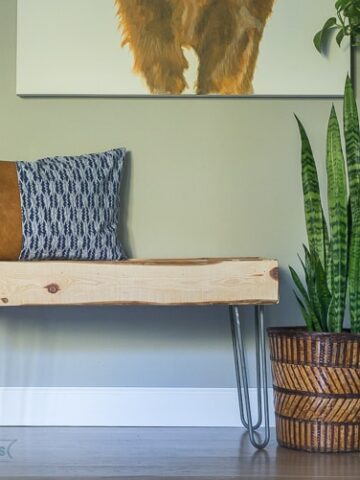
You can use this idea to make lots of different things. I think the triangle itself without the mirror would be pretty cute as well. I could totally see a plant hanging out in the middle of the frame, couldn't you?
}
Alison G
It is at the cabin. It's clever and cute but....I am afraid that the first thing I thought of was it's another thing to clean and dust....Sorry I don't like dusting. Monday is cleaning day for me, maybe that is why.
Ashley Mayes
Thanks Alison! Yes, it is another thing to take care of but it adds functionality. We didn't have a mirror out there and needed one so it's kinda perfect. Hope your Monday ended up going well!