• Skip to primary navigation
  • Skip to main content
  • Skip to primary sidebar
Bigger Than the Three of Us
  • Our Home
  • DIY IDEAS
    • DIY IDEAS
    • DIY Open Shelving Kitchen Guide
  • Shop
    • Shop Our Home
    • Shop My Closet
    • Vintage Home Decor
    • My Current Favorite Rugs For Sale
    • Pieces I’m Loving
  • Podcast
  • Travel
  • The Three of Us
    • Privacy and Disclosure
menu icon
go to homepage
search icon
Homepage link
  • House Tour
  • Floating Shelving Guide
  • DIY Projects
  • Shop
  • The Three of Us
    • Email
    • Facebook
    • Instagram
    • Pinterest
    • YouTube
  • ×

    Installing Trim (Baseboards, windows, door, walls and ceilings) at the Cabin

    September 7, 2016 by Ashley Mayes 17 Comments

    Did you all have a nice holiday weekend? Whenever we have a three day weekend, I always think afterwards how nice it would be if every weekend was a three day weekend. Seriously though, there's enough time for each of us to do our own thing, get some house mainenance done, get a small DIY project started and have family time. It's like the perfect mesh of things. Let's start a petition for schools being four days and work only being four days a week, k? =) Anyways, today... let's talk about installing trim!  It's the last cabin how-to post before the reveal! The reveal is next week.. who's excited?! I'm raising my hand!

    installing trim using rough cedar

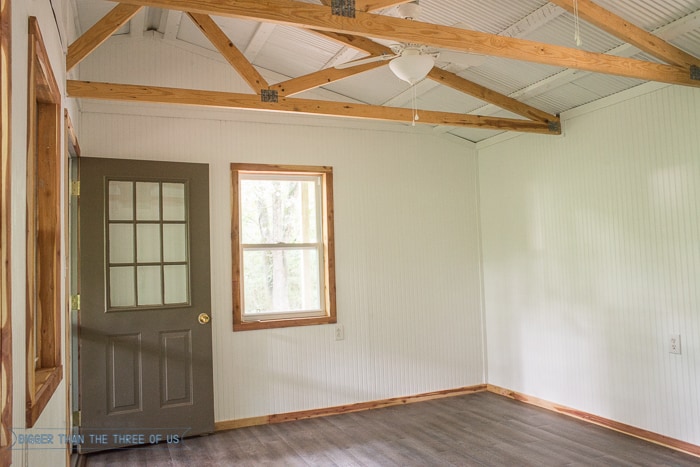
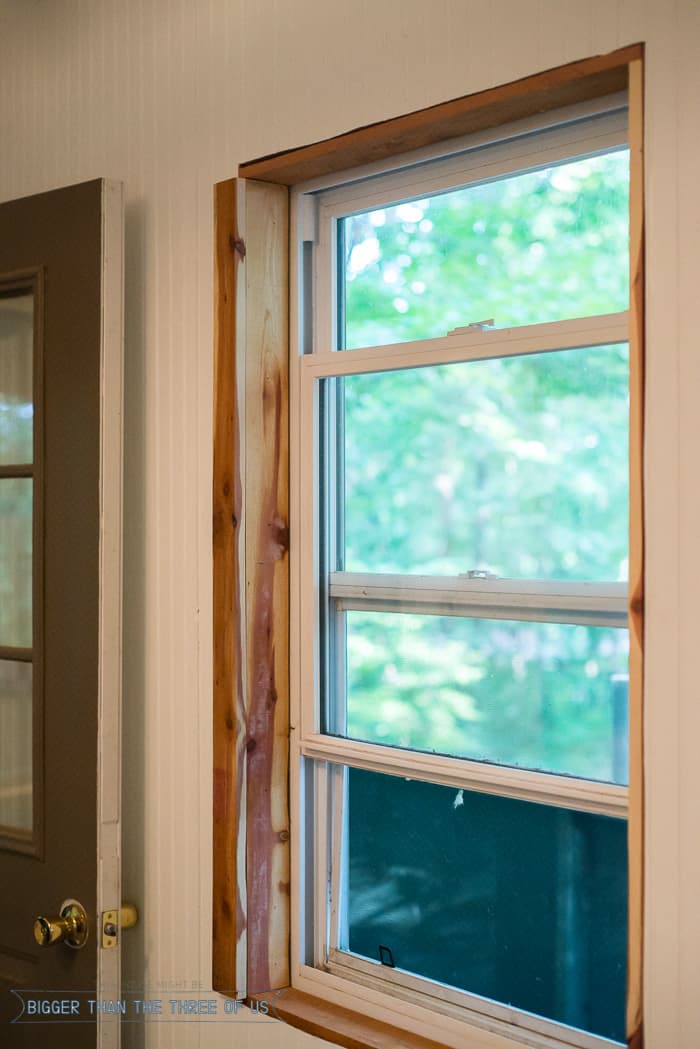
    Is the trim what you expected? I lost the battle on having all white trim but I do have to say that I don't think the rough cedar looks bad. The deal on the cedar is that my dad scored it years ago and has held onto it. It was rough-cut cedar, meaning that it was different lengths/widths. I'm not going to give you a full step-by-step tutorial on the install but you can check out my tutorial for installing window trim in our kitchen if you'd like. 

    How to install Laminate flooring - full tutorial!

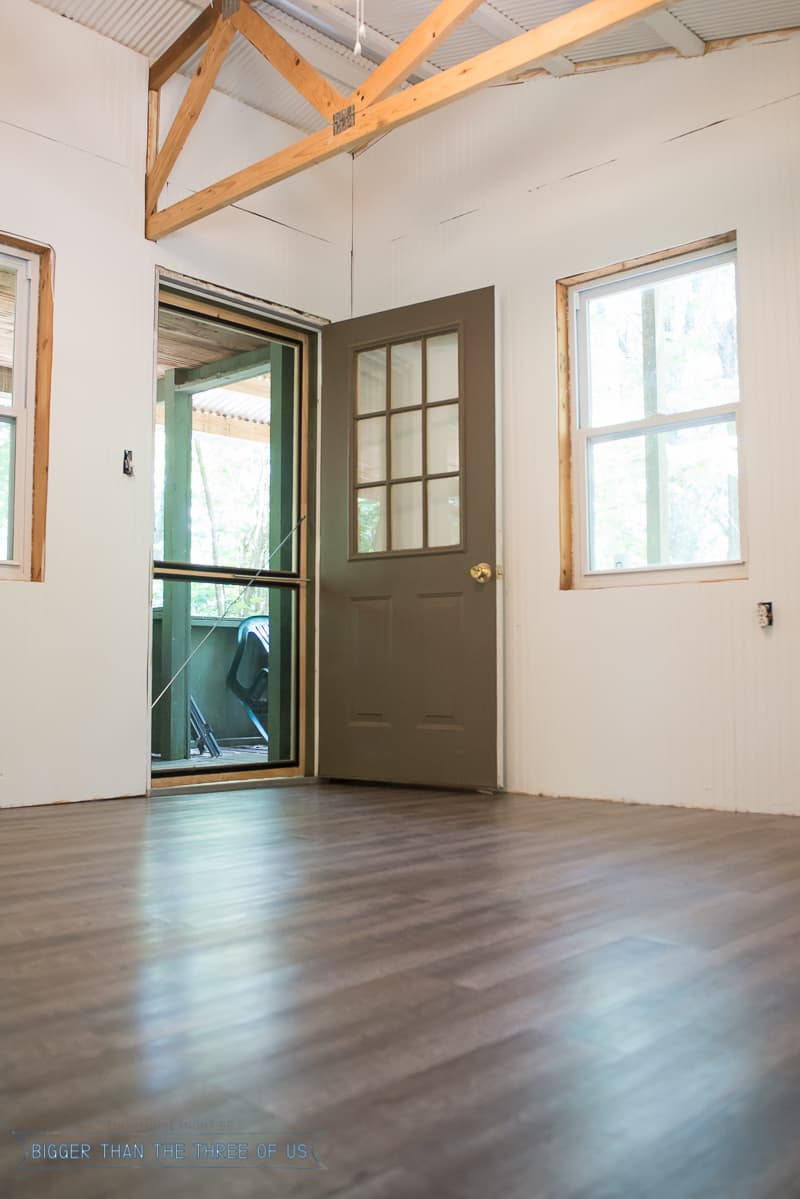
    This project require ALOT of trim. All the windows (inside the seals and outside window frames) needed to be trimmed as well as each corner, baseboard, seam (where the paneling met up) and ceiling.

     We started with the inside of each of the windows.
    installing trim using rough cedar

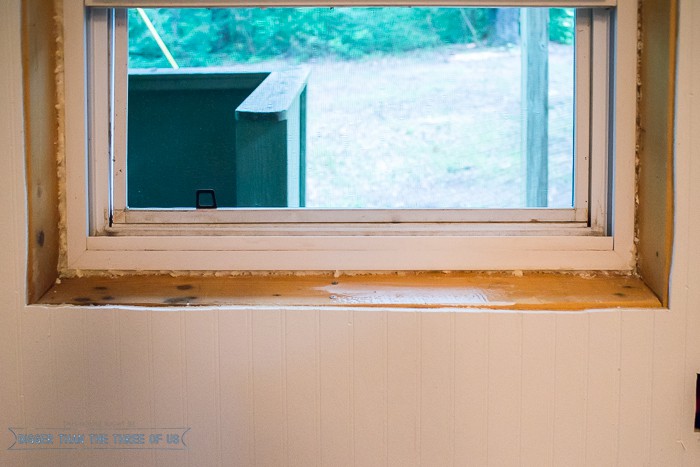
    Measure twice, cut once and nail in using an air compressor and nail gun. That's the formula for all the trim.

      installing trim using rough cedar

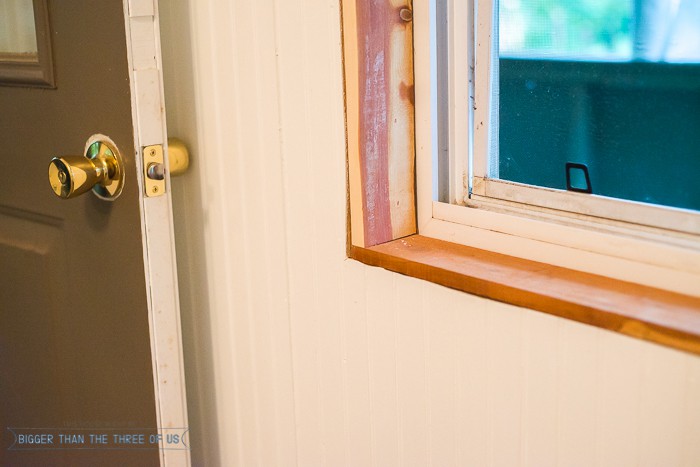
    Once each of the insides of the windows were trimmed out, we trimmed the outside.

      installing trim using rough cedar  installing trim using rough cedar

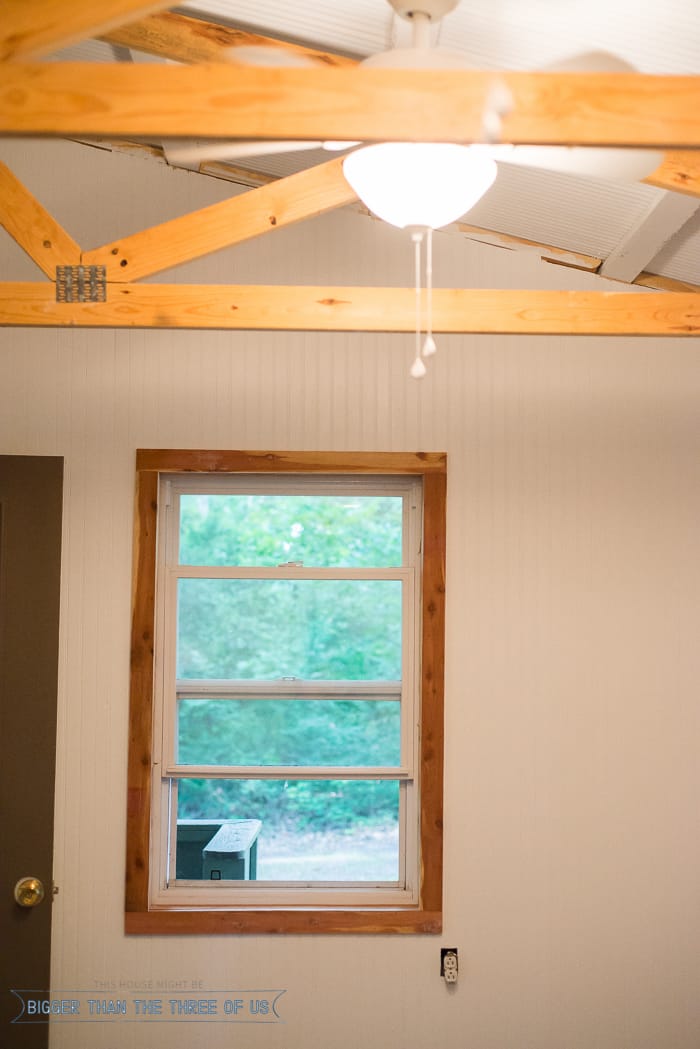
    After the windows were finished, corner trim and baseboard seems were put in.   installing trim using rough cedar

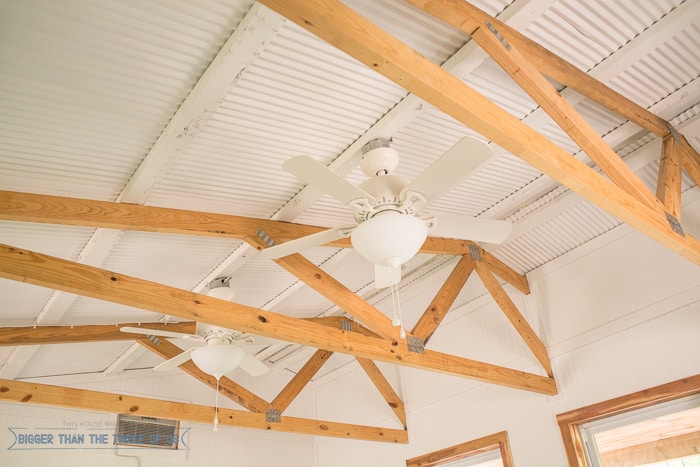
    Look at the photograph above. Do you see the seam trim? Doesn't it look good?  installing trim using rough cedar

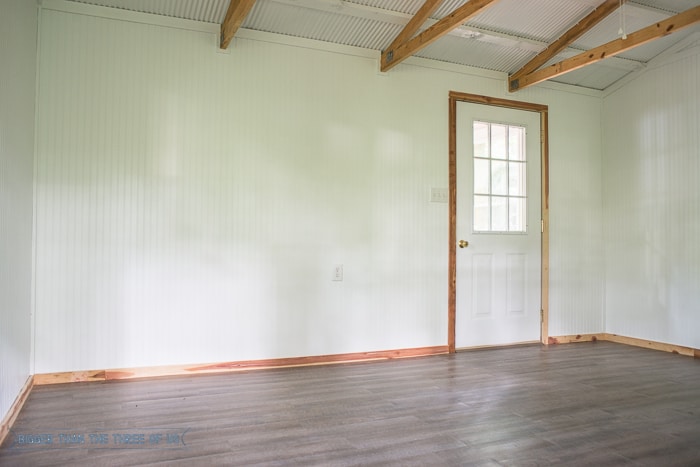
    We installed trim around each roof beam as well as the metal roofing.

      installing trim using rough cedar

    Overall, it was quite a process. But, it definitely finished off the space.

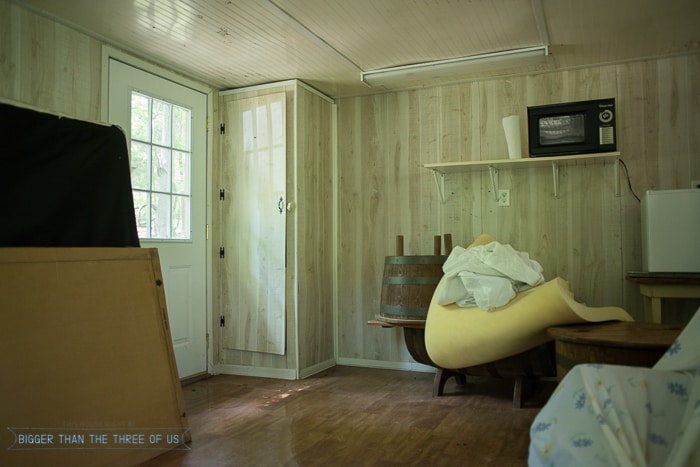
    Can you believe this is the before?

    Planning a Cabin Renovation - the Before

    Make sure to catch the reveal next week!

    If you need to... play catch up on all the other cabin posts!

    Planning a Cabin Renovation

    Cabin Demolition

    Building Walls and Finishing the Ceiling

    Design Plan

    Extending the Roof To Help With Water Control

    How to Install Paneling without it looking like the 70s!

    Install Laminate Flooring In Just Three Hours

    More Cabin

    • cabin addition and design
      Cabin Design Plans
    • Simple, Rustic and Modern Cabin Reveal
      Simple, Rustic and Modern Cabin Renovation
    • Rustic bench modern bench DIY bench hairpin legs
      Rustic Modern DIY Wood Bench with Hairpin Legs
    • Use this tutorial to install laminate flooring that looks like wood in just three hours!
      How to Install Laminate Flooring

    Keep In Touch...

    Sign up for my weekly emails to see new projects, plus what I'm doing behind-the-scenes.

    You can unsubscribe anytime. For more details, review our Privacy Policy.

    Thank you!

    You have successfully joined our subscriber list.

    .

    Disclosure: This post may contain affiliate links. I receive a small commission at no cost to you when you make a purchase using my link.

    About Ashley Mayes

    Founder & Creative Director

    Reader Interactions


    Comments

      Leave a Reply Cancel reply

      Your email address will not be published. Required fields are marked *

    1. Cassie Bustamante

      September 07, 2016 at 6:53 am

      i am so in love with this project! it's amazing- every thing!

      Reply
      • Ashley Mayes

        September 07, 2016 at 9:52 am

        Thanks Cassie! It was challenging but fun! Can't wait to share the reveal. It's definitely a bit rustic ...

        Reply
    2. Charlotte W

      September 07, 2016 at 3:29 pm

      I actually really like the cedar trim, I think it helps tie in the beams and it's a fun contrast, especially for a cabin. Can't wait to see the final reveal.

      Oh, and I feel the EXACT same way about three day weekends, I don't know how it is we seem to get SO MUCH MORE done with that extra day!!
      And actually our school does four day weeks, I just have to get my work on board!! 🙂

      Reply
    3. Julia@Cuckoo4Design

      September 08, 2016 at 7:38 am

      The before and after is so good already! And can't wait to see the reveal

      Reply
    4. Erin Taylor

      September 17, 2016 at 9:38 am

      This project is a good decoration idea. It is very simple but beautiful. In my opinion, it will be more wonderful if you combine some elements from nature like wildflowers and green plants.

      Reply
      • Ashley Mayes

        September 22, 2016 at 1:48 pm

        Thanks Erin!

        Reply
    5. Kimclark

      September 17, 2016 at 10:33 am

      This project is great decoration idea. I think it helps tie in the beams and it’s a fun contrast, especially for a cabin. Thanks for sharing.

      Reply
      • Ashley Mayes

        September 22, 2016 at 1:48 pm

        Thanks so much.

        Reply
    6. Alan C. Brown

      September 19, 2016 at 3:23 am

      It is definitely different before and after trim, can’t wait to see the reveal. Thanks for your amazing DIY project.

      Reply
      • Ashley Mayes

        September 22, 2016 at 1:49 pm

        Thank you!

        Reply
    7. Kati

      September 19, 2016 at 10:24 am

      Wow! It looks so good. I love the trim and the rafters. It's amazing what you have done, can't wait to see it all finished.

      Reply
      • Ashley Mayes

        September 22, 2016 at 1:49 pm

        Thanks Kati! It has come so far!

        Reply
    8. Ana

      October 01, 2016 at 11:40 am

      The project appears to run smoothy. I'm always in love with your plans. Can't wait to see the final makeover next week. I'm so excited. Thank you for such interesting post.

      Reply
      • Ashley Mayes

        October 04, 2016 at 1:11 pm

        Thank so much.

        Reply
    9. Laura

      October 09, 2016 at 11:42 am

      I really like installing trim like you, i intend to take it for windows, floor, doors but my husband think it is silly thing. Well, i hope he will change his idea after i show him your final reveal. Thanks a lot.

      Reply

    Trackbacks

    1. Rustic Modern DIY Wood Bench with Hairpin Legs says:
      September 12, 2016 at 1:00 am

      […] DIY Wood Bench with Hairpin Legs. I knew I wanted to do something with the leftover wood from the trim install. I thought about it for a bit and then decided to make a bench.The rough-cut cedar is exactly […]

      Reply
    2. The Creative gallery link party #197 • Our House Now a Home says:
      September 18, 2016 at 11:23 pm

      […] Installing trim in the ceiling from, Bigger than the three of us […]

      Reply

    Primary Sidebar

    Bigger Than The Three Of Us - Family of Three

    Follow Me On

    • Email
    • Facebook
    • Instagram
    • Pinterest
    • YouTube

    Favorites

    Footer

    ↑ back to top

    About

    • Privacy Policy
    • Disclaimer
    • Terms & Conditions

    Newsletter

    • Sign Up! for emails and updates

    Connect

    • [email protected]
    • Instagram
    • Facebook

    As an Amazon Associate I earn from qualifying purchases.

    Copyright © 2023 Bigger Than the Three of Us All Rights Reserved