

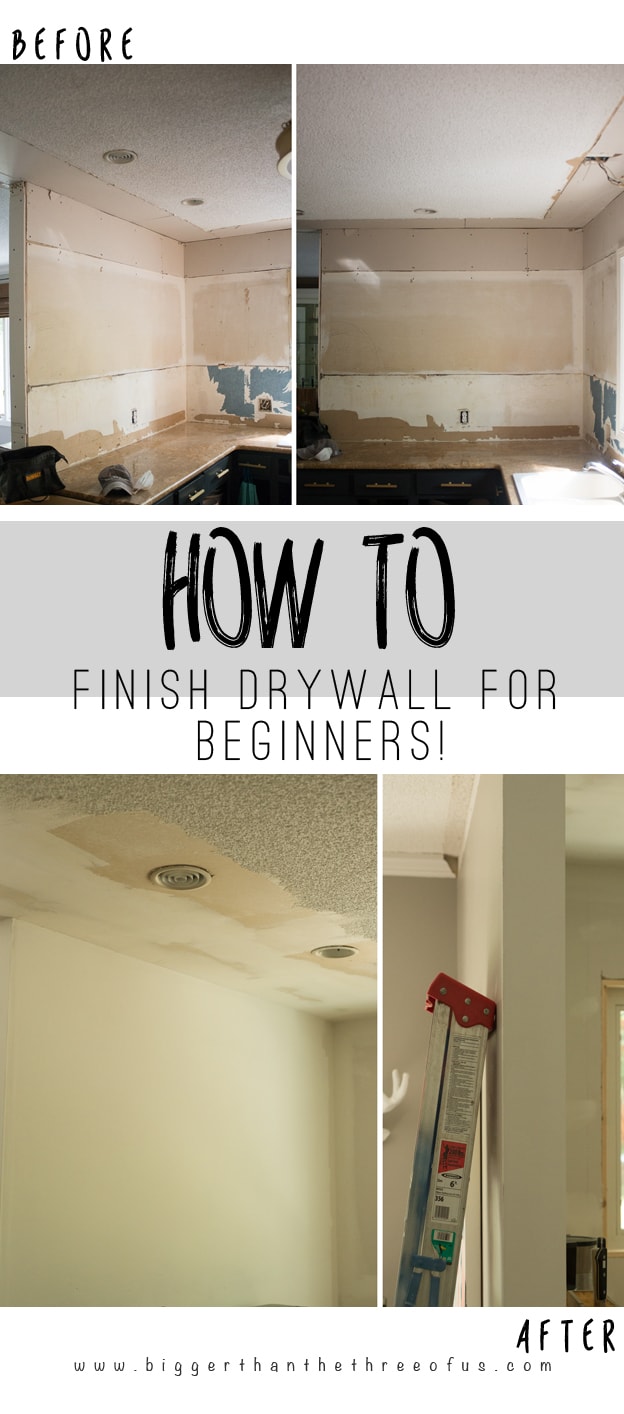
Learn how to mud drywall for small patch jobs or renovation projects.
Before you reach for the joint compound, make sure your boards are hung correctly for a smooth finish. If you’re starting from scratch, check out my tutorial on How to Install Drywall for tips on layout and screw placement
We've done our fair share of renovation projects that have included drywall mudding and finishing. We've learned a few things, done a bunch of things wrong and have done a bunch of mudding and taping drywall right. I'll be sharing a bunch of that information today as well as when you should consider hiring out drywall, too!
Adding drywall tape and mud is just a step in the process of drywall installation!
If you have never done any part of drywall, then I do want to be clear and say that this step, adding drywall tape and mud, is just one big step in the whole drywall installation and finishing. At the end of this post, I'll include other drywall installation posts to check out for previous and future steps!
*Affiliate links below. Thanks for supporting this blog. Click to read my disclosure policy.
How to Mud Drywall
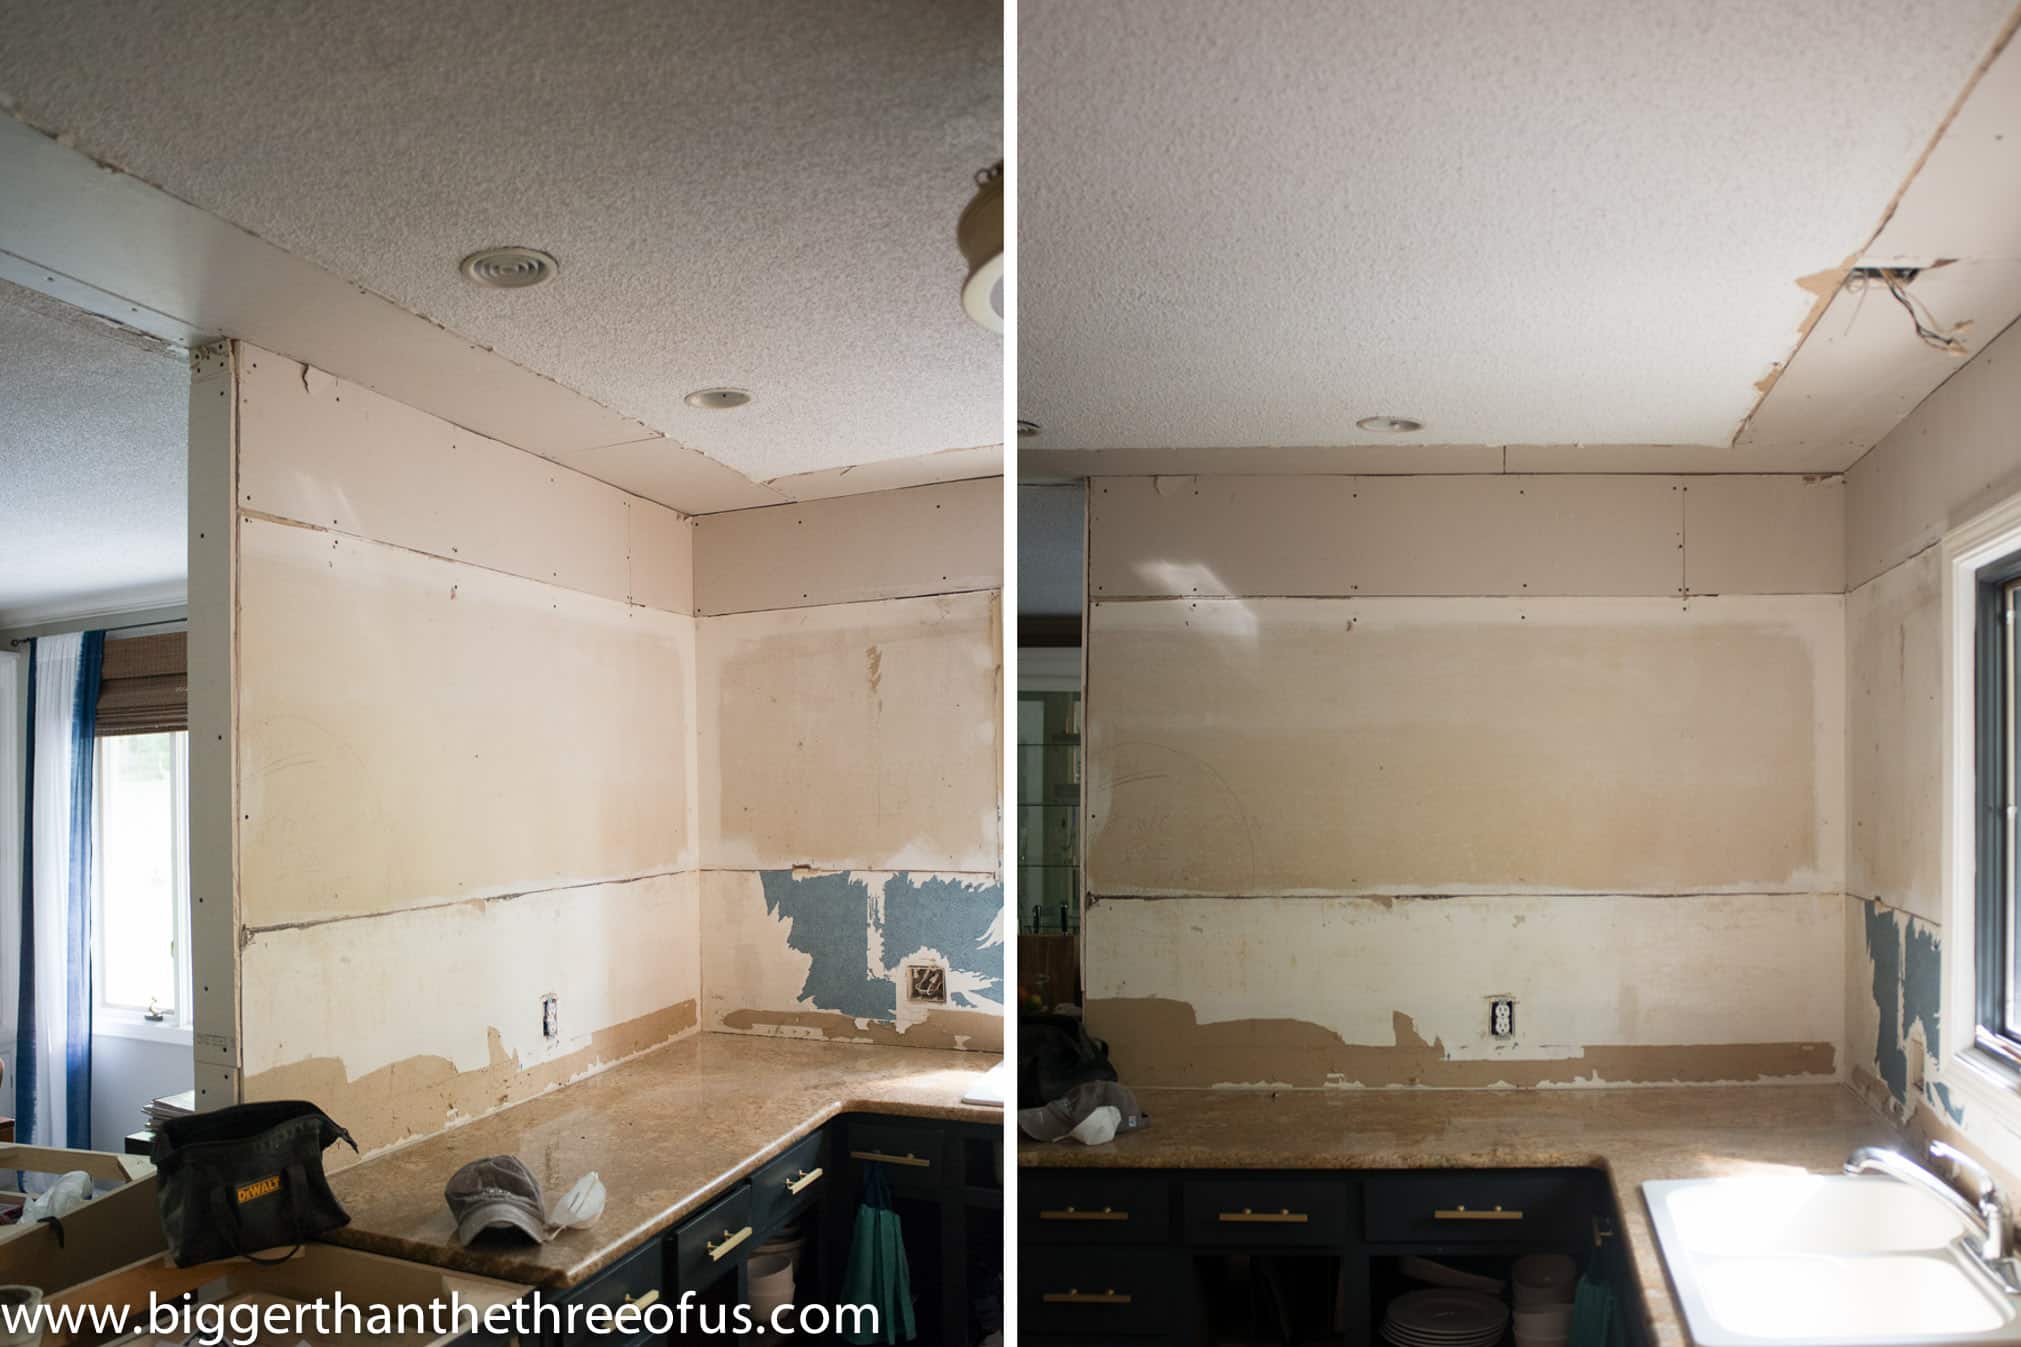
*To help simplify showing you how to tape and mud drywall, I'm only showing this tutorial on one kitchen wall.
Essential Tools and Supplies for Mudding Drywall
You will need a couple different sizes of taping knifes (we used a 12" and a 8"), mud pan, joint tape, wall sander, and wallboard joint compound (a.k.a. "mud"). We chose to buy the premixed buckets of mud but you can mix your joint compound yourself and save money if you'd like to go that route.
The premixed joint compound costs about $20 and it took one whole bucket for a patch job that ran about 16 feet with multiple seams.
How to Tape and Mud Drywall: Step-by-Step Tutorial
- Spread the joint compound over your seams working on one seam at a time and using a knife to spread. The seam should be completely covered with extra joint compound built up a bit on top.
- Place drywall tape over the joint compound that you just added.
- Anchor one side of the tape (with your finger or a second knife) and run your knife along the full length of the tape to set it firmly in the mud.
- Go over the drywall tape with more joint compound. Smooth out the application over the seams.
- When you are mudding drywall, you have to allow the mud to set before continuing on. Check your dry times at this stage and let dry.
- Using a drywall hand sander, sand where you used drywall tape and mud. This is VERY messy.
- Wipe walls down with a sponge or shop vac.
- Next, apply the second coat of mud using the 12" knife. All coats after the first are the same. You just start by applying some mud along the seam, and then use the large knife to gently smooth out the seams and widen the mudded area. This helps taper out the drywall so it covers the seam well in the middle and then gets thinner and thinner the farther away from the seam you go.
- Repeat this process until your seams look good. We went three rounds.
I know there are many of us (me included) that really need a visual for projects. So, here's a step-by-step of how to mud and tape drywall in photos with a bit more information for each step.
Step 1:Pre-fill Gaps and Apply the First Coat
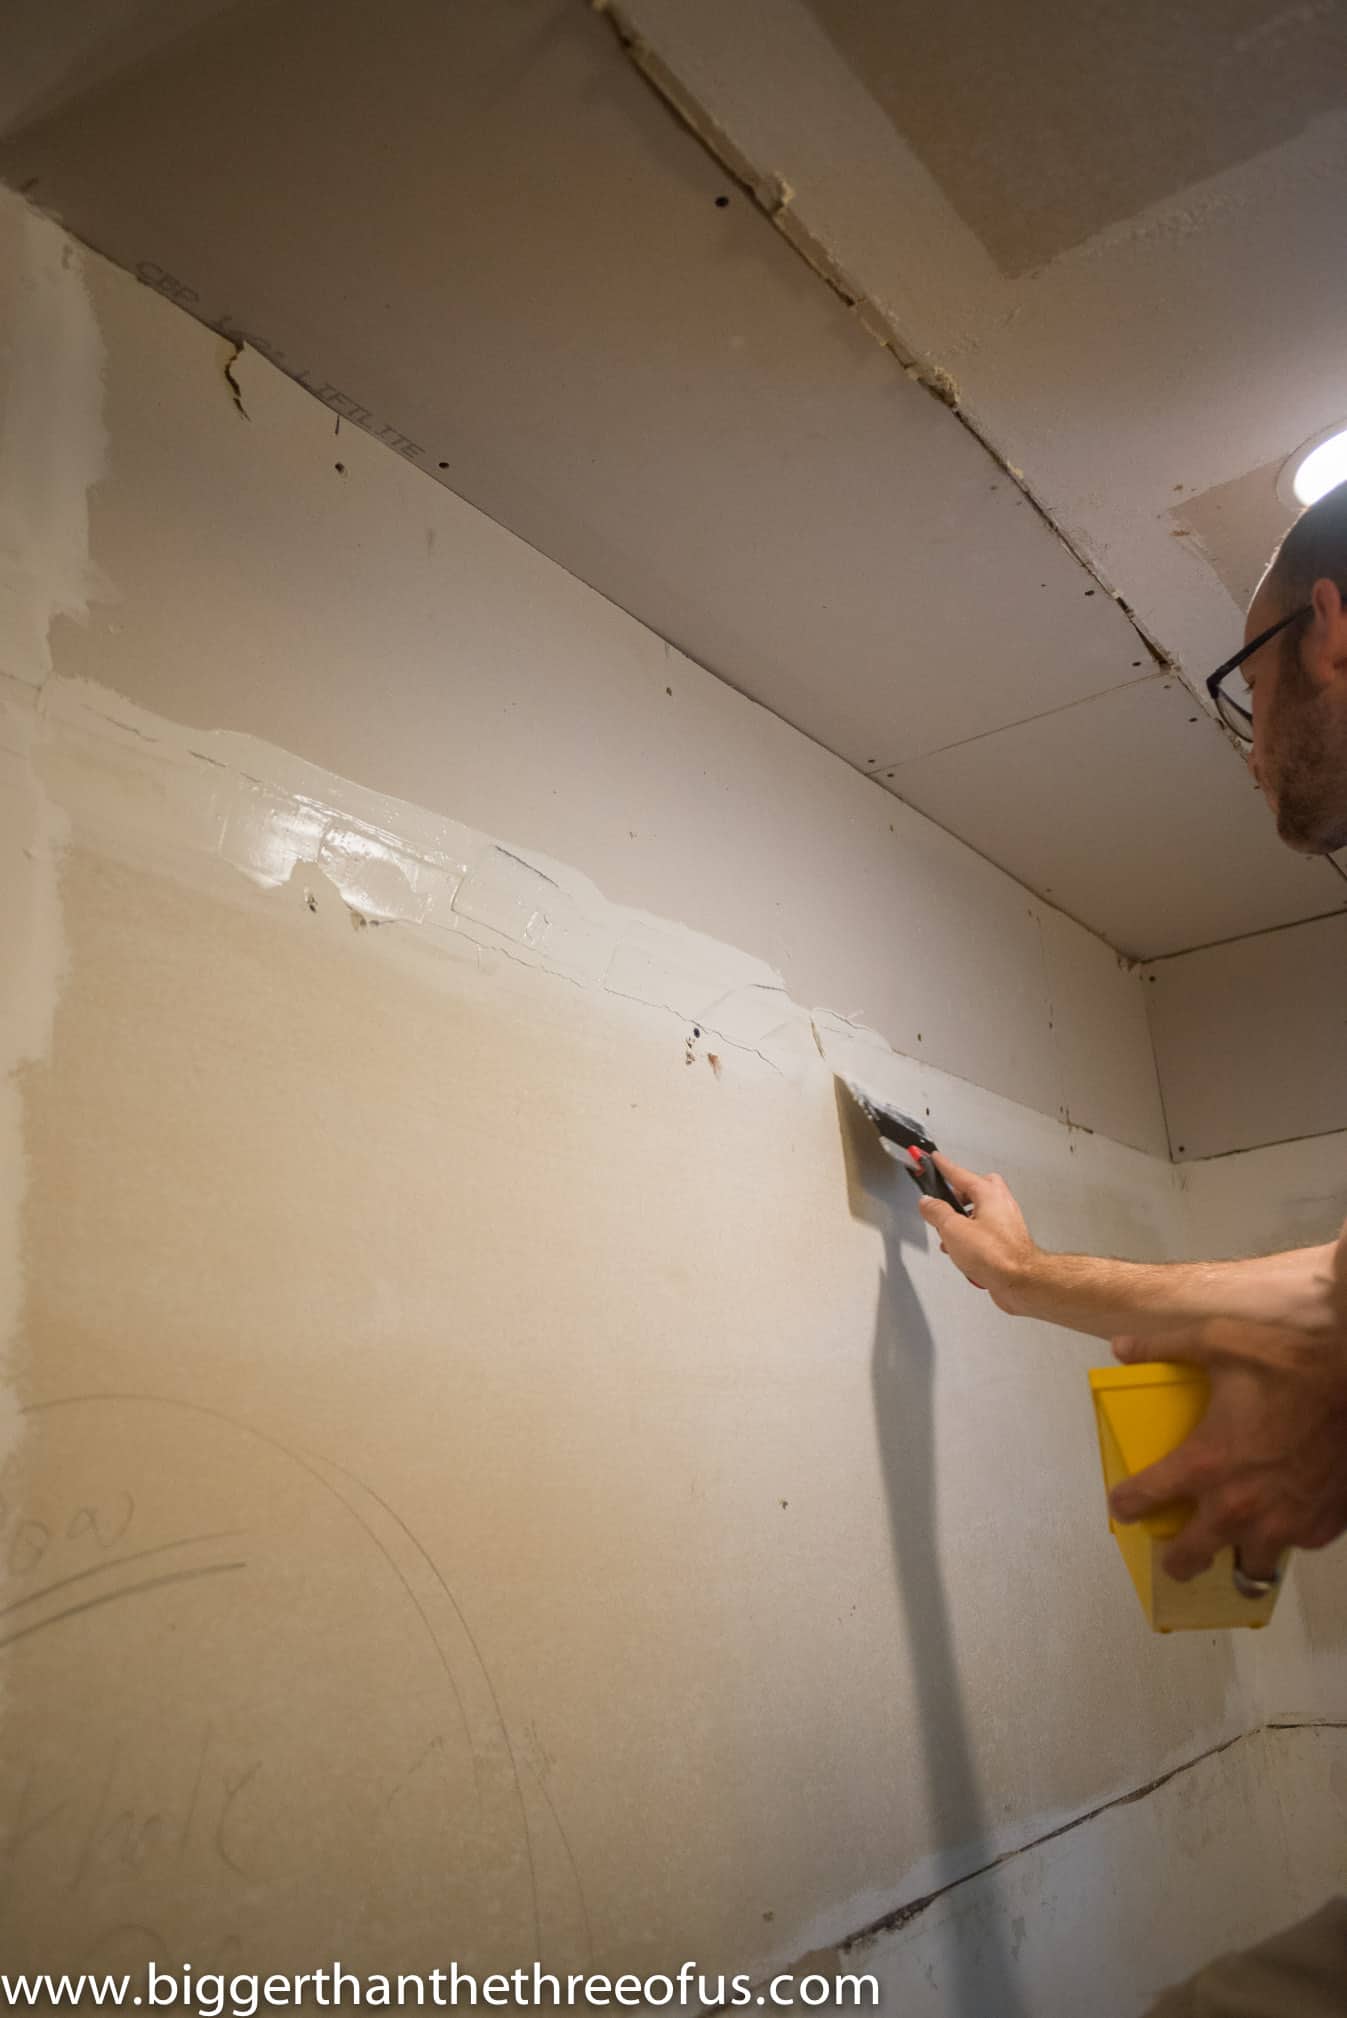
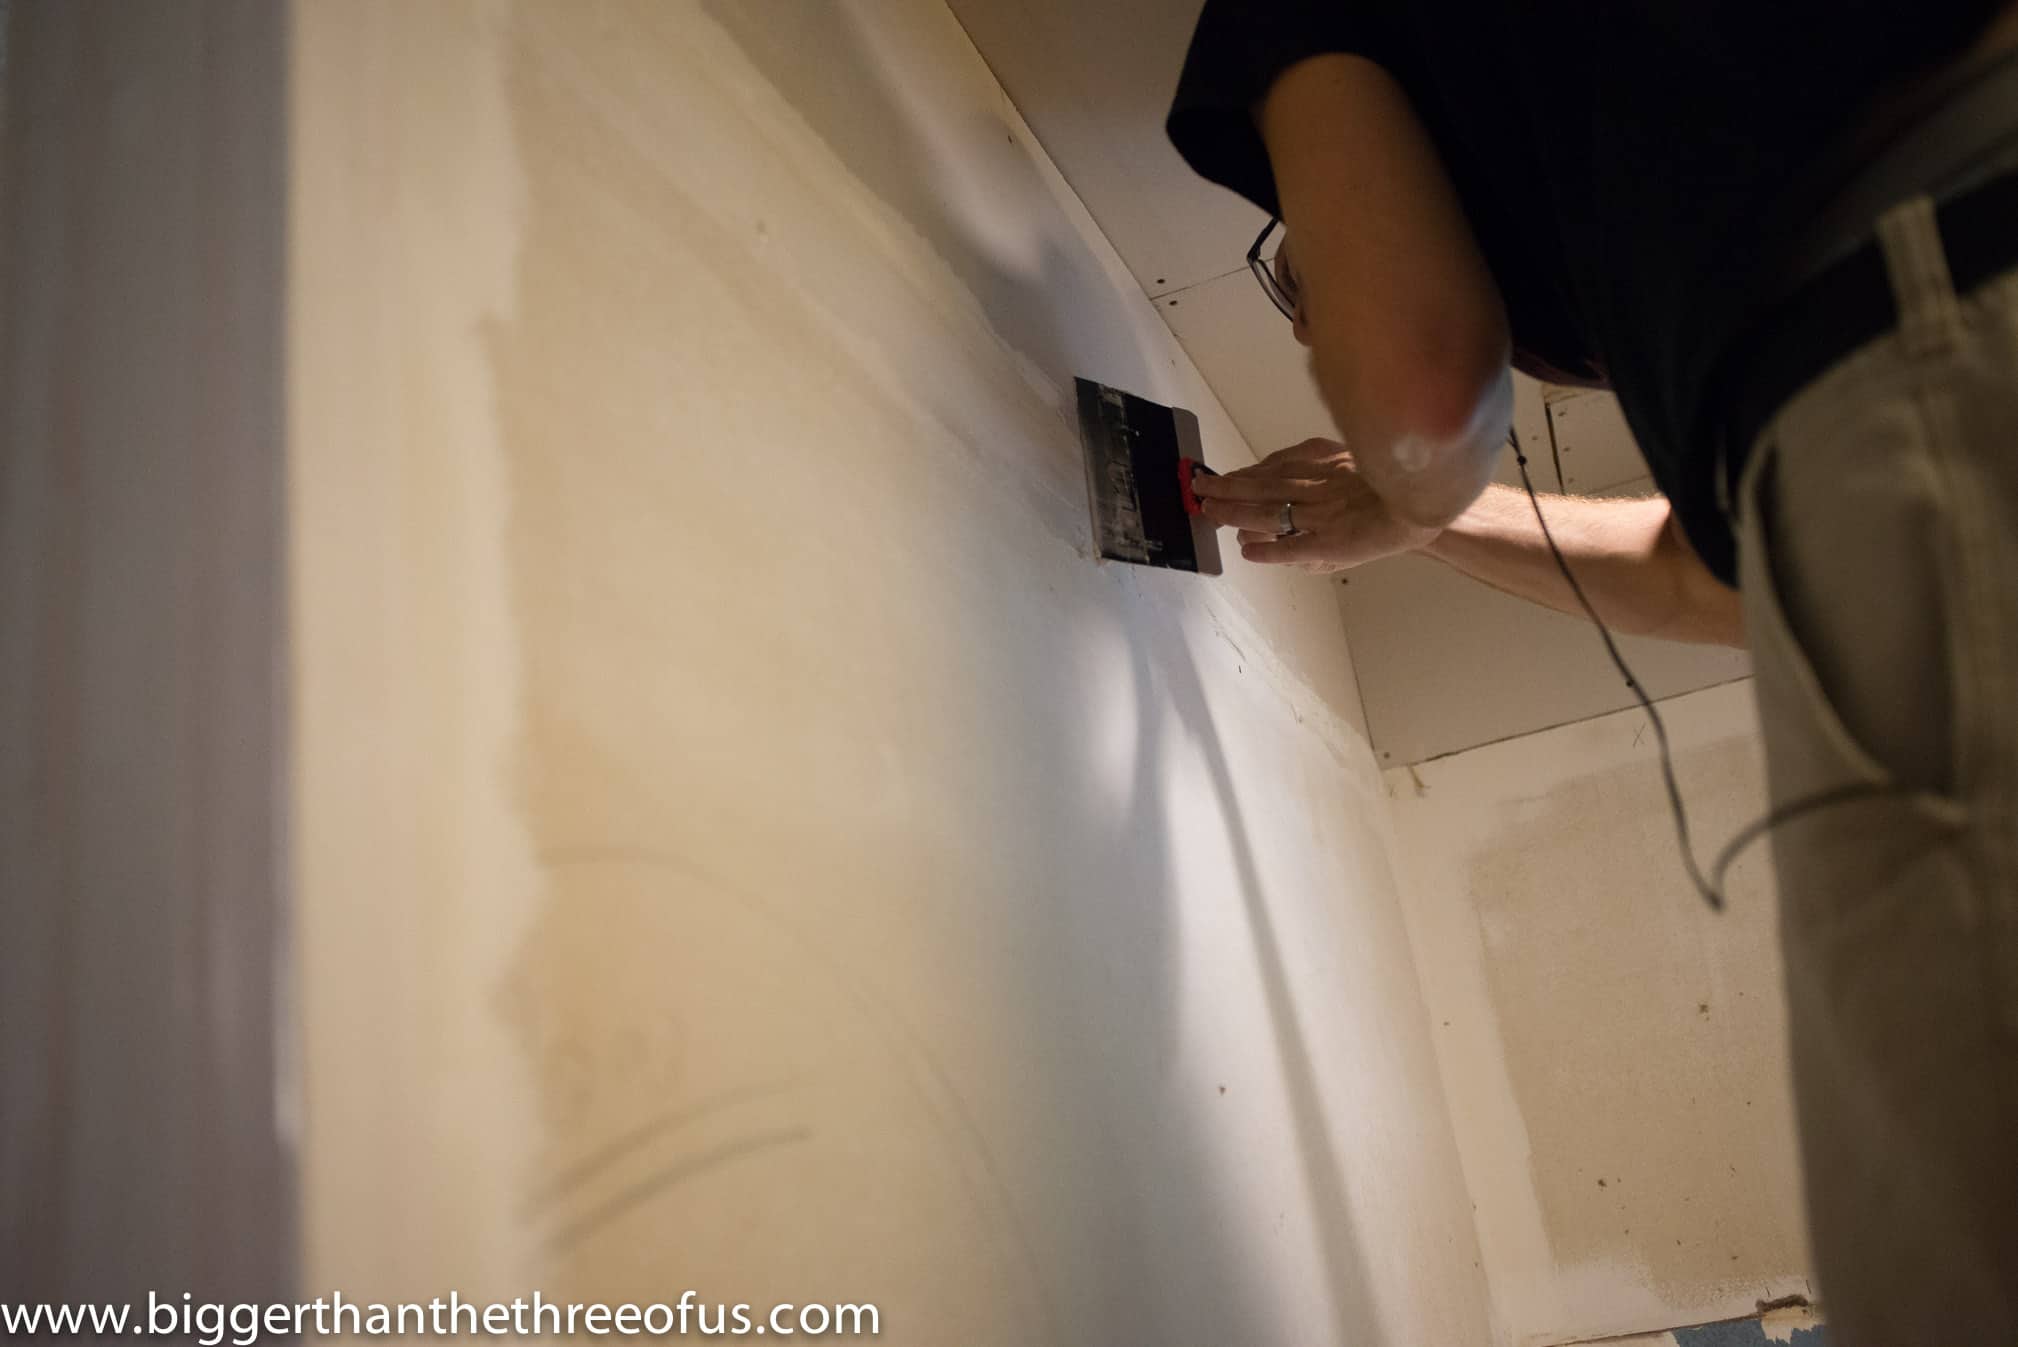
We are using a 8" knife and spreading the joint compound over the seams (work with one seam at a time). The seam should be completely covered with extra built up on top of it.
Step 2: Bedding the Drywall Tape
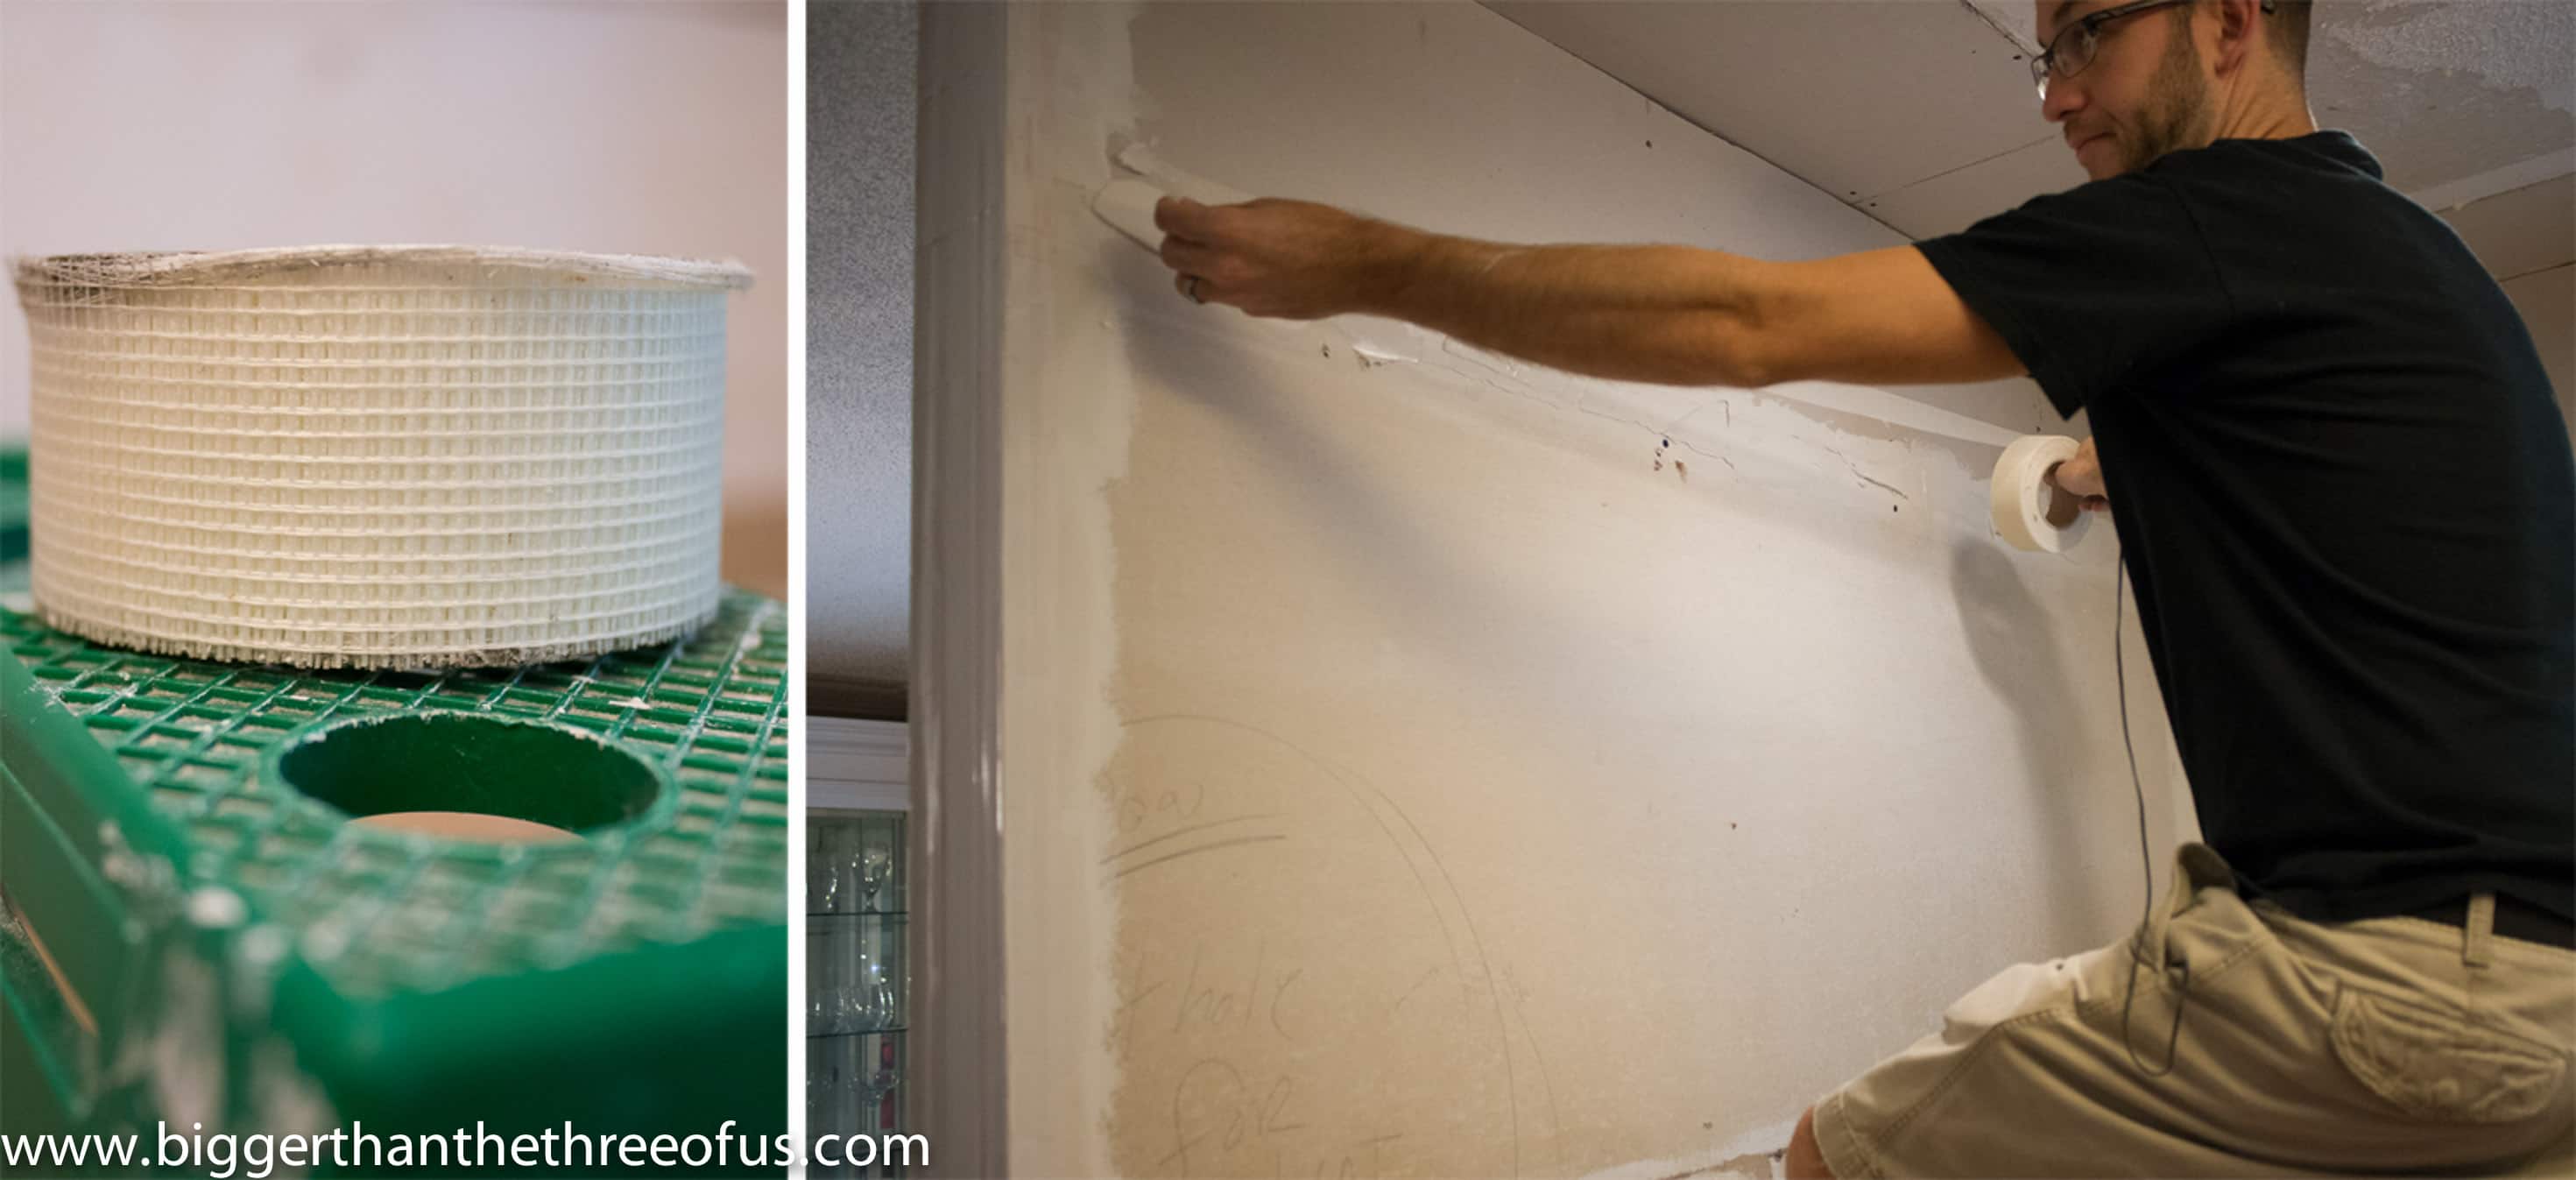
It usually works best if you focus on setting (pushing in) one end of the tape with your knife and then work from that end down the tape to set the rest of the tape into the mud.
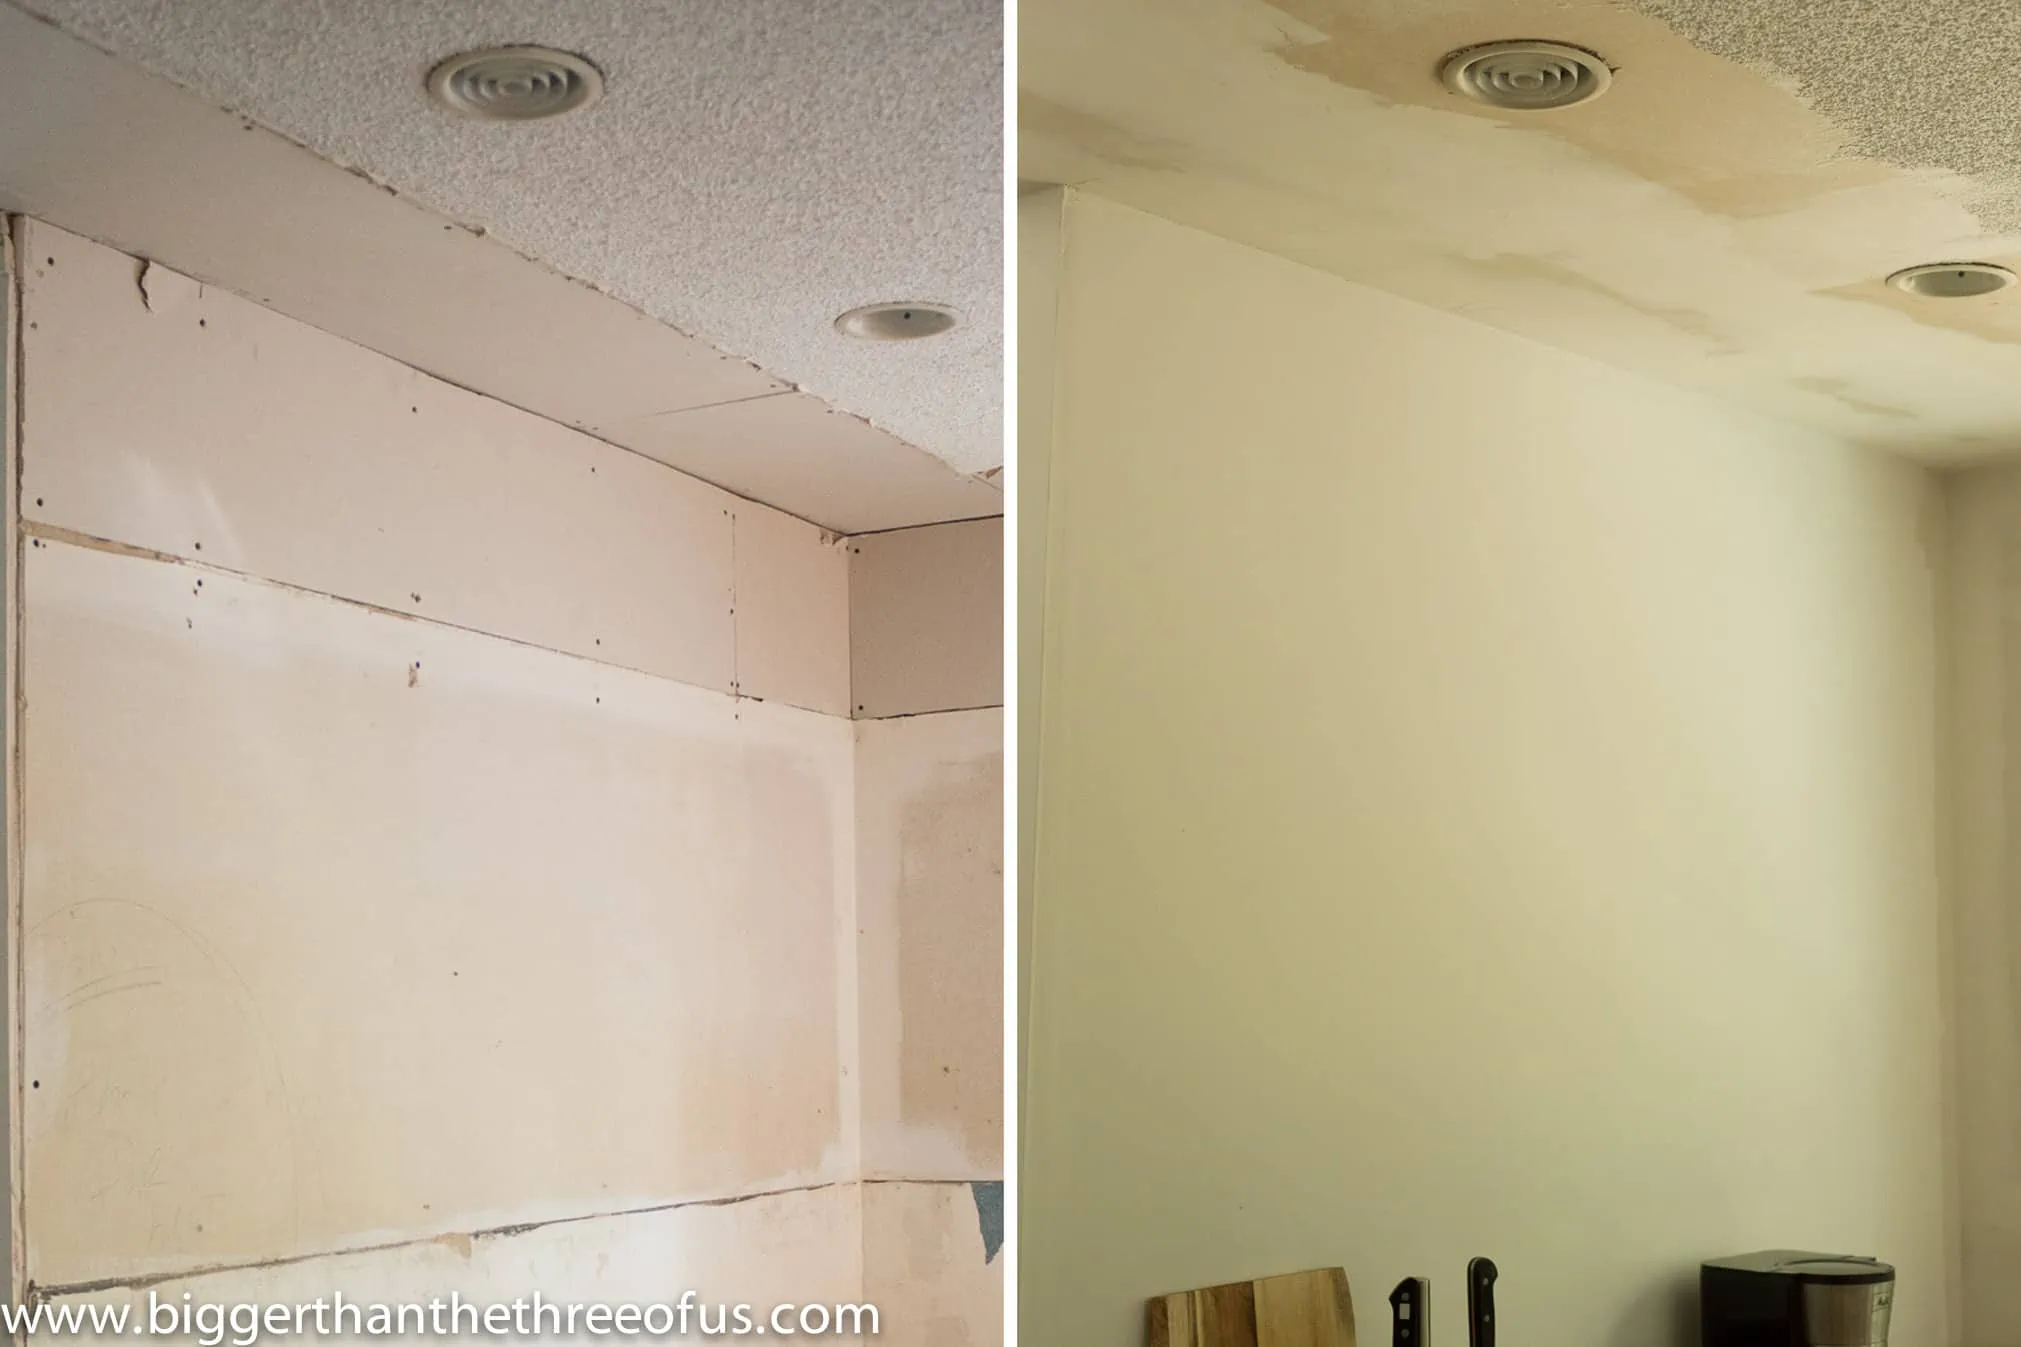
Here's how the mudding and taping drywall looks at this point:
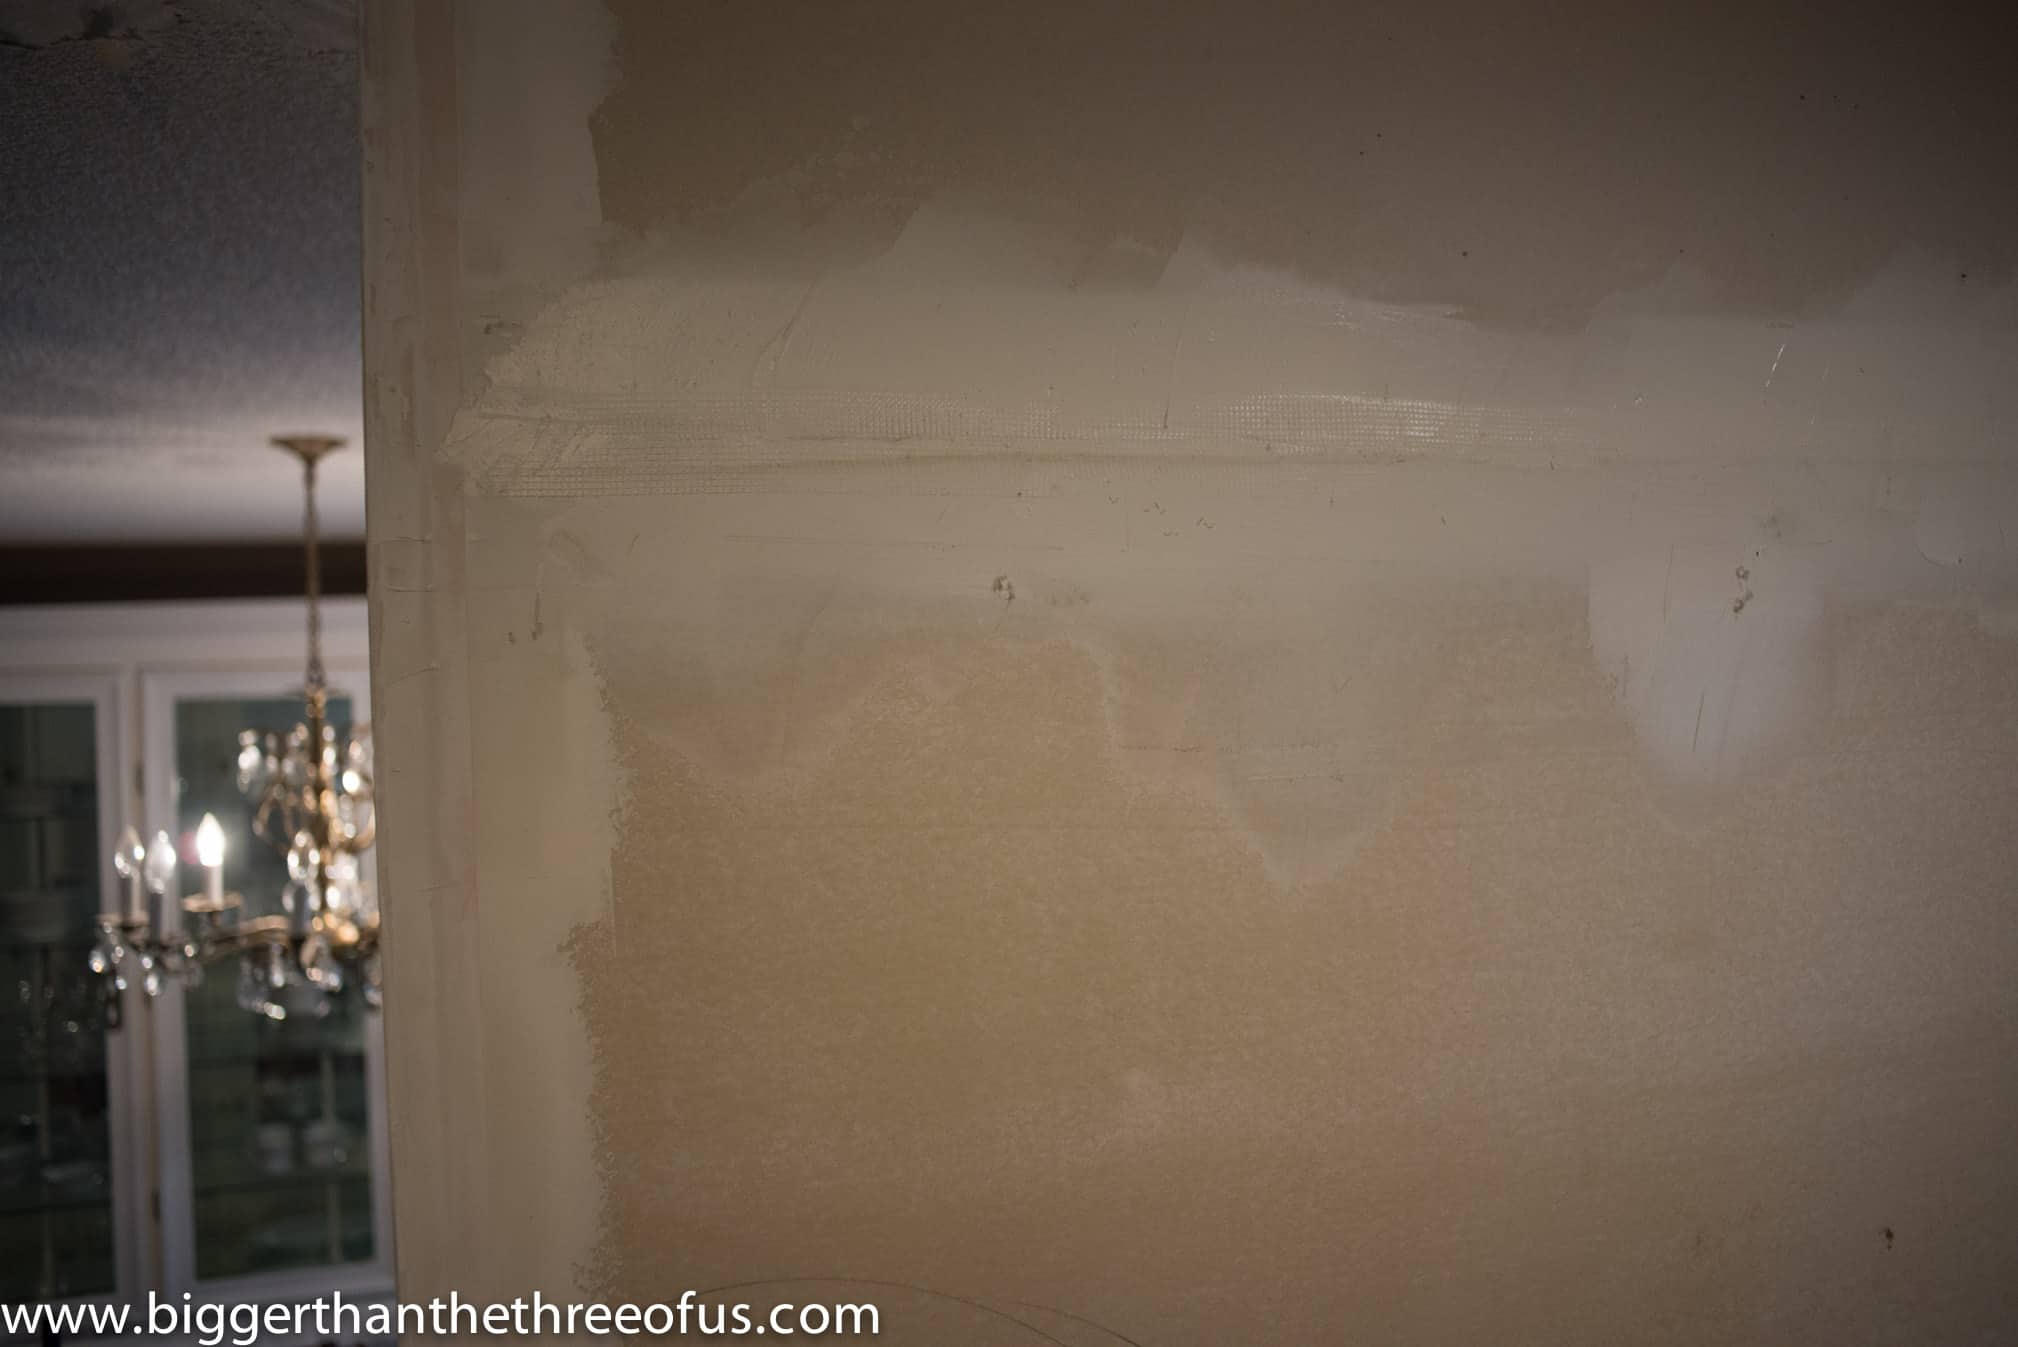
Step 3: Applying the Fill Coats (Second and Third Coats)
After the tape mesh is applied, go back over the mesh with mud. Then, lightly smooth out the seam to get rid of any big edges. It doesn't need to be perfect. Repeat this process on all drywall seams.
Don't forget to let the joint compound dry here for the full dry time before continuing!
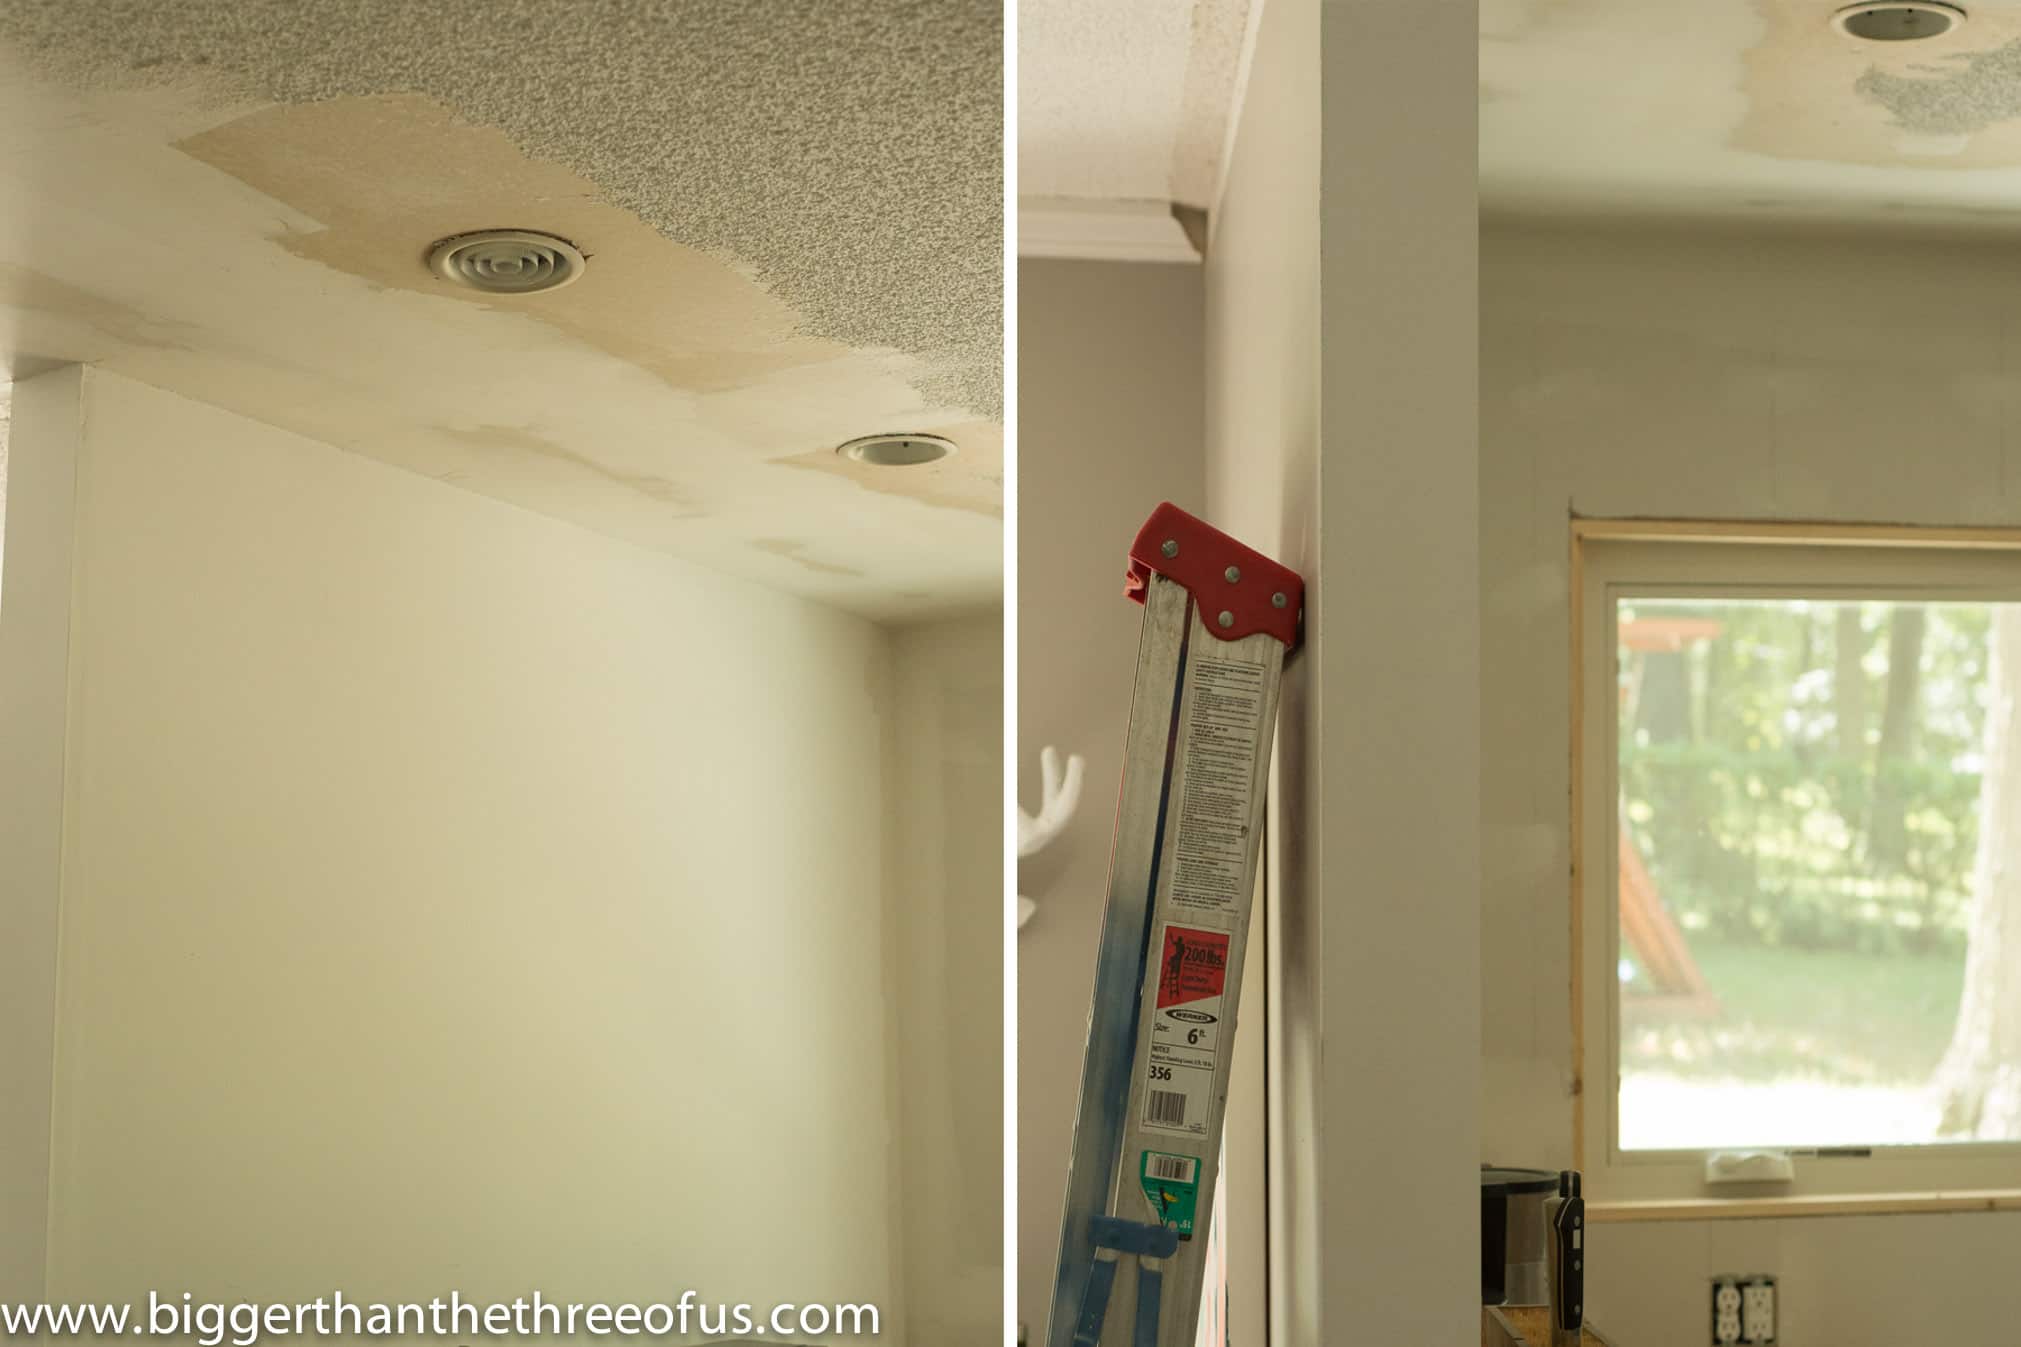
Step 4: Sanding for a Smooth Finish

Just FYI - this is super messy, like messier than anything we have ever done. Take the time and cover your counters with plastic and hang plastic sheeting to help contain the drywall dust. You will thank yourself. Promise!
After you have sanded, wipe the loose dust off the walls with a large sponge or a shop vac!
Step 5: Repeat all steps as needed
Apply the next coat of mud using the 12" knife. All coats after the first are the same. You just start by applying some mud along the seam, and then use the large knife to gently smooth out the seams and widen the mudded area. This helps taper out the drywall so it covers the seam well in the middle and then gets thinner and thinner the farther away from the seam you go.
Once your last coat of mud is dry and you’ve finished that final round of sanding, it’s time for the fun part. New drywall requires a specific approach to get the best results, so head over to my guide on How to Paint New Drywall for my favorite primers and pro tips.
A tip for making it smoother and getting good results
Every time you mud drywall (we did this process three times), try to smooth and arc with the knife so that the drywall looks smooth. You do this by putting more pressure on the tapered side of the mud (away from the seem). This will help with the reapplication process.
Usually 3—a tape coat, a fill coat, and a finish/skim coat.
24 hours for standard mud, or as little as 20–90 minutes for "hot mud.
All in all, installing the drywall (check out our tutorial for how to install drywall if you haven't), and finishing the drywall together are a pretty decent-sized project. It's definitely a doable project for a DIYer. But, between the install and letting the mud dry between coats; I'd say it's definitely a two-weekend-type project. For us, it was more like a 2 month project... but who's counting?
DIY projects of this scale require a lot of patience—it reminds me of the 140 hours I spent hand-painting stripes in our hallway. It’s a lot of work, but the level of detail is always what makes the final result worth the effort!
How to Tape and Mud Drywall

Learn how to mud drywall for small patch jobs or renovation projects.
Materials
- Drywall Tape
- Wallboard Joint Compound
Tools
- 12" Taping Knife
- 8" Taping Knife
- Wall Sander
- Mud Pan
Instructions
- Spread the joint compound over your seams working on one seam at a time and using a knife to spread. The seam should be completely covered with extra joint compound built up a bit on top.
- Place drywall tape over the joint compound that you just added.
- Anchor one side of the tape (with your finger or a second knife) and run your knife along the full length of the tape to set it firmly in the mud.
- Go over the drywall tape with more joint compound. Smooth out the application over the seams.
- When you are mudding drywall, you have to allow the mud to set before continuing on. Check your dry times at this stage and let dry.
- Using a drywall hand sander, sand where you used drywall tape and mud. This is VERY messy.
- Wipe walls down with a sponge or shop vac.
- Next, apply the second coat of mud using the 12" knife. All coats after the first are the same. You just start by applying some mud along the seam, and then use the large knife to gently smooth out the seams and widen the mudded area. This helps taper out the drywall so it covers the seam well in the middle and then gets thinner and thinner the farther away from the seam you go.
- Repeat this process until your seams look good. We went three rounds.
Notes
A TIP FOR MAKING IT SMOOTHER AND GETTING GOOD RESULTS
Every time you mud drywall (we did this process three times), try to smooth and arc with the knife so that the drywall looks smooth. You do this by applying more pressure to the tapered side of the mud (away from the joint). This will help with the reapplication process.


Anni
Great job! We did this in our kitchen some months ago and I second the "totally doable but takes a while and very messy" assessment. And the husband needs beer after. 🙂
Ashley Mayes
Yes! I'm thrilled to have it done. Lots of beer might have been consumed during the process... and take-out of course.
Casey
I have a few projects I'd like to tackle that require new drywall and have been putting them off because it seems so intimidating! Thanks for sharing this - makes it look a lot less scary 🙂
Ashley Mayes
Go for it! Just be prepared for the mess... that's really the worse part.
Naomi @ Plaster & Disaster
Great job!! I just tried mudding drywall for the first time this month (on the garage ceiling, which the previous owner had just left unfinished). Let me just say... good thing it was just in the garage! This tutorial is super helpful, thanks!
Ashley Mayes
Oh man, that dust gets everywhere. I'm thrilled to be moving on.
Julia@Cuckoo4Design
You guys did an amazing job! I hate doing this type of work and usually try to have someone else do it.
Ashley Mayes
It's such a hard decision for me whether to try to DIY it or pay it out. This one was definitely doable but a HUGE mess.
Tim Ellis
Just a note for the next time you finish some drywall. I have done enough drywall, both on the job and as a diy-er, to have learned a few tricks. Plus, my dad is an expert. You should tape your joints with a 4" knife. Save the 8" for the second coat. The 4" knife is made to fit in the tapered joints of the drywall, otherwise you'll end up bowing the wider knives permanently after a few uses. And you can just stick the mesh tape directly to the drywall, then mud it. You only need to run a pass of mud for paper tape. Otherwise you'll be sanding a lot more.
Ashley Mayes
Thanks for your advice, Tim! All of that is great to know. Sanding is so annoying so anything that saves time is amazing!
Boardwiser
Leave the drywall to the professional, what I see, read or listen to here is wrong. I'm a 45 year veteran and know exactly what I'm talking about
Reno Queen
One piece of advice -- do NOT sand between coats. After the first coat of mud, knock down the ridges by pushing your 5" knife over the mudded area. Then reapply a second coat of mud. Repeat again after the second coat of mud is dry. Save the sanding until the last finish coat is done! Much less cleanup and the mud will stick to the slightly rough texture of the previous coat far better than to a sanded coat of mud.
Ashley Mayes
oooh, thanks for the tip! We are BEGINNERS when it comes to mudding drywall but have been pleased with the outcome so far. I will definitely try it your way next time around though. Thanks for stopping by!
Sam
Just another drywall tip that is much less dusty from sanding. Use a smooth rag bought at paint stores or other stores. Use a bucket of water and wet the rag and ring it out very well Just wet wipe lightly on the edges of the finished drywall. Very little sanding is necessary if you smooth out the edges.