Is peel and stick floor tile a good product for bathroom floors? What is groutable vinyl tile in general? Get all the details about our peel and stick tile now that we've had it for years.
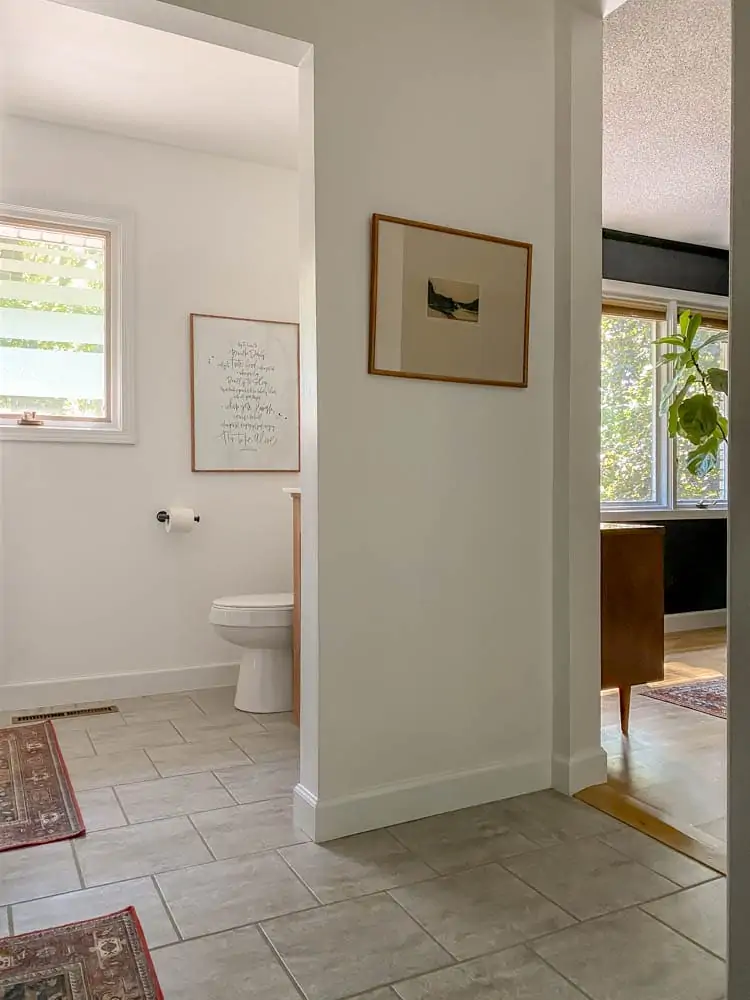
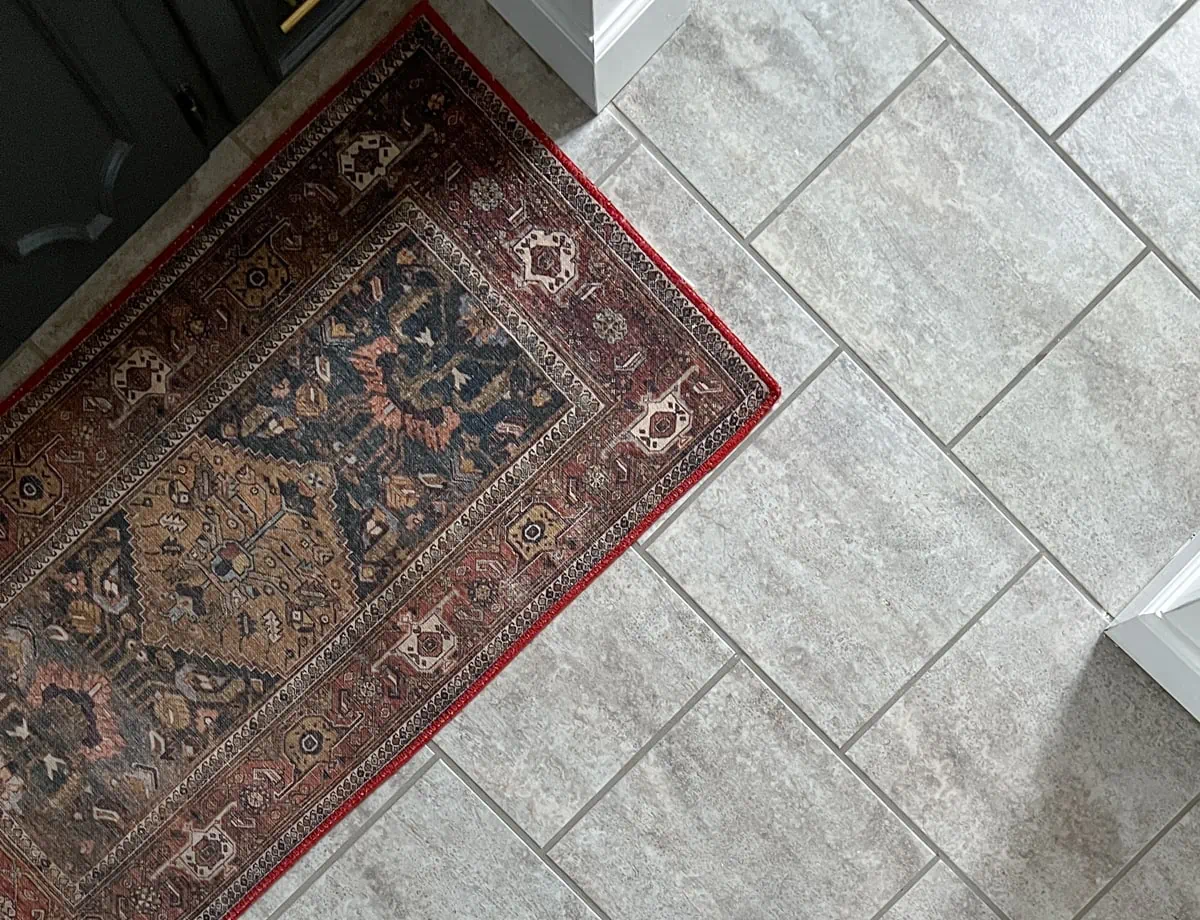
Peel and stick flooring is super easy to lay and lasts for years and years. We've had it for a long time (8+ years!), so I figured it was time to share more about it. From how we laid the peel and stick tile, how to grout the peel and stick flooring and how the stick on tiles have held up... read on for all the details!
Peel and Stick Vinyl Flooring
On move in day at this house, back in 2012, we knew we had a long uphill road when it came to the bathrooms. ALL OF THE BATHROOMS HAD CARPET. Seriously, is there anything more disgusting than carpet in bathrooms?
We had ZERO home improvement skills. Seriously. The 'handiest' thing we'd ever done was to paint walls at our previous house and even that was new to us at that house. So, to say that we were in over our heads on the house renovation thing was an understatement.
We weren't scared of learning how to DIY and improve our house, but we just were new to everything. One of the first things that we knew we wanted to change was the flooring in our bathroom. The stained carpet really grossed both of us out.
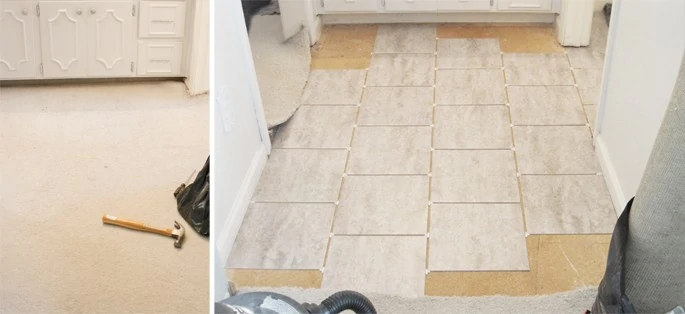
After researching flooring and flooring costs combined with where our skillset was at that time, we ultimately decided that a good short-term option for our bathroom was vinyl stick-on tile. Since we moved in to a house that needed so much done to it, cost was a very important factor.
Peel and stick bathroom floor tile usually ends up being MUCH cheaper than traditional tile because of the cost of the flooring itself AND the fact that you don't have to have many other supplies to lay it. For example, with traditional floor tile, you also need to install an underlayment (such as cement board), purchase mortar, rent or buy tile saws, etc.
How Much Does Stick on Tiles Cost?
There are many different vinyl stick-on flooring options right now and most of them range from $1.50-$3.00 a square foot. When we purchased and installed ours back in 2013, there weren't very many options. We paid $1.50 a square foot.
Since we didn't expect to have this bathroom layout forever, the cost combined with the fact that we could learn to DIY a floor by ourselves made stick on vinyl tiles seem like a perfect fit.
Affiliate links below. Thanks for supporting me. Click to read my privacy and disclosure statement.
Peel and Stick Floor Tile Installation
Groutable Peel and Stick Tile Supplies
- Wet/Dry Vac
- Laser Level or Chalk Line
- Rolling Pin or Rolling Tool
- Vinyl Tile* (similar)
- Utility Knife
- Vinyl Tile Grout
- Grout Float
- Sponge and Bucket
- Grout sealer
How to Lay Peel and Stick Bathroom Tile
- Prep your space by ripping up the carpet, taking all the tack strips out and making sure there aren't any staples or nails that are sticking up.
- Make sure you have a good base flooring (no excessive water damage to your plywood floors).
- Vacuum plywood and then dry brush it. We didn't use any chemical cleaning agents but if you have water damage or think you're flooring is on the bad side of things, definitely check into this.
- Decide how you want to place your vinyl tile. Do you want a brick pattern or some other kind of pattern?
- Decide where you want to start with your first tile. For us, I knew I didn't want a cut tile to be the transition tile from the bedroom, so we started with a full tile there.
- Draw a chalk line or use a laser level to keep you tiles straight.
- Peel the backing off of your first tile and lay it. Press firmly on the tile. We used a rolling pin to roll the tile down even more firmly and then made sure to step on them on each side as well. You can rent a rolling tool if you have a larger space (my dad and I borrowed a large rolling tool when we laid the stick-on flooring at the cabin and, for that large of space, it was a great tool to have). For a small bathroom, the rolling pin and stepping on each tile worked great.
- For tiles that need to be cut, you can make a paper template to help but it's really not that hard to just cut them. Use a utility knife to cut the vinyl tile. You'll need a few blades, but it's pretty easy. The blades dull quickly and it's a lot easier with sharp blades.
Grouting Stick on Tiles
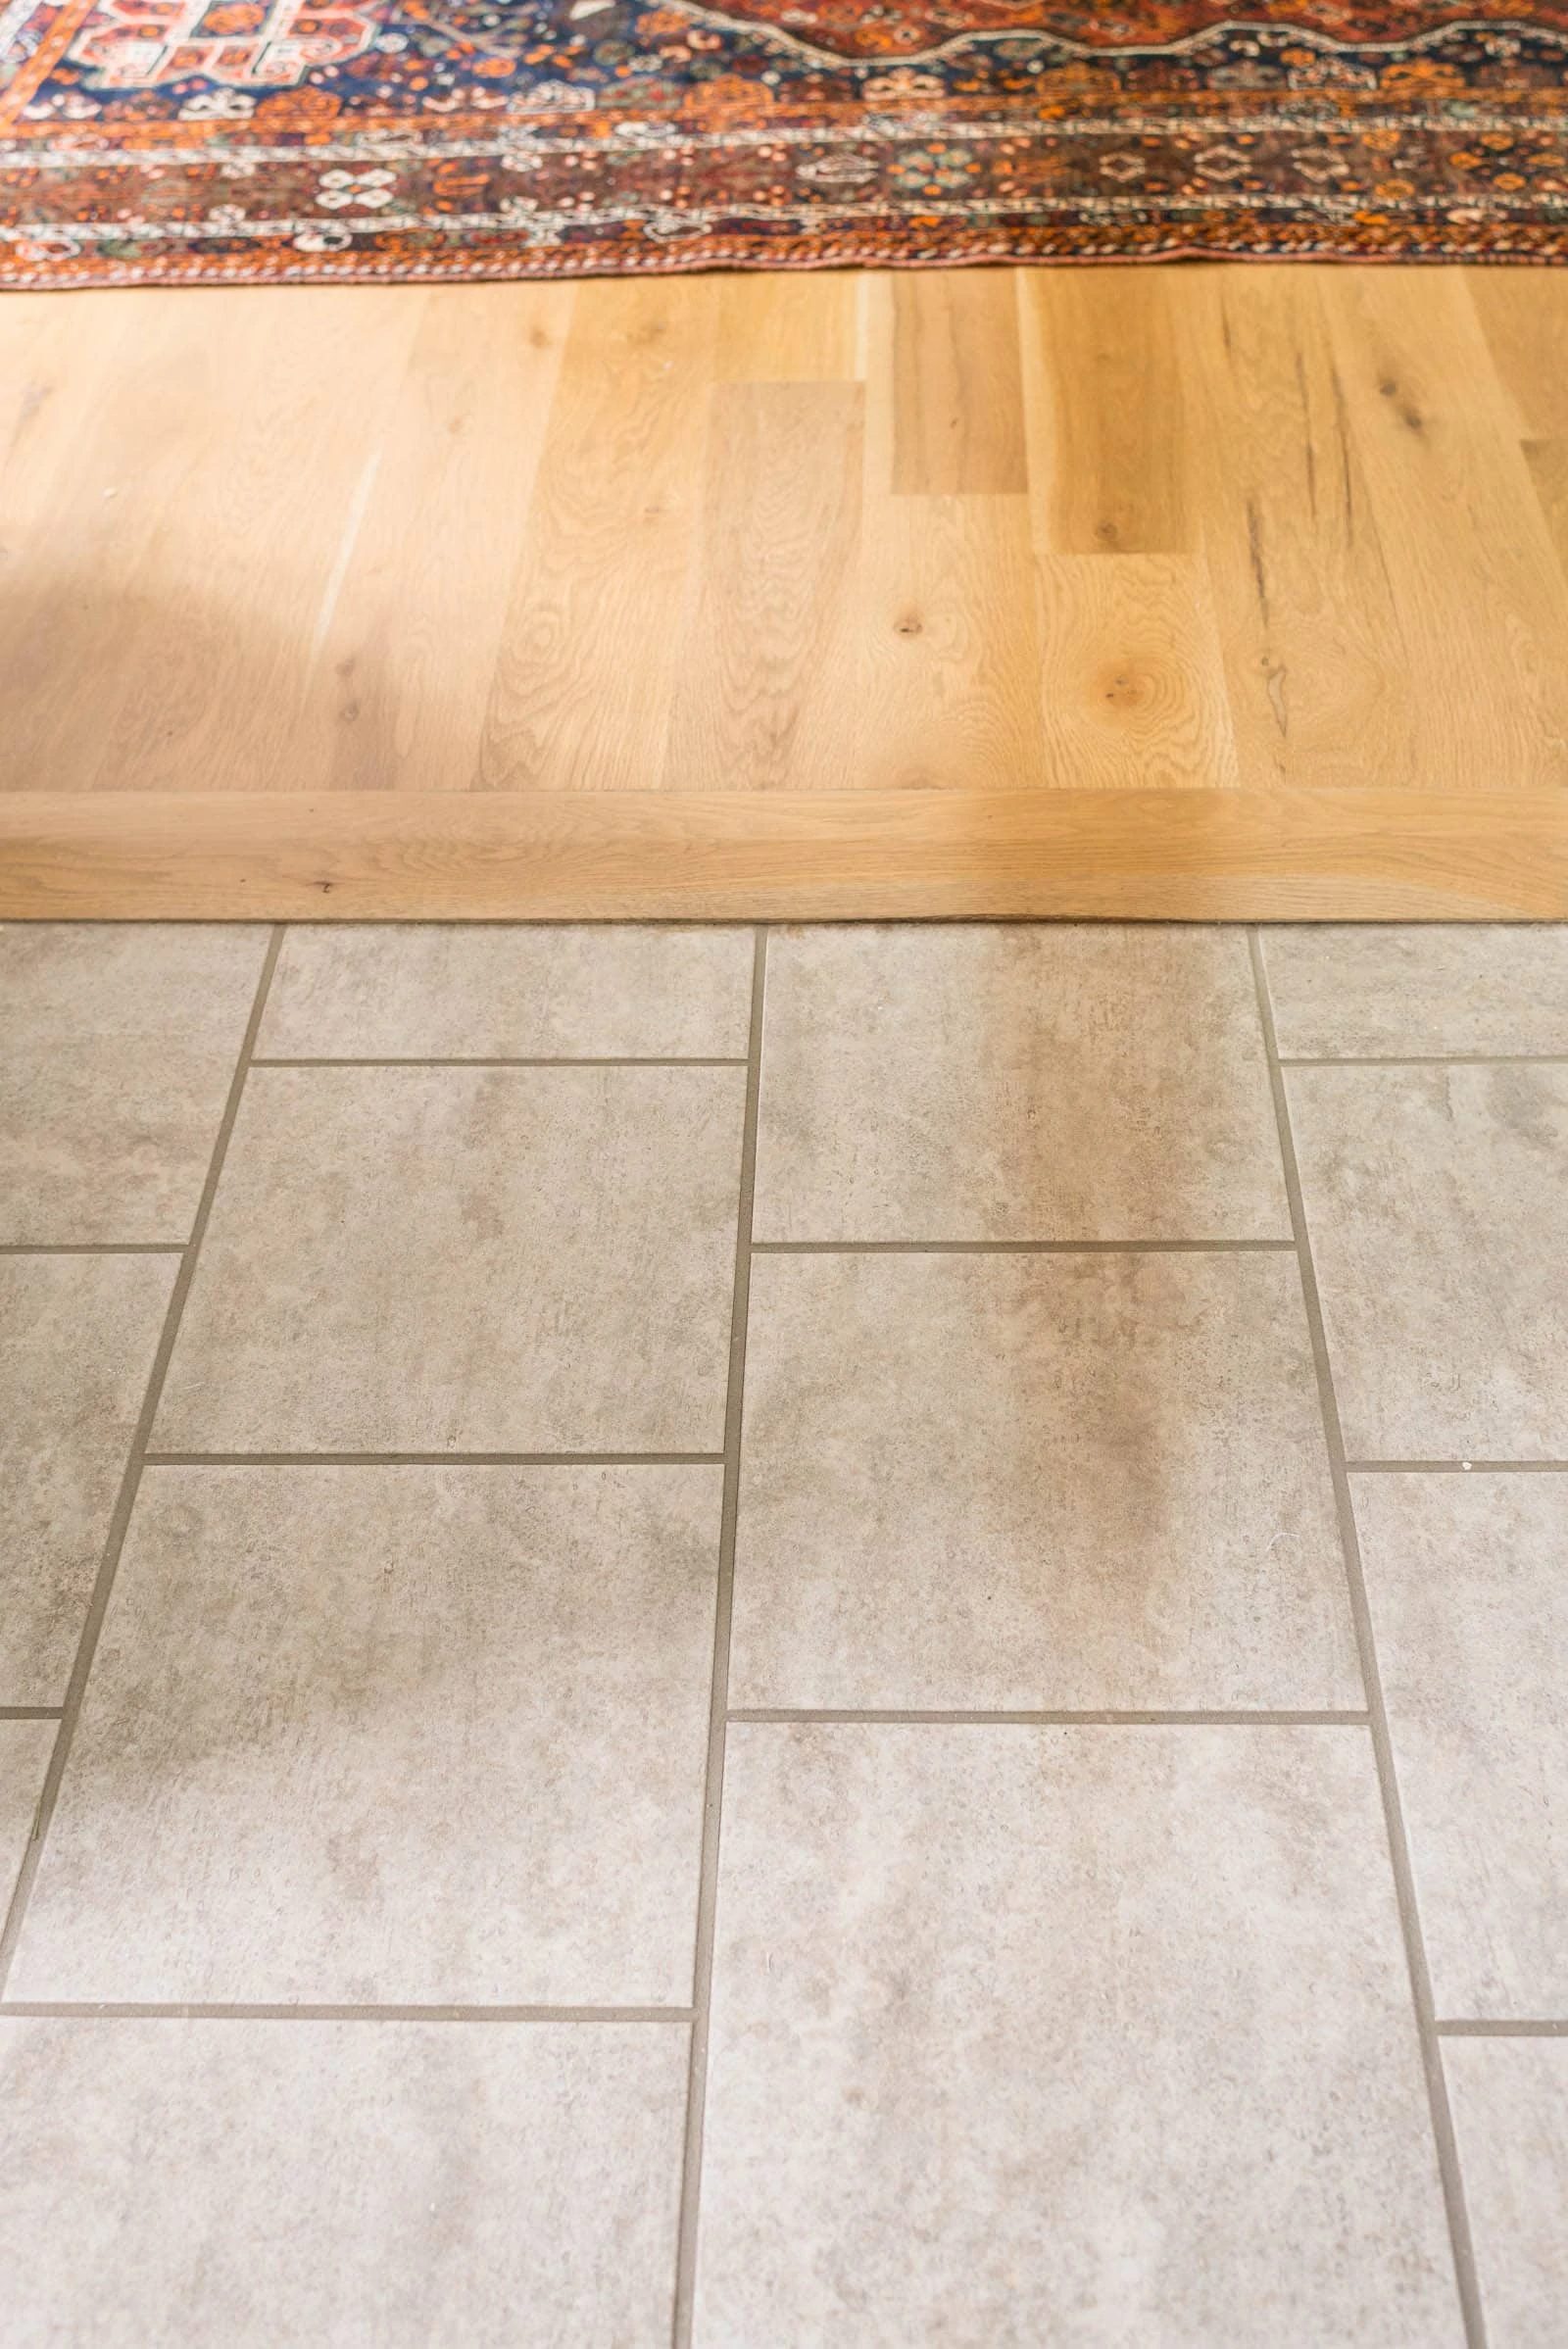
I wanted our stick on flooring to look like real ceramic tile, so we decided to grout it. To do that, as you are laying the vinyl tile, you just need to lay it with tile spacers.
Once you have the vinyl floor tiles laid, take up the spacers and grout the peel n' stick tile, just like you would with traditional tile.
There are definitely a few extra steps because you have to let the grout dry, then get rid of the grout fog by cleaning and then seal the grout. So, definitely extra steps to grout the vinyl tile but not hard at all. I think it really helped our tile look nice, so I'd definitely recommend it.
Peel and Stick Tile FAQ'S
What Can You Use To Cut Vinyl Tile?
Like I mentioned up above, peel and stick vinyl floor tile is really easy to cut with a utility knife and a straight edge. You'll want to have a few blades on hand but, other than that, it's super easy to cut.
Does peel and stick flooring last?
Sometimes a temporary project that you think will only last you two years or so, ends up lasting 6 years and is still going strong! When we replaced our carpet with peel and stick tile from Lowe's, I thought we'd be ripping it back up after a few years. I didn't think it would hold up all that well longterm and I thought we'd be making a move to completely cut our master bathroom sooner rather than later. Products surprise you though and plans change.
One thing has led to another and we still have the peel and stick floor tile in our bathroom 6 years after we installed it and it's looking just as good as the day we laid it.
Is Peel and Stick Floor Tile Any Good?
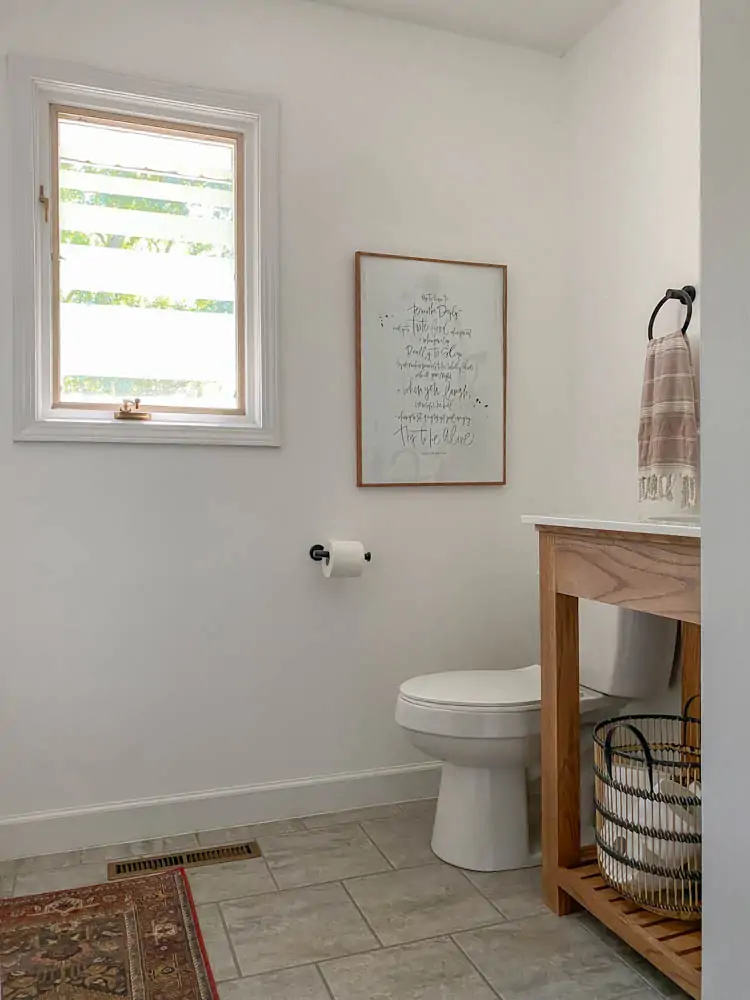
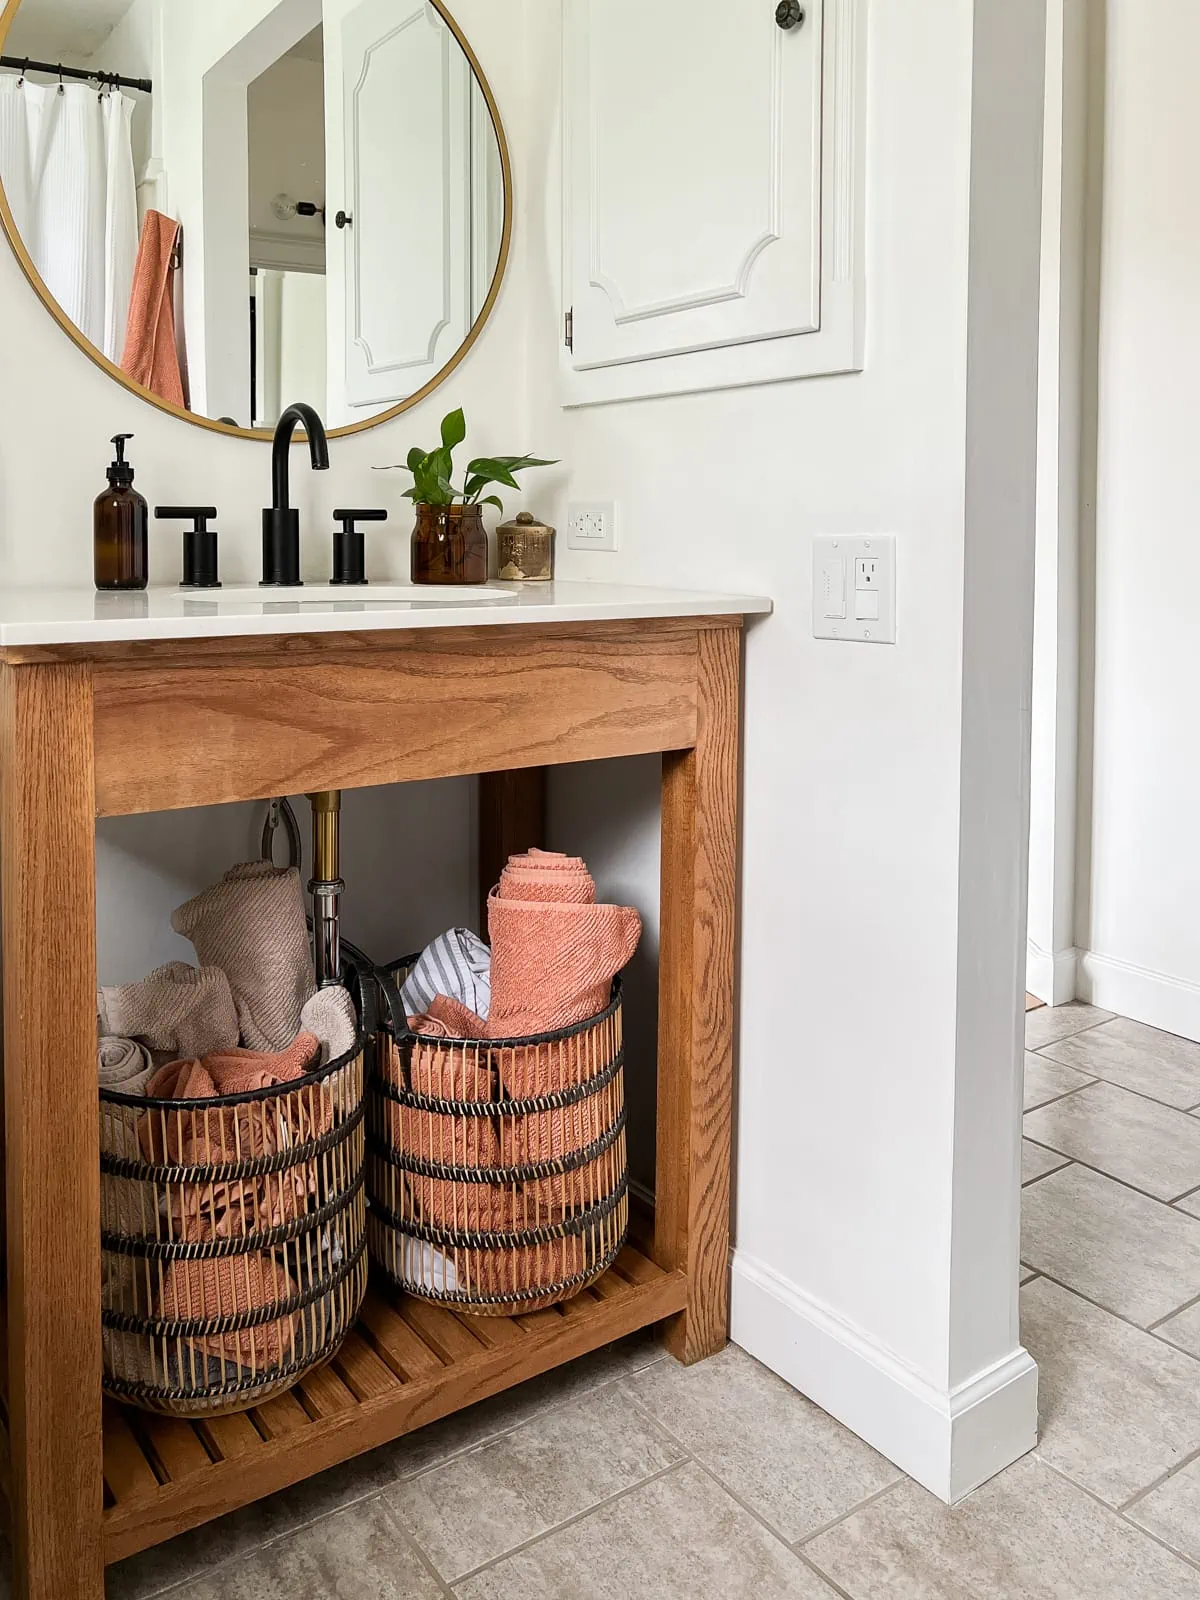
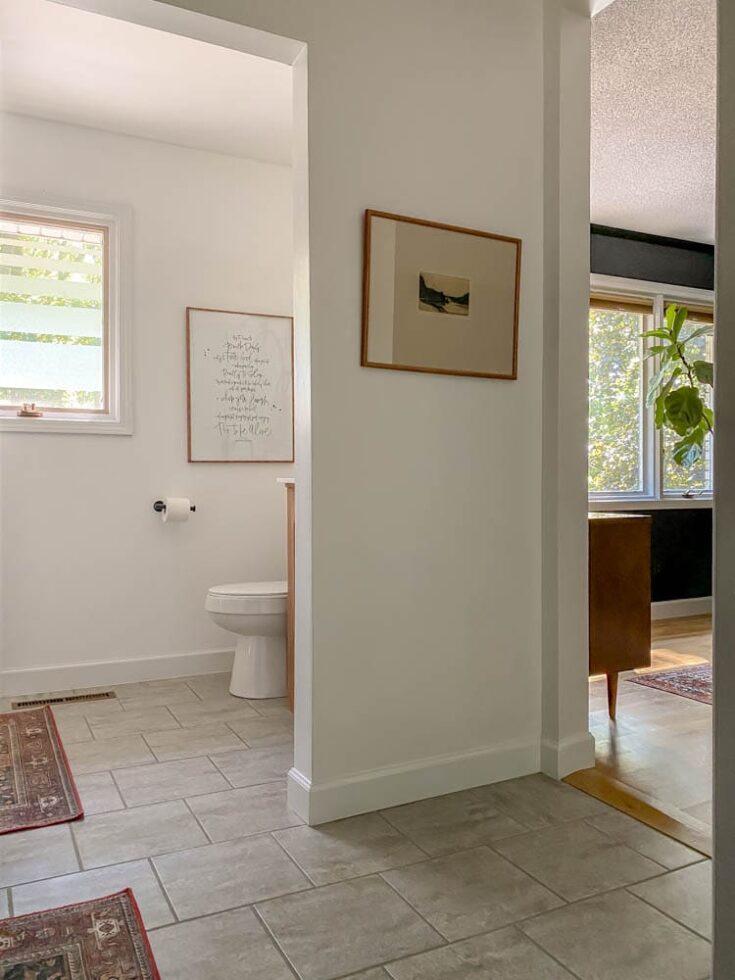
Yes! We've now had the peel and stick bathroom tile over 6 years and it looks just as good as it did when we laid it. It's super durable.
We are very happy with how the cheap peel and stick tiles have held up. I know that vinyl tile isn't for everyone but it definitely fit our needs and gave us confidence to tackle more flooring jobs.
Our bathroom still has a long ways to go, but lots of progress has been made since move-in day. The $87 bathroom nook reveal was the biggest help in getting this space to a blank slate. I still can't believe that $87 changed it so much. Next up on the list is refreshing the medicine cabinet. This DIY medicine cabinet makeover is giving me all the inspiration to just get it done!
How to Install Peel and Stick Floor Tile
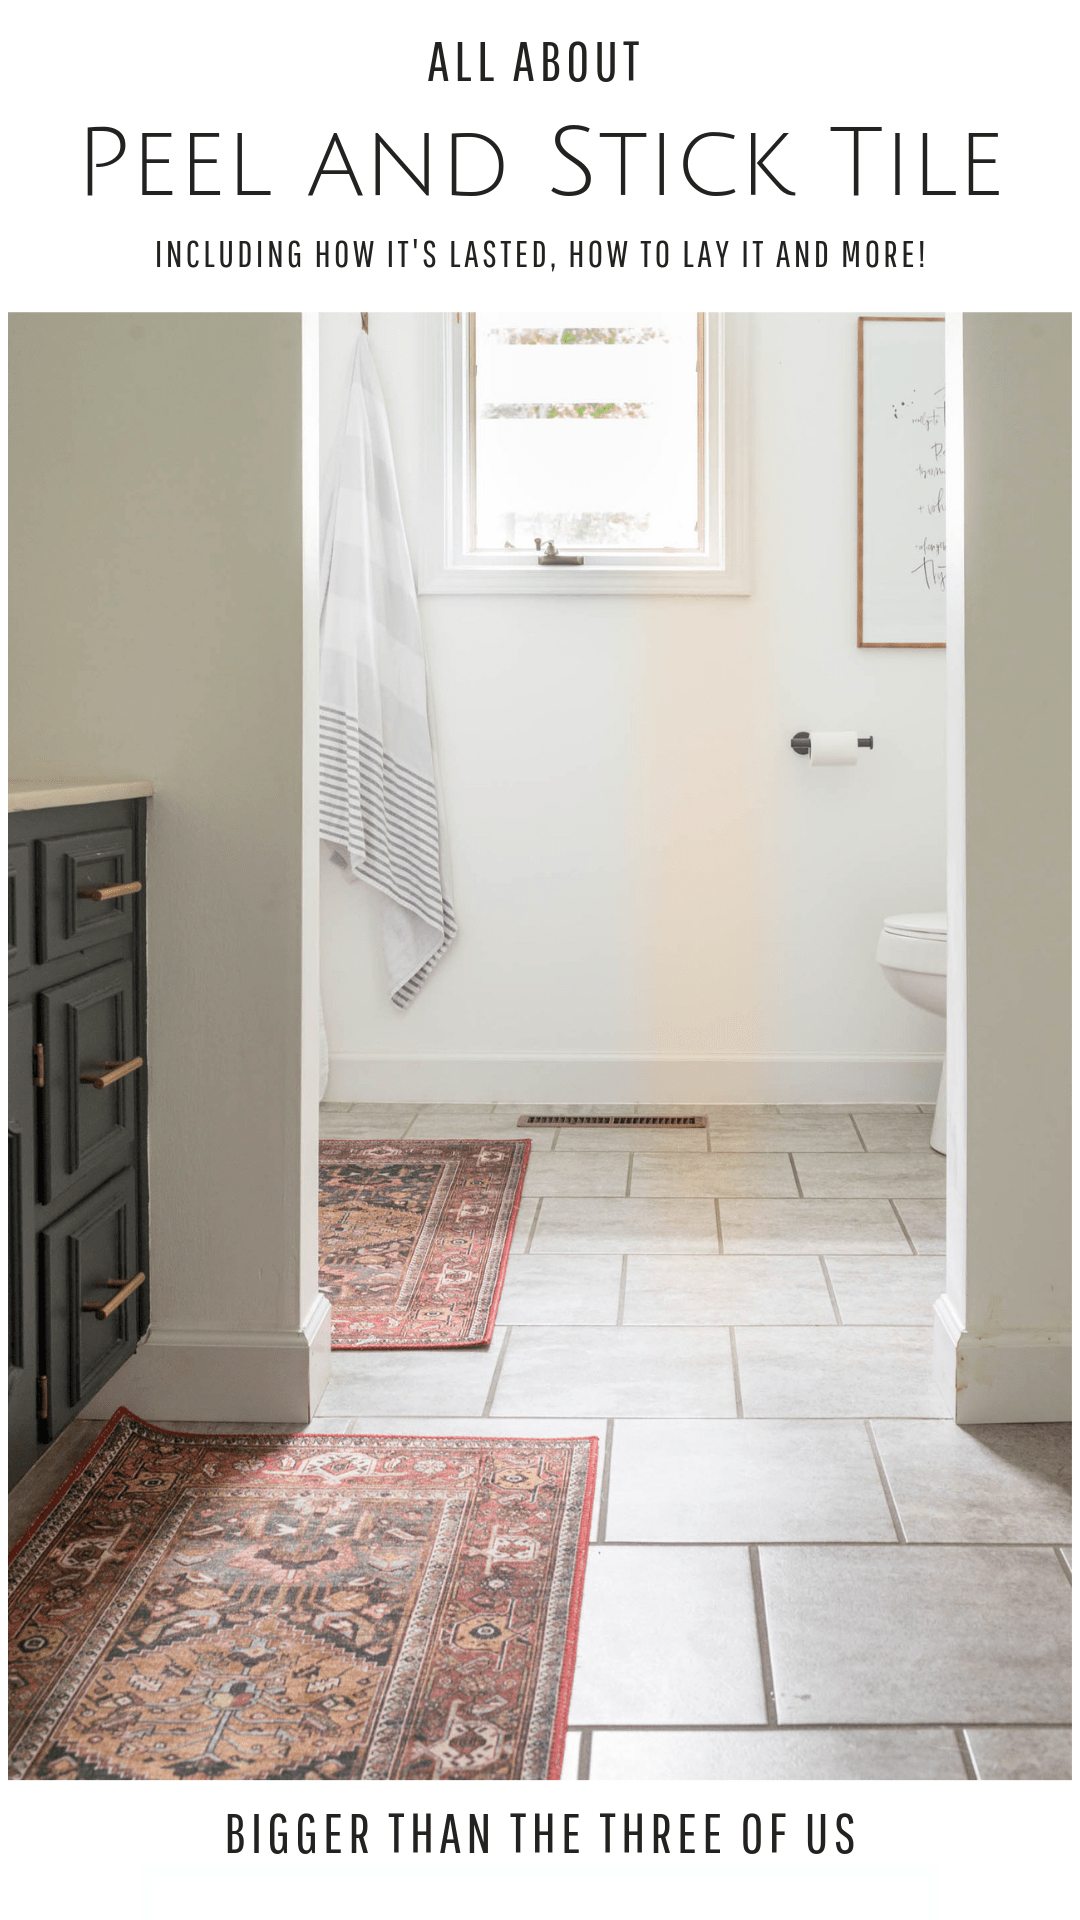
Learn how to install peel and stick floor tile with this easy tutorial! Plus, make your peel and stick flooring look like regular tile by grouting it.
Materials
- Groutable Peel and Stick Vinyl Tiles
- Vinyl Tile Grout
- Grout sealer
Tools
- Wet/Dry Vac
- Laser Level or Chalk Line
- Rolling Pin or Rolling Tool
- Grout Float
- Sponge and Bucket
- Utility Knife
Instructions
- Prep your space by ripping up the carpet, taking all the tack strips out and making sure there aren’t any staples or nails that are sticking up.
- Make sure you have a good base flooring (no excessive water damage to your plywood floors).
- Vacuum plywood and then dry brush it. We didn’t use any chemical cleaning agents but if you have water damage or think you’re flooring is on the bad side of things, definitely check into this.
- Decide how you want to place your vinyl tile. Do you want a brick pattern or some other kind of pattern?
- Decide where you want to start with your first tile. For us, I knew I didn’t want a cut tile to be the transition tile from the bedroom, so we started with a full tile there.
- Draw a chalk line or use a laser level to keep you tiles straight.
Peel the backing off of your first tile and lay it. Press firmly on the tile. - We used a rolling pin to roll the tile down even more firmly and then made sure to step on them on each side as well. You can rent a rolling tool if you have a larger space (my dad and I borrowed a large rolling tool when we laid the stick-on flooring at the cabin and, for that large of space, it was a great tool to have). For a small bathroom, the rolling pin and stepping on each tile worked great.
- For tiles that need to be cut, you can make a paper template to help but it’s really not that hard to just cut them. Use a utility knife to cut the vinyl tile. You’ll need a few blades, but it’s pretty easy. The blades dull quickly and it’s a lot easier with sharp blades.
- See steps below for grouting!
Notes
GROUTING STICK ON TILES
I wanted our stick on flooring to look like real ceramic tile, so we decided to grout it. To do that, as you are laying the vinyl tile, you just need to lay it with tile spacers.
Once you have the vinyl floor tiles laid, take up the spacers and grout the peel n’ stick tile, just like you would with traditional tile.
There are definitely a few extra steps because you have to let the grout dry, then get rid of the grout fog by cleaning and then seal the grout. So, definitely extra steps to grout the vinyl tile but not hard at all. I think it really helped our tile look nice, so I’d definitely recommend it.
ps. Want more flooring inspiration? We installed LVP in our basement and love it.


Yvonne @ Sunnyside Up-Stairs
I'm impressed that you grouted peel and stick vinyl. 🙂 It makes all the difference in your photos! Neat idea!
Ashley Mayes
Thanks Yvonne! It's even better in person, so that's huge!
Carrie
Carpet in the bathroom - disgusting! Whoever did that definitely didn't have any little boys around. 🙂 Your tile looks beautiful - I never would have known from the pics that it is peel and stick.
Ashley Mayes
For sure...although around here it seems that most people had carpet in their bathrooms in the 70s. My Grandma was telling me that she actually made the decision to put it in theirs back in the day.
Loribeth
My mom & dad had carpet in their bathroom in the 70s. It was the style to do wall-to-wall carpet, and that meant the bathrooms too. My mom still wants carpet in her kitchen. We tell her it's a bad idea, but she insists she liked it before and she wants it again.
Ashley Mayes
Funny! Our current house had carpet in all four bathrooms but not in the kitchen. I'm such a messy cook that it would be terrible for me.
Julia @[email protected]
Vinyl has come a long way and I totally love it! Looks great!
Ashley Mayes
Thanks Julia!
Jennifer @ Brave New Home
That turned out great! I've been thinking about using peel and stick tiles myself.
Ashley Mayes
They were definitely easy and everyone who sees them thinks they are ceramic. That's a win in my book.
Audra
Looks great! What kind of grout did you use?
Ashley Mayes
Thank you! We used a pre-mixed container of sanded grout from Home Depot. I think it was called "Deloren Gray".
Loribeth
I never would have thought of using grout with peel and stick tiles. I've seen laminate tiles that are made for grout, and that's what I thought you used, but then I realized that wasn't the case. Is the grout thick enough that it doesn't chip?
Ashley Mayes
We haven't had any issues with chipping.
Becky
Wow Ashley, they look great! It's nice to know someone that's done this and that it's holding up so well.
Ashley Mayes
Thank you!
CC
GREAT job! But I'm really curious, why you would grout a peel & stick tile... please share 🙂
Ashley Mayes
I wanted it to look like real tile instead of just the plain peel and stick. Doing the real thing, wouldn't have fit our budget or experience so that is why we decided to grout. That said, I definitely think it was the way to go. I love how it looks and the grouting wasn't difficult.
Jan Elizabeth
I've never thought of grouting peel and stick tiles. Good idea - looks great!
Ashley Mayes
Thank you!
Cindy
I love it. I did a porcelain tile ten years ago and broke a tile the first week when I accidentally dropped my drill. Another tile broke last week when I dropped a glass. I think I may try this over the tile... Did you seal the grout?
Ashley Mayes
No, we didn't seal the grout. We actually recently just tiled another bathroom and we sealed that grout because it was white. I'm thinking I should have done this bathroom as well, but so far we haven't had any stains or problems.
Penny
Please, please, tell me what tile you used? I have been searching for a pure gray with no brown in it....your floor looks so so good!
Ashley Mayes
I believe it was Armstrong Tile. We got it from Home Depot and they had two different versions of gray in store. One was a concrete looking one, but both were really pretty. Thank you.
Deborah
In high heels, I'm betting chipping would become an issue with the grout. I'm wondering about the smooth textured grout that's available. Would that work just as nicely, and not be such an issue with the heels?
Ashley Mayes
We haven't had any issues...so I'm not sure.
linda kelley
Thats a good idea to grout in the bathroom so the water doesn't get underneath and lift the tiles!
Ashley Mayes
We loved how it looked like tile that way.
Janet
Just wondering how the grout is holding up? It looks great.
Ashley Mayes
It's holding up perfectly! We seriously have had no issues with the flooring and it's the bathroom that we use the most.
Daisy
Love it. I have stick peel tiles for steep stairs to laundry room and want to grout it, now I've seen this. Just regular floor ceramic tile grout???
Ashley Mayes
We used regular grout when we did it but I think they may have a new product next to the tiles available. You should ask at your local hardware store. =) Good luck with your update!
melinda wilhelmi
It's super clean and sharp looking! Thank you both for being brave and breaking trail for the rest of us!
Ashley Mayes
You are quite welcome! We are still really liking it!
Lori
It's been fun looking back at the comments since 2013! This is an amazing idea, and we will try it in a small bathroom. Thank you for the inspiration!
Ashley Mayes
Thanks Lori! Give it a go, it's a pretty easy project and has lasted us a long time.
Karen
I'm really impressed with the way the floor turned out. I wonder, though, about the life span of the tiles? Would you apply sealer over the whole floor including the grout, or is that just looking for trouble?
Ashley Mayes
You know, I'm not sure but I think if you install right they should last. We are on 4+ years and they are in perfect condition still. I wouldn't apply the sealer over the whole floor because the sealer is just for the grout.
Michelle
The floor looks amazing! And they are still holding up. Great job! I love the laminate floor you did also (I saw it on Hometalk). I rent now but plan to buy a home soon! You've inspired me!
Ashley Mayes
Thank you! Yes, this was an easy project that is still going strong!
Lorraine
This looks amazing! I had a two questions:
1. You do not have to remove baseboards in order to place the tile?
2. How long do you think this lasts?
Thank You!
Ashley Mayes
Thanks Lorraine! For removing the baseboards, it depends. Our floor had carpet and our baseboards were on top of the carpet. So, when we pulled the carpet up, there was enough room to slide the tiles in underneath. If you didn't have enough room to go underneath the baseboards then you would have to pull them up. We did this project in 2013 and the floor looks just the same (in amazing condition) today. So, I'd say it's going to be great for a long time!
Victoria
Hi. Love the look!! This may be a dumb question but can you lay vinyl tile on regular tile?
Ashley Mayes
You know what, I'm not sure! I'd seek out a contractor and ask.
Nathalia Fernandes
Hi! Is it still looking good? What do you think about put this kind of tile in the whole house?
Ashley Mayes
Hi,
It still looks perfect! =)
Jenna Wertheim
I’m wondering if you removed your toilet in order to lay the tile? Trying to figure out if I can get away with laying the tile around our toilet and pedestal sink.
Ashley Mayes
Hi Jenna,
Yes, we did!
Ek
I think the tiles look great I wish I knew what color and make this was I'd like to do the same thing.
Ashley Mayes
I totally get that! They are probably no longer carried though because it was so long ago!