

Learn drywall installation tips for beginners. From how to cut sheetrock to how to fasten it to the wall, learn more about installing drywall in this post.
Today, we are chatting all about the process of hanging sheetrock. I have quite a number of other posts on how to do drywall including mudding, patching and finishing that I'll link up at the bottom of this post.
Sheetrock Installation is messy. Definitely consider a small job first!
One thing to note, when you install drywall, is that it's very messy and takes multiple days to get it finished. For small projects, we've found that we can definitely do it ourselves, but for bigger projects (like our 800 square foot basement remodel) we definitely feel like it's better to hire out the drywall install and finishing.
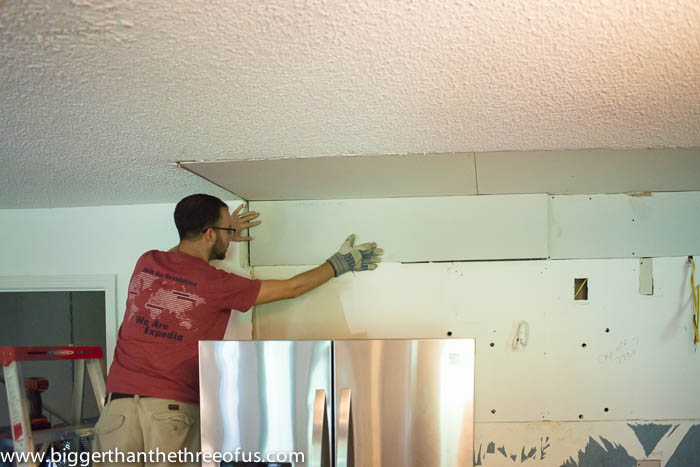
So, for the purpose of this step-by-step drywall installation, we are showing you a smaller job in our kitchen. We took down the upper cabinets in our kitchen as well as the bulkhead and needed to patch drywall where we didn't have any. For us, this felt like a manageable sheetrock installation project that we could do ourselves.
Ok, now that we've cleared that all up, let's get to the how-to!
*This post contains some affiliate links. Read my full disclosure.
Supplies needed for drywall installation:
- Drywall*
- Drywall screws
- Drywall dimpler bit - otherwise known as drywall screw setter bit tip
- Drill
- Utility knife
- Drywall rasp
Check existing drywall sheet thickness before purchasing
*Before buying drywall sheets, measure your pre-existing drywall to check how thick it is. ⅜" and ½" drywall sheets are definitely the most common but there are other thicknesses out there so be sure to check what you have in your space before buying to match.
Home Depot has a great post on types of drywall that includes lengths and thicknesses. Check that out for more information, too.
Step by Step Drywall Installation
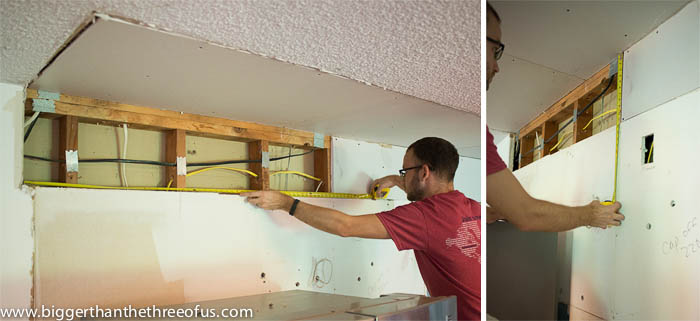
- Measure the space that you need to place drywall in. It's really important to measure the length and width but also measure the width at a few spots within the length.
- Once you have your measurements, diagram it out on paper so that you remember.
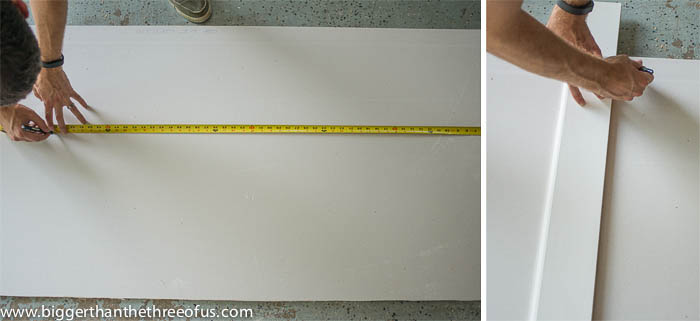
- Place your drywall white side up and mark your measurements. Use a straight edge to draw your lines for your cut.
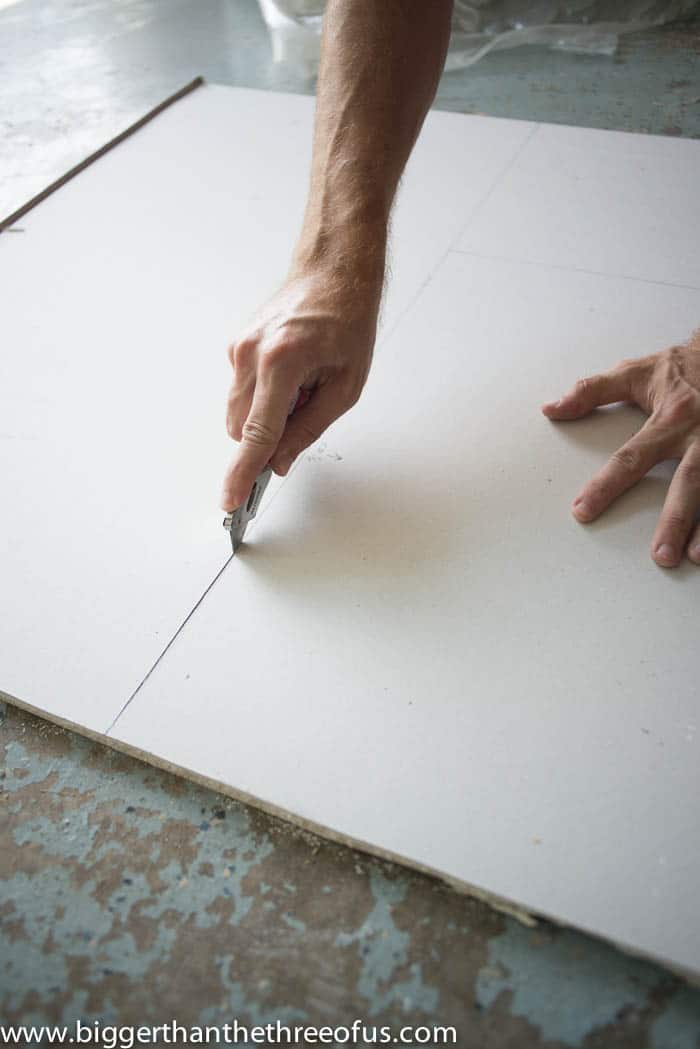
- Using a utility knife, score your drywall. You don't want to press completely through your drywall, but you want to press firm enough to score it evenly down your line.
- From the backside, give it a good knee bump and it will cut in half where you scored it.
- If it doesn't have a clean break, cut through the back paper with an utility knife.
- Take it in and test it out in your spot.
- Many times, it is just a smidgen too wide and that's when you want to use a drywall rasp. This will sand it down enough so that you can get it to fit within the space.
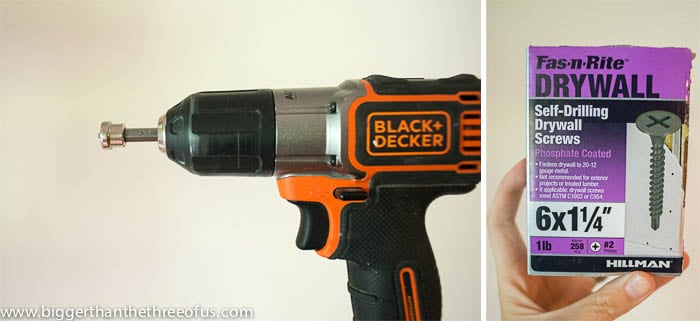
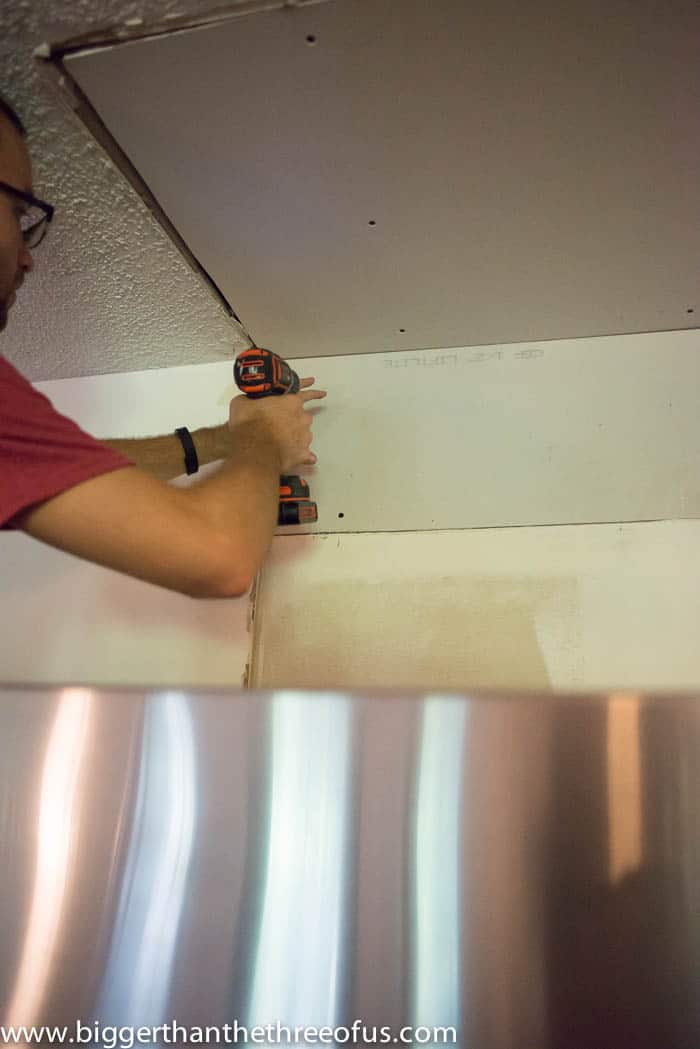
- Use the drywall screws and dimpler bit to put the screws in to studs. The bit stopper will allow you to put the screws in at the perfect length, helping you protect the drywall from cracking (which happens when your screw goes in too far).
- Finish placing drywall screws in the studs until you feel like you have it well. It helps prevent cracking if you start at one end and work your way down.
If you are a visual learner, let me walk you through some of the steps on how to install sheetrock in photos!
After measuring, we created a simple diagram of what drywall length and width were for needed for the drywall installation.

Next, we are taking our measurements and using a straight edge and measuring tape to mark the measurements.
Using a utility knife, score the drywall at the marked lines. We did this on the front of the drywall but the next photo is showing a bit of cleanup scoring that had to be done on the backside.
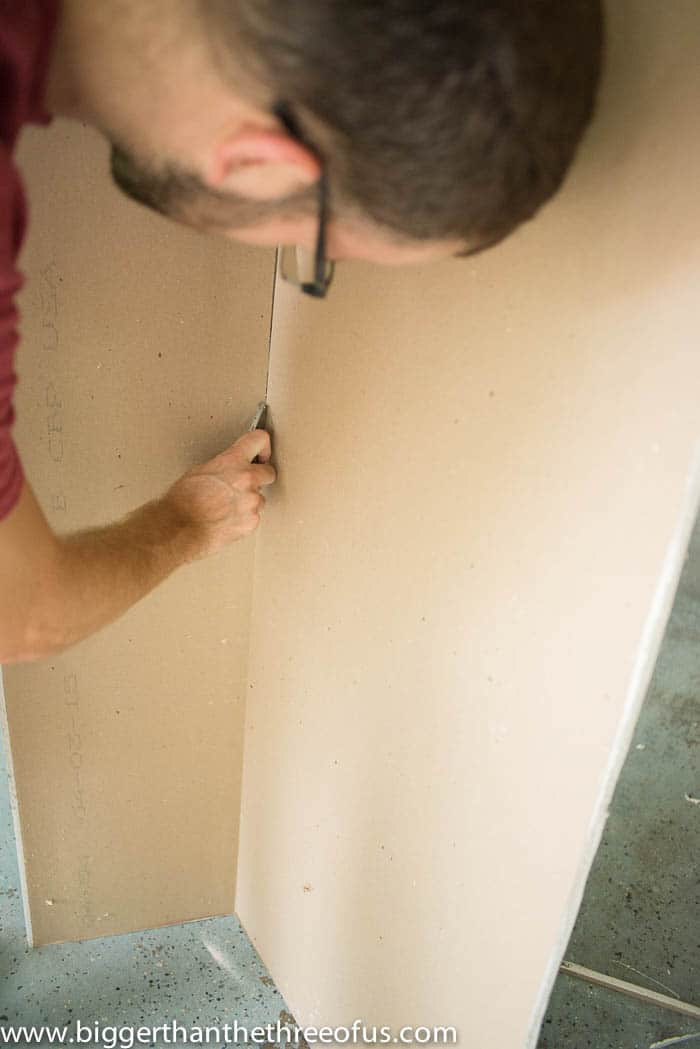
From the backside, give it a bit of a knee bump to break it.
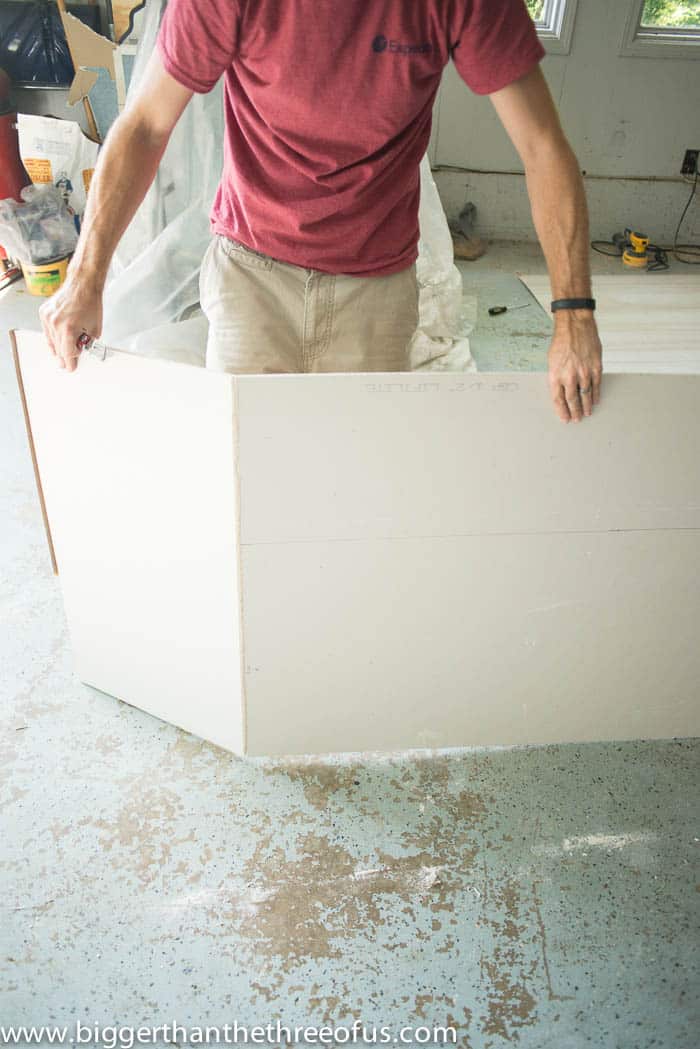
Check for fit and use a drywall rasp to take off a bit if it's too tight.
Using the drill and dimpler, add drywall screws to install drywall on the wall.
Now, you know how to hang drywall. At this point in the project, it's definitely not pretty nor close to being finished but it's a big step done.
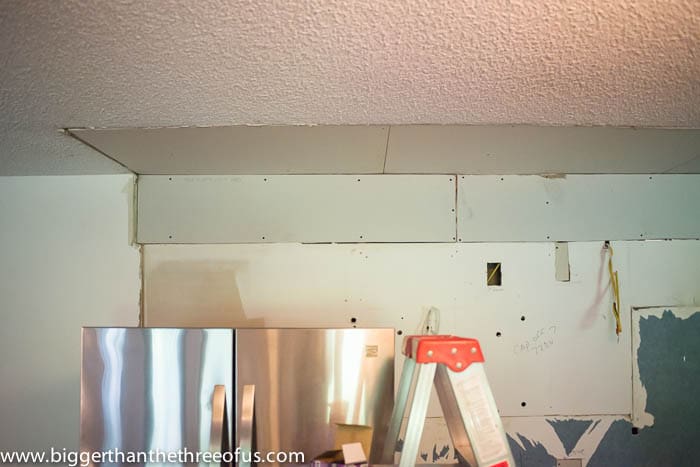
Admire how good it looks. Just kidding! Actually, to be honest, this is a HUGE improvement from looking at bare studs. So, if you made it this far, then consider it a success. This is by no means the only way to install drywall but we've done this rodeo a few times now and for us, it's the best way we've found to install drywall.
Like I mentioned earlier, this is the first step for how to drywall. If you want to learn more about how to finish drywall, then check out mudding drywall and our video on how to patch and finish drywall. Or, if you've decided that you want to hire out the drywall installation then check out my post on the cost to install drywall on walls and ceilings.
Pin for later:
How to Hang Drywall
Learn drywall installation tips for beginners. From how to cut sheetrock to how to fasten it to the wall, learn more about installing drywall in this post.
Materials
- Drywall *
- Drywall Screws
Tools
- Drywall Screw Setter Bit Tip
- Drill
- Utility Knife
- Drywall Rasp
Instructions
- Measure the space that you need to place drywall in. It’s really important to measure the length and width but also measure the width at a few spots within the length.
- Once you have your measurements, diagram it out on paper so that you remember.
- Place your drywall white side up and mark your measurements. Use a straight edge to draw your lines for your cut.
- Using a utility knife, score your drywall. You don’t want to press completely through your drywall, but you want to press firm enough to score it evenly down your line.
- From the backside, give it a good knee bump and it will cut in half where you scored it.
- If it doesn’t have a clean break, cut through the back paper with an utility knife.
- Take it in and test it out.
- Many times, it is just a smidgen too wide and that’s when you want to use a drywall rasp. This will sand it down enough so that you can get it to fit within the space.
- Use the drywall screws and dimpler bit to put the screws in to studs. The bit stopper will allow you to put the screws in at the perfect length, helping you protect the drywall from cracking (which happens when your screw goes in too far).
- Finish placing drywall screws in on studs until you feel like you have it well. It helps prevent cracking if you start at one end and work your way down.
Notes
CHECK EXISTING DRYWALL SHEET THICKNESS BEFORE PURCHASING
*Before buying drywall sheets, measure your pre-existing drywall to check how thick it is. ⅜″ and ½″ drywall sheets are definitely the most common but there are other thicknesses out there so be sure to check what you have in your space before buying to match.


Naomi @ Plaster & Disaster
So helpful, thanks! I have this vague dream that I'll re-do the luan board walls in some of my rooms one day as a DIY.., but it seems so daunting. thanks for sharing!
Ashley Mayes
I totally understand about projects that seem daunting! Once you start though, it does get better.