

I was trying to decide exactly what to share today and was having problems with it. To be honest, I've been doing ALOT of grunt work lately. You know the kind, the ugly hard work that has to be done before you can have a blank slate. Yep, that kind. Well, I'm close to having a clean, blank slate. Once I get there, I know I will feel more inspired, but now, I'm feeling a bit blah. Looking at ugliness will do that to a person. =)
So, I'll keep the ugliness to myself for a few days and share a little project that I did for our master bedroom.
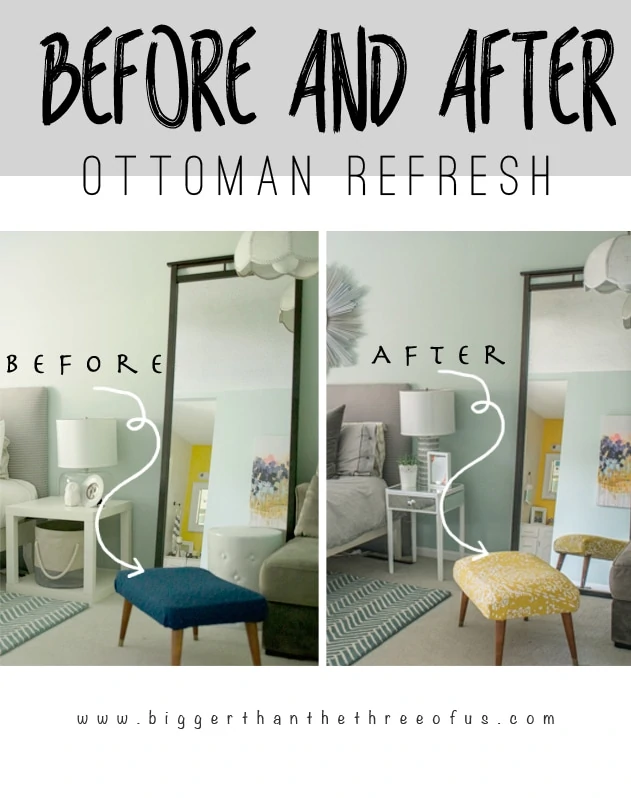
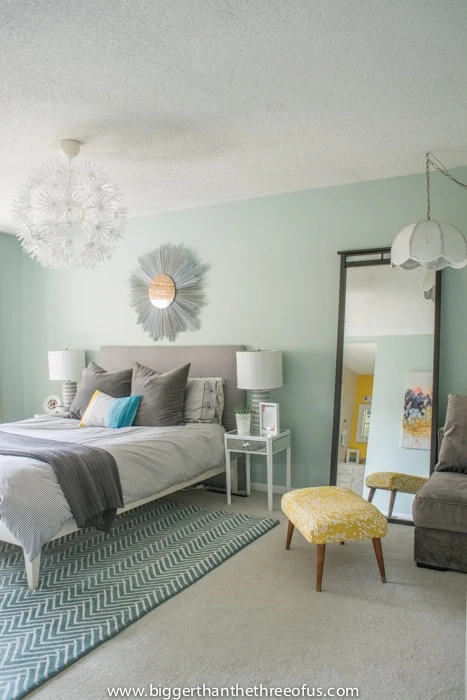
We used to have this little ottoman in our master bedroom:
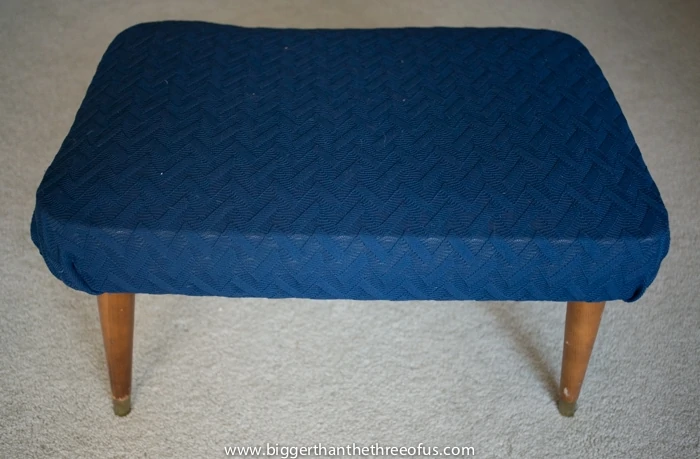
My Dad gave it to me awhile back and I recovered it in the blue fabric. It was an improvement, but it was pretty drab. I loved the legs so I knew it could be cute. I played with some fabric and finally found something that looked good and helped pull the bedroom together.
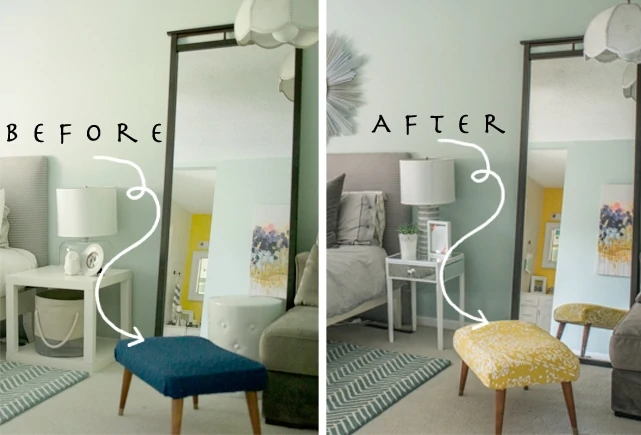
Pretty big difference, right? It's pretty amazing what the right fabric can do (and a little bit of extra 'fluff').
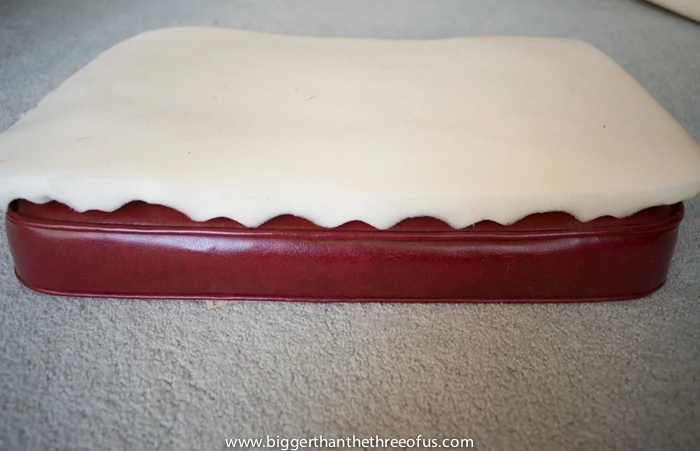
This was an easy peasy, five minute project. Basically, I pulled out all the staples from the underneath and unscrewed the legs.
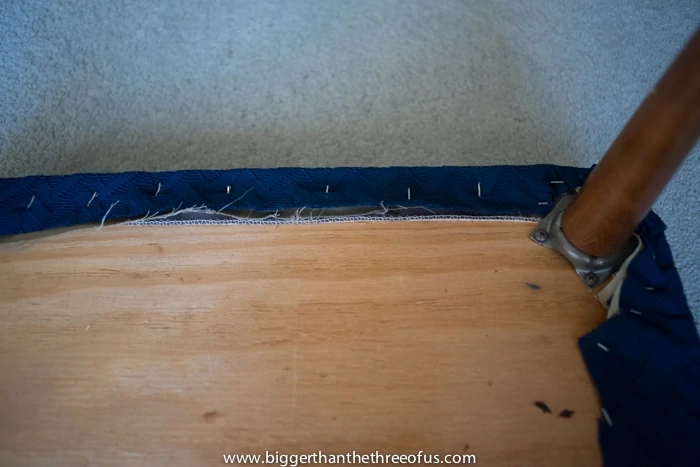
I flipped it over and cut a piece of foam to fit.
Then I cut my new fabric and stapled it back on.
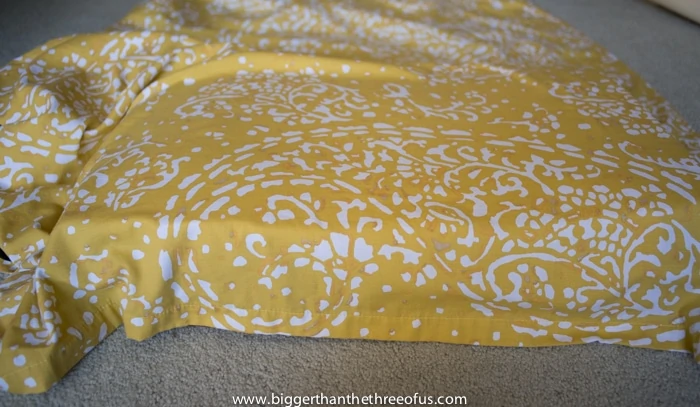
I probably would have flipped the foam over the other way and laid some batting on top to smooth it out... if I would have had batting. But, I didn't have any so I just ran with it. It isn't, by any means, a great upholstery job; but it gets the job done. When you have a cat that loves to sleep on it and a 4 year old that loves to jump off of it, you realize that things that look pretty and get the job done are great. =)
Hope you all have a great weekend! I'm off to do more grunt-work.
}
Julia@Cuckoo4Design
Perfect fabric for the stool. So pretty!
Ashley Mayes
Thanks Julia! Gotta love fabric from Goodwill (or window treatments as was in this case!). =)
Amber
So easy but so effective!! Love the fabric and pop of color!
Ashley Mayes
Thanks Amber!
Jennifer @ Brave New Home
The extra foam really helped the shaped. Great update!
Ashley Mayes
I really can't believe it made such a big difference, but it totally did. Thanks Jennifer!
Katie @ Upcycled Treasures
Ashley, I LOVE how this turned out and it brightens up the space so much. Wow, what an improvement. I especially love the fabric you used and the legs on that stool are pretty fabulous too 🙂 The stuff I do may not always be perfect, but if it looks good and gets the job done than I am all for it! Pinned!
Ashley Mayes
Thanks Katie! I agree with you on the legs... Love them.
Cheryl @ Artzzle
Hi.
Just found you as I looked around on Google. Always searching for Easy, Economical and Pretty projects. Covering this was good, but so much nicer the second time around. Adding the padding really made a difference!
Ashley Mayes
Thanks so much!
Theresa
Hello,
What's the name of the paint on your walls? It's so calming.
Ashley Mayes
Thanks! It's Rainwashed by Sherwin Williams.