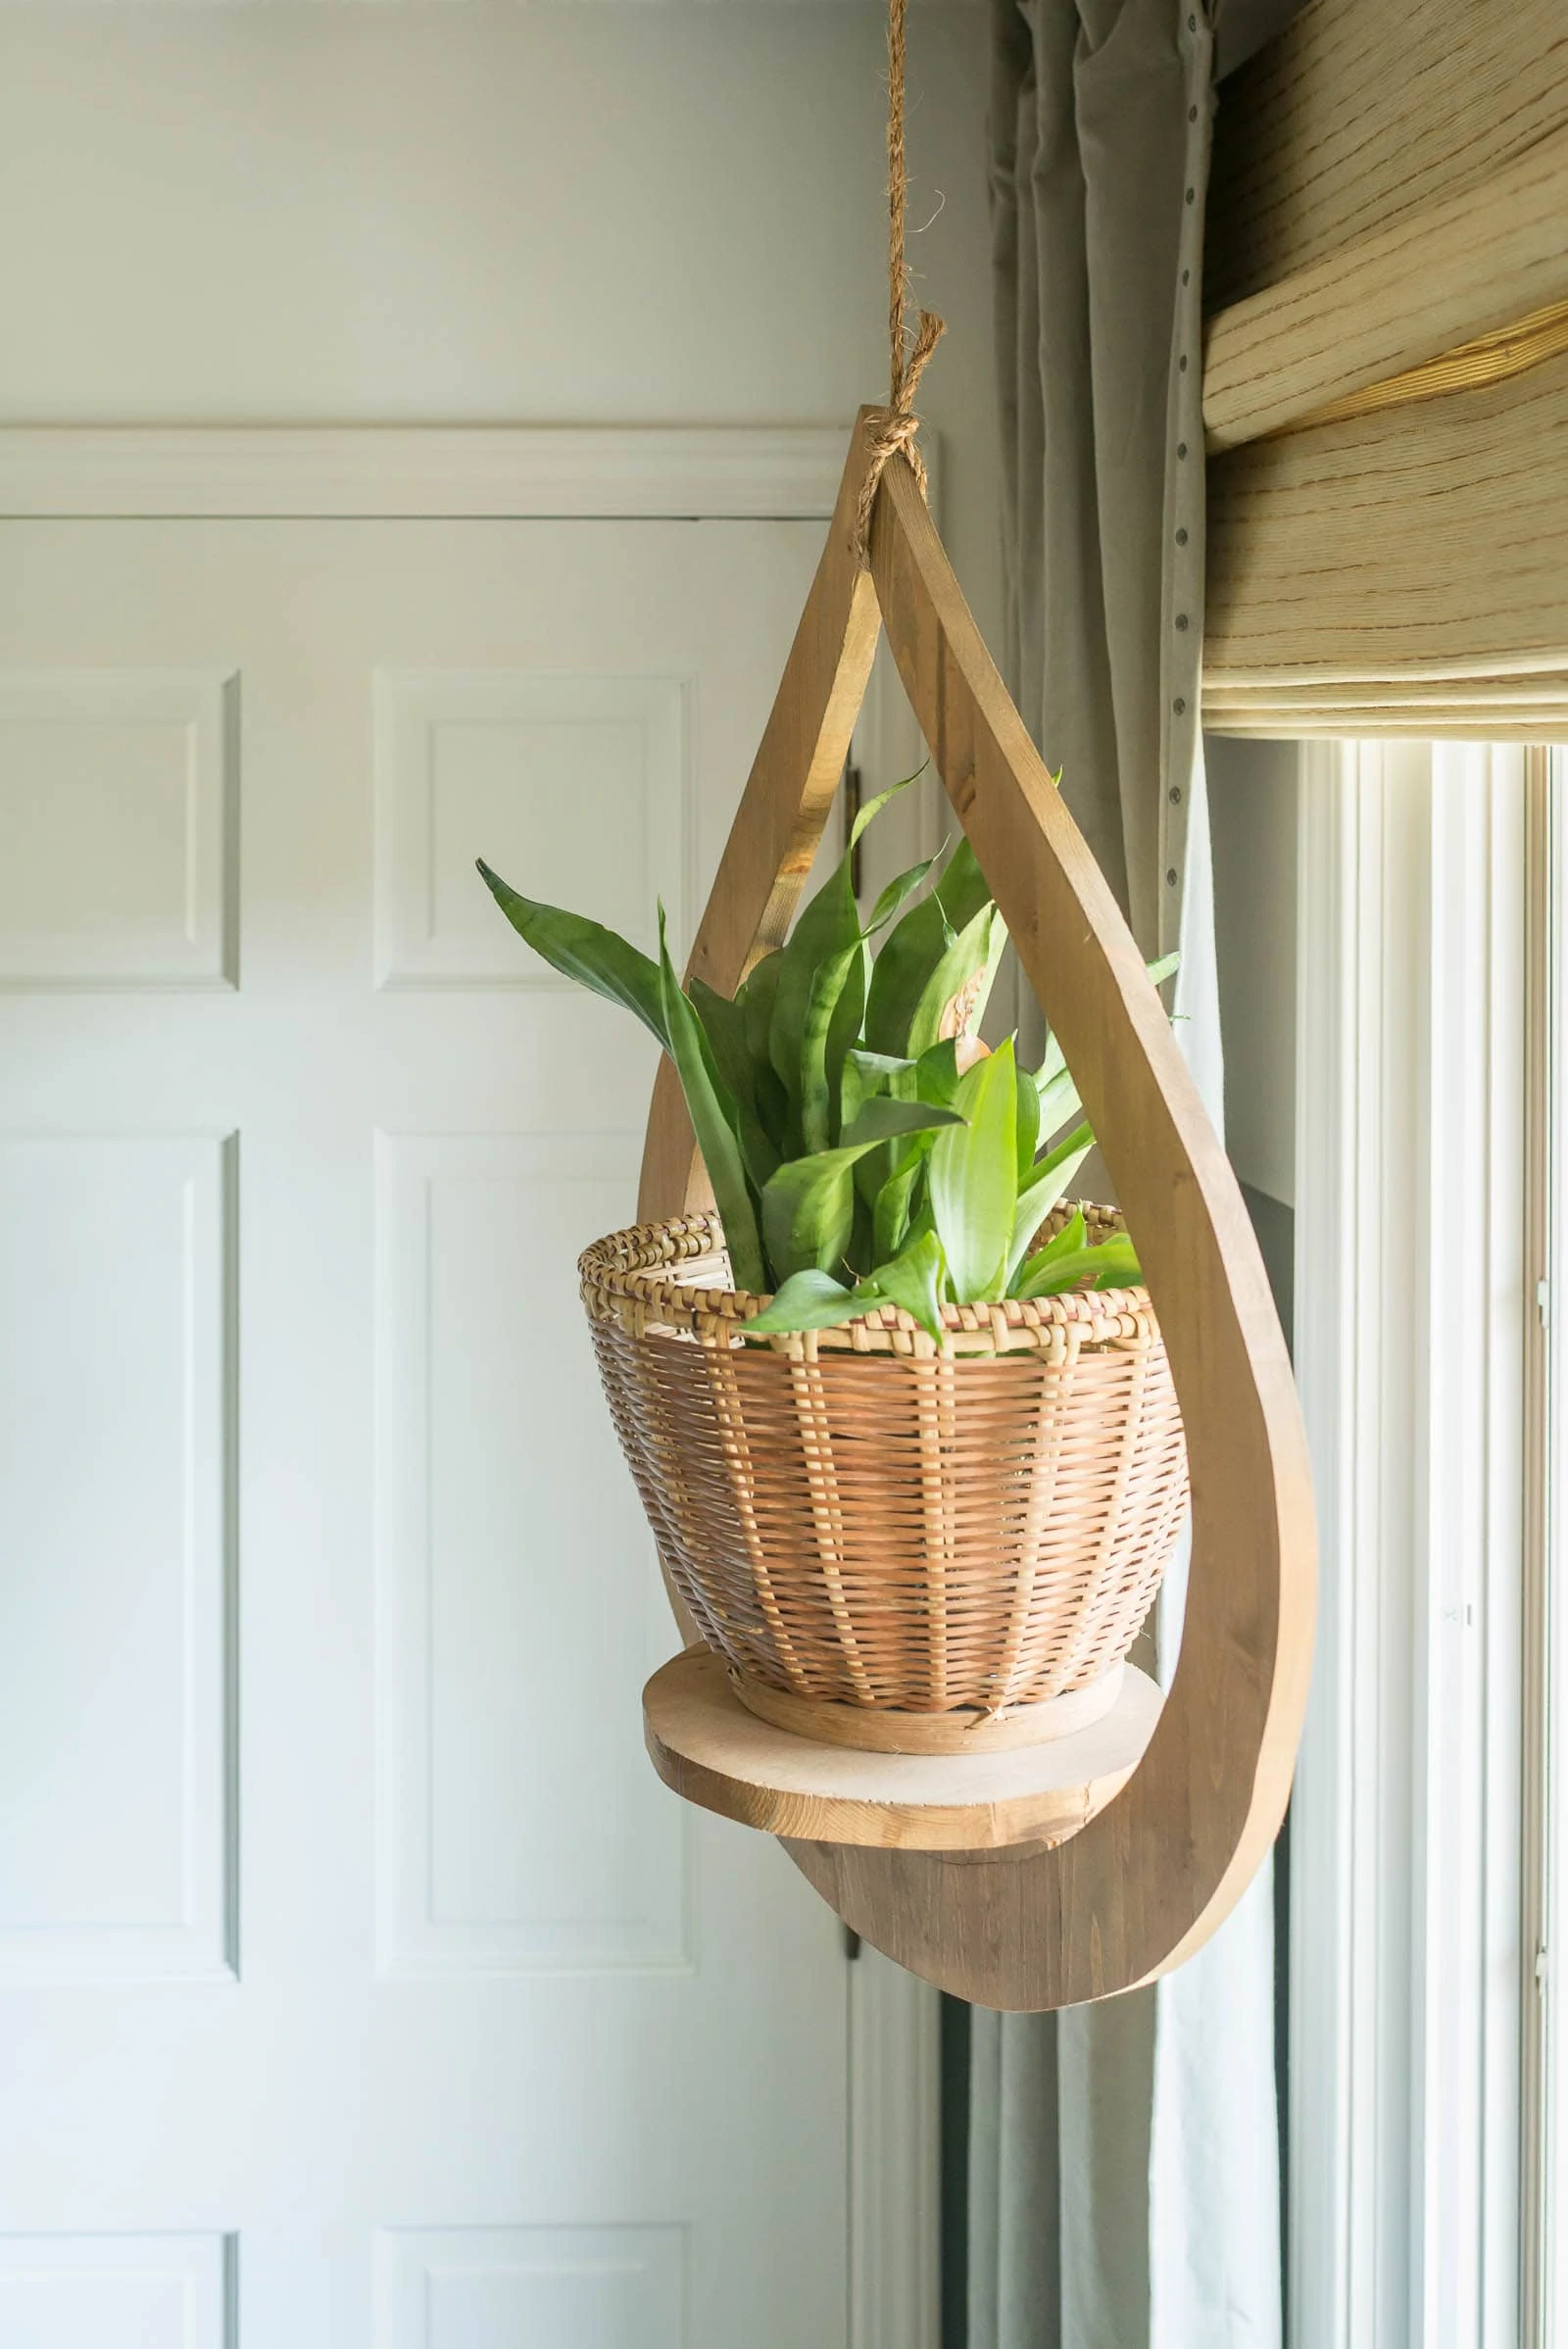
Make this Indoor Plant Hanger for less than $20! This wooden plant hanger could be used as an outdoor plant hanger, too! Size it up or down to fit your space and have fun with it. This is a great wood project for beginners!
I love plants and I love mid-century design. A few years ago, I decided it would be fun to try my hand at an entry-level woodworking project and make a diy hanging planter. I love how it turned out.
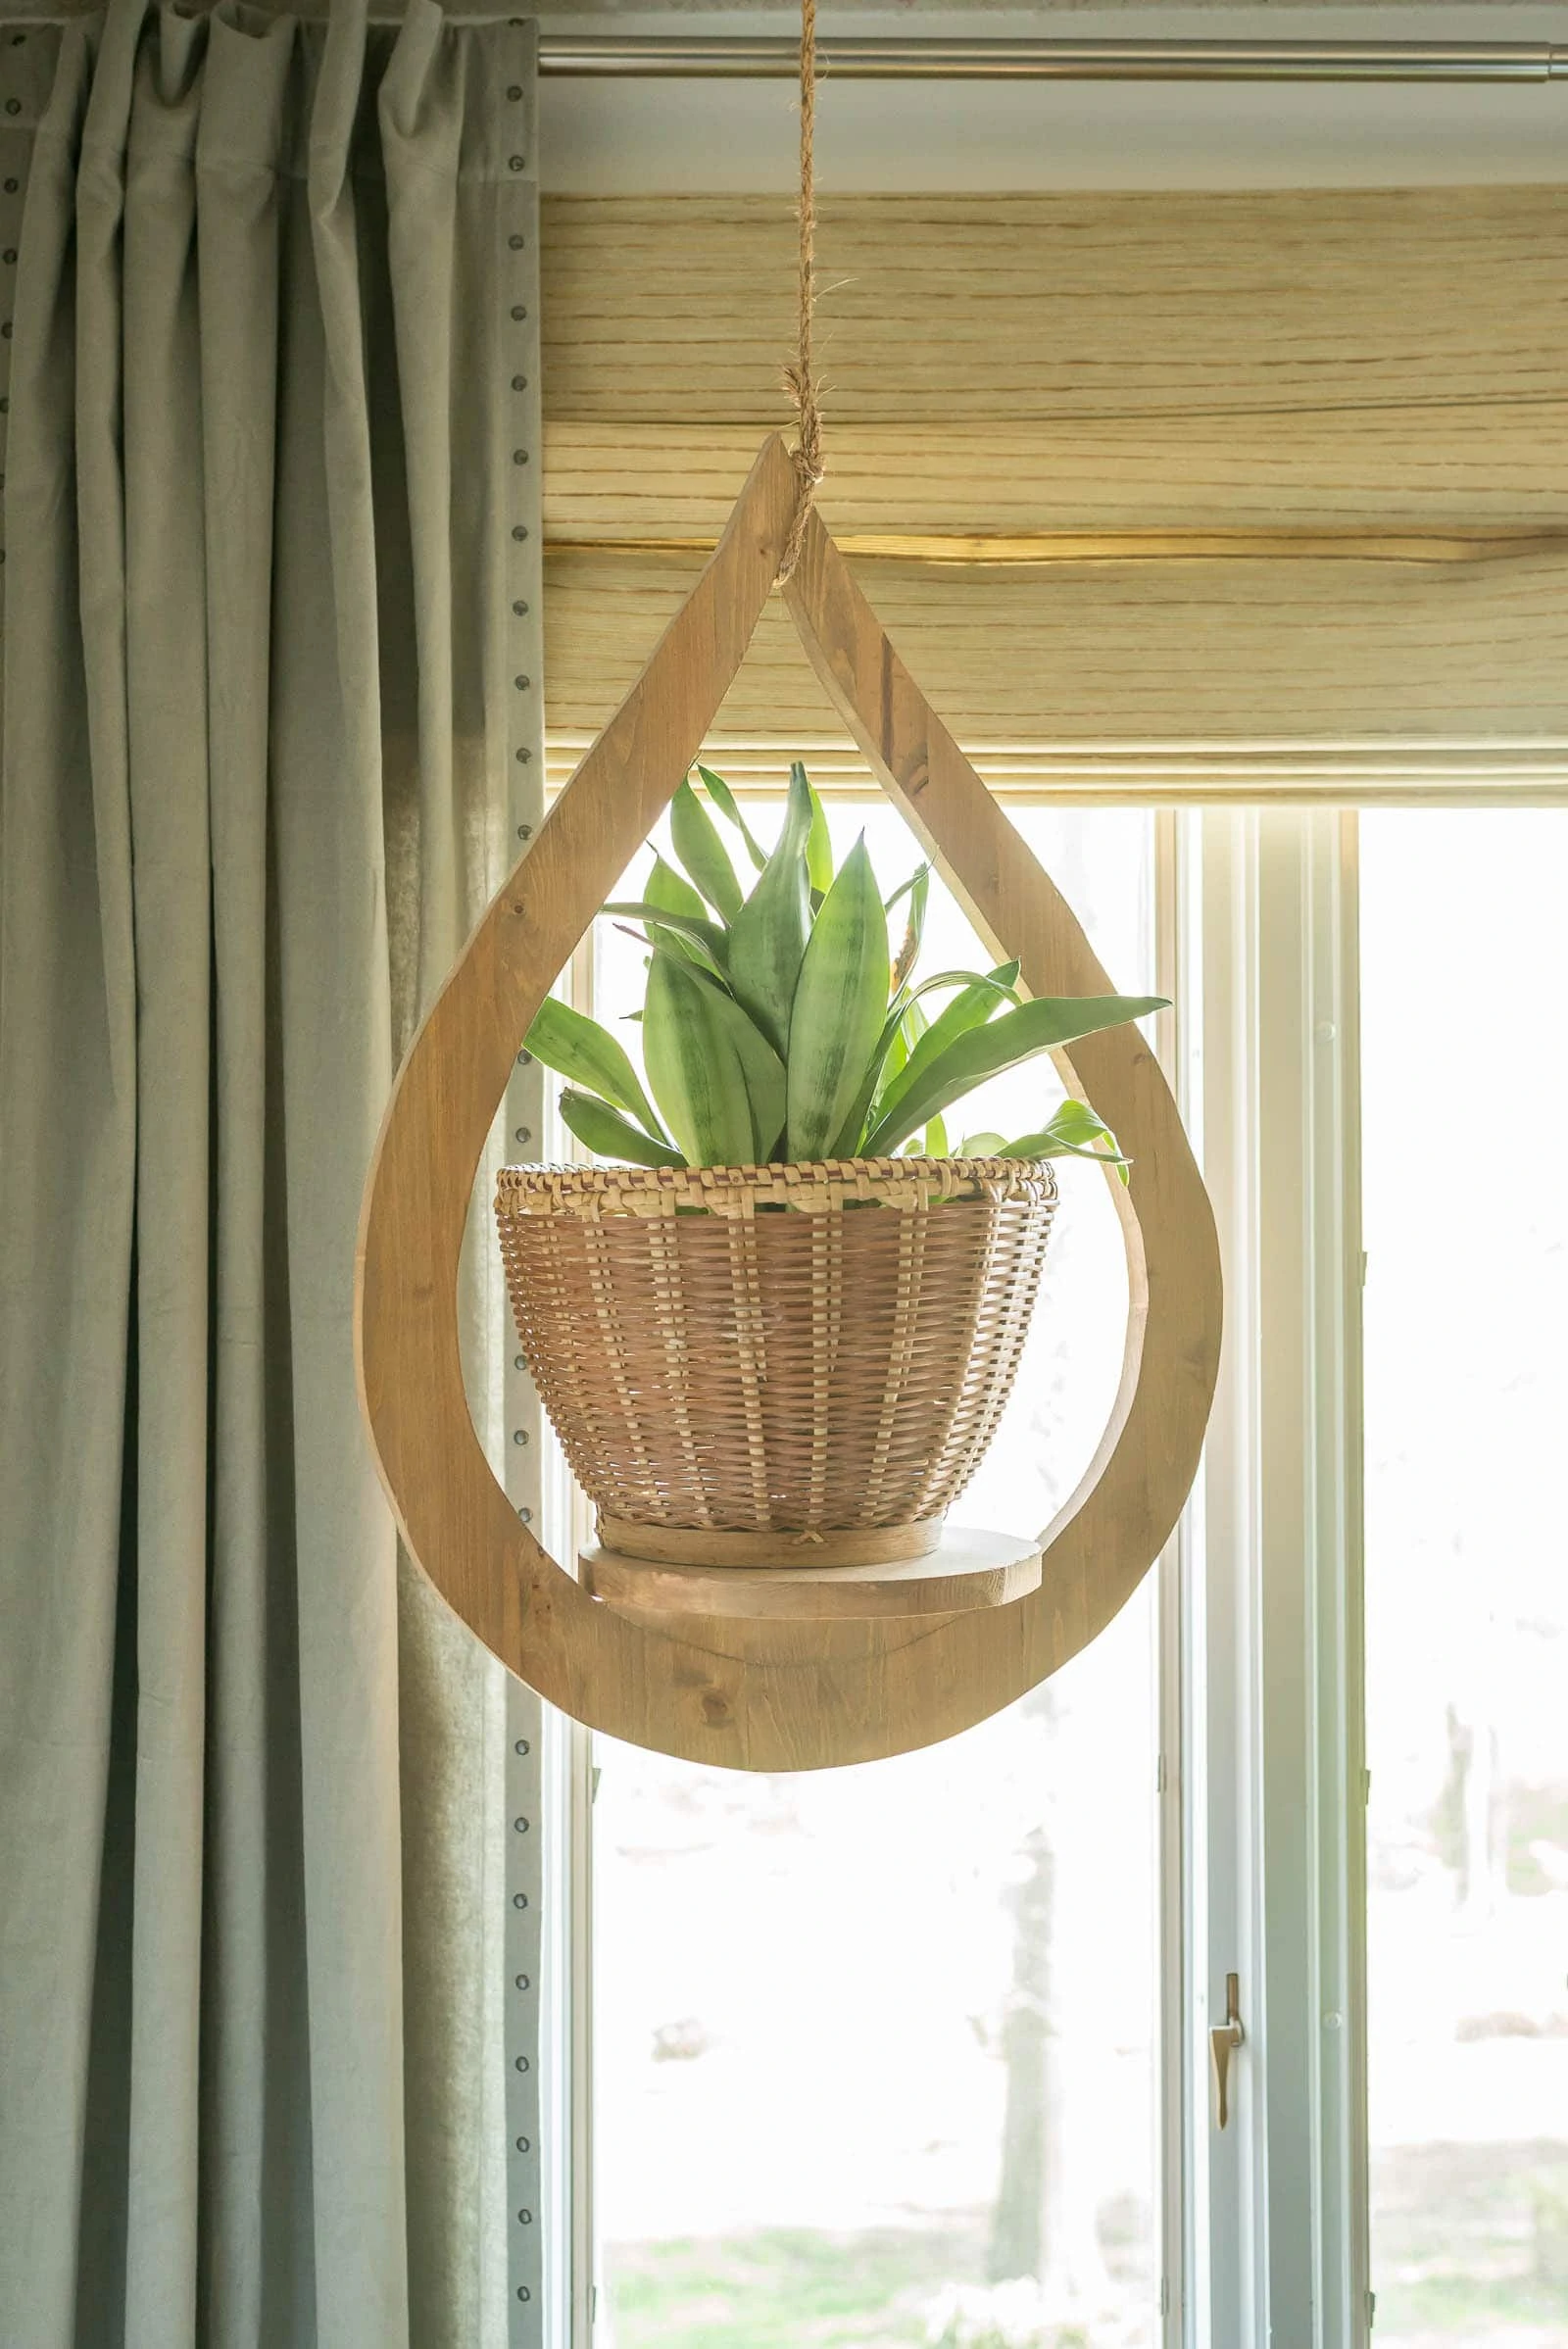
How To Make An Indoor Plant Hanger
This ceiling plant hanger comes together in an afternoon and doesn't take a ton of supplies (or skills!). I think you could easily sub out the project panel that I used for hardwood scraps. Be creative and have fun with it! Also, if you want to print steps for this DIY Plant hanger, find those at the bottom of this post.
Affiliate links below. Thanks for supporting this website. Click to read my privacy and disclosure statement.
Planter hanger supplies
- Hardwood Project Panel
- Screws (2-3 inches)
- Rope
- Drywall Ceiling Hanger Hook
- Minwax Dark Walnut Wood Stain
- Teardrop shape (see steps below for more information)
- Wood glue
Tools needed to make this modern hanging planter
- Jigsaw
- Clamps
- Sanding block
- Drill
- Scissors
How To Make Indoor Plant Hangers
- Search for "Teardrop" clip art and pick your shape. I knew that I wanted a pretty large teardrop so I scaled the size up and had it printed as an engineer print at Staples.
- Trace the form on the wood.
- Clamp your project panel piece to another piece of wood.
- Using a jigsaw, slowly cut your form out.
- Repeat the tracing and cutting for the inside of the teardrop. First, you need to use scissors to cut the middle of the teardrop out. Tape the paper template to the wood, and trace the middle of the teardrop onto the cut teardrop piece.
- Clamp your teardrop down and use the jigsaw on the inside line of the teardrop. *Use a drill with a decently large head to start your hole on the inside.
- Make the plant base. Using the leftover inside piece of your teardrop, make a circular base. For my teardrop, the top of our dutch oven was perfect, but you can use any circular shape in the house to do this. Cut it out using the jigsaw.
- Make a wedge for the plant base. When I went to attach the plant circle base, I realized that it would be much sturdier if it touched on all sides to the teardrop. So, I used my cut teardrop form (pictures below will help show this) to make a wedge that would fit in between my teardrop and my plant base.
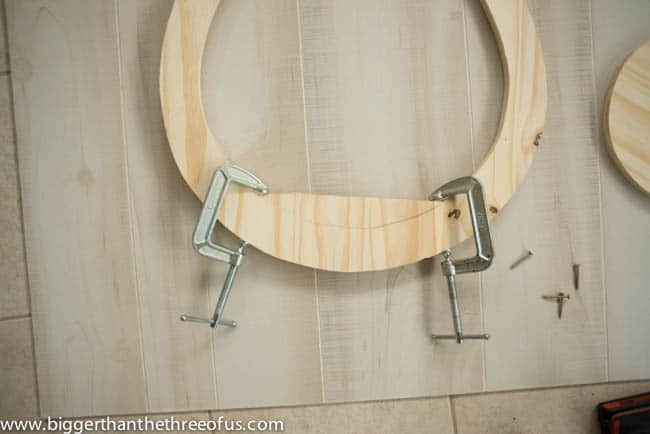
- Using screws, attach the wedge to the teardrop. Clamps will keep it attached as you are screwing in the screws.
- Attach the plant base to the wedge using screws.
- Sand and stain.
- Attach rope and hang.
Let's clarify a few steps with visuals.
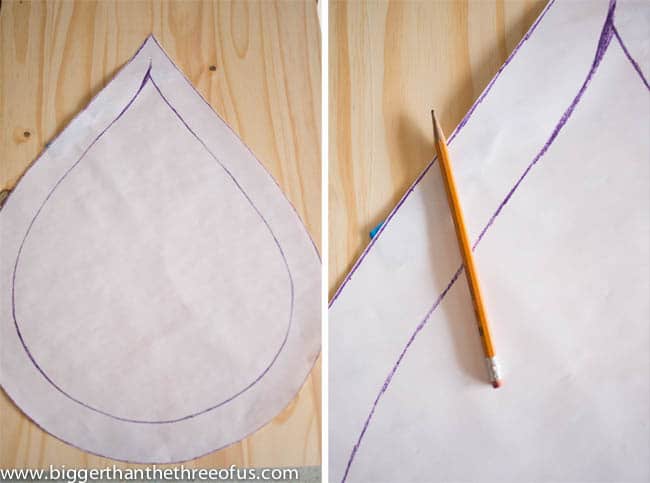
Here's what the planter hanger template looked like. I traced this template onto my wood.
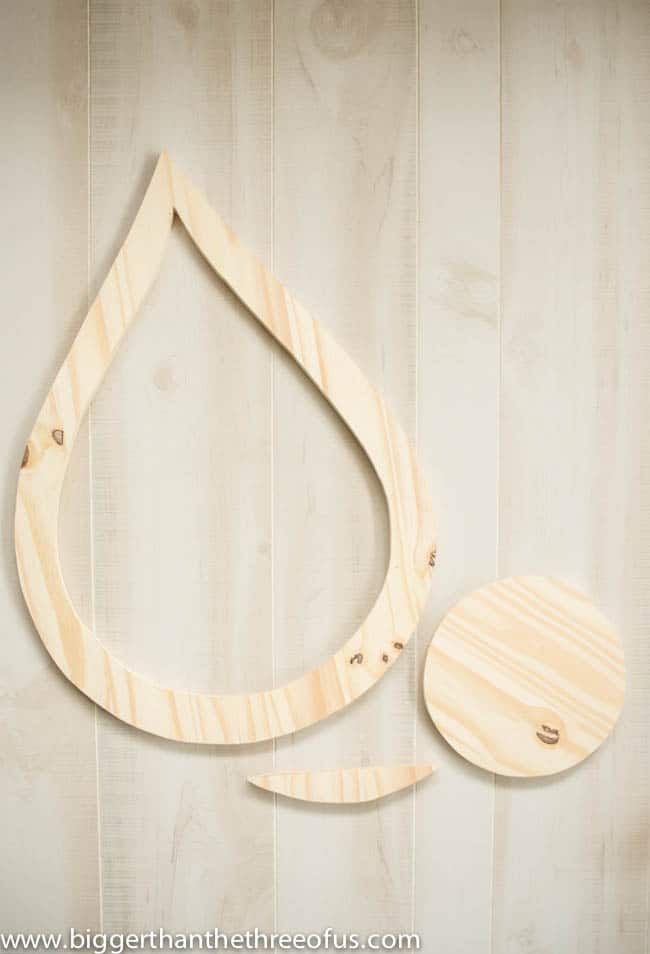
After tracing and cutting your pieces, you should have an unassembled planter hanger with these parts:
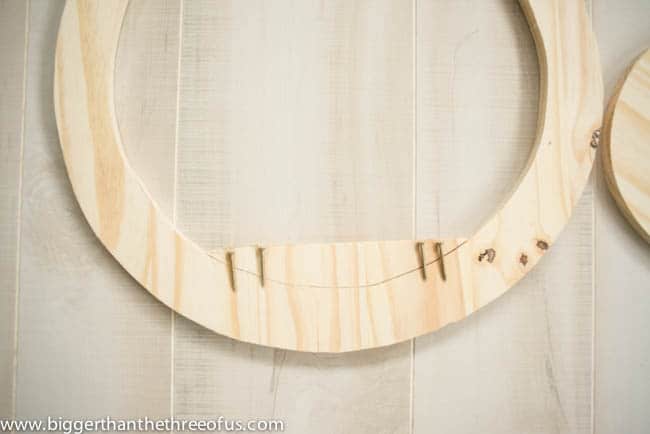
Attach your wedge to the teardrop with wood glue and screws. This helps create the base of the planter hanger.
Clamp down until dried.
Once you screw in the circle base to hold the plant, you are ready to finish and hang.
Making this modern hanging planter could be free if you had some scrap lumber. If you had to buy everything (like me) it costs less than $20!
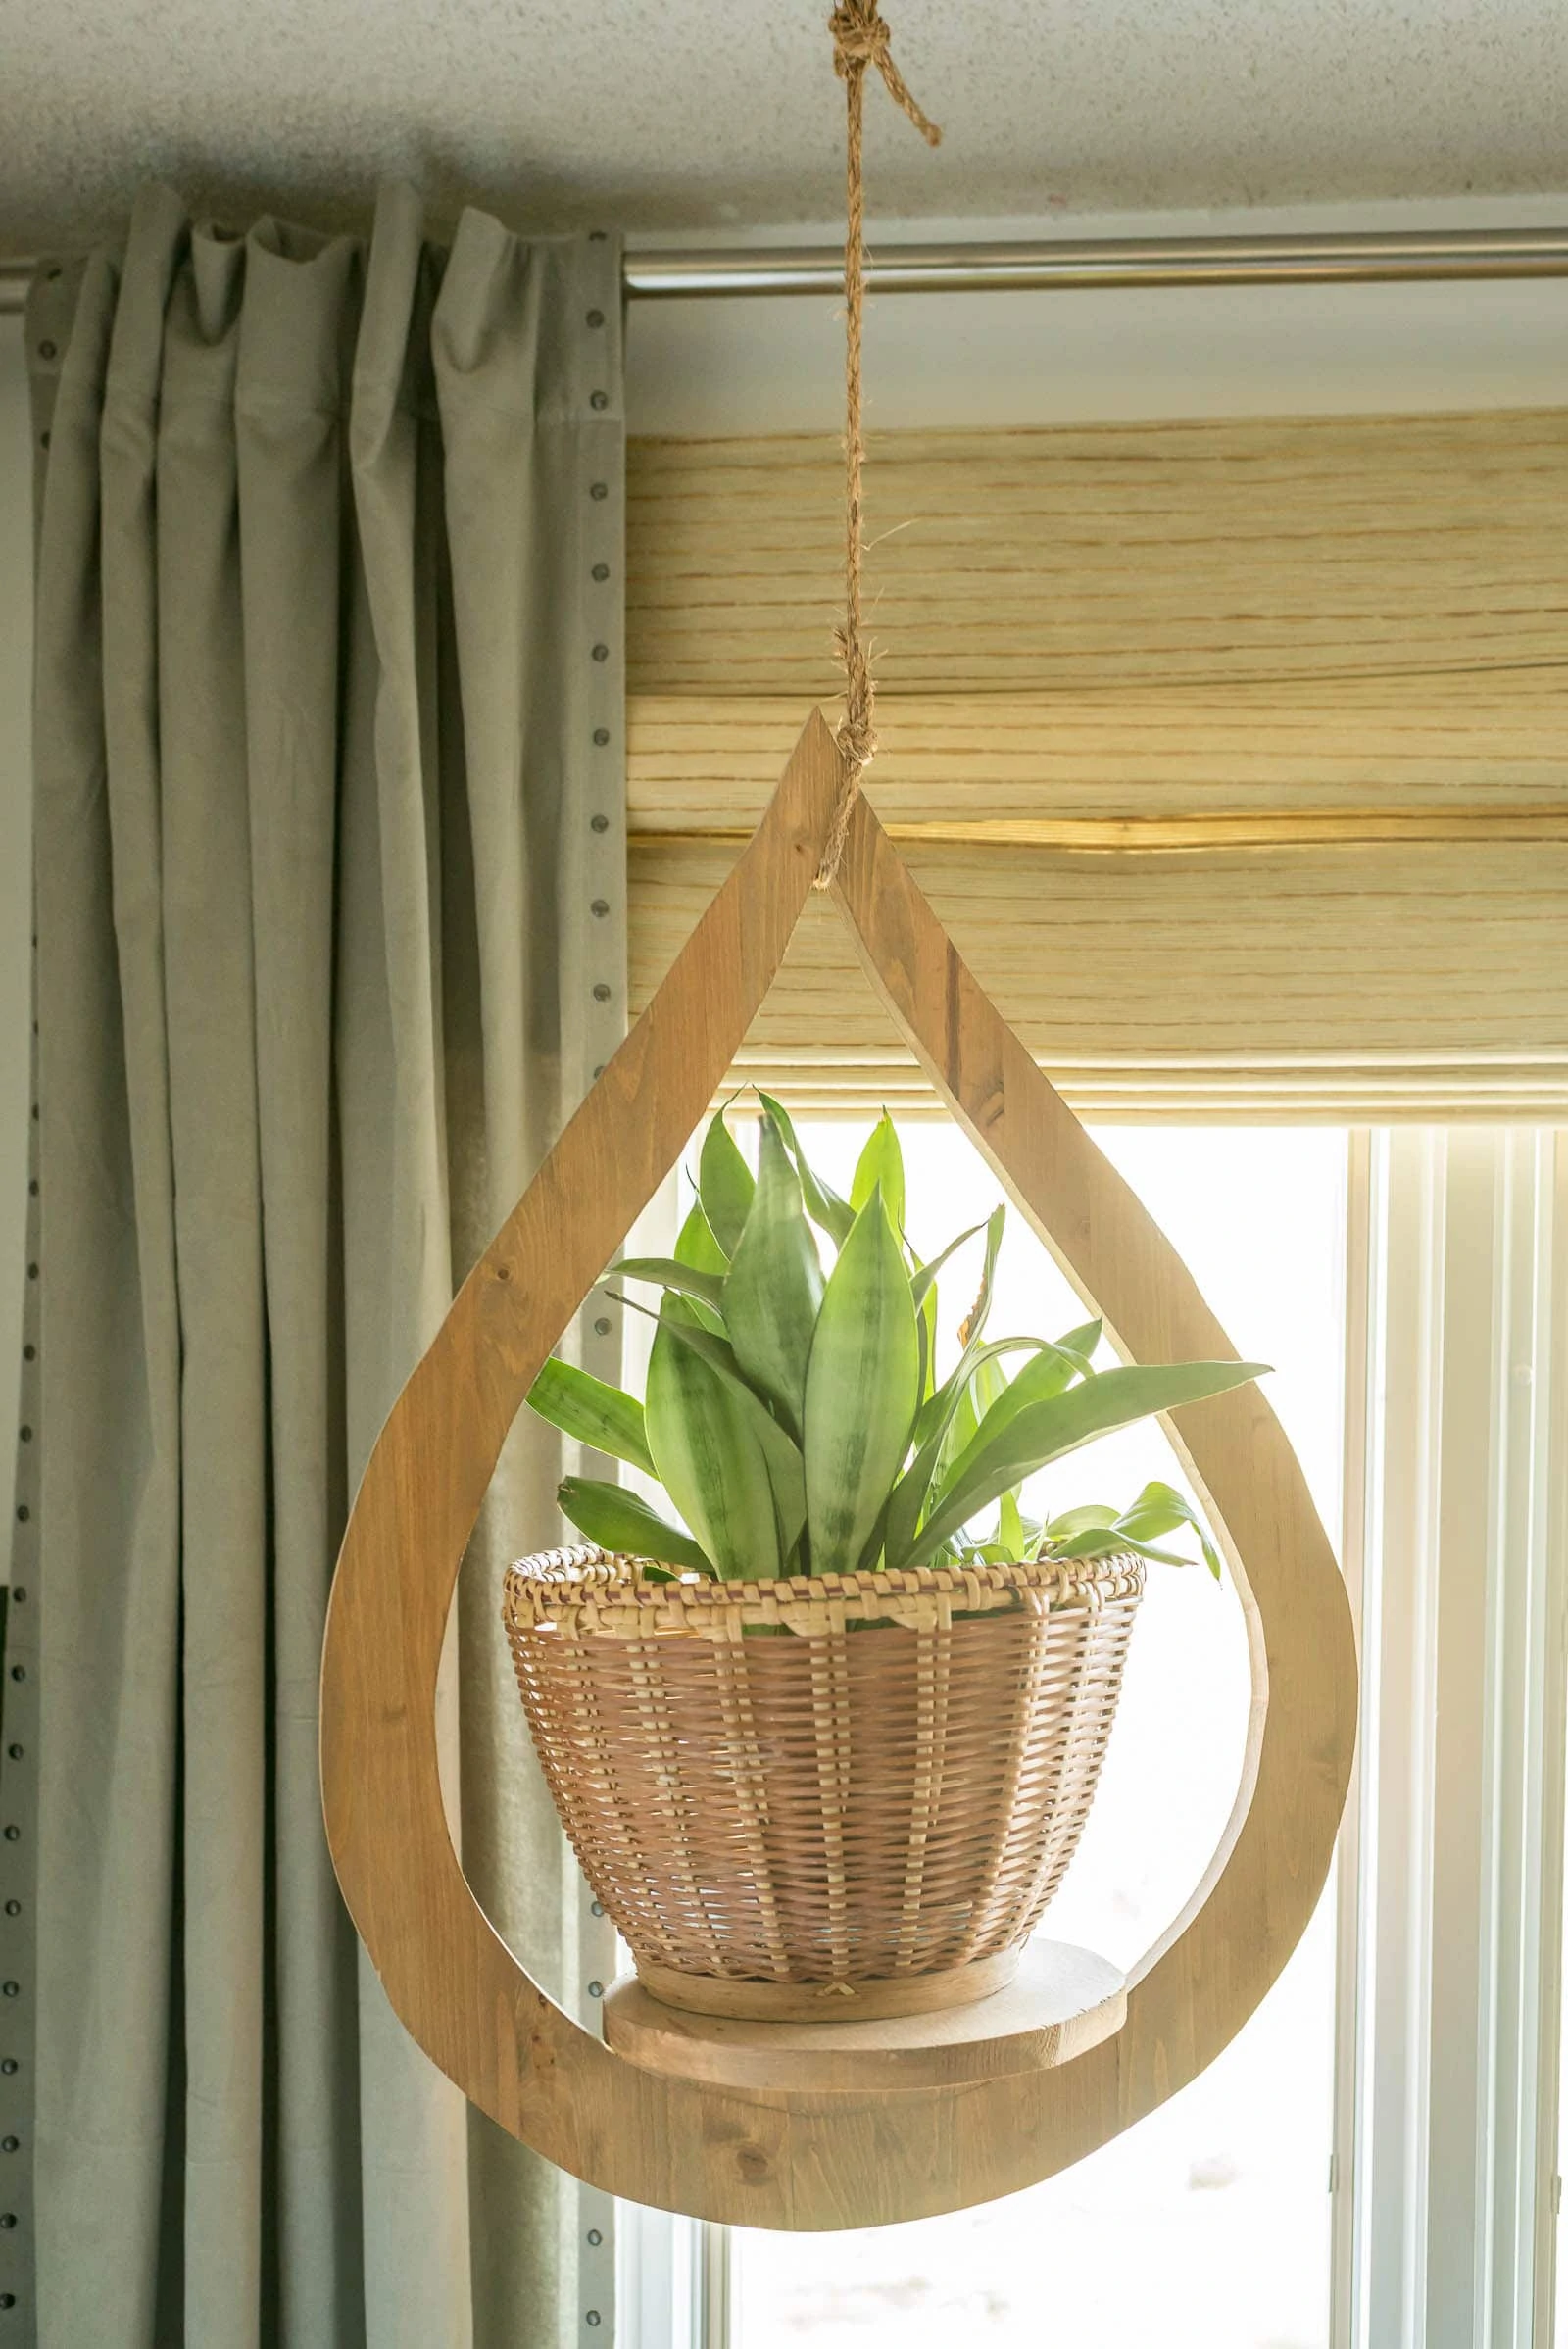
I feel like this indoor plant hanger is a great DIY wood project for beginners and you can't beat the price point. If you love this wooden plant hanger and are interested in further developing your woodworking skills then here's a few others related to plants, as well!
Wood Plant Projects for Beginners
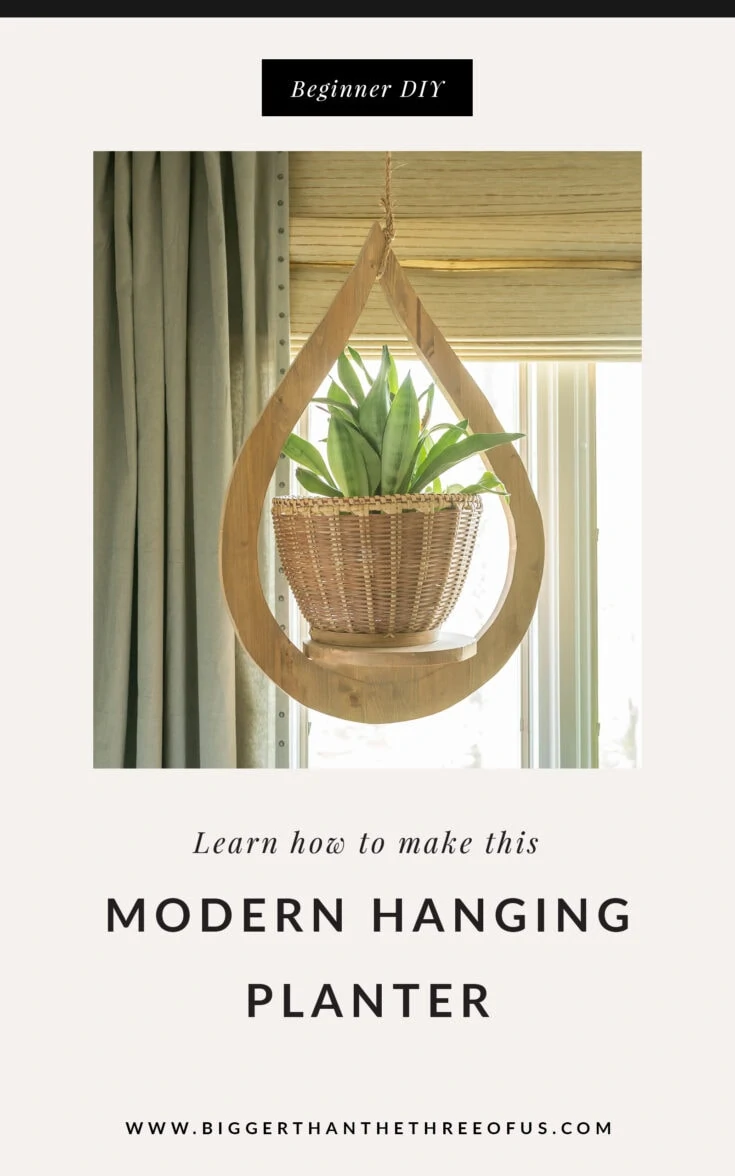
How to Make a DIY Hanging Planter
Materials
- Hardwood project panel
- Screws (2-3 inches)
- Rope
- Drywall ceiling hanger hook
- Minwax dark walnut wood stain
- Teardrop shape (see steps below for more information)
- Wood glue
Tools
- Jigsaw
- Clamps
- Sanding block
- Drill
- Scissors
Instructions
- Search for “Teardrop” clip art and pick your shape. I knew that I wanted a pretty large teardrop so I scaled the size up and had it printed as an engineer print at Staples.
- Trace the form on the wood.
- Clamp your project panel piece to another piece of wood.
- Using a jigsaw, slowly cut your form out.
- Repeat the tracing and cutting for the inside of the teardrop.
- First, you need to use scissors to cut the middle of the teardrop out. Tape the paper template to the wood, and trace the middle of the teardrop onto the cut teardrop piece.
- Clamp your teardrop down and use the jigsaw on the inside line of the teardrop. *Use a drill with a decently large head to start your hole on the inside.
- Make the plant base. Using the leftover inside piece of your teardrop, make a circular base. For my teardrop, the top of our dutch oven was perfect, but you can use any circular shape in the house to do this. Cut it out using the jigsaw.
- Make a wedge for the plant base. When I went to attach the plant circle base, I realized that it would be much sturdier if it touched on all sides to the teardrop. So, I used my cut teardrop form (pictures below will help show this) to make a wedge that would fit in between my teardrop and my plant base.
- Using screws, attach the wedge to the teardrop. Clamps will keep it attached as you are screwing in the screws.
- Attach the plant base to the wedge using screws.
- Sand and stain.
- Attach rope and hang.
Pin this DIY Hanging Plant Holder for later!




Julia@Cuckoo4Design
That is so different and so awesome. Love
Ashley Mayes
Thanks Julia! I saw one in an Etsy shop sometime last year but it was much smaller (and it sold).
cassie
this is AWESOME, ashley!!! love love love!
Ashley Mayes
Thanks Cassie!!
Emily @ Table & Hearth
Gah! Can I pay you to make one of these for me??? Seriously, this is soooo good Ashley! Did you glue or bracket the pot onto the platform or does it just sit on it?
Ashley Mayes
lol. =) I just sat the pot on top and it feels sturdy. If I was putting it in a high traffic room, then I would probably bracket it on.
Amy W
SO crazy cool, girl!!
Ashley Mayes
Thanks Amy!
Charlotte W
That turned out great! What kind of plant is that?
Ashley Mayes
Thanks Char! I have no idea... picked it up last year at Lowe's.
Shannon Churchill
I want one!! So smitten! Nice job.:)
Ashley Mayes
Ha. Thanks Shannon... you should totally make one!
Jennifer @ Brave New Home
Love this! It's so amazing especially for that price.
Ashley Mayes
Thanks Jennifer!
Corinna - For My Love Of
How neat! The teardrop shape is so fun! I really like it!
Ashley Mayes
Thanks Corinna! I'm loving it.
Jenni Ahokas
I love your idea and design! After seeing your instructions I would saw the inside of the teardrop differently. On the design phase you can already draw the "wedge" part, so you don´t have to first cut it out and then screw back in. 😉
Ashley Mayes
Totally Jenni. Hindsight is 20/20. After I cut it, I realized that the platform wouldn't sit well without the wedge, but it would be easier to just cut it with the wedge. Thanks for stopping by!
Jenn C
I love it and I am gonna make one. WHAT kind of PLANT is that. Both are stunning.
Ashley Mayes
Thank you! I wish I knew. It was with the hanging plants at Lowes last year. It's some sort of cactus.
Serisblog.com
I am so happy you posted this! I can't wait to make my own. You have a wonderful blog and I am so excited to have found you. I would love for you to check out my blog. - Serisblog.com
Ashley Mayes
yay, seriously send me a pic if you make one!
Malia @ Small Town Girl
That is seriously gorgeous! I love love love your style! Pinned!
Ashley Mayes
Thanks Malia! I really adore how it turned out!
Wendi @ H2OBungalow
This is so creative! I LOVE how it turned out! Great job! Pinning and sharing!
Ashley Mayes
Thanks Wendi! It's a fun little feature in the room.
Gwen
Hi Ashley!
I just wanted to let you know that I LOVE your diy plant hanger, and I'm featuring you as my pick for the Rockstars this week from Creativity Unleashed!
As a Rockstar you're in the running for this week's MEGA Rockstar! Grab your friends and come vote at http://www.theboldabode.com/2015/05/creativity-unleashed-week-70-and-the-most-wonderful-parents-a-girl-could-have.html
The MEGA Rockstar gets loads of love including:
1. The Mega Rockstar project will be featured on all of our social media networks (that’s FB, Twitter, Pinterest, and G+ shoutouts from five different bloggers!!!)
2. Each host will visit the Mega Rockstar’s blog that week and we’ll pin a bucketload of any other great content we find to some of our largest group boards!
3.The Mega Rockstar of the week will get an invite to our secret group Pinterest board where you can pin your own great content. We go through that board each week when we are looking for great, new content to pin, so this means that even months after you’ve won the Mega Rockstar of the week, we can still find and pin your newest awesome content!
Congratulations and Good Luck!!!
Ashley Mayes
I totally missed this! We've been on vacation but thanks for including me in the feature group!
Trista
I absolutely love this design. I'm going to try to recreate this week. What size did you end up at? From top to bottom?
Ashley Mayes
Thanks so much! It's just over 30 inches.
Sany Ahmed
Cool post and creative indeed. I just love your idea and design. You just showed the another different way. I'm going to try this soon.
Ashley Mayes
Thanks so much!
Bev True
Looks great. Just one observation. I think instead of adding a wedge, i would be inclined to simply make the inside of the teardrop squared off. Seems way easier.
Ashley Mayes
Yes! In hindsight, I should have done it that way!
The DIY Hubby
Great post and great design. Love your articles, keep up the good work!
Ashley Mayes
Thank so much!
Clayton T.
I like the design of this planter. It is definately unique.
Ashley Mayes
Thanks Clayton!
Kevin Smith
What a fabulous plant hanger you've done. Thank you for the inspiration to start "mid century diy plant hanger" :).
Keep up the great work.
Ashley Mayes
Thanks Kevin!
Carl K
Might be a little tricky with the jigsaw at first but most people will get the hang of it if they practice on a scrap piece of wood. Great idea!
Ashley Mayes
Exactly!! Thanks Carl!
ToolVee
Cool, I really loved that. The best part is everyone can make it and we can use our excess part of the wood to make this without wasting them.
Allana Kim
Hiya Ashley,
This hanger is gorgeous!! you don't happen to plan on selling them at all?
Allana 🙂
Ashley Mayes
Allana,
I'm happy to hear that you love the DIY plant hanger! Unfortunately, I don't plan on selling them at this time. Thank you!
Dad Life
I shoed this to my wife. Needless to say she said get on it and make me one. I will be making this over the next week or two I just hope mine turns out as pretty as yours.
Ashley Mayes
Hope it turned out well!
Emily
I love to do DIY things like you. and believe me it is a lovely masterpiece. thanks for sharing your talent with us. i will try it too. keep sharing more incredible ideas. pinning!
Bestsawpick
Not a Good Idea That's you thinking.