

Looking for large inexpensive DIY outdoor planters to make? I've always loved the look of concrete planters but have never wanted to actually pour concrete. These DIY concrete planters actually use concrete pavers that are pre-made. If you are looking for some cute patio planter ideas to try, these are them!
This project came to life years ago (2014 but who is counting?!). Browsing Pinterest was all the rage and everyone was there posting photos and tutorials. Anyways, I started doing a few projects here and there that I saw on Pinterest and was inspired by. This outdoor planter DIY project was one of those projects.
I had been trying to get a jumpstart on our front porch and back patio before summer hit. Every year, it seemed like we wait and wait and then, by the time we get started thinking about improving our front porch, it's already May. But, not this time.. I was determined to make a change.
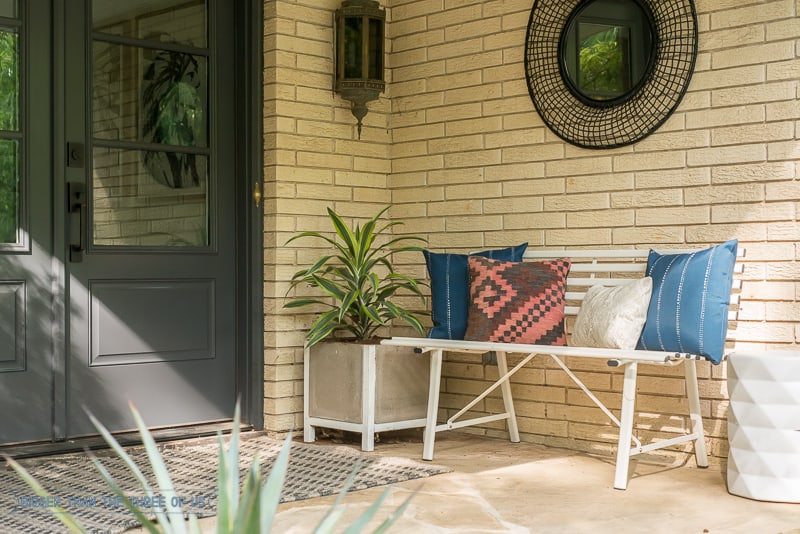
We desperately needed some major love on our front porch. Budgets are tight though, so being thoughtful on where and what we wanted to update was key.
Inspiration for DIY Outdoor Planters
I saw this four step paver planter box and was intrigued.
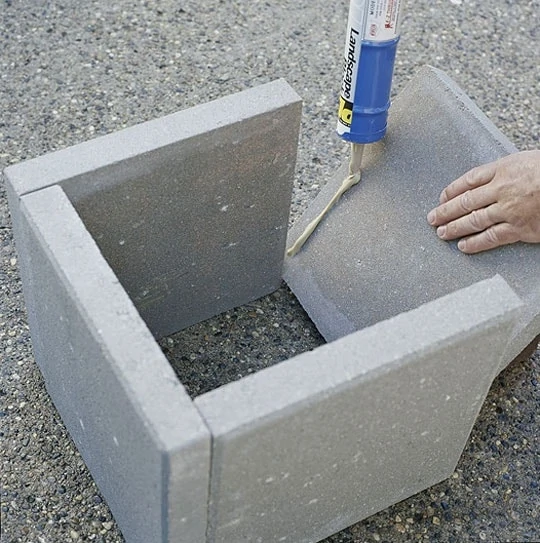
I liked it and pinned it, but something was bothering me about it. I loved the look of the concrete planter, but I didn't love the seam on one side that the pavers glued together gives you.
As I was checking my supply list and getting ready to grab supplies, I searched around a bit more online and found a similar outdoor planter DIY that I liked better.
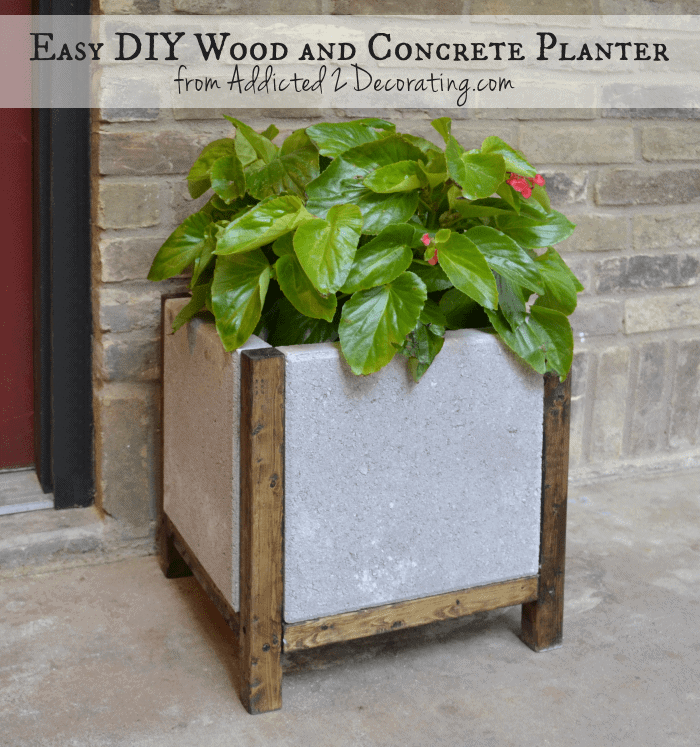
That wood and concrete planter solved the issue of seeing the seams. The cost of making the concrete planter wasn't going to be that much more because it still uses the same concrete pavers.
So, Luke and I went Home Depot to gather our supplies. I'm not going to give you a step-by-step tutorial of making these large concrete planters, because Addicted 2 Decorating does that really well (go over there for the step-by-step tutorial of the concrete planter DIY), but I will summarize the steps we did.
Making Concrete Planters
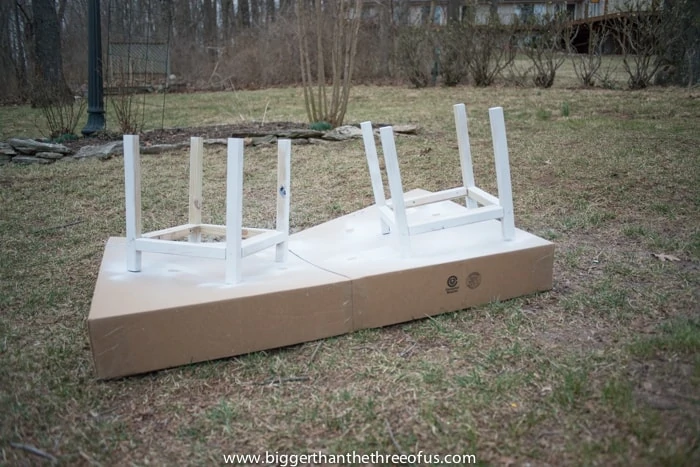
- We first gathered supplies. We needed 2x2 wood and concrete pavers.
- Next, we cut the wood with our miter saw and assembled the concrete planter bases.
- Using spray paint, I sprayed the wood white.
- After the paint was dry, we put in two pavers at a time with glue. We used the other pavers that we had on hand to weigh down the pavers that were drying with glue.
- After the allotted time was up for the glue dry time, we put in the remaining pavers.
What is the Cost to make this Large Concrete Planter?
Each planter cost $15 total! For the size of the outdoor planter, this is quite a steal
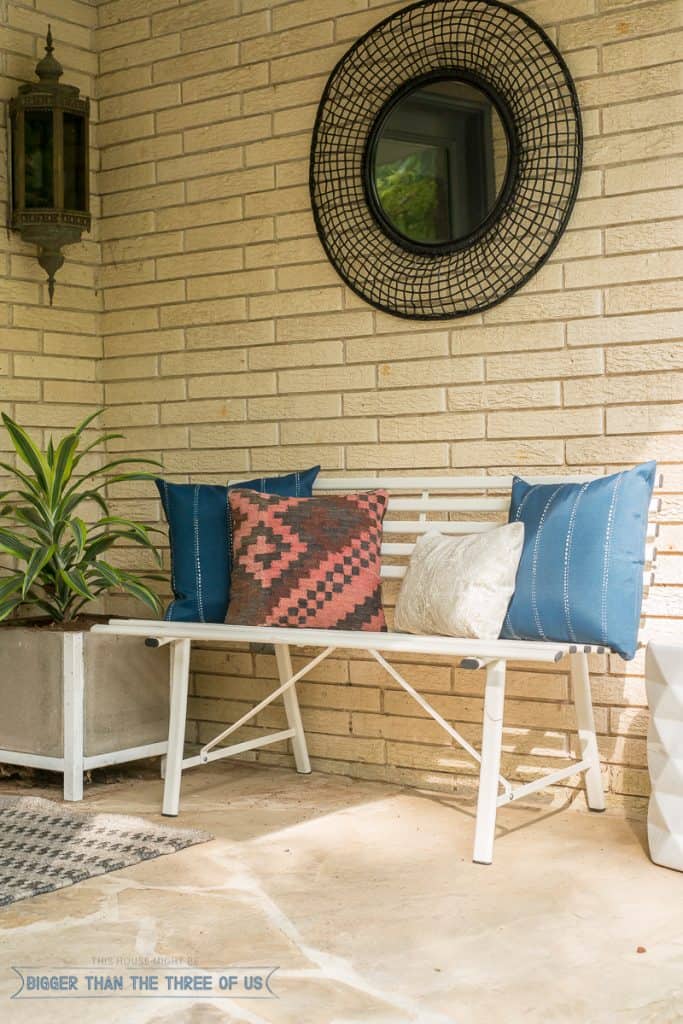
Because we used concrete pavers, these outdoor planters are very heavy. When you put soil and a plant in them, expect to need to use a dolly to be able to move them. This wasn't a concern for us because we are used to using a dolly on our large outdoor planters but just wanted to share in case you are new to larger planter pots!
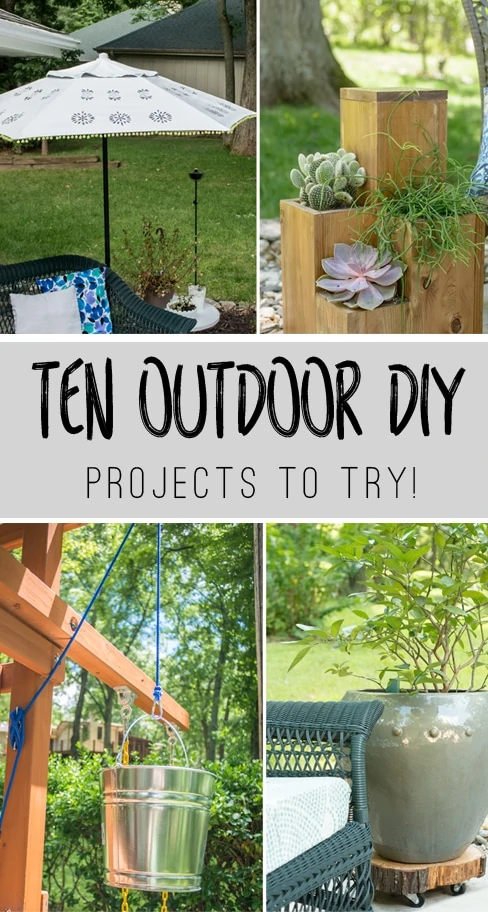
Looking for more Budget-Friendly DIY Projects?
Breanna
SO cute! Definitely going to remember this down the road 🙂
Ashley Mayes
Thanks Breanna!
Charlotte
How cool. I love that look, especially at that price point! And the white is a great compliment to the bench! Have you considered putting a low growing plant to kind of grow around the base of the topiary, to me it looks kind of lonely
Also - just an observation, I spotted that ivy creeping along the brick wall of your house, you should consider removing it from the house walls. They can be HAVOC on mortar!
Ashley Mayes
I've seen the plants in the bottom when people have topiaries, but it's probably more than I want to do. That space gets almost zero light, so I would have to baby them and I'm totally lazy with outdoor plants! Like zero patience for them. lol. Thanks for the reminder on the ivy. We have cleaned that up quite a few times and it just never stops. Definitely need to get on that.
Brynne@TheGatheredHome
I really love the modern edge the concrete adds!!
Ashley Mayes
Me too! Thanks Brynne.
Julia@Cuckoo4Design
I love them and the modern look is so you.
Ashley Mayes
Thanks Julia!
jamie@kreyv
Oh my gosh, love those planters! Everything looks amazing!
Ashley Mayes
Thanks Jamie. It's coming along, but definitely slowly.
Michelle
I really love how modern and chunky these are! They really hold great visual weight and fill up the space nicely. And I can't believe they only cost $30 to make. These would easily be double that retail!
Ashley Mayes
Thanks Michelle! They took a few hours to make, but I think they are so worth it. It's hard to find bigger, modern planters at a good price point. Thanks for stopping by!
Jennifer @ Brave New Home
Woah, those are seriously creative! Great job. Planters that size start getting pricey, too...
Ashley Mayes
Big planters are expensive! It's really crazy how much $$$ they can be.
Ashley @ 3 Little Greenwoods
Okay... I got totally side tracked by the rug! Love the concrete planters too. Great choice to paint them white!
Ashley Mayes
Thanks!