• Skip to primary navigation
  • Skip to main content
  • Skip to primary sidebar
  • Skip to footer
Bigger Than the Three of Us
  • Our Home
  • DIY IDEAS
    • DIY IDEAS
    • DIY Open Shelving Kitchen Guide
  • Shop
    • Shop Our Home
    • Shop My Closet
    • Vintage Home Decor
    • My Current Favorite Rugs For Sale
    • Pieces I’m Loving
  • Podcast
  • Travel
  • The Three of Us
    • Privacy and Disclosure

Bullet Planter DIY Tutorial

July 20, 2015 by Ashley Mayes 21 Comments

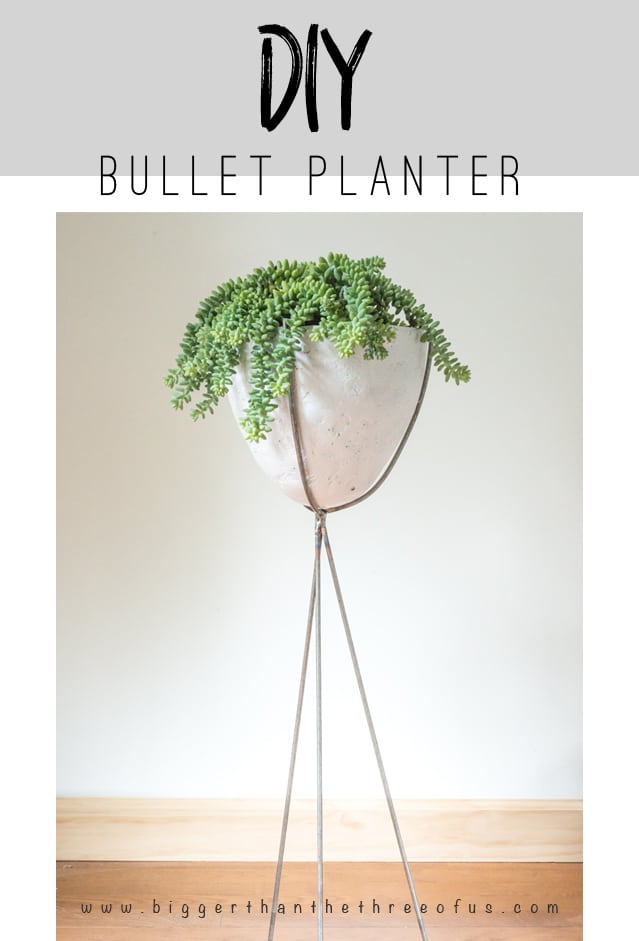
Do you ever get something in your head that you just can’t get out? Sometimes, that can be a good thing and in this case it was… after working out some kinks. But, I’m glad to say that I worked out some kinks and am finally sharing how I made a Bullet Planter. This Bullet Planter DIY Tutorial will walk you through how I made one and, the best part is, you can make one exactly like it. And, better yet, I will even recommend some shortcuts! Ready to get started?

Make this Mid-Century Modern Bullet Planter

*Affiliate links below – click to read my disclosure policy. Thanks for keeping my blog up and running!

Step 1: Gather Your Supplies

Planter (in a shape close to an egg) – something like this or this

OR an over-sized Easter Egg

Styrofoam Ball (close to the diameter of the bottom of the planter pot)
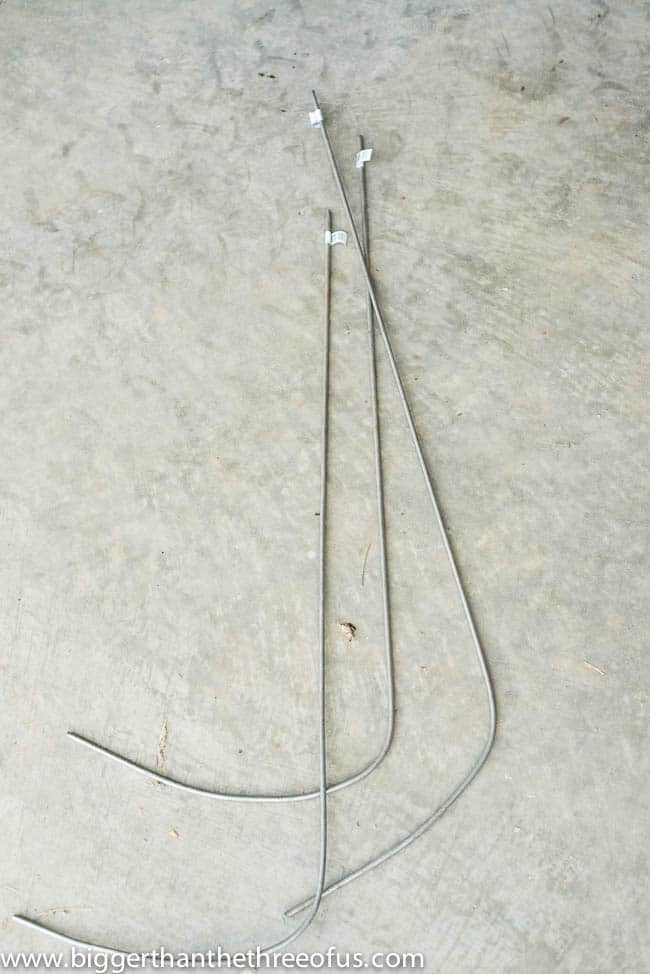
3 Steel Rods (found in hardware dept – make sure they are bendable)

Fiberglass Kit

Wax

Orbital Sander

Duct tape

Level

Welding Equipment and Safety Gear (Thanks Dad!)

Plastic Cling Wrap

Spray Paint

Make this Mid-Century Modern Bullet Planter

Make this Mid-Century Modern Bullet Planter

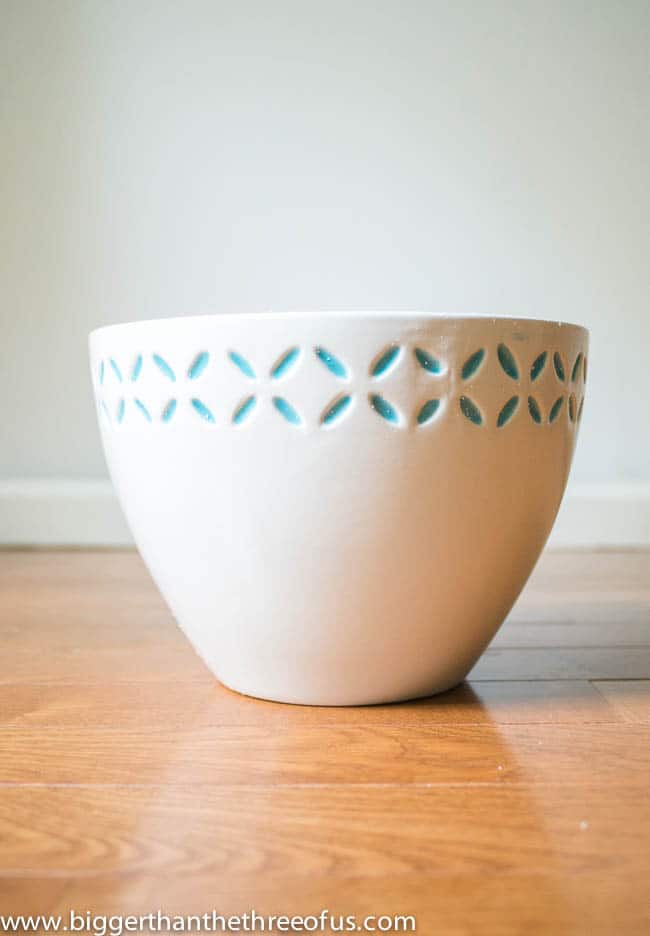
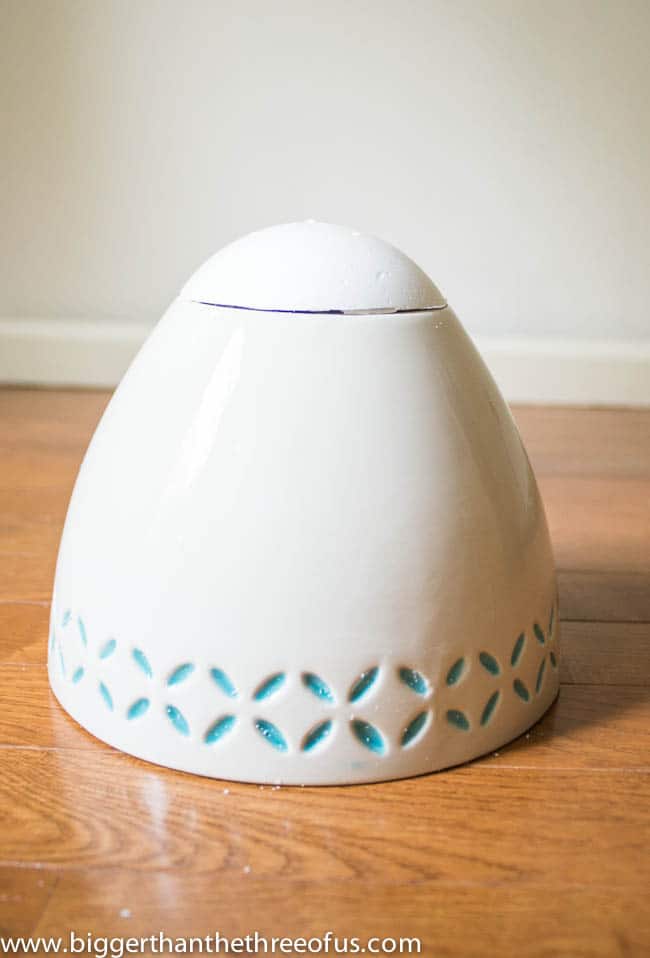
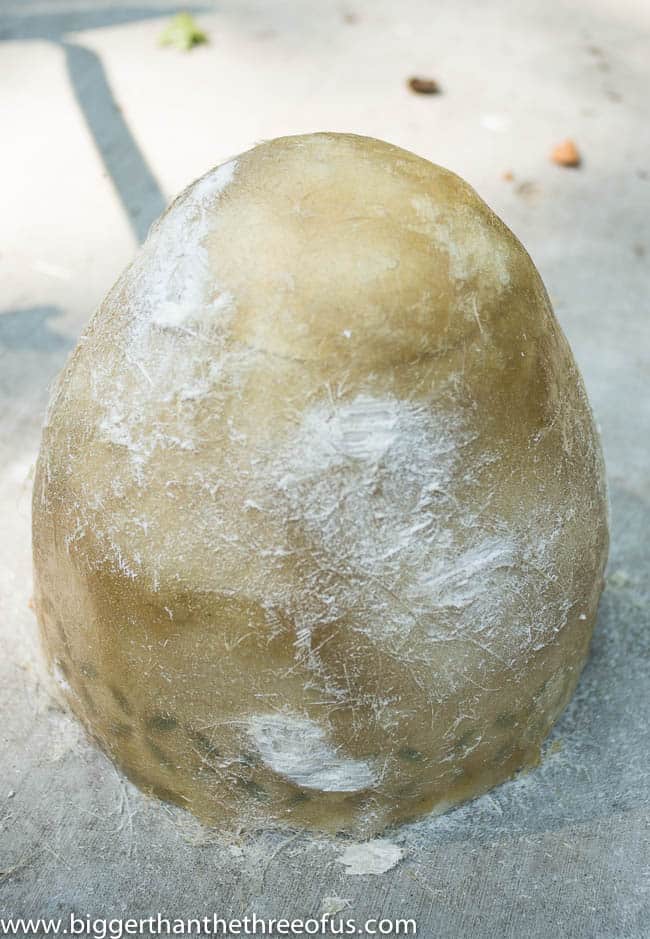
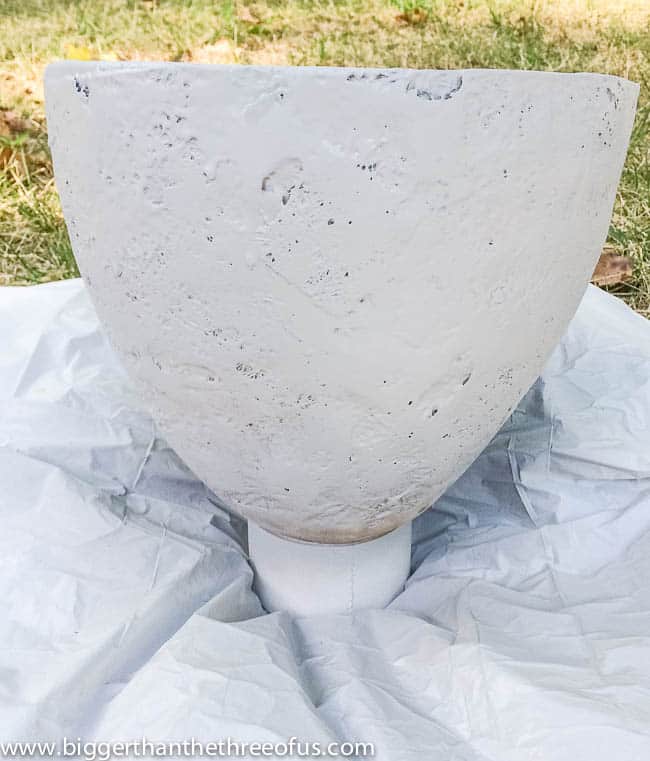
Step 2: Cut and Attach Styrofoam to Planter

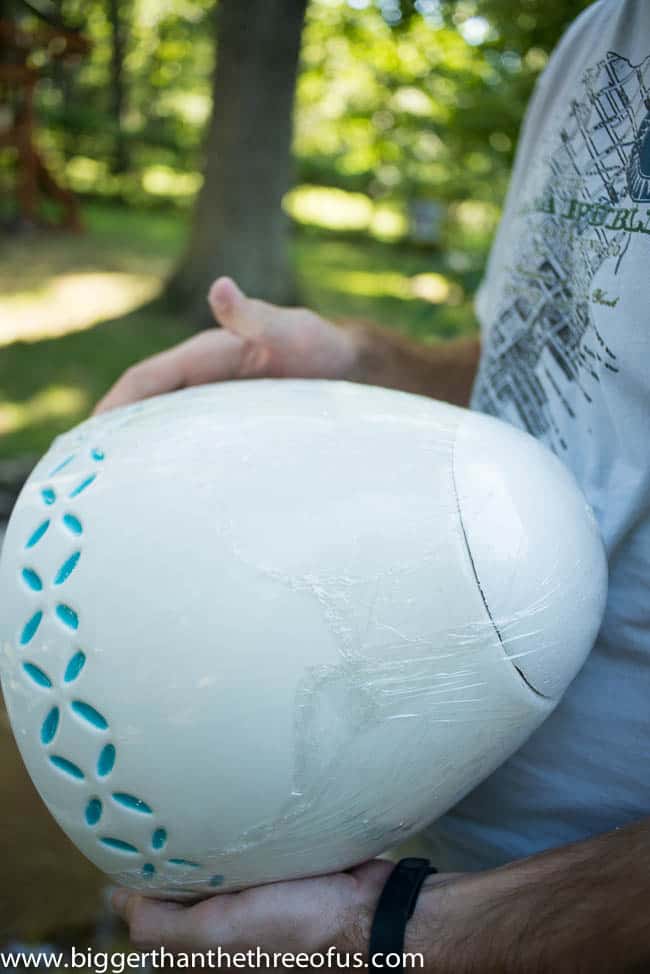
Cut your styrofoam ball so that it fits on the bottom of your pot. This will give you the bullet-type shape. Attach the styrofoam piece to the planter using tape.

*If you bought an Easter Egg, you could skip this part.

Make this Mid-Century Modern Bullet Planter

Step 3: Prep Planter 

Using plastic wrap, cover the entire outside of the planter and coat with wax.

Make this Mid-Century Modern Bullet Planter

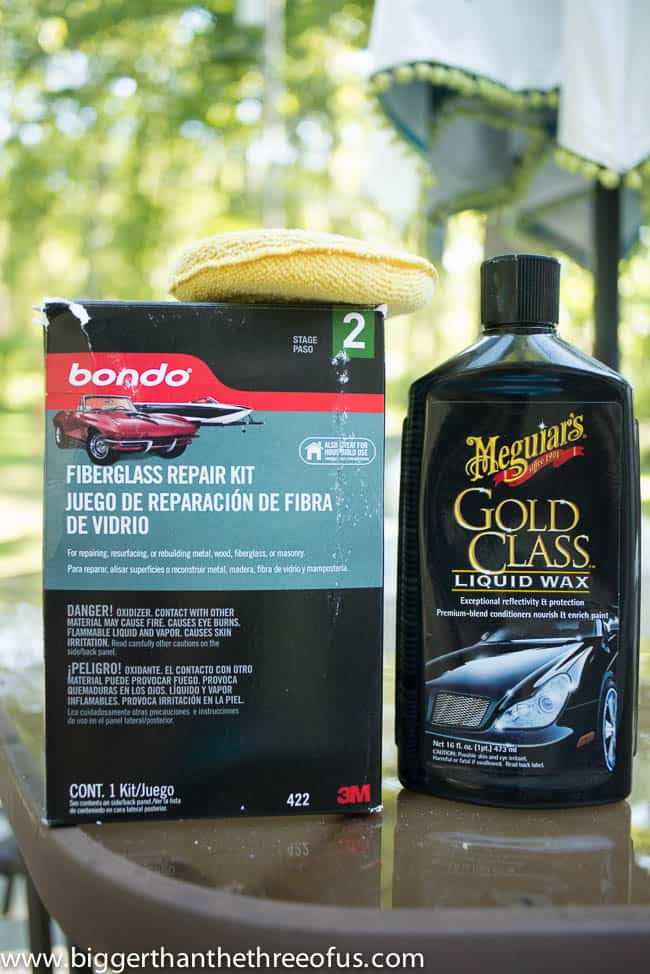
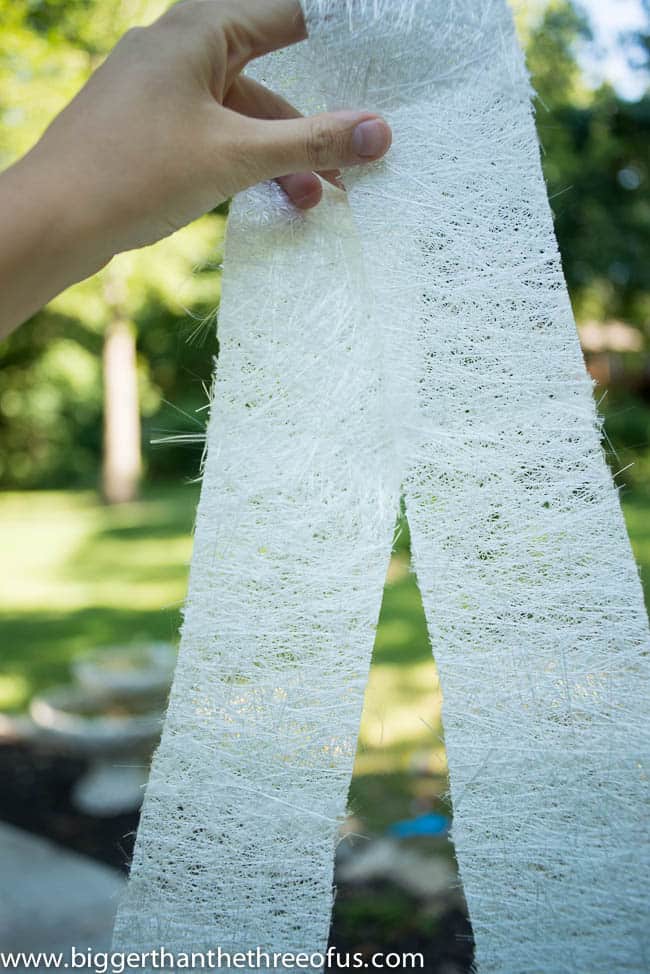
Step 4: Apply Fiberglass

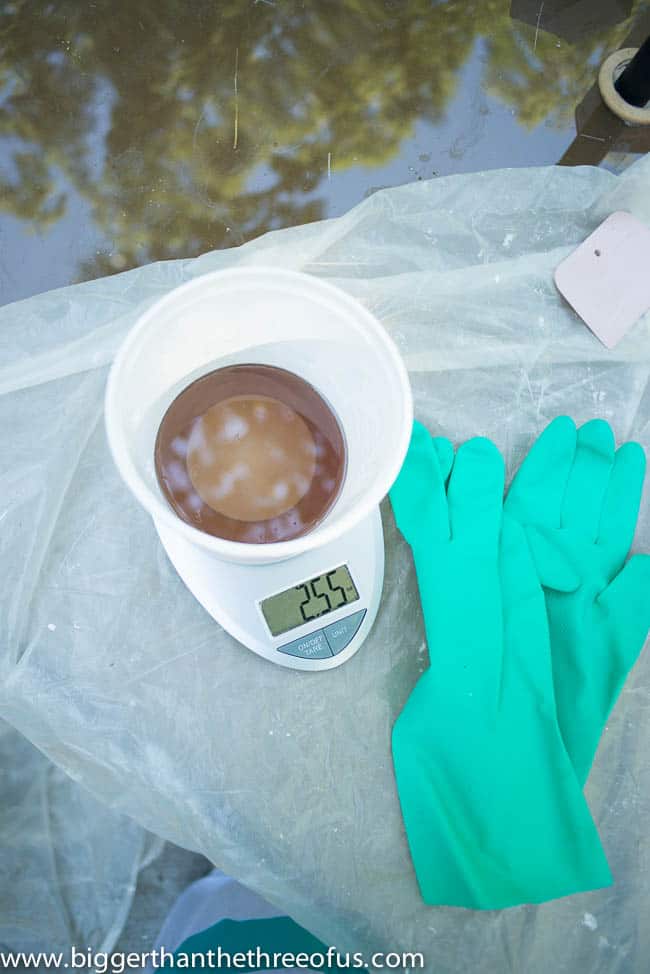
Cut strips out of your fiberglass mat first. Next, follow the directions of the kit and add the hardener to the resin and mix. Once your mixture is mixed, you will need to work fast as the mixture will harden. We found it easiest to dip the strips in the mixture and then smooth them around the pot. Try to avoid bubbles under the strips as you are applying them. Coat the whole pot once and let dry.

Make this Mid-Century Modern Bullet Planter

Make this Mid-Century Modern Bullet Planter

Make this Mid-Century Modern Bullet Planter

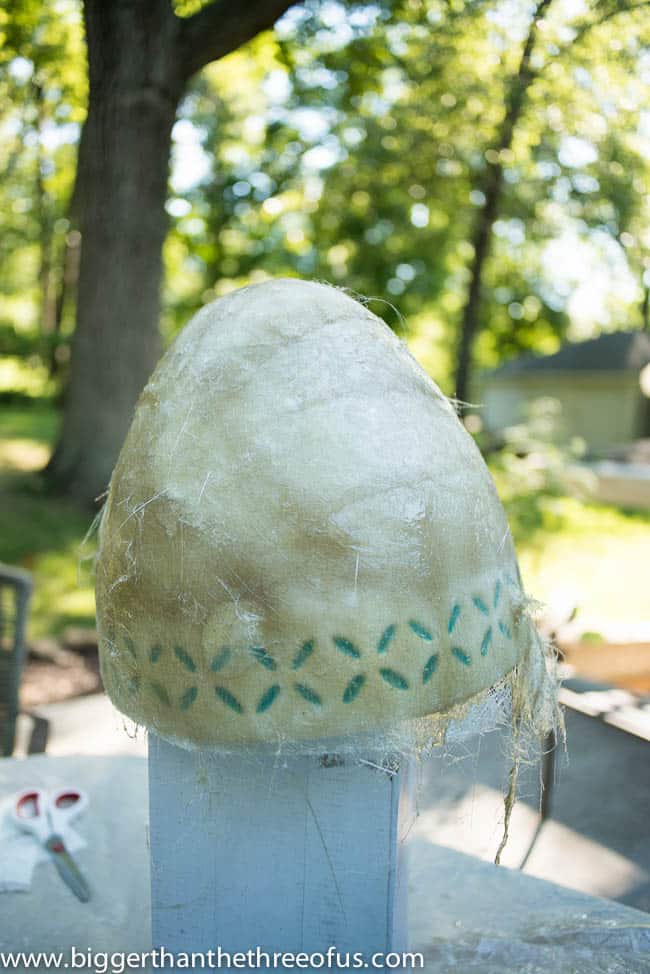
Step 5: Repeat Step 4 and then Sand

After you have applied the second coat of fiberglass and it has dried, you will need to sand it. We did this with an orbital sander. If you’re better than we were at applying smooth layers of fiberglass, you might be able to hand sand. Wipe clean.

Make this Mid-Century Modern Bullet Planter

Step 6: Apply Resin

Reapply resin but not the fiberglass strips. Let dry. Lightly sand after it’s dry.

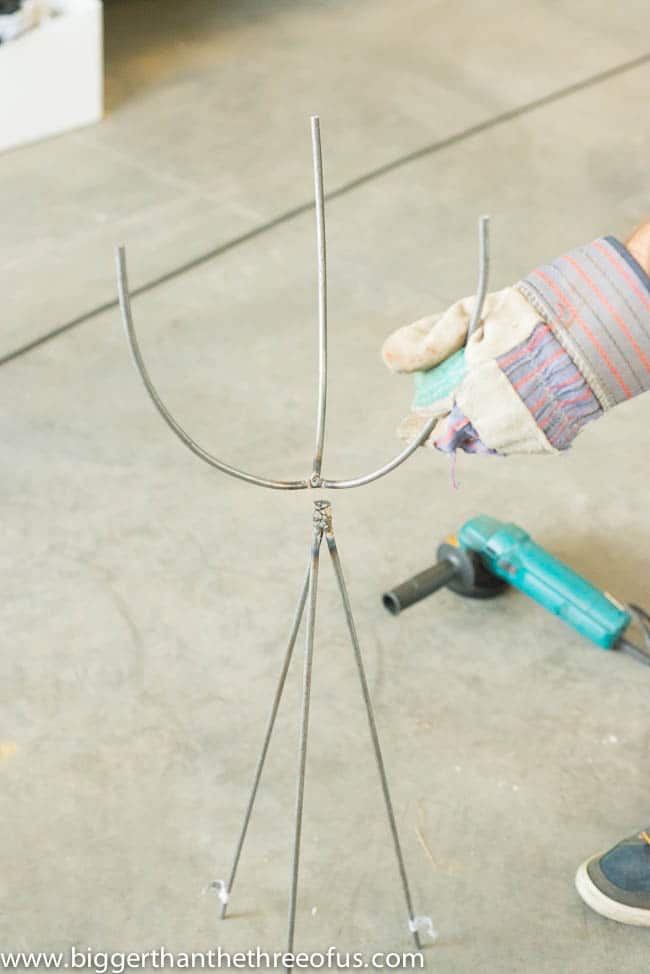
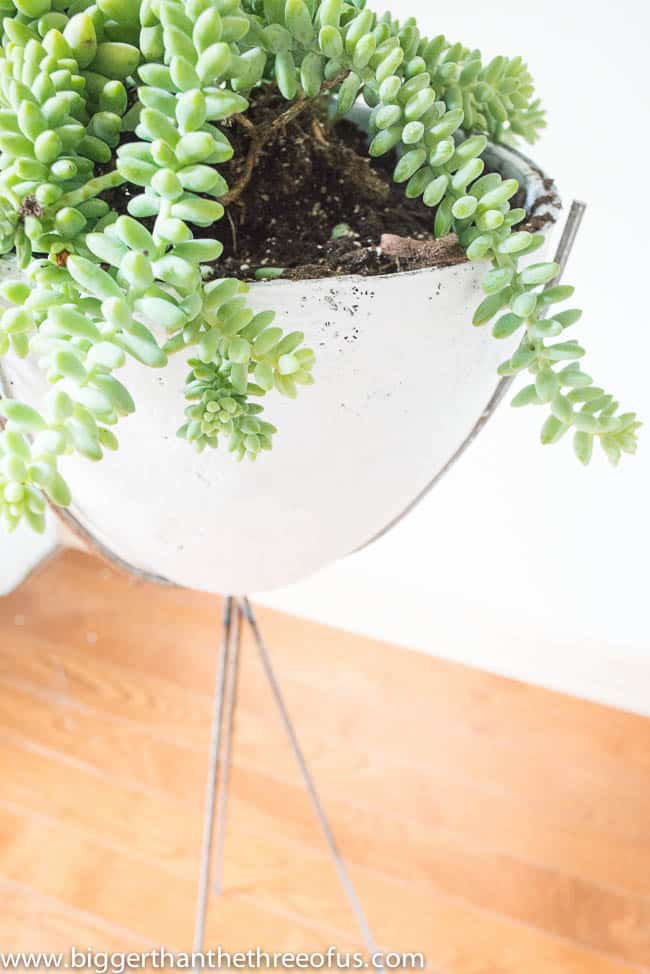
Step 7: Bend Steel Rods

Our steel rods were bendable by hand but we did make it easier on ourselves. We drilled into a piece of wood and stuck one end of the rod into the wood. Then, we bent the rods until we thought we had the curve of the bowl within the bend. At this point, you will need to check your bend with the curve of the planter and make adjustments accordingly.

Make this Mid-Century Modern Bullet Planter

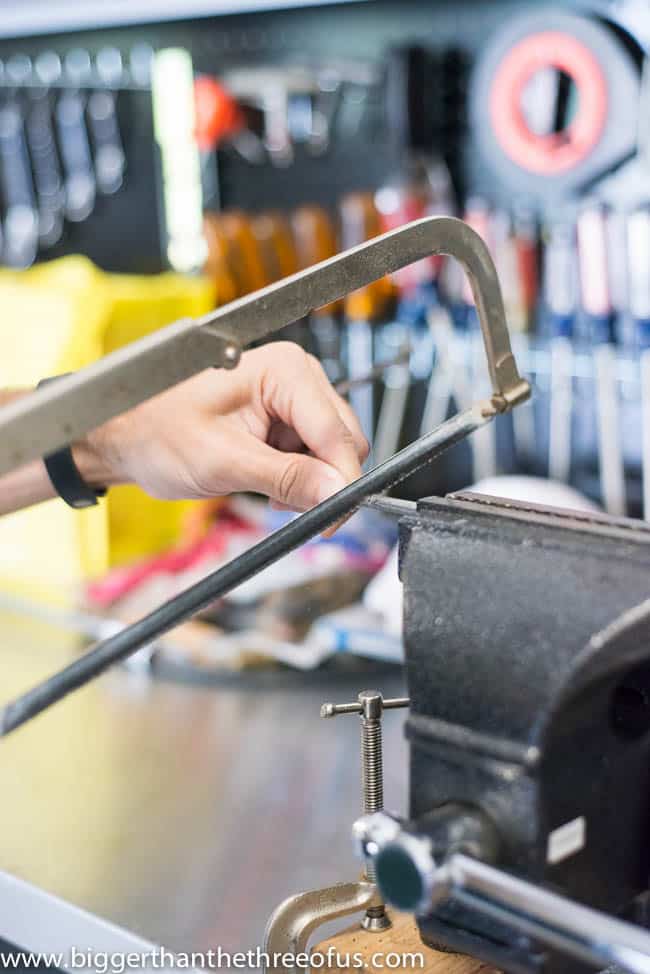
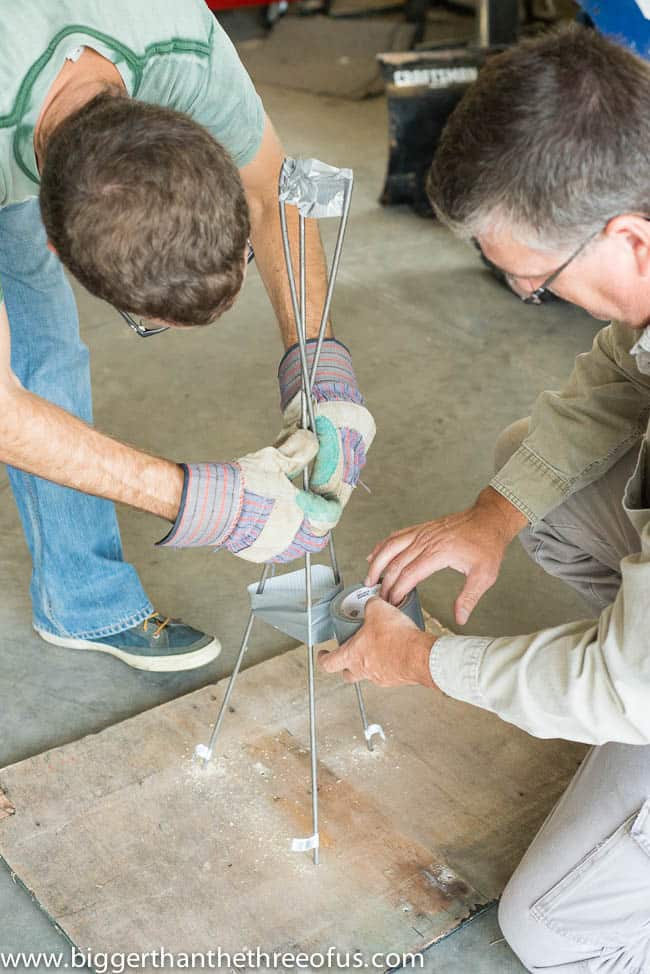
Step 8: Prep Rods for Welding

Mark your rods and cut them where they are going to be joined together to hold the planter. Using duct tape, tape the pieces together to create the form to hold the planter.

Make this Mid-Century Modern Bullet Planter

Make this Mid-Century Modern Bullet Planter

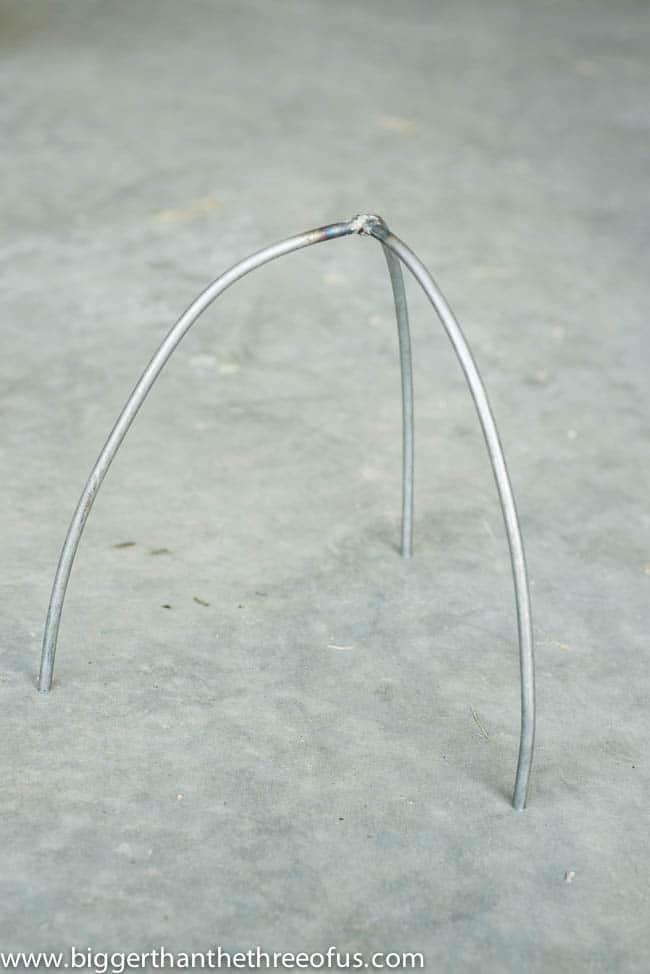
Step 9: Weld your Base

Weld your planter base together first and then weld your tripod base to the planter base. Use a level to make sure you get them level.

*Luke and I have never done this type of thing before, so my Dad helped us. He’s only done it a few times, so I’m sure this part of the tutorial could be improved if you knew what you were doing, but it totally worked for us and our planter is still looking amazing a year later!

Mid-Century Modern Bullet Planter Tutorial-4

Make this Mid-Century Modern Bullet Planter Make this Mid-Century Modern Bullet Planter

Make this Mid-Century Modern Bullet Planter

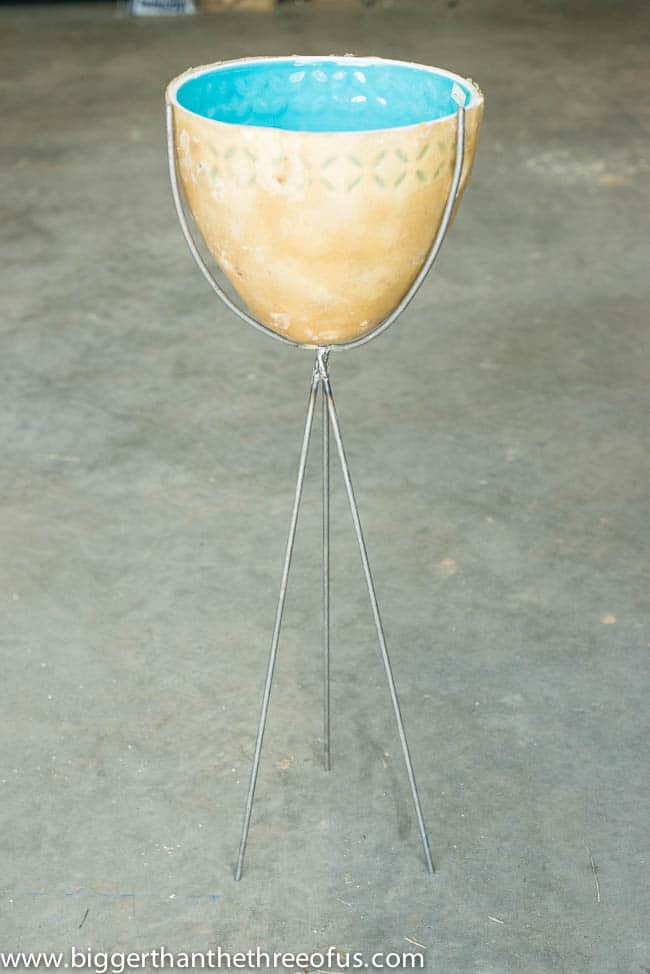
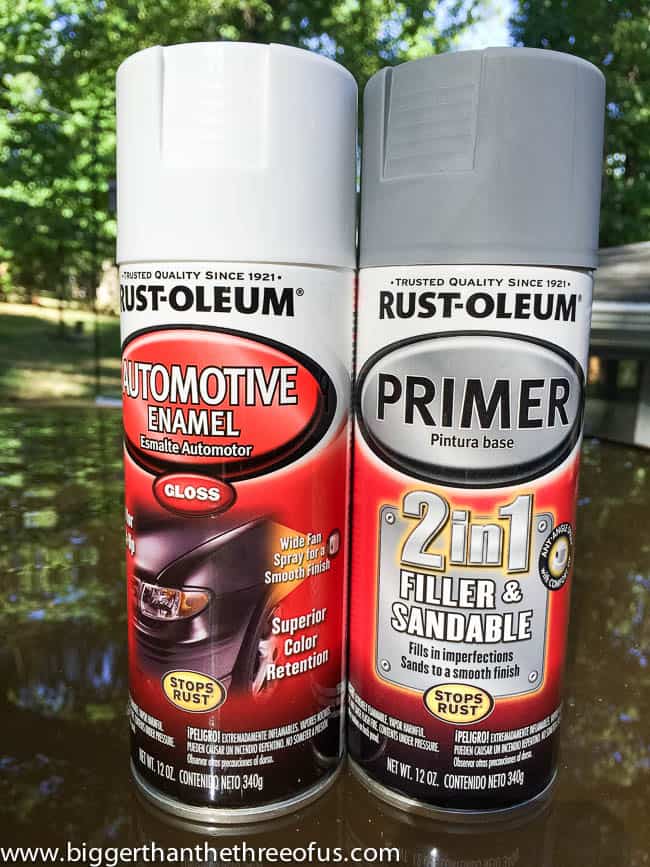
Step 10: Spray paint

I used Rustoleum primer and then followed that with Rustoleum Automotive enamel.

Make this Mid-Century Modern Bullet Planter

Make this Mid-Century Modern Bullet Planter

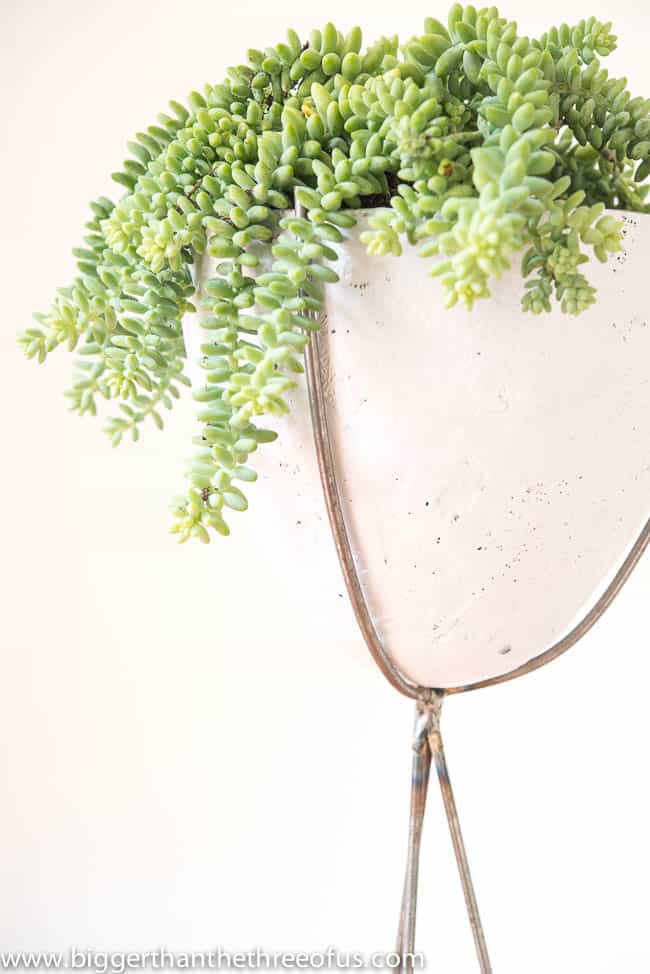
Step 11: Add a Plant

Make this Mid-Century Modern Bullet Planter

So, as far as DIYs goes… this one can be intense especially if you’ve never welded. I LOVE how it turned out though so I’d definitely say go for it if you have the skills to try it.
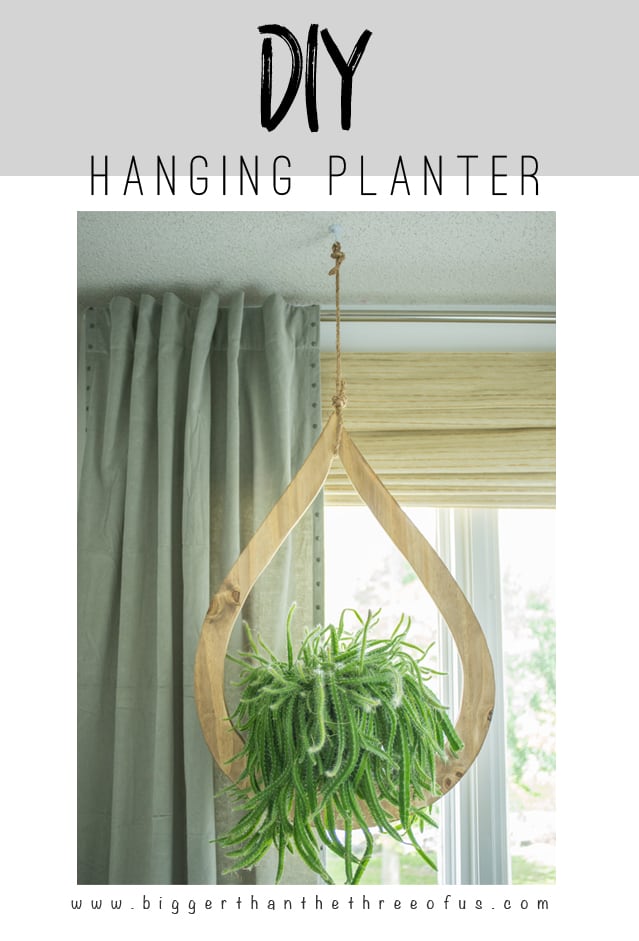
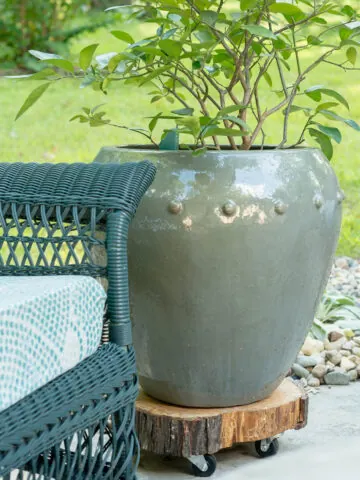
Make this Mid-Century Modern Bullet Planter

Make this Mid-Century Modern Bullet Planter

If you think it’s outside of what you can tackle, then take a look at these bullet planters:er


Also, if you liked this post then you may like:

Mid-Century-Modern-Master-Bedroom-9

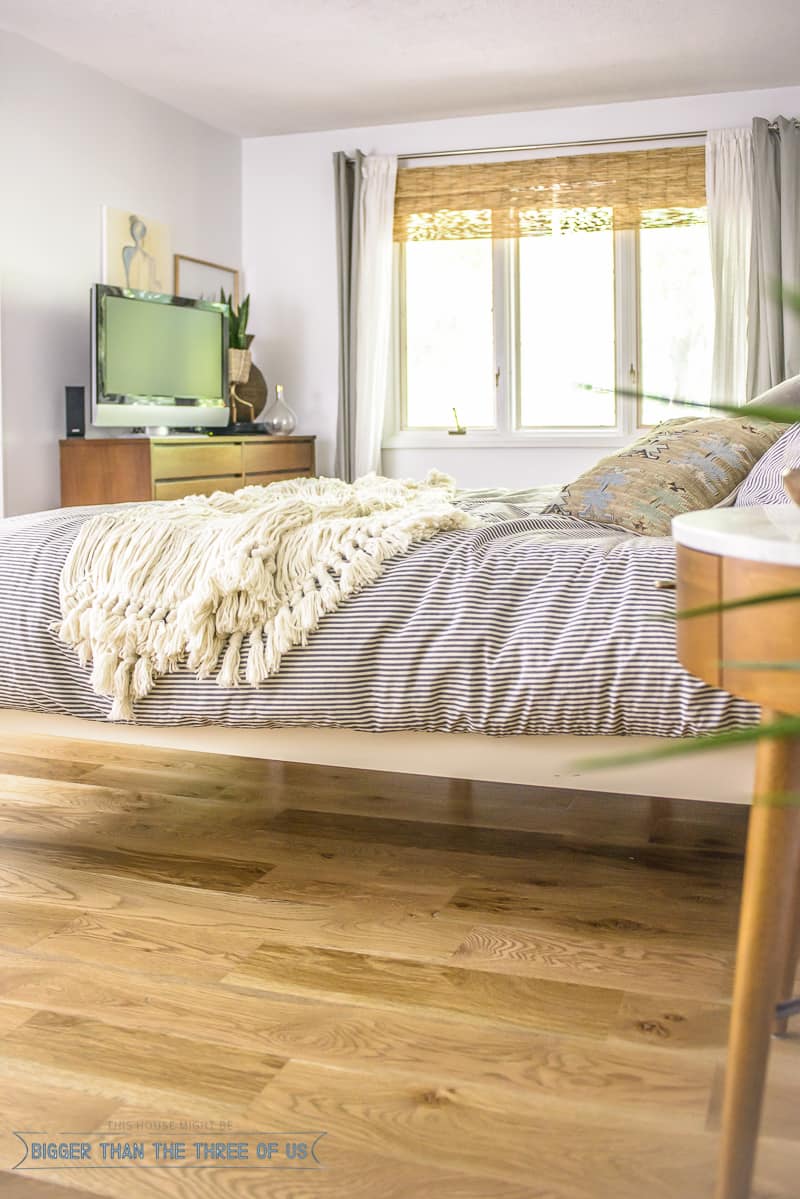
Our Mid-Century Master Bedroom

or

DIY Mid Century Inspired Plant Hanger

Our DIY Hanging Teardrop Planter

Share
Pin
Tweet
Email
Print

Keep In Touch...

Sign up for my weekly emails to see new projects, plus what I'm doing behind-the-scenes.

You can unsubscribe anytime. For more details, review our Privacy Policy.

Thank you!

You have successfully joined our subscriber list.

.

Disclosure: This post may contain affiliate links. I receive a small commission at no cost to you when you make a purchase using my link.

Filed Under: DIY, Home Decor Projects Tagged With: Mid-century, plant

Previous Post: « Modern Table Lamps
Next Post: Be Brave Free Printable »

Reader Interactions


Comments

  1. Trisha D. @Black and White Obsession

    July 22, 2015 at 10:15 am

    Wow, props to you for using out of the box materials! Welding AND fiberglass?! I’m jealous! The planter turned out wonderfully!

    Reply
    • Ashley Mayes

      July 24, 2015 at 8:16 am

      Thanks Trisha! We definitely had some help with the welding… that’s no joke!

      Reply
      • John

        January 17, 2020 at 1:59 pm

        Instead of welding. Next time just try some jb weld epoxy or putty. I used it on a metal chair whose bolthead was sheared off. It works with incredible strength and can be sanded down to look good. Just a tip.

        Reply
        • Ashley Mayes

          February 3, 2020 at 9:47 am

          Thanks John!

          Reply
  2. Corinna - A Designer At Home

    July 25, 2015 at 10:04 am

    Very impressive! I’m not brave enough to attempt it, but I love it!

    Reply
    • Ashley Mayes

      July 26, 2015 at 7:04 am

      It’s definitely one of those challenging ones. Thanks so much!

      Reply
  3. Naomi @ Plaster & Disaster

    July 30, 2015 at 9:10 pm

    What an awesome project! Love the base, what a cool method. Thanks for sharing your tutorial!

    Reply
    • Ashley Mayes

      August 2, 2015 at 3:54 pm

      Thanks Naomi! We really love it.

      Reply
  4. Alvae

    May 29, 2016 at 4:47 pm

    Welding equipment? Really?! This is ‘way beyond a DIY project, l0l.

    Reply
  5. Bethany Evans

    May 5, 2020 at 7:13 pm

    Your planter is so cool! I love your mid-century modern style BTW!☺️

    Reply
    • Ashley Mayes

      May 7, 2020 at 9:59 am

      Thank you!!

      Reply

Trackbacks

  1. DIY Egg-Shaped Planter With A Stand | Gardenoholic says:
    August 12, 2015 at 11:00 am

    […] an original indoor or outdoor planter? Here’s a great idea from biggerthanthethreeofus.com! Prepare a planter in a shape close to an egg, a styrofoam ball, 3 steel rods, a fiberglass kit, […]

    Reply
  2. happy weekend - almost makes perfect says:
    August 14, 2015 at 7:12 am

    […] be a perv. ok, be a perv ⋅ boys will just never get what it’s like to be a girl ⋅ GUH i wanna make one but i totally won’t ⋅ how insanely good does this look?! ⋅ want want want this so bad ⋅ […]

    Reply
  3. Five Minute Repurposed Planter - Bigger Than the Three of Us says:
    May 25, 2016 at 1:00 am

    […] if you love planters and want a more intensive DIY option … a few years ago we made a Bullet Planter. Make sure to check that […]

    Reply
  4. DIY Rolling Plant Stand says:
    July 12, 2016 at 7:59 am

    […] you love this post, then you might like our DIY Bullet Planter or our DIY Plywood plant […]

    Reply
  5. Build Your Own Bullet Planter — Apartment Therapy Reader Submission Tutorials - Tmarie Linens says:
    July 21, 2016 at 9:35 am

    […] (Image credit: Ashley of Bigger Than the Three of Us) […]

    Reply
  6. Build Your Own Bullet Planter — Apartment Therapy Reader Submission Tutorials – Sofia Consola says:
    July 21, 2016 at 9:47 am

    […] (Image credit: Ashley of Bigger Than the Three of Us) […]

    Reply
  7. Build Your Own Bullet Planter — Apartment Therapy Reader Submission Tutorials says:
    July 21, 2016 at 9:55 am

    […] (Image credit: Ashley of Bigger Than the Three of Us) […]

    Reply
  8. Build Your Own Bullet Planter — Apartment Therapy Reader Submission Tutorials | Interior Insider, UK #1 home decor & design magazine says:
    July 21, 2016 at 8:00 pm

    […] (Image credit: Ashley of Bigger Than the Three of Us) […]

    Reply
  9. Build Your Own Bullet Planter — Apartment Therapy Reader Submission Tutorials | Interior Insider, UK #1 home decor & design magazine says:
    July 21, 2016 at 8:00 pm

    […] (Image credit: Ashley of Bigger Than the Three of Us) […]

    Reply
  10. DIY Mid-Century Planter - Bigger Than the Three of Us says:
    December 7, 2016 at 1:00 am

    […] DIY Bullet Planter […]

    Reply

Leave a Reply Cancel reply

Your email address will not be published. Required fields are marked *

Primary Sidebar

Follow Me On

  • Email
  • Facebook
  • Instagram
  • Pinterest
  • YouTube

Favorites

Footer

Connect with Me:


ashley at biggerthanthethreeofus.com

  • Bloglovin
  • Email
  • Facebook
  • Instagram
  • Pinterest
  • YouTube

Disclosure, Copyright and Privacy Policies

Follow Me On Instagram

Copyright © 2023 · Bigger than the Three of Us · All Rights Reserved