

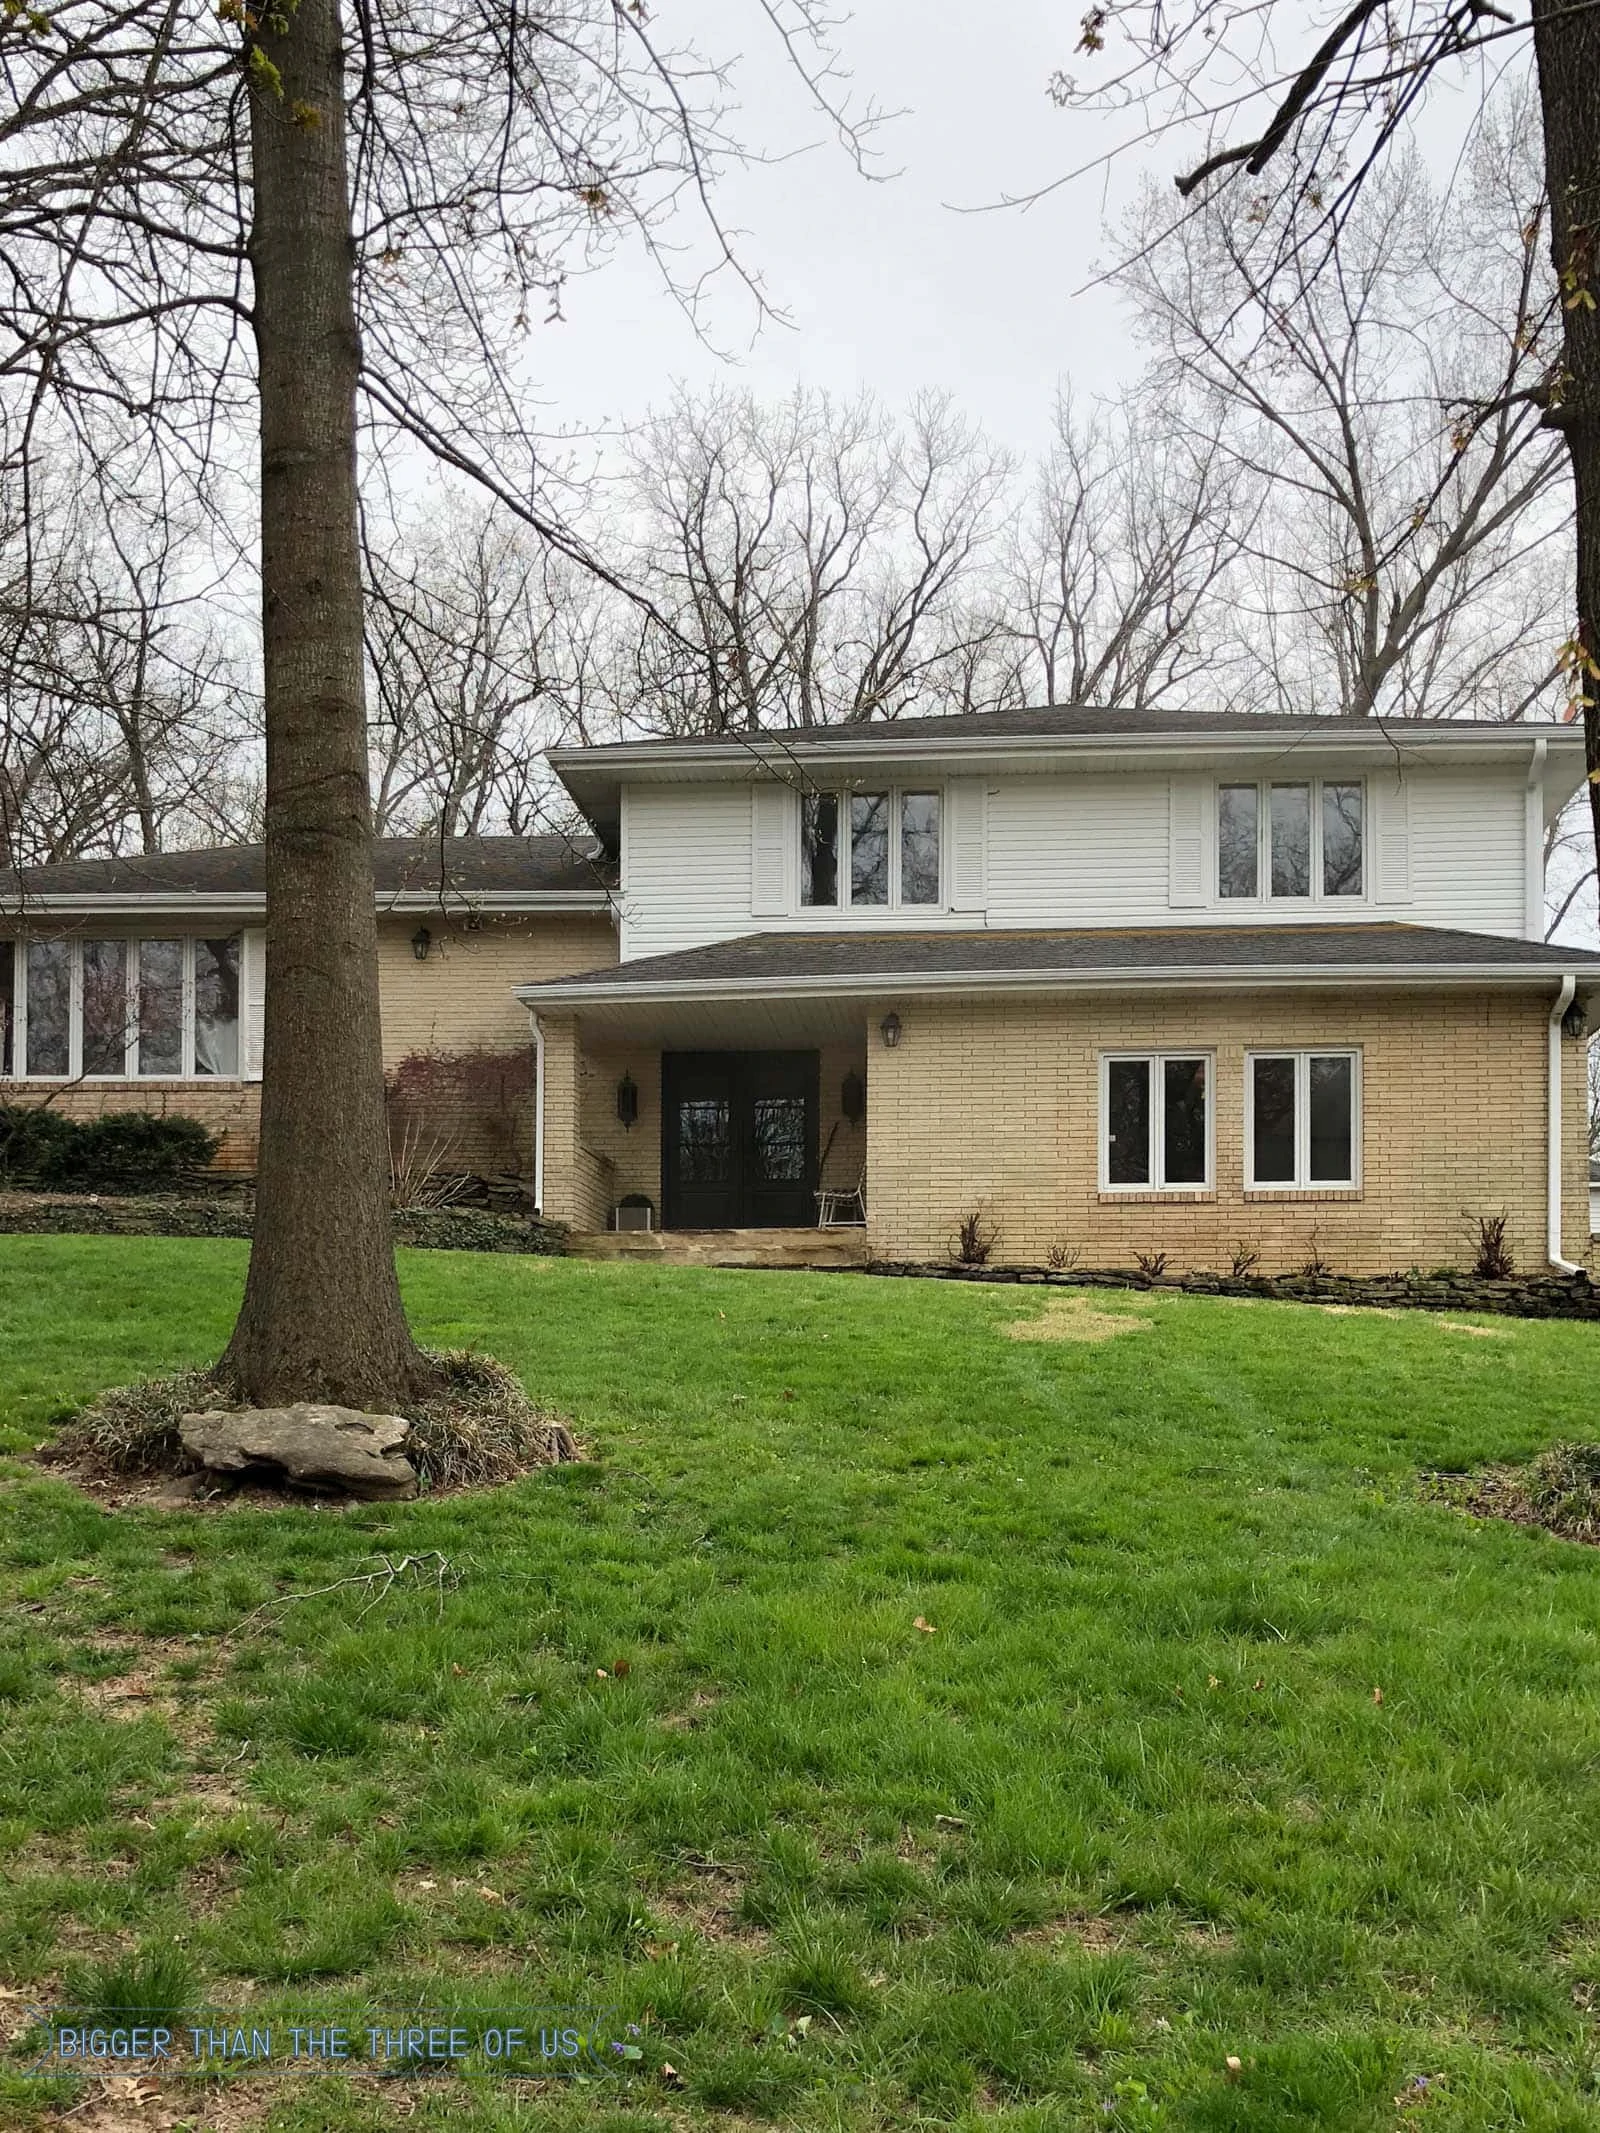
I'm always honest with you guys, so let's be real, I don't like exterior projects. I'm all about interior projects (you know, in the air conditioning and without the bugs), because exterior projects are always uncomfortable. It's either too hot or too cold or muggy or rainy. Then, there's the added fear of bugs and snakes and other gross rodents that I can't name. All of that being said, exterior projects need to be done and we have a laundry list of projects that are in the queue. I motivated myself in June to work on Trimming Back Boxwoods and Shutter Removal and I'm proud to say that I did about 97% of it on my own, without help, and without freaking out when I saw a bug (or two or three). I draw the line on snakes though. If there's a snake.. I'm done. Ha!
I'm pretty proud of this project and think it really helped with our curb appeal, so I'm going to stop talking and show you!
Trimming Back Boxwoods and Shutter Removal :: Exterior Updates
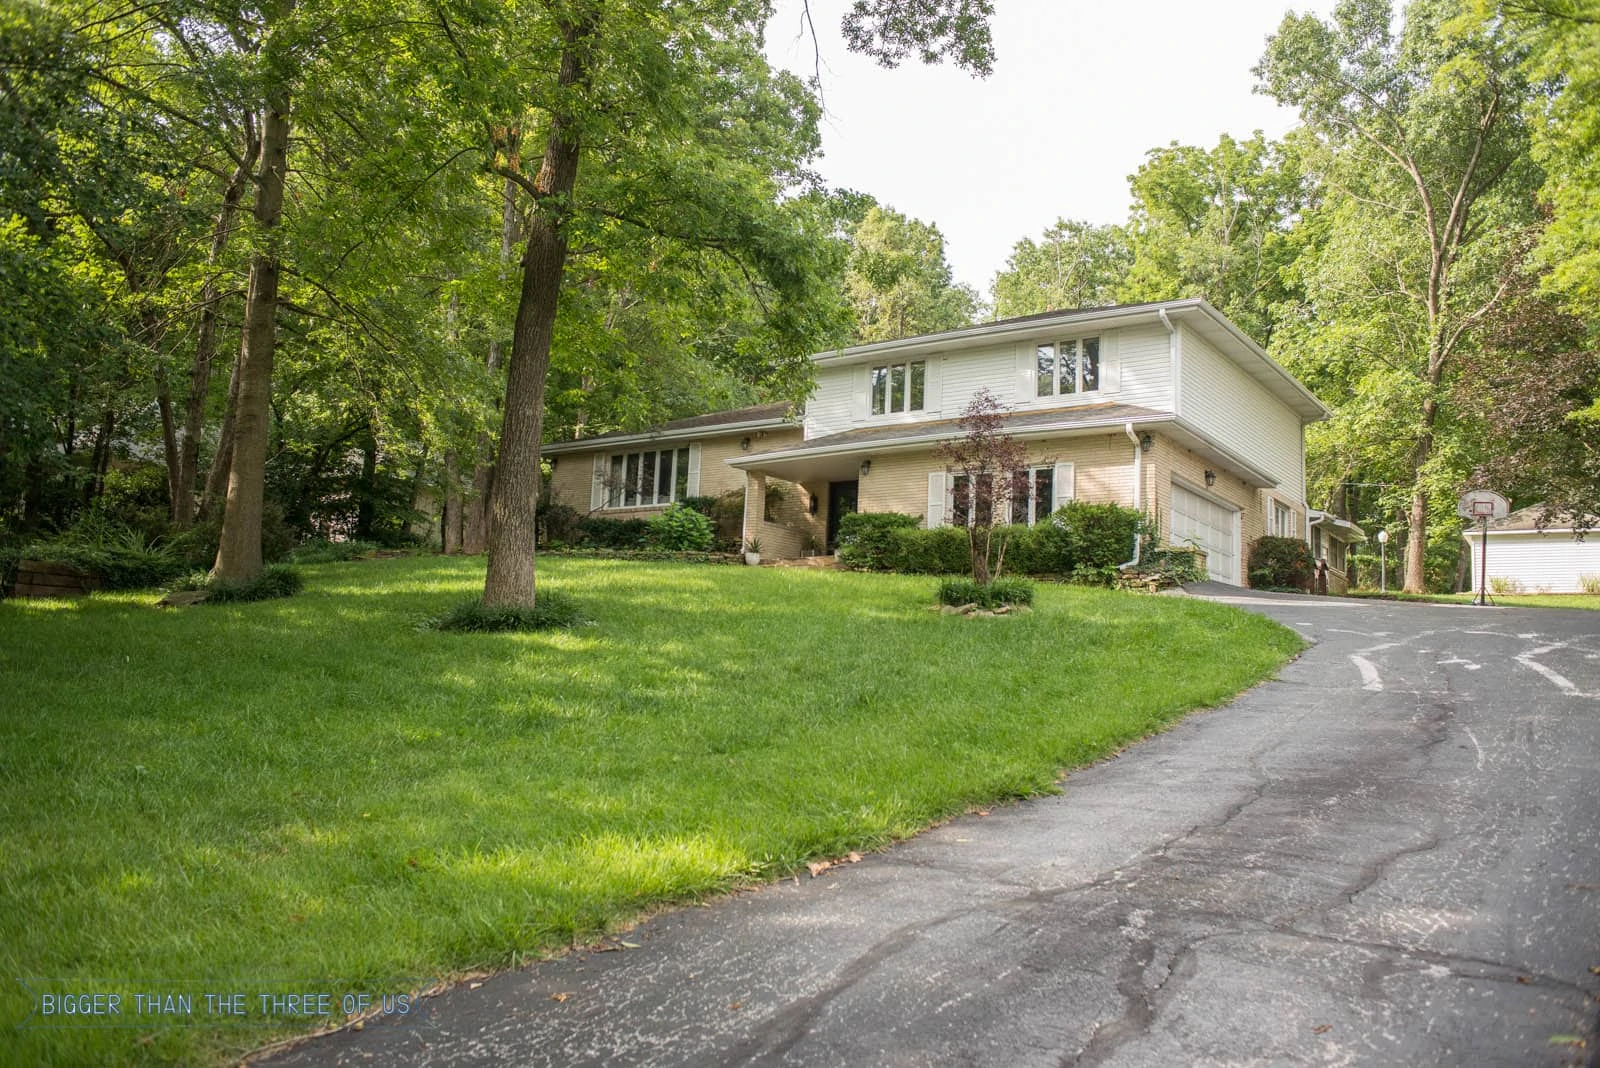
I didn't think to take picture of the house right before starting this project, so the first two "BEFORE" pictures are from last summer! The area that I wanted to tackle was the landscaping right in front of the garage.
If you want to see more of our landscaping, you can see our house tour for details and pictures!
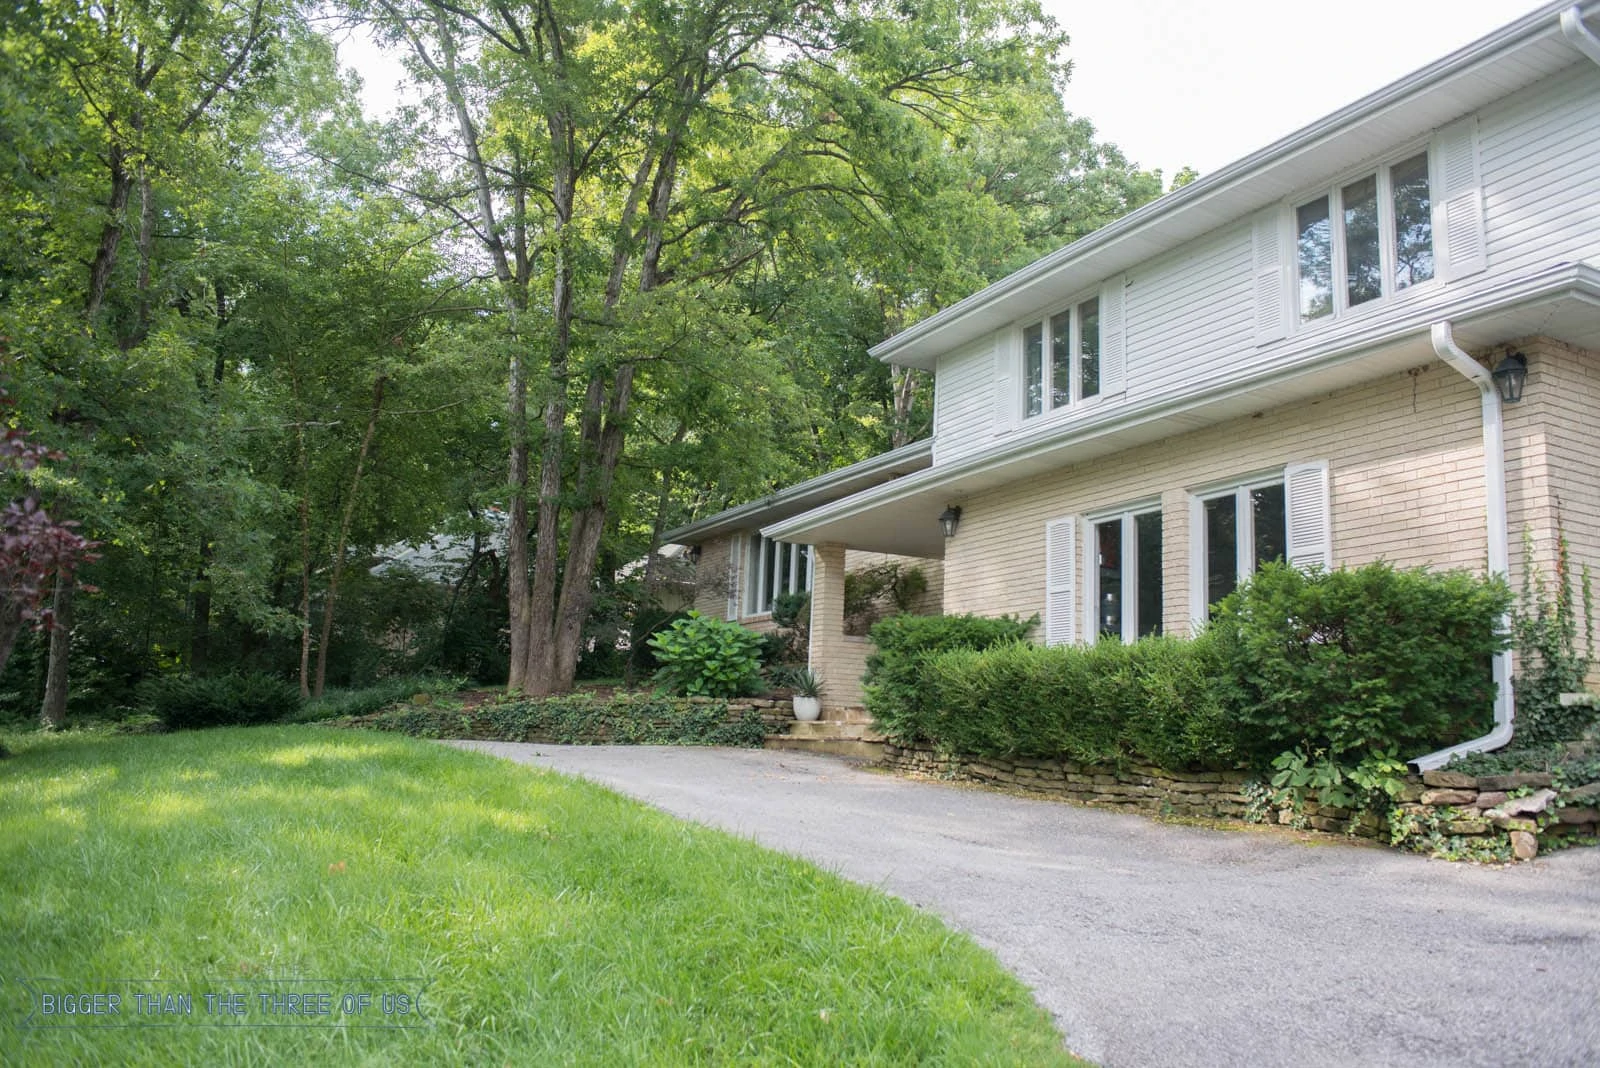
I don't think you can tell from these pictures, but the bushes overhung the stone wall and would scratch vehicles that wanted to use the circle drive. So, not only was it not working for us because of that, I really think it was making the house look more dated.
You'd think that trimming back boxwoods wouldn't be a big deal and something that I'd just naturally think of, but landscaping ideas and motivation just don't come naturally to me. I don't enjoy trying to visualize the outside and I don't know where to start with picking out new plants and products.
After talking about the overgrown bushes on Instagram stories (and hearing some amazing feedback for either trimming the boxwoods way back or taking them out), I decided that I didn't like any of the landscaping and wanted to rip it all out.
So, one early morning in April, I went to work and went for it.
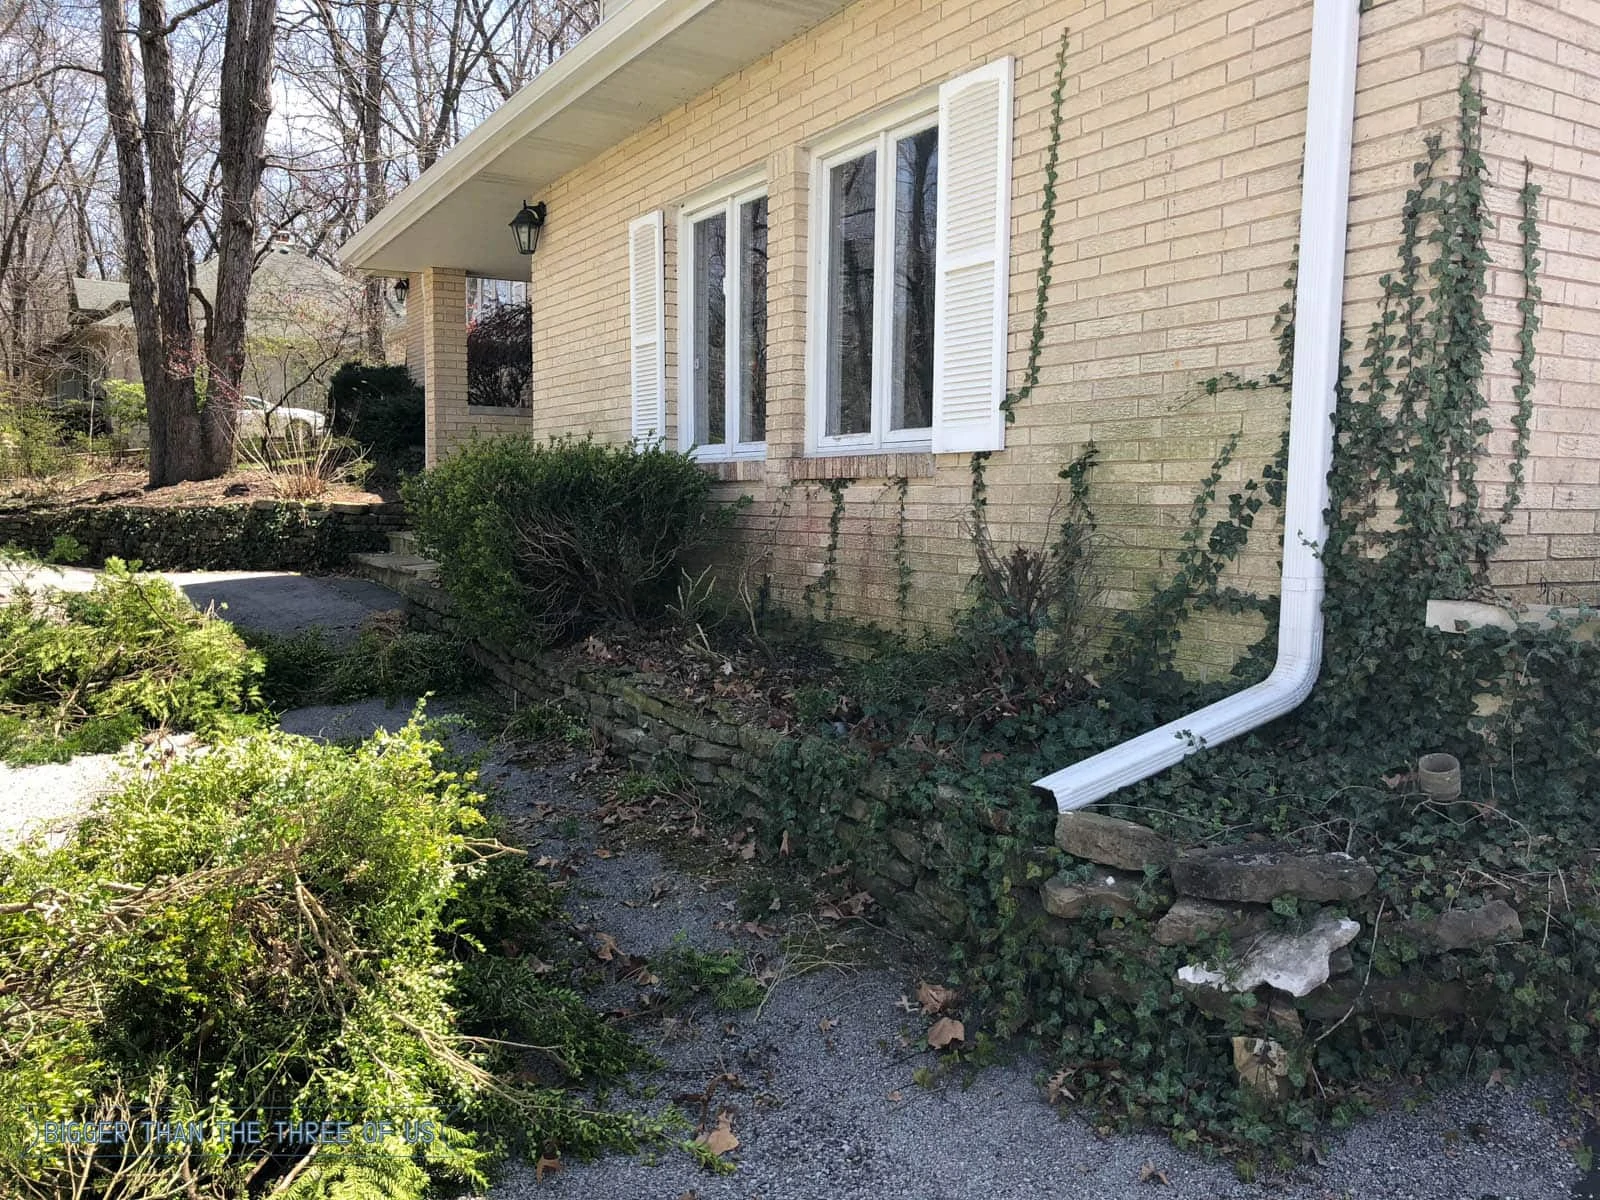
It quickly became evident that getting the bushes trimmed down was a big job, but one that I could handle. On the other hand, getting the root ball out of the soil was a job that was proving to be VERY difficult.
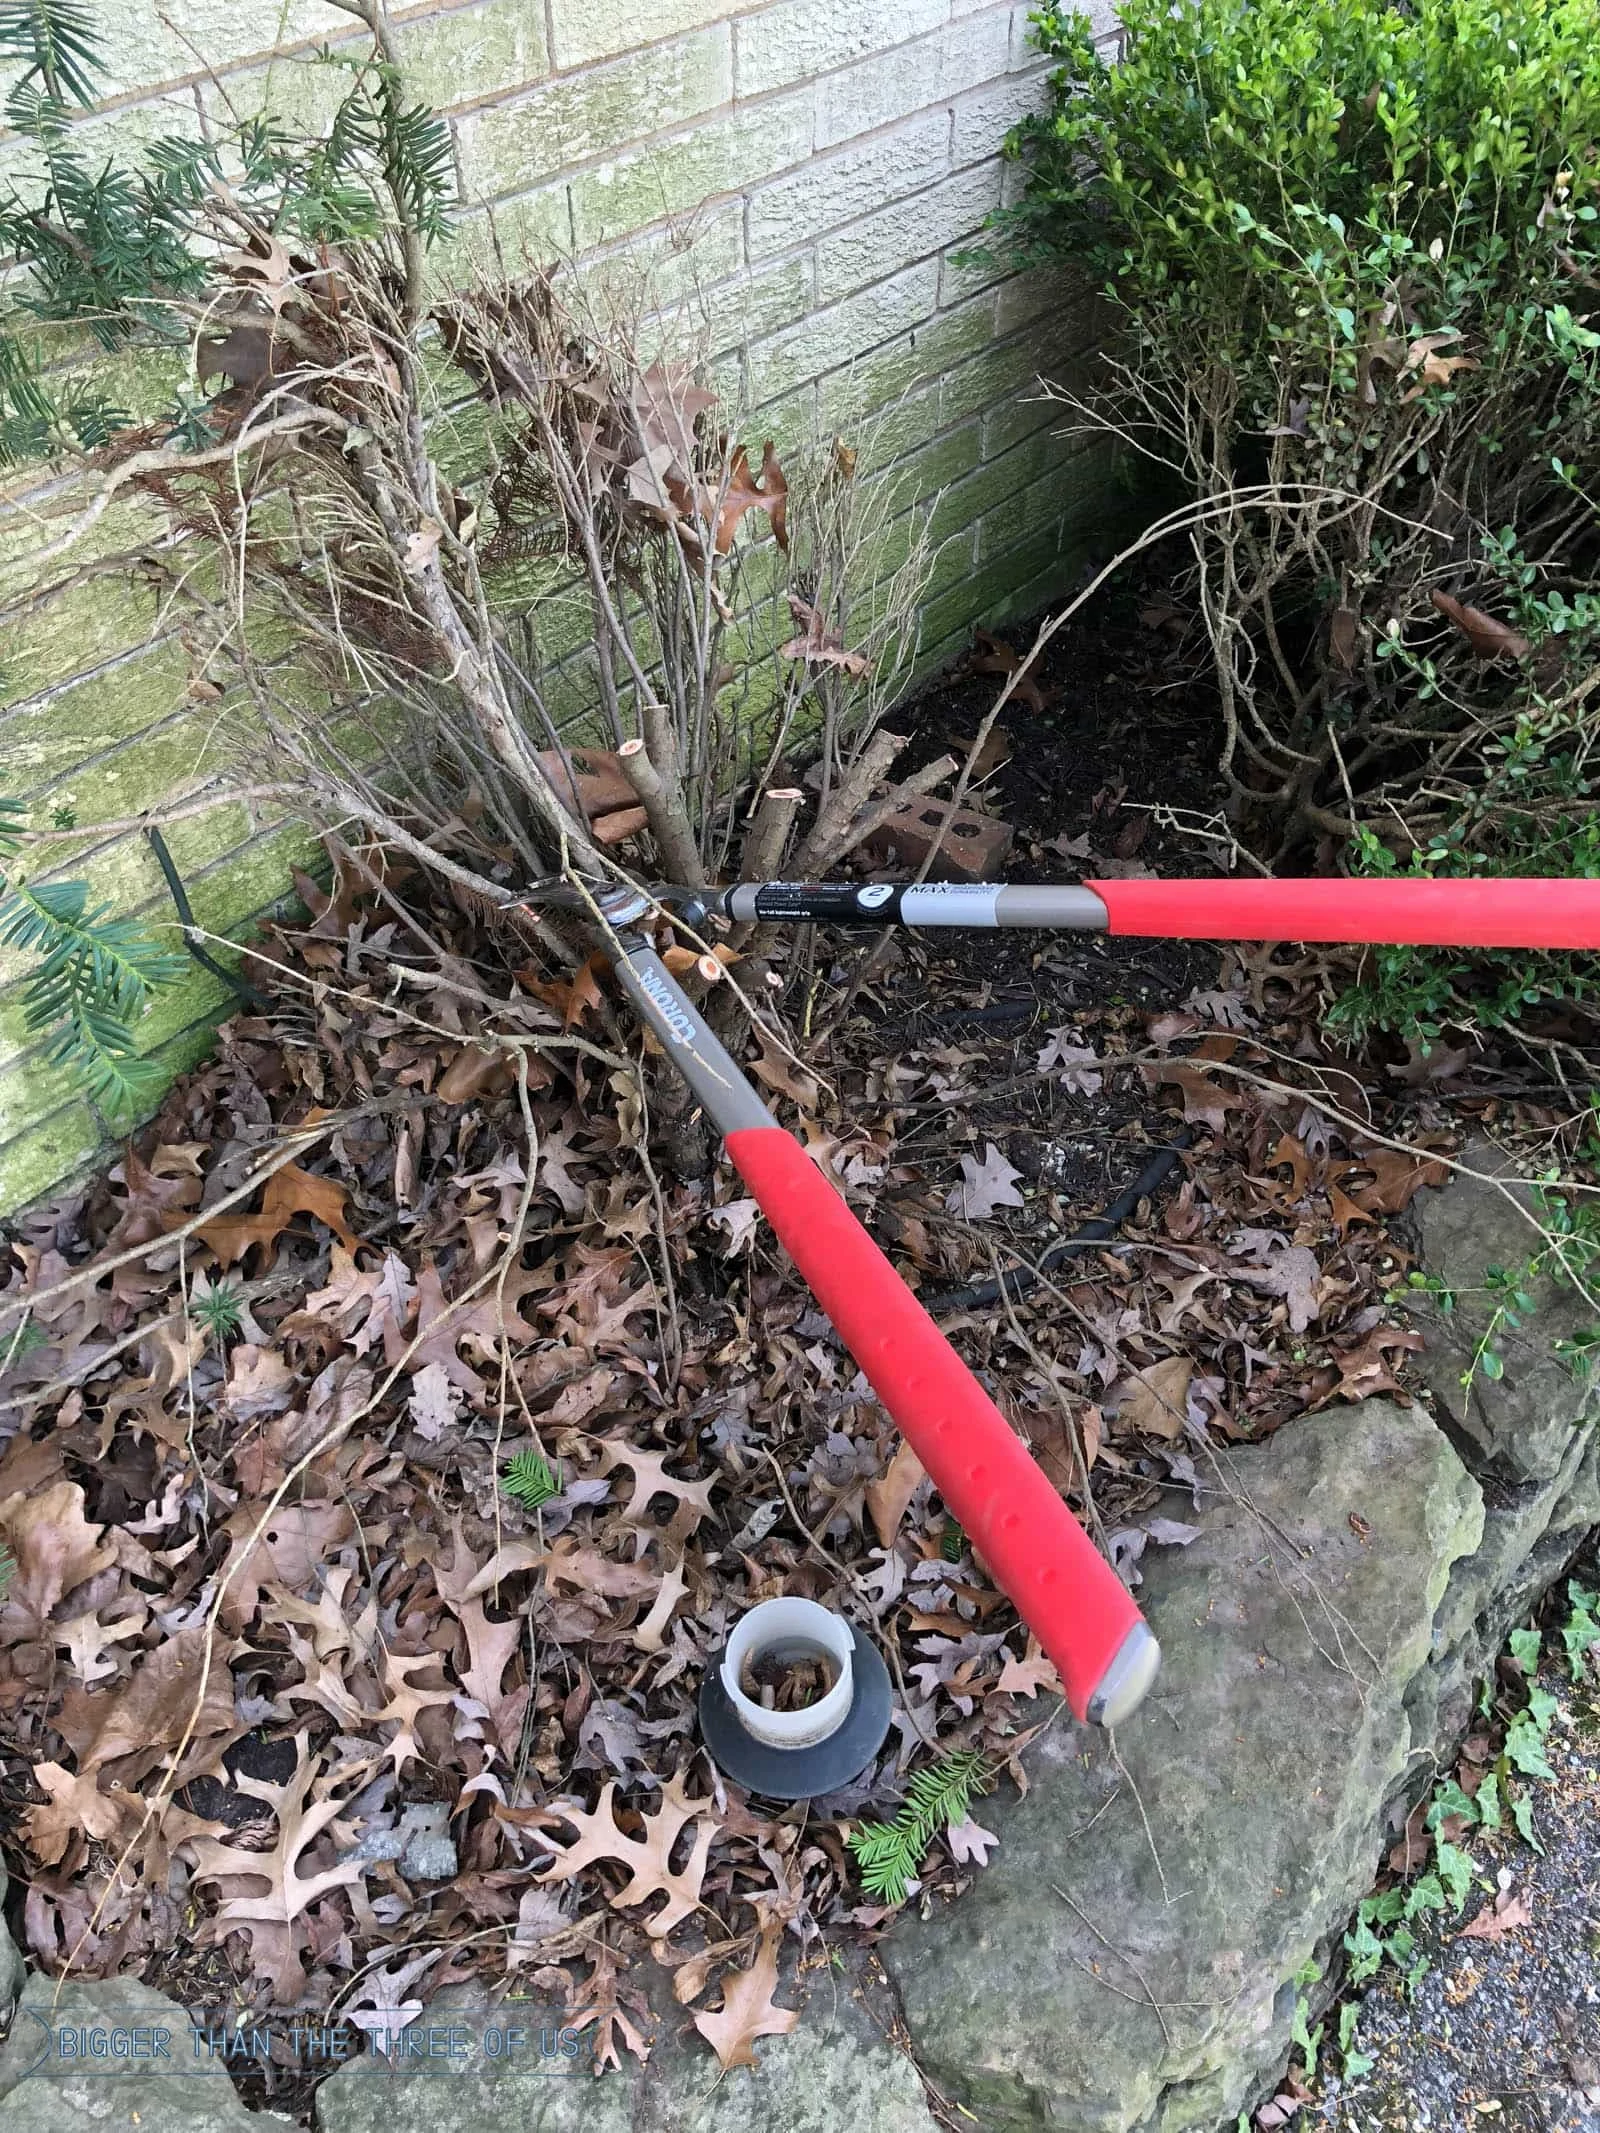
Since the root balls were going to be super hard to get out, I decided that I would just leave them in the landscaping bed and see if the boxwoods would grow back in. IF I knew I was going to do this in the first place, I would have left a bit more to the boxwood instead of trimming the boxwoods way back. It all worked out in the end, but you'll have to read a bit more to see!
Ok, so I decided to leave the four boxwood stumps but pull out the two overgrown (evergreen?) bushes that flanked the sides of the landscaping bed. This is where the 3% of help came in. I couldn't get those out of the soil. Luke came in and saved the day (after his own struggling with them).
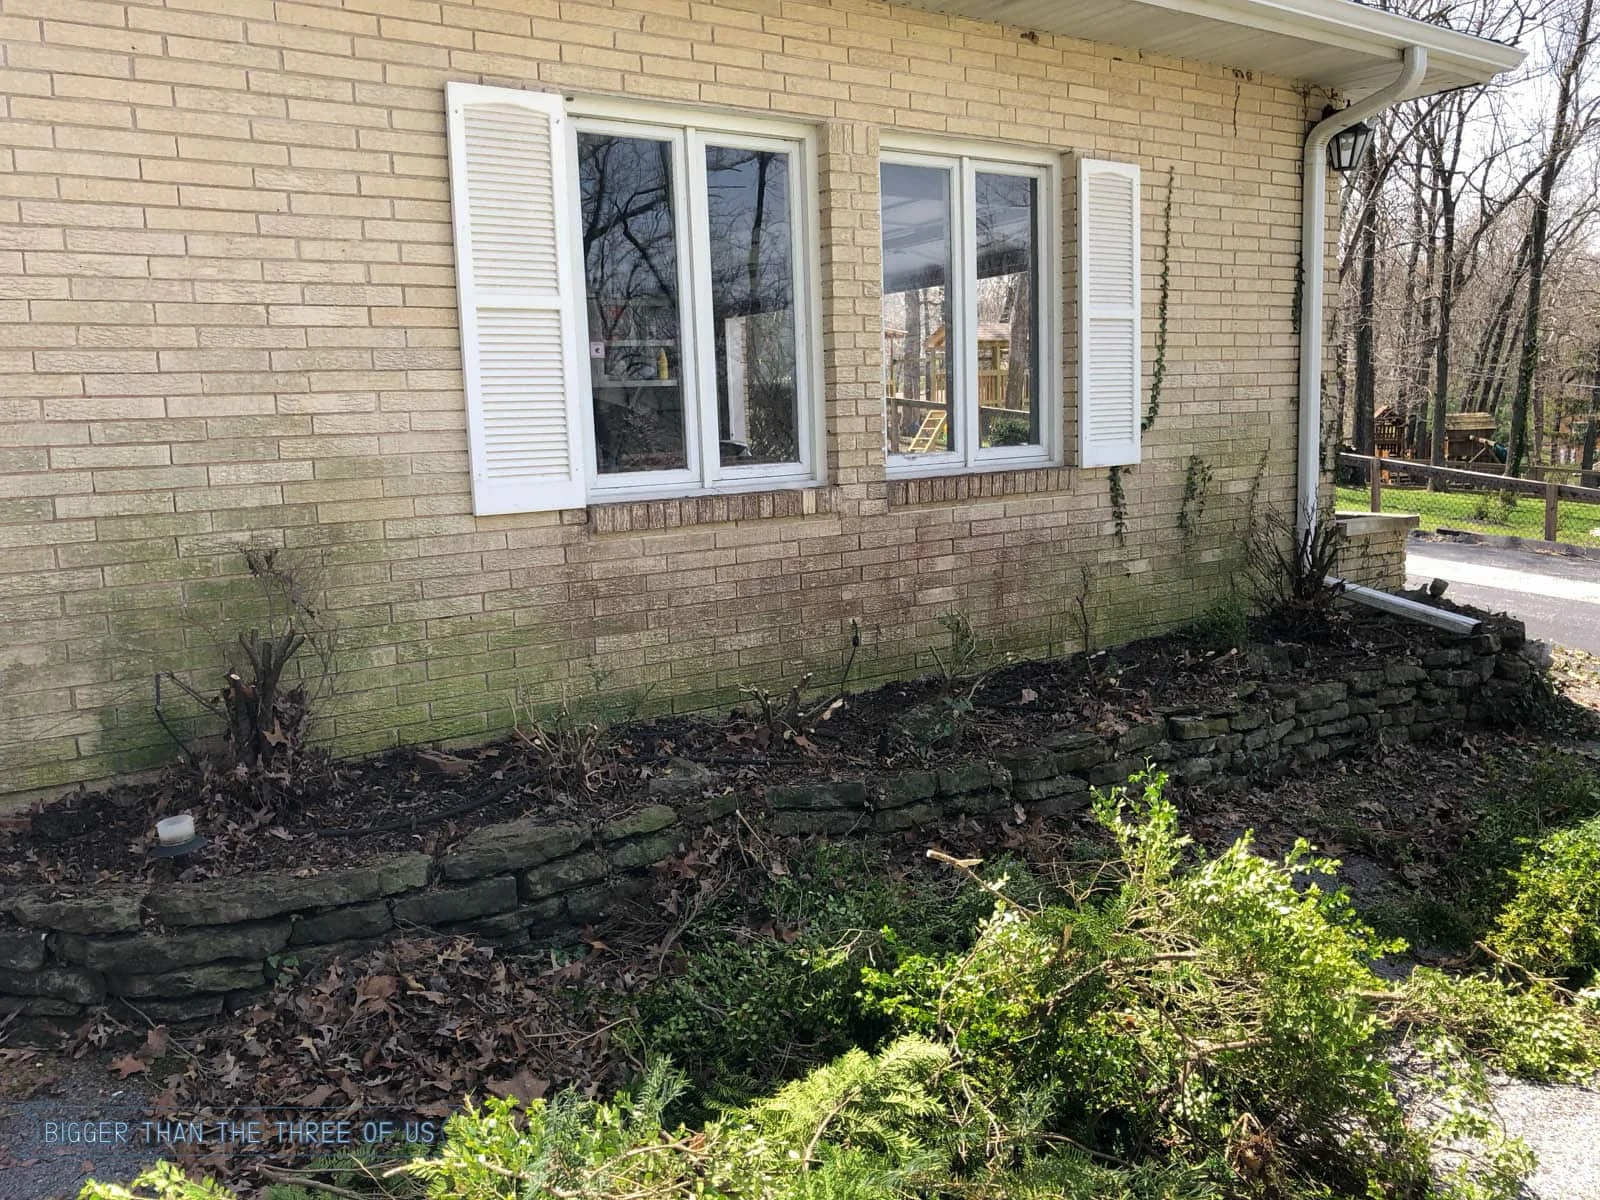
If I'm completely honest, I was scared at this point. It looked much WORSE than it did before I started the project. That's generally how a project goes over here but when all your neighbors can see it, well, it's more intimidating for sure.
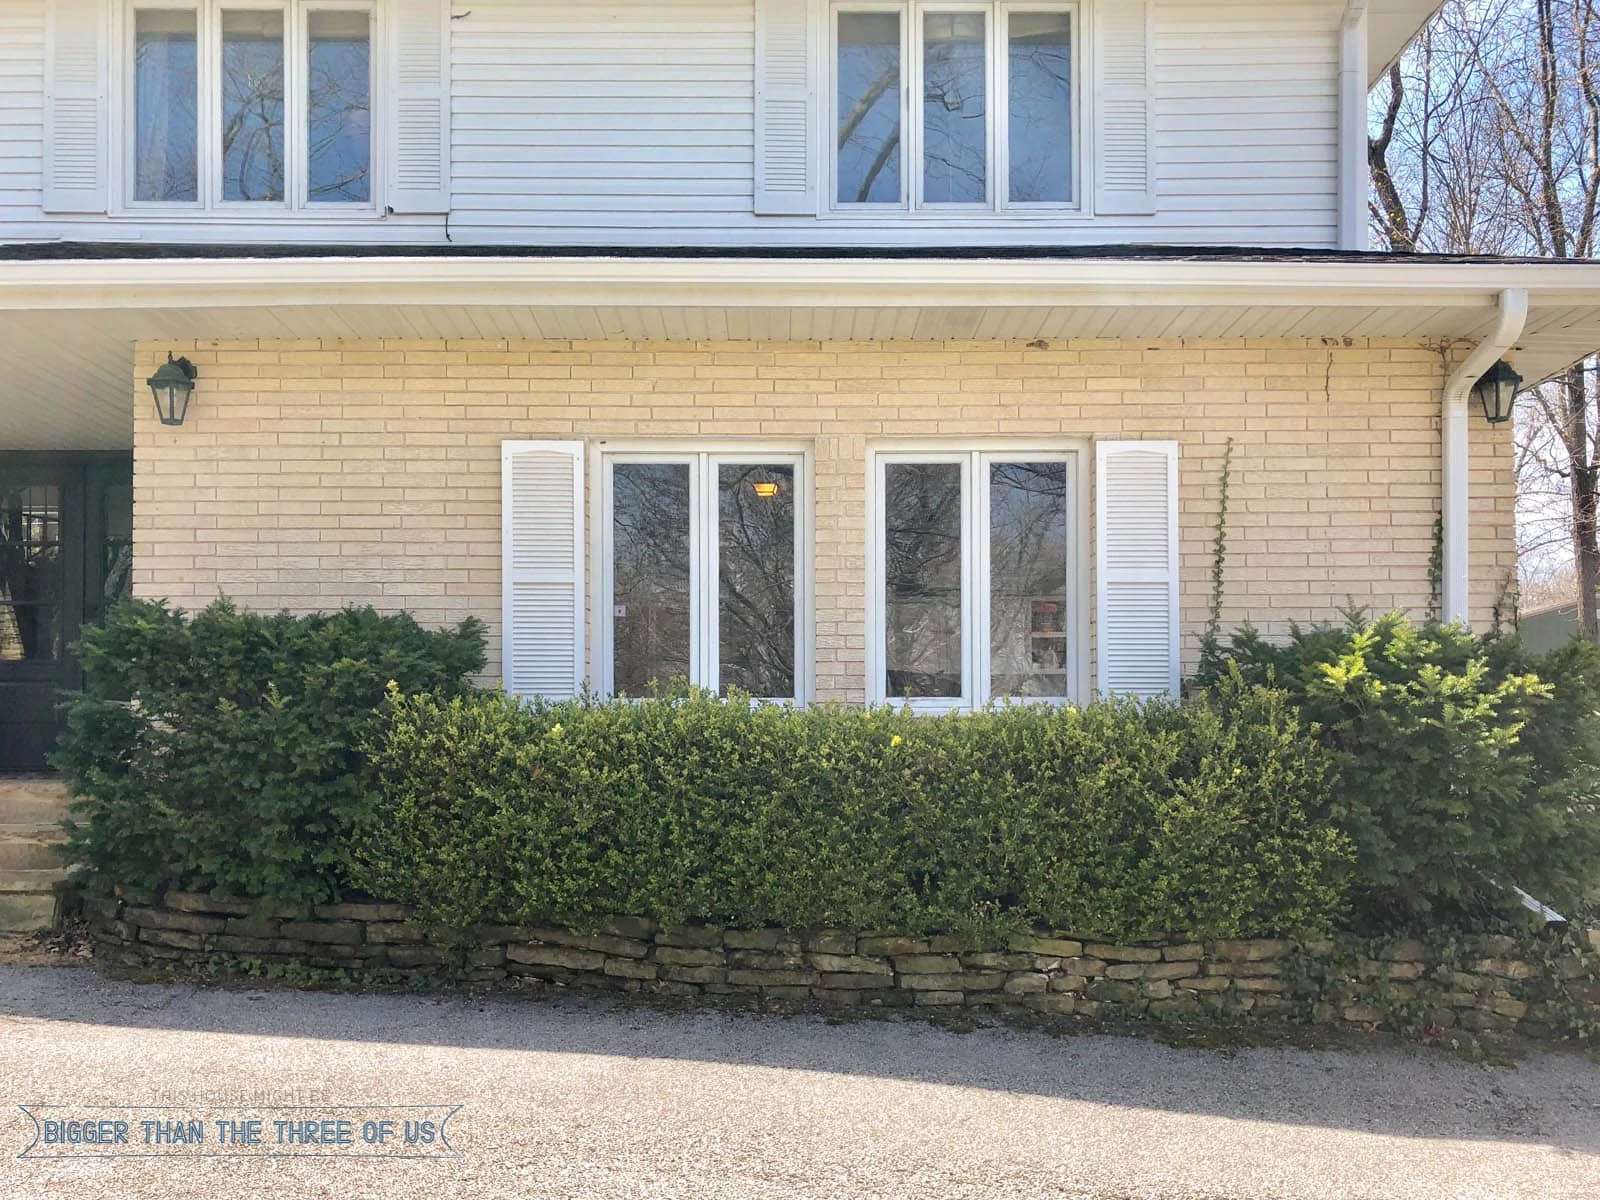
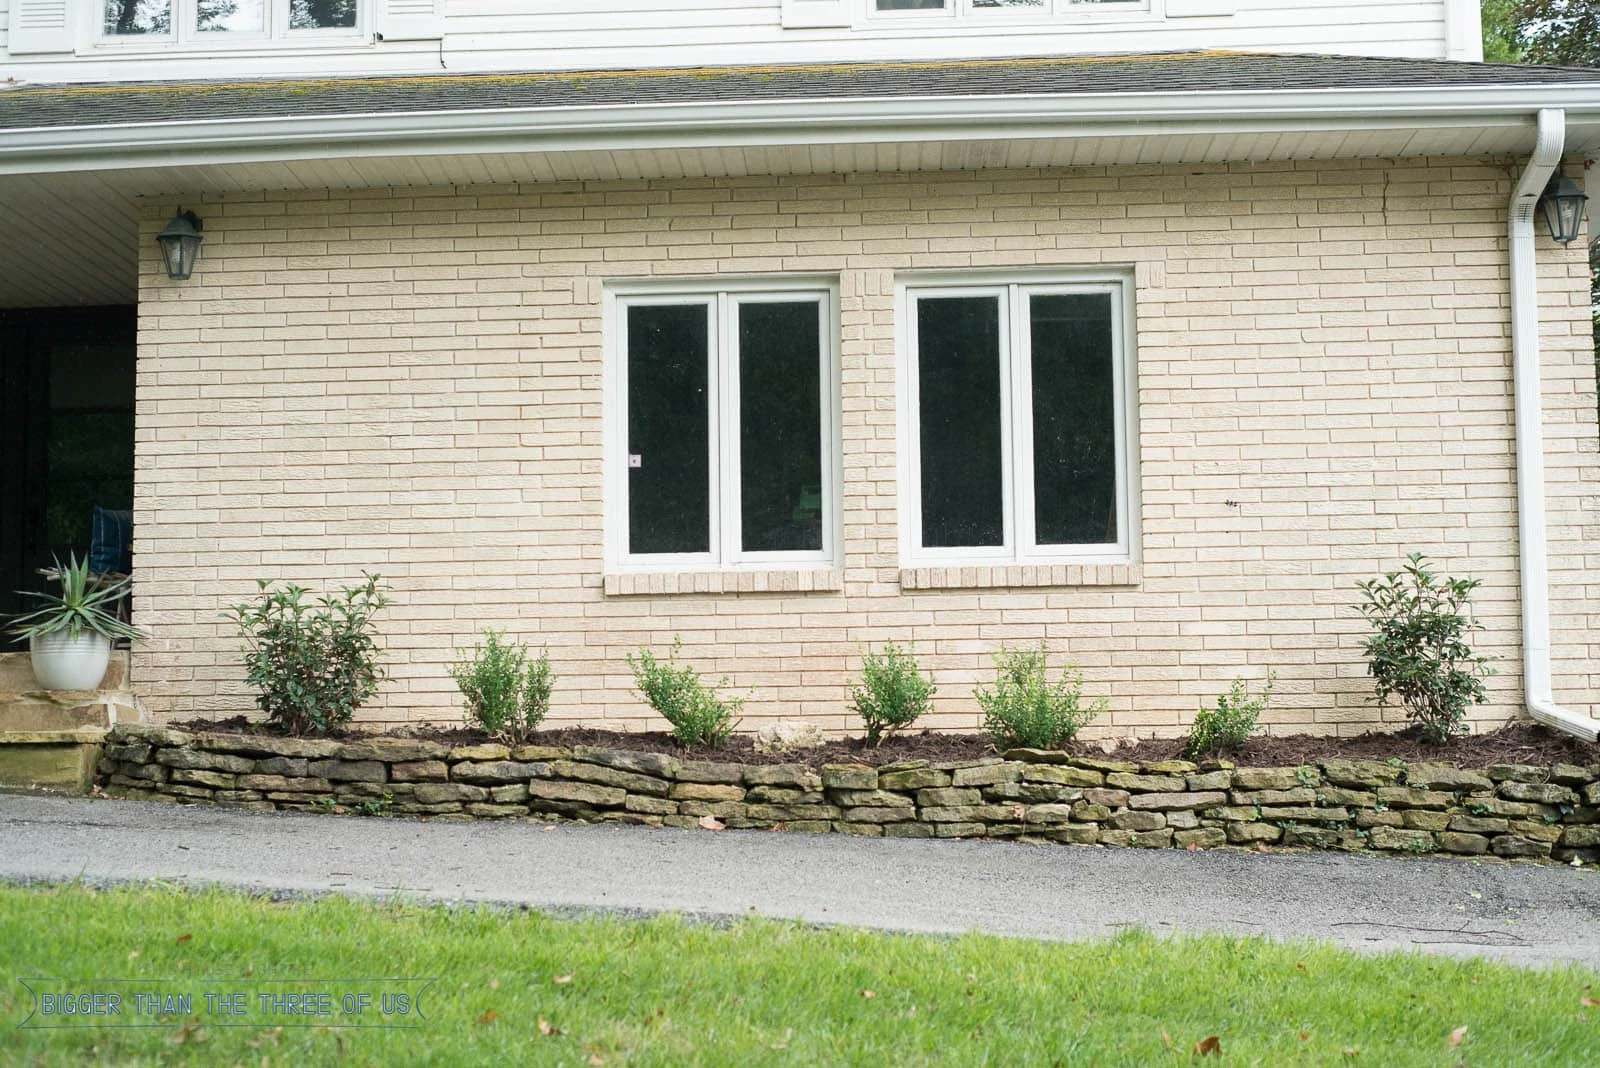
Since the shutters were able to be reached, I did something that I'd been thinking about for awhile and I removed the shutters.
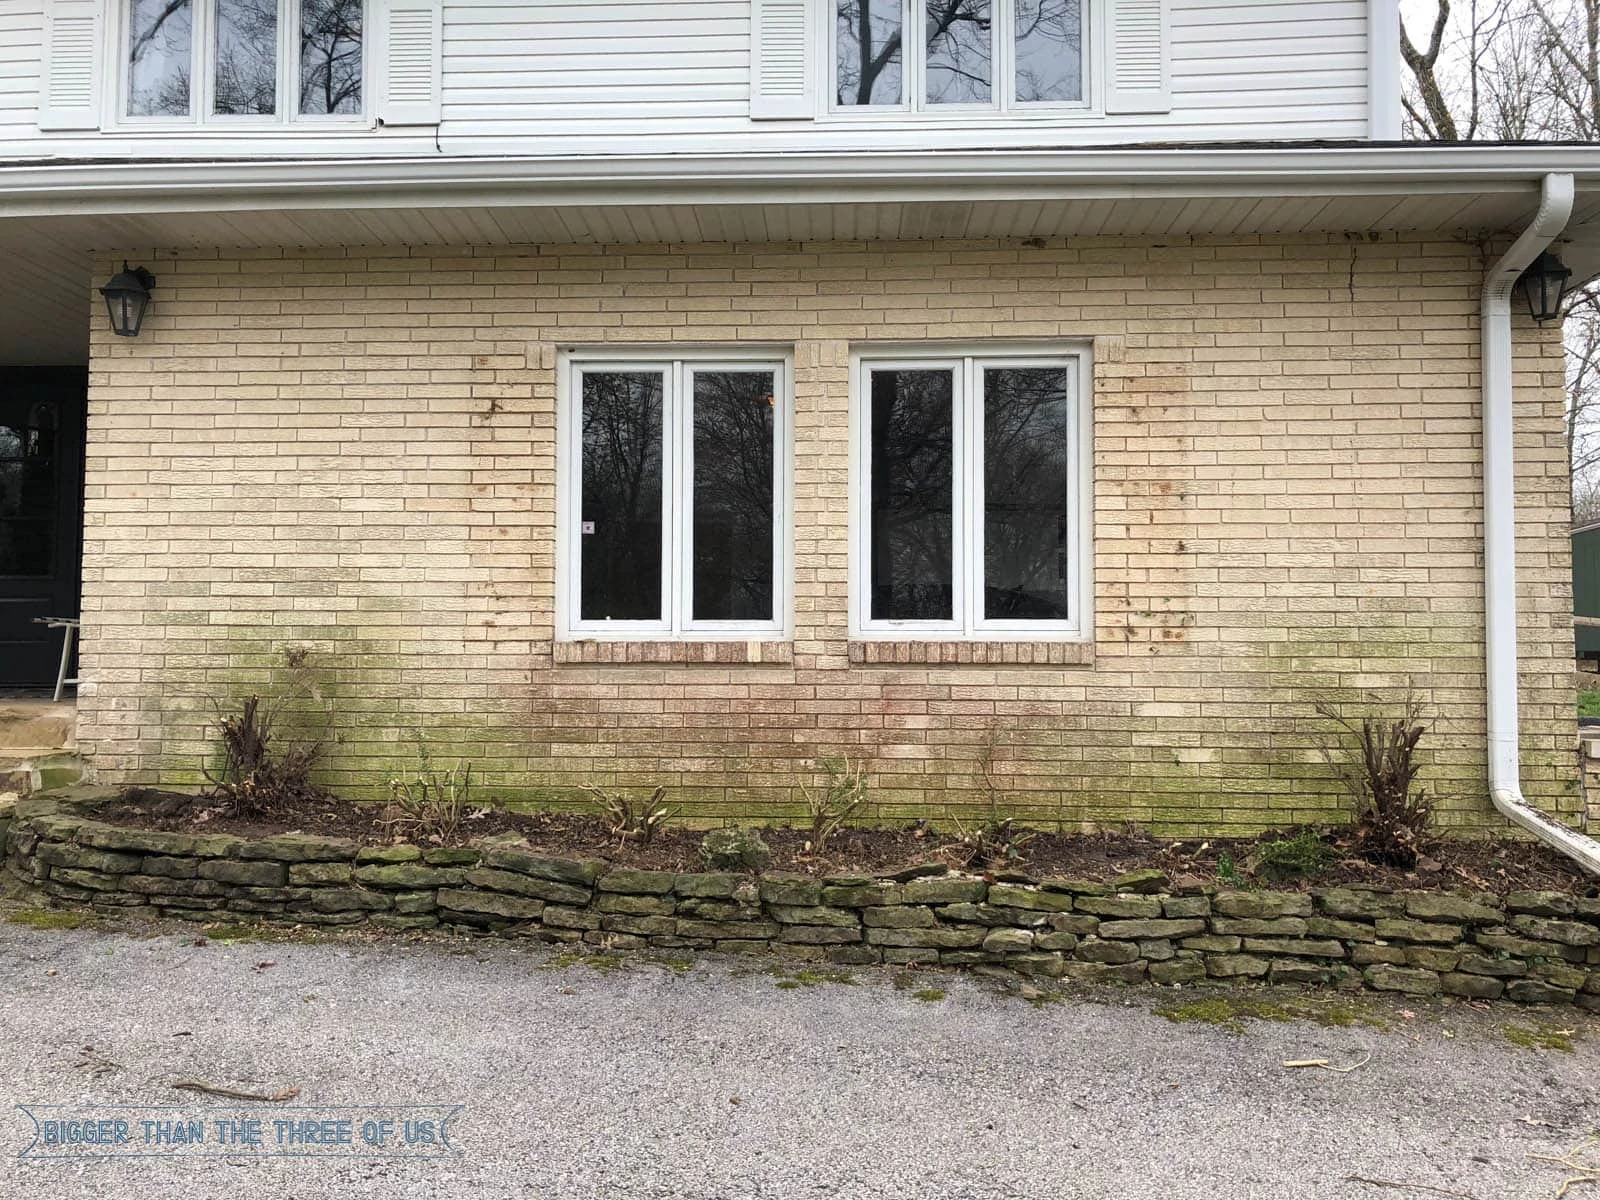
From there, you can see that we needed some major power washing on the brick. I actually love to power wash so that was kinda fun!
It's still a bit wet in these pictures but the brick cleaned up pretty well with the power washing.
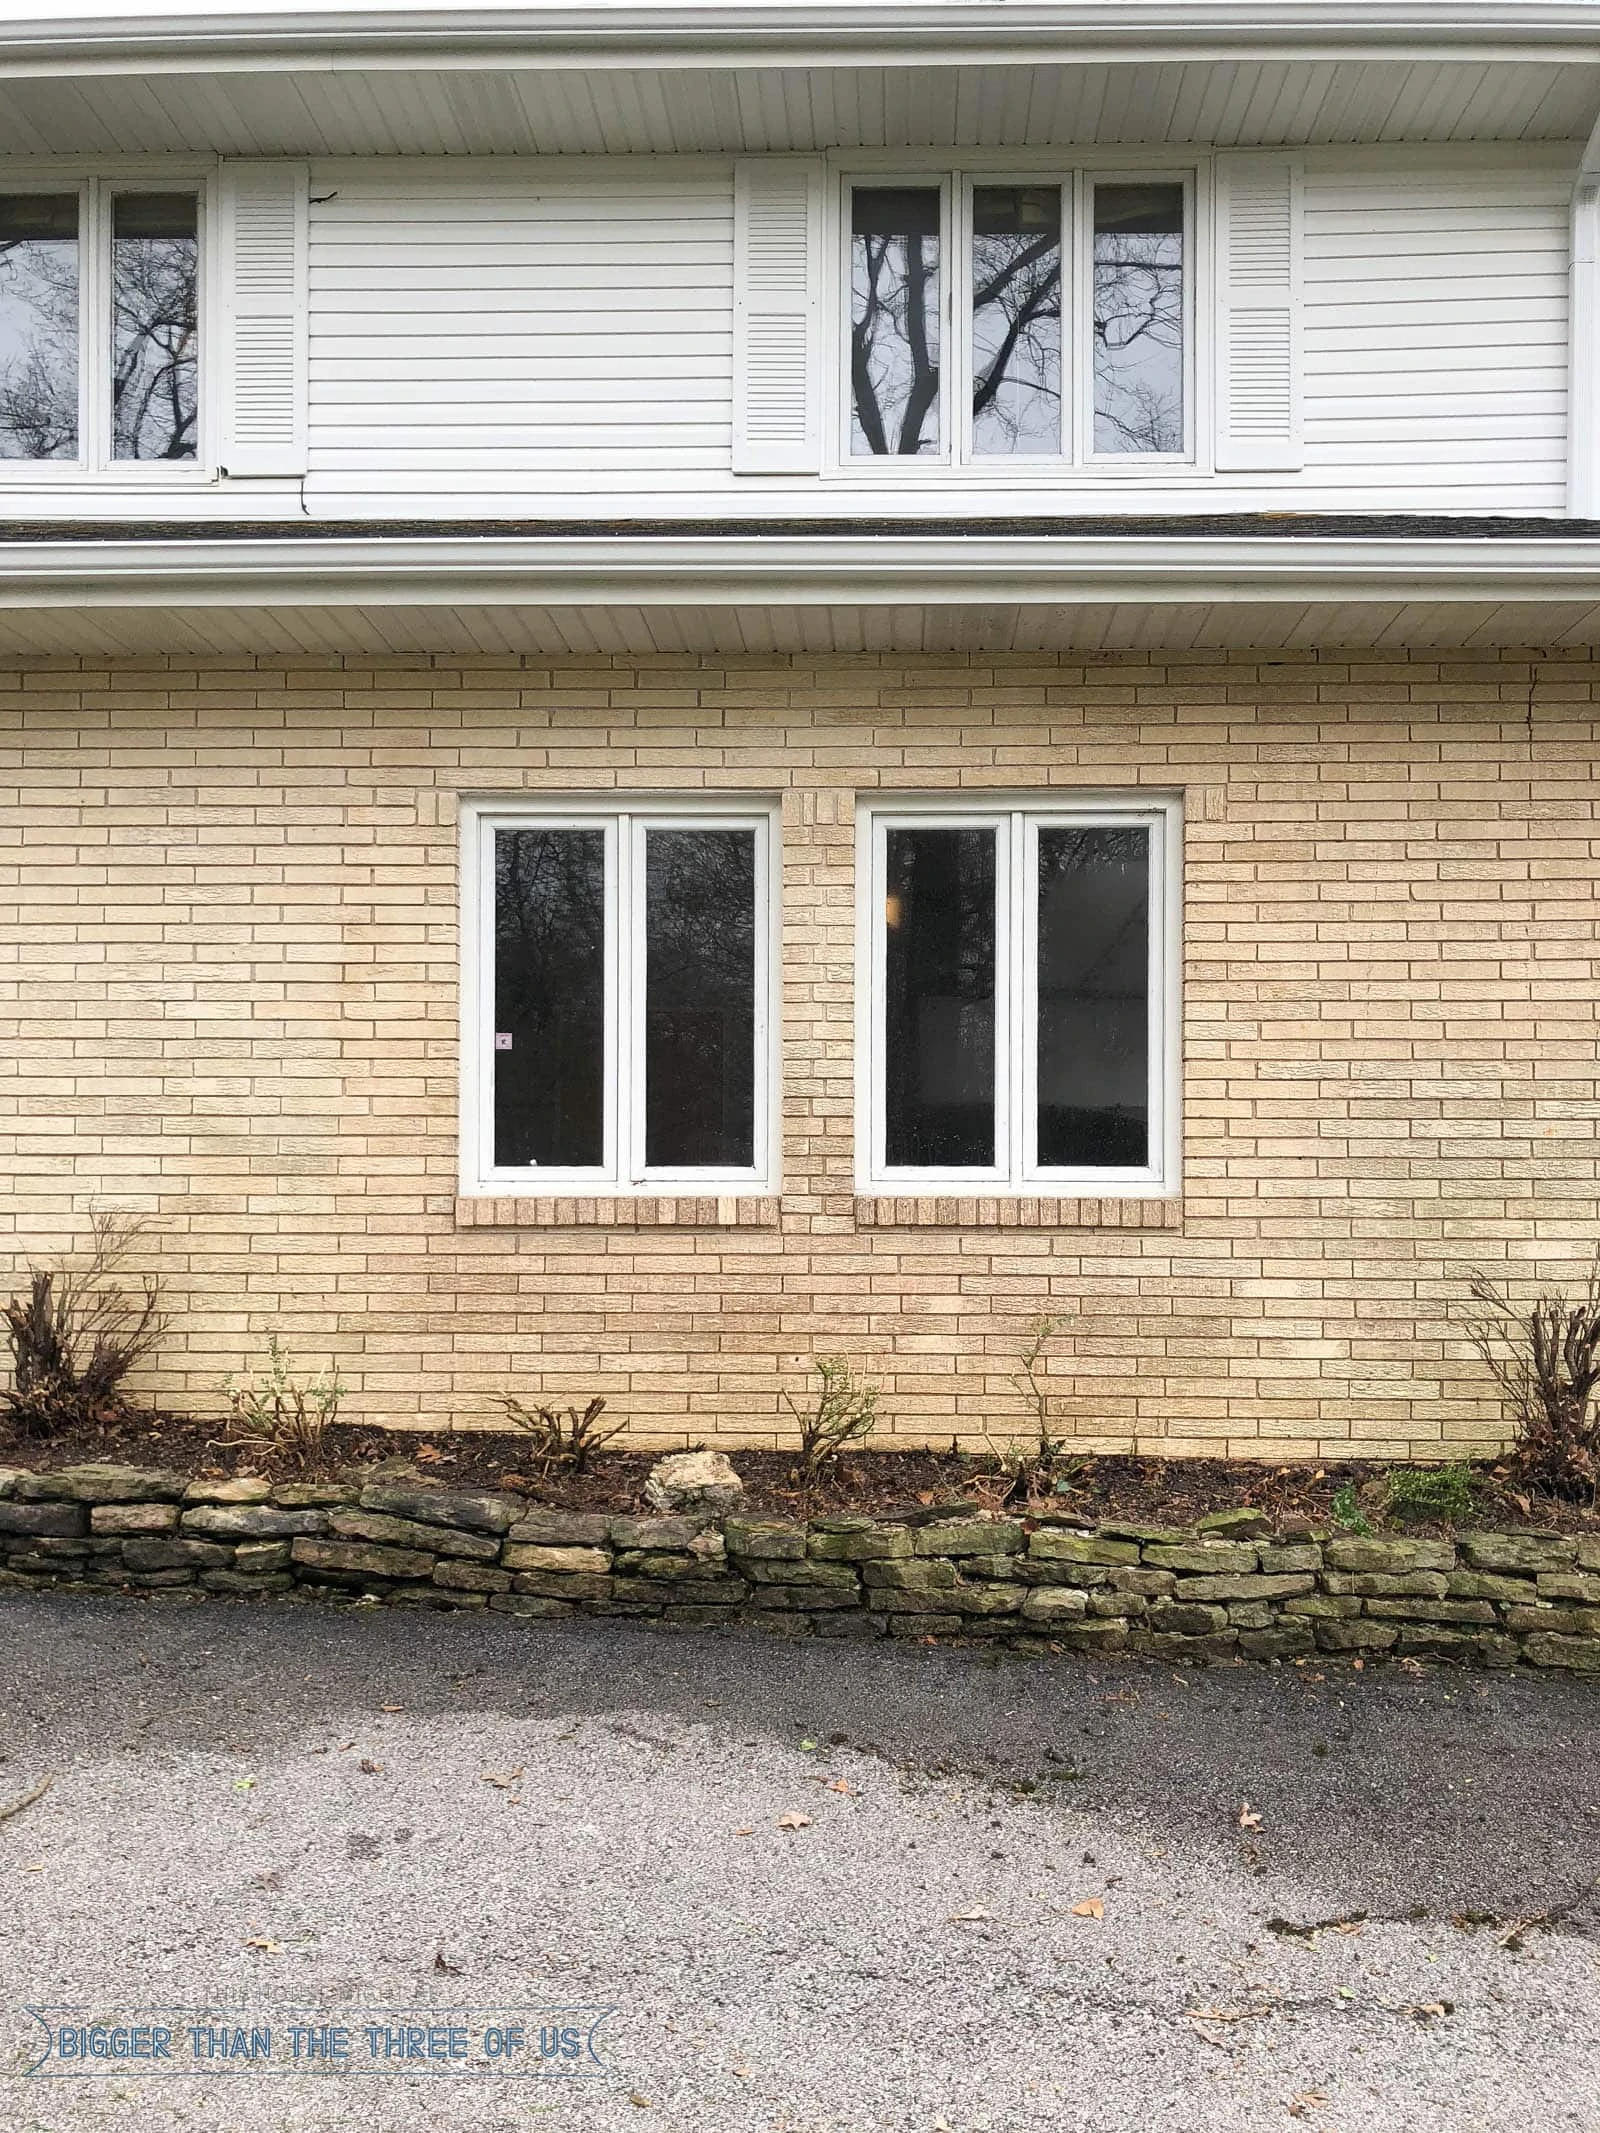
From there, I planted two deer-resistant plants (although I can't remember what they are) on each side of the bed. I also put in three mini-fern-type plants, hoping that they'd survive since that area doesn't get much sun.
We added some mulch and let the plants grow.
As of August, here is where we are:
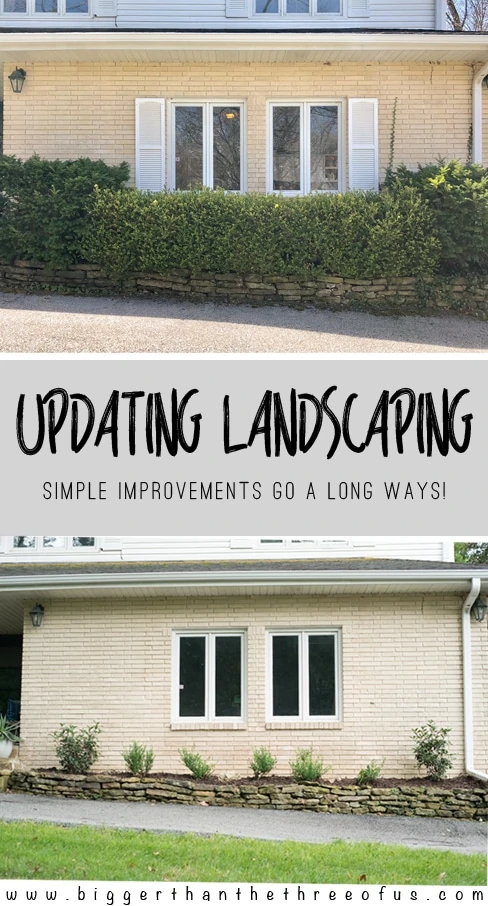
Let me give you a before and after so you can really appreciate how much trimming the boxwoods back helped our curb appeal!
BEFORE: Overgrown Boxwoods
AFTER: Trimmed Landscaping

Gosh, I just love the new change! What do you think about the shutter removal though? I think I like it better, but then again, I don't feel like it's a huge, noticeable change. Thoughts?
If you need a few exterior tools to do a project like this, we love these:
Pin For Later: Trimming back boxwoods & Updating Curb Appeal

Julie
Looks so much better! We had our lawn guy remove our big bushes, he used his truck to pull the roots out. We also planted new boxwoods and white begonias, changed the mulch to black, and put pretty rocks instead of ugly brick around the beds. Made such a huge difference!!! And we repainted our shutters, but honestly if our house looked good without them we would have removed them. I think yours totally does though, midcentury style homes are the best when they have clean lines!!!
Ashley Mayes
Thanks Julie! White begonias sound beautiful!
Create/Enjoy
Looks so great!! Those plants are super cute! I was initially thinking that I like it both ways, shutters or no, but the shutter look is more traditional so you could go more modern if you leave them off. Then I noticed that you didn’t have shutters in between the windows, just the two little ones on the way outsides, so looks even more artificial if you think about it. That’s a tough one!
Ashley Mayes
Thanks Suzannah! I took off the shutters on the side and the other front ones by the brick and I think I like it! The upper shutters will stay on though.
Charlotte
I LOATHE disproportionate shutters so I am SO glad you removed them. I think it looks tons better. And great job on the landscaping. I am always nervous tearing out and starting from scratch, so you inspire me to be more brave. I've been slowly working on our front bed and trying to work with what's there, but it's been annoying me more and more each summer.
Ashley Mayes
Haha! Very strong feelings about those shutters! Thanks girl! Landscaping is so hard and it takes months and months to really see if it's going to turn out. You can do it!
Charlotte
Ha, yeah I think it's those architecture design courses. Professors really had it out for fake architecture. Don't even get me started on on the whole McMansion discussion
Ashley Mayes
LOL!
Ardith
You definitely modernized the look of the house by removing those shutter and clearing out the flower beds. It looks great! And I amazed at how much the power wash transformed the brick. All around I'd say you knocked this exterior project out of the park. Cheers, Ardith
Ashley Mayes
Thanks Ardith! The brick probably had never been washed. I do think the lighting is different in those two photos though - you can kinda tell by the concrete difference. So, the brick is a tad warmer than the AFTER photo looks. Still though, it's a definite improvement!