Sharing about the process of working with Dzinly to get virtual exterior design ideas for my '70s split-level house!
Dzinly is a new home improvement platform that focuses on virtual exterior design, which helps customers visualize what changes they would like on their current exterior.
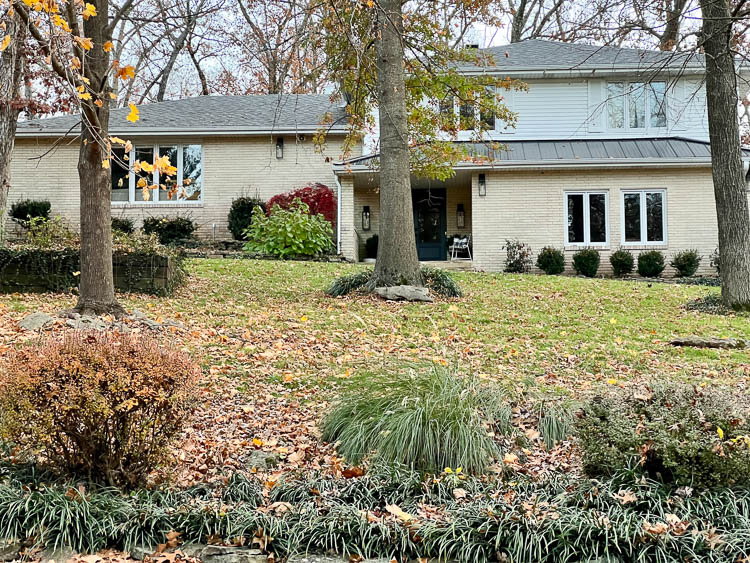
Virtual Exterior Design with Dzinly
This is such a timely episode because, on a previous episode, we chatted about how hard exterior updates are to visualize. We've had a landscape architect come on the show and interior designers but have always felt like there was a major lack of access to help for exterior updates.
A representative of Dzinly contacted me to see if I was interested in doing an interview with their founder for the show. I thought the idea of Dzinly was great but thought you would be more interested in me walking through the Dzinly process in order to review it for you. So, that's what I'm doing. Just to be super honest and forthcoming, I was gifted the experience that Dzinly gives but I'm not getting paid for this review. They have no idea what I'm going to say. This is just my honest review, so here we go!
The Process of Using Dzinly
- Upload a photo of your house (I chose to upload two)
- Specify what types of changes you would be interested in making and/or what you aren't willing to change
- Upload a few inspiration images and share what you love about each of them (my inspiration images all had a common theme - cream houses with metal windows)
- In the comment section, be as specific as you can. I specified that I was willing to paint my brick and change the siding. I wasn't willing to change the roof, front doors or exterior lights. Other than that, I was open to shutters or no shutters.
At this point, Dzinly had three designers create palettes that they thought would work for my house. I believe, at this point, it was just palettes and not a house render that gave me options such as brick colors, siding changes, etc. I was able to choose which palette I liked the best and submitted that palette to be rendered.
Two days later, I was able to log in and see those designs on my actual house. On the website, you also have a few toggle buttons that allow you to toggle between an option or two that might look better. For example, on my design, I was able to toggle between cream brick and a whitewashed brick. I was also able to toggle between black shutters, gray shutters and wood shutters.
Virtual Exterior Design Renderings of my House
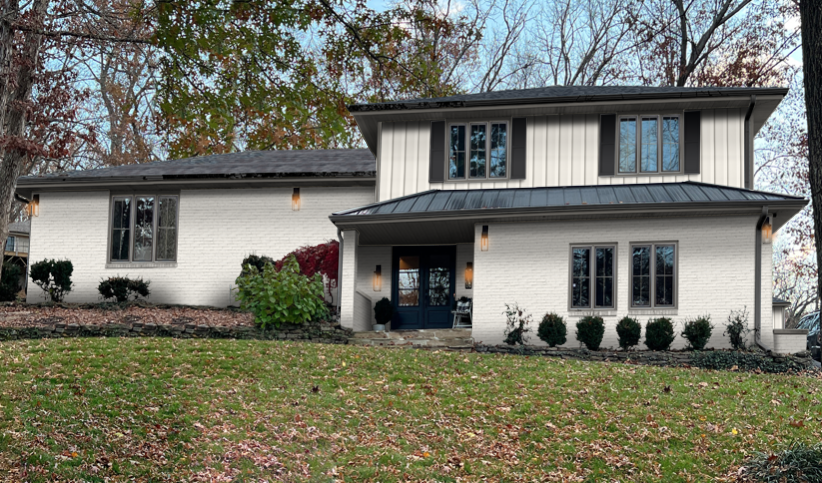
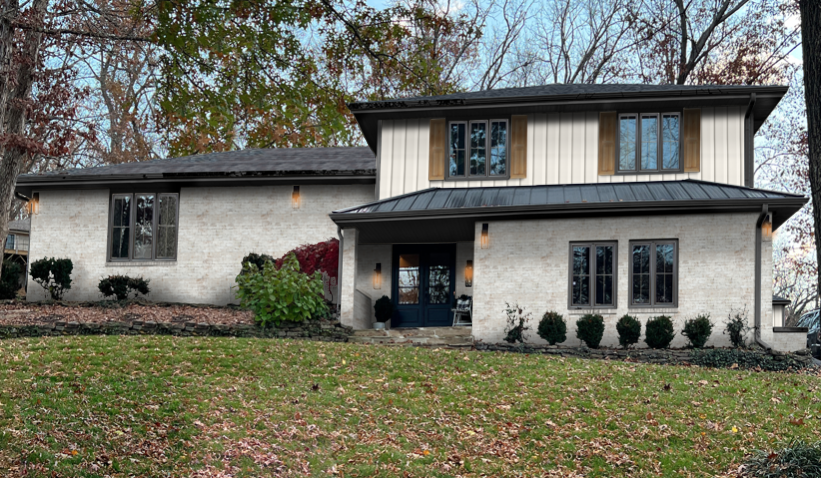
One thing to note, is that each of these rendering options comes with the actual product detail. For example, when I see the cream brick, it's giving me the actual paint color and then actual window brand and type. That takes out the guess work for making the rendering come to life. You know exactly how to replicate the rendering from the product sources.
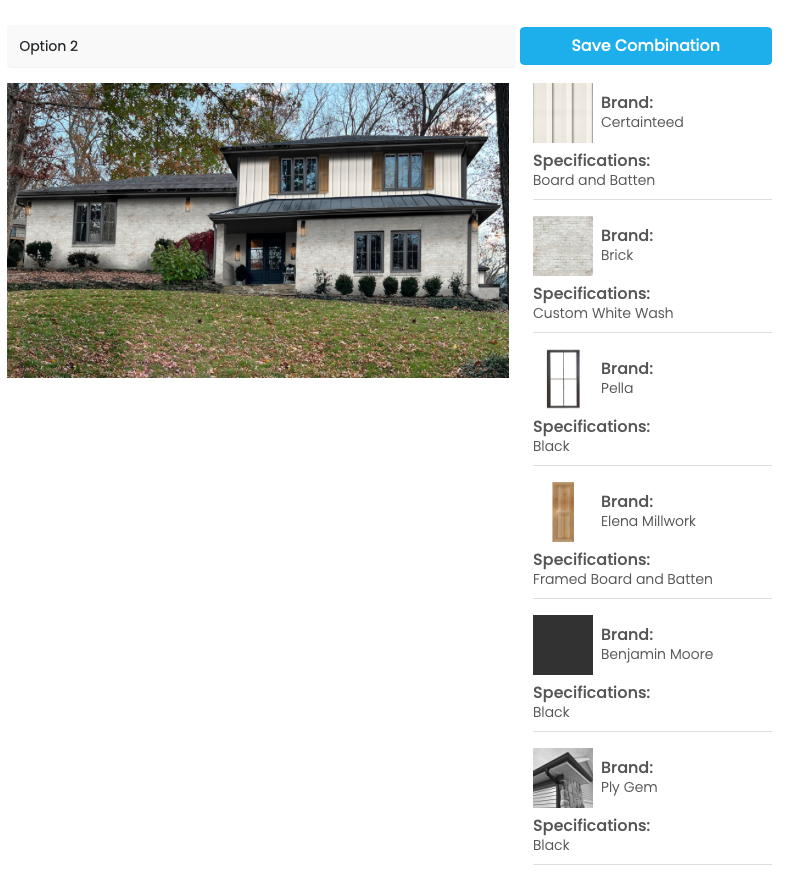
I can color change in Photoshop and do small mockups but this was so much more than that. The rendering is really neat and it's pretty amazing to toggle between a few options to see what my house could actually look like. Plus, having actual colors and brand names is huge!
What does Dzinly cost?
They have two options, a premium and a classic. I did get the premium option at $199. The premium gives you the three designer palettes and some toggle options. The classic is a bit more basic but still gives you a rendering. The classic option might be a good fit if you were just looking for a paint color rendering or something like that.
I think there's a ton of value in the Premium option. I might have gotten a few more toggle options than normal but you can add in more toggles at $5 per toggle item if you want to see what you could do after the rendering.
All in all, I love the price point for the output. If you were thinking about adding a pergola or porch, that can be part of the rending as well.
I love tools that help me make expensive decisions for the future in the planning process and think this one is a great tool for just that; and at a great price point. The one negative thing I would say is that the interface inside the website could use a tiny bit of tweaking. It would be great to be able to save the images of the renderings, but I had to take screenshots to get them. There was also a bit of a hiccup with knowing when the rendering and palettes were ready. It seems like they have this as an automatic process but I didn't get the email in the right order. All in all, those hiccups wouldn't cause me to not use them in the future.
I hope that gives you some insight on Dzinly. Like I mentioned, I went through the process for free but would have been happy paying the premium price for the rendering that I got.



Leave a Reply