

Check out our dry creek bed landscaping using large rocks and mid-sized river rocks on our sloped front yard. Lots of dry creek bed pictures, including before and after, plus pricing for the rock bed, how long it took to install and more!
It's a pinch-me moment over here. After years and years of hating our landscaping down the side of our house and wanting to replace it... we had a slope dry creek bed installed and are so happy with how it turned out!
Dry Creek Bed Landscaping
Our house sits on a hill and we desperately need some front yard landscaping. Where the rock decoration was installed, it is super shady so it's hard to get grass to grow. A past owner of our house had that area very-well manicured, but he/she must have been a master gardener.
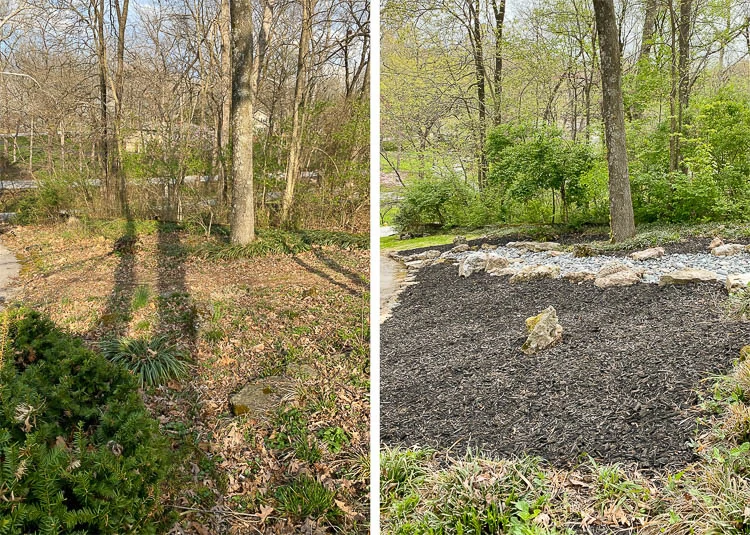
Before, I jump right into all the details, let me show you one before and after photo of the dry creek landscaping area. You'll know better what it looked like before vs. now and some of what I'm trying to share will make more sense.
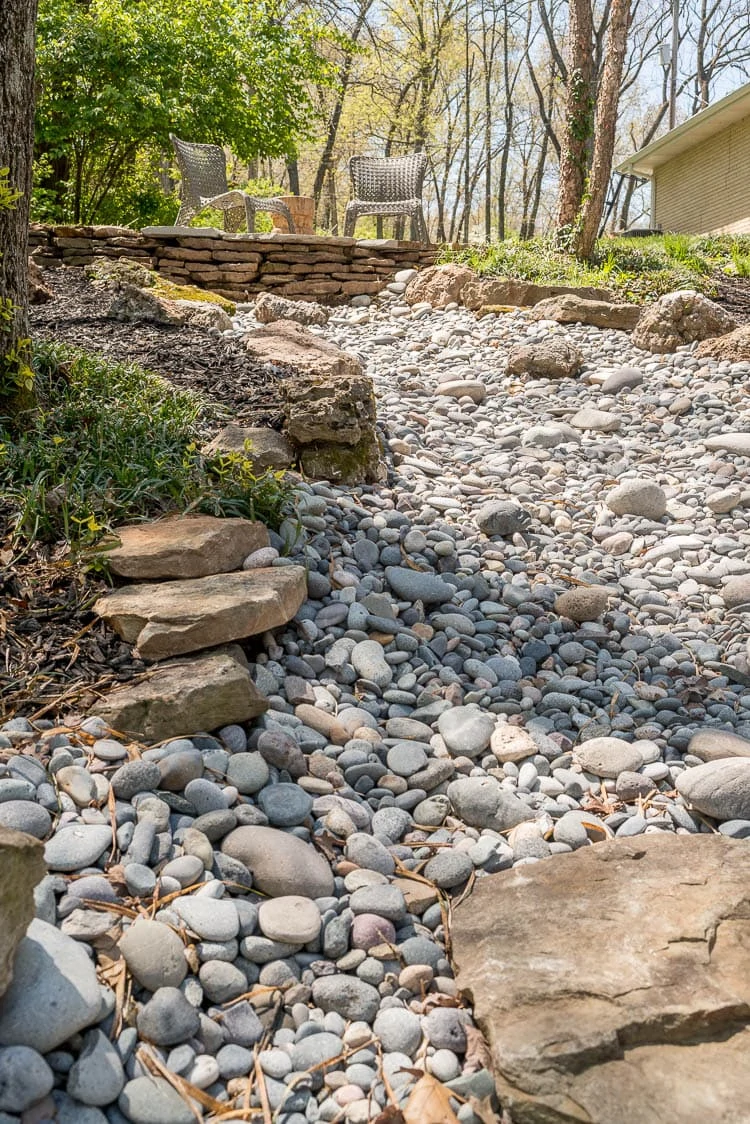
Dry Creek Bed Pictures
Adding river rocks for landscaping in a large bed
We have such a large landscape bed. We've been overwhelmed with the maintenance and care since day one of living here. Over the course of the 7+ years we've lived here, we've done a few landscape improvements to that part of the yard but just haven't been able to keep up with it.
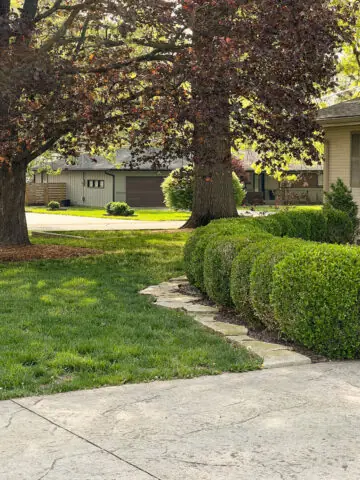
I got the idea to do a front yard dry creek bed landscaping project from a house that's a few miles away from ours. They have a similar sloped front yard and I remember that house before it had all the large river rock brought in. Their slope dry creek bed draws my eye every time I go by and I just knew that it would be the same as our house if we installed one.
I started planning for the front yard dry creek bed landscaping project a few years ago by gathering inspiration and talking to Luke about it. When we had the hardscape contractor build the stacked stone egress window wells for the basement, we decided to have him bid the rock front yard project.

Getting a bid for the river rock landscaping idea
To get started with getting a good bid for the landscape design with rocks, we started the process by talking about what I wanted. I offered to email him inspiration images of exactly what I was looking for after that. I've always loved the look of darker rocks with big boulders so I emailed him a picture of an image of that.
After seeing the inspiration images, we set up a time a few weeks later to meet at the stone quarry to talk about river rock sizing, colors, etc. Before that meeting, I already had scope creep for the project crop up. Friends of ours have this semi-secret patio off the side of their house and I think it's the most charming thing ever. So, I got to thinking about how to get something like that at my house.
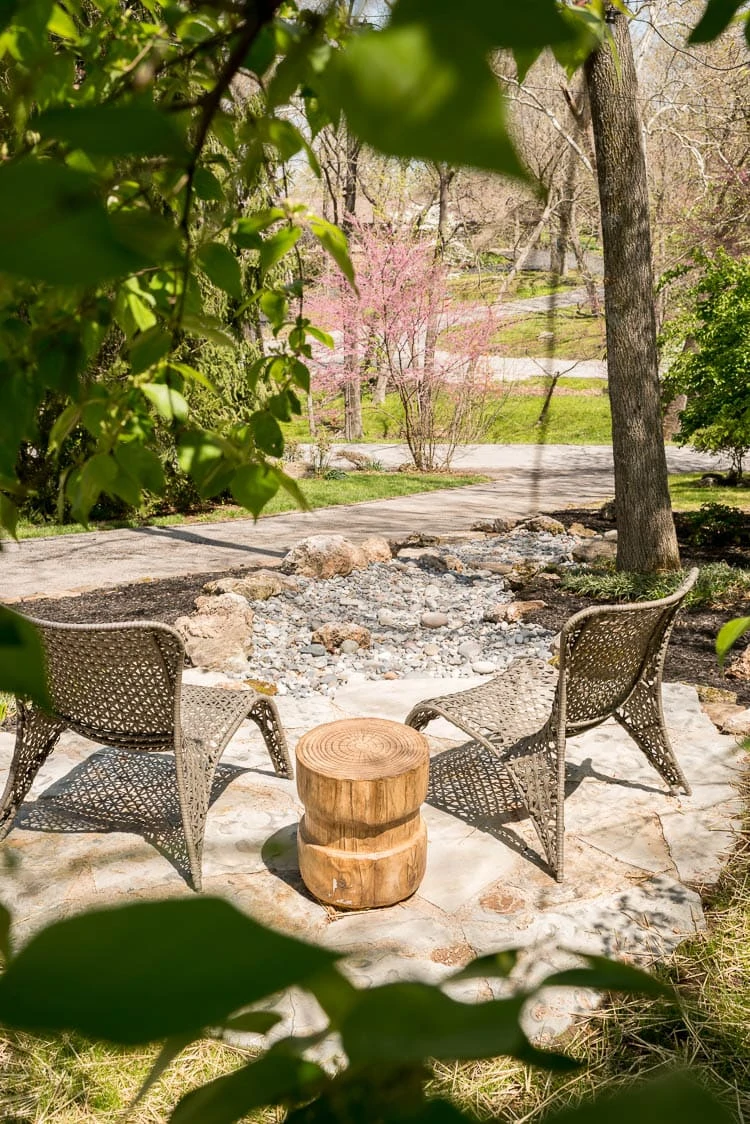
Scope Creep hit with wanting a flagstone patio
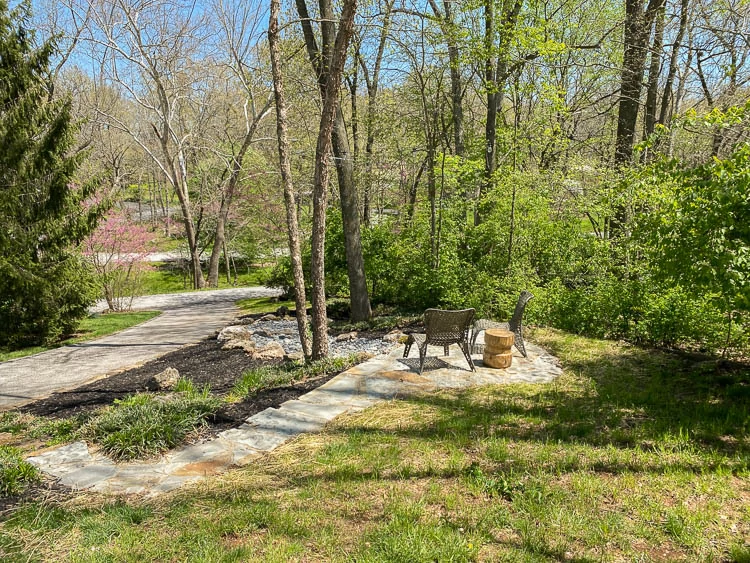
I came upon the idea of having a small flagstone patio installed on top of the rock creek. The placement of the rock landscaping between the flagstone and the dry creek bed seemed ideal for everything to just work together.
Luke wasn't as confident that we'd actually use/love the flagstone patio but he's always game for my ideas (or usually is anyways). So, I called the hardscape contractor back and added the flagstone patio to the landscape plan. I sent him a picture of a stone walkway and small patio to help show what I was looking for in regards to the flagstone seating area.
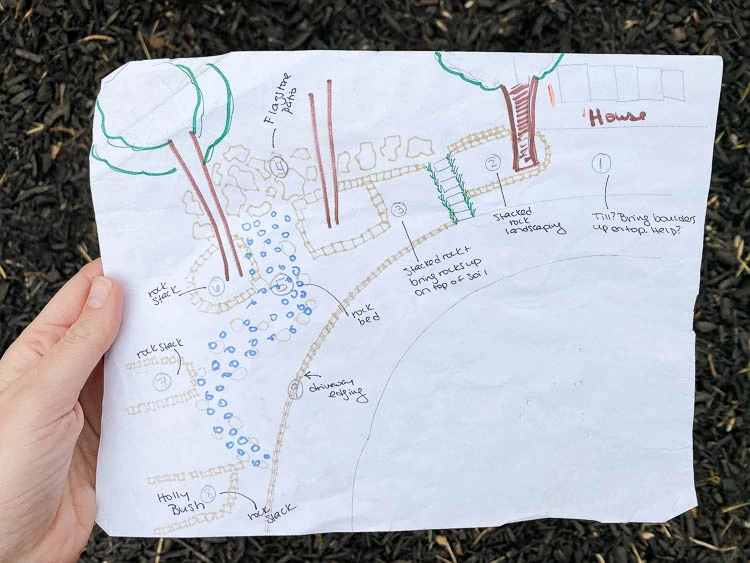
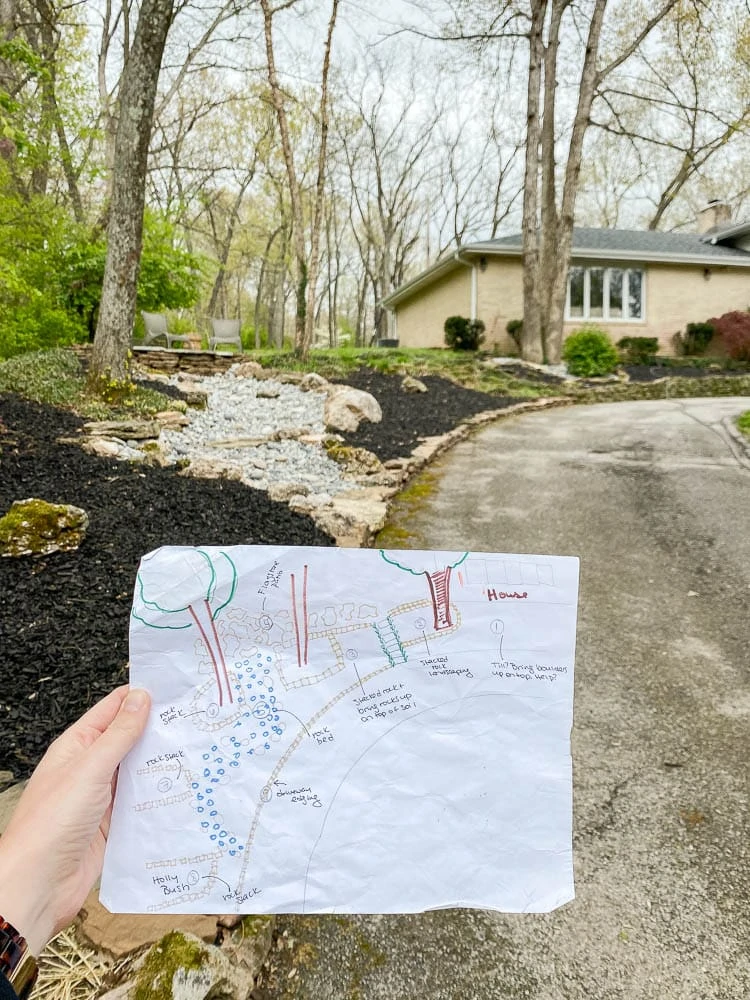
From there, we setup a time to meet at our house to go over everything one more time and he asked me if I could have a hand-drawn hardscape plan to give him.
Hand drawn landscape design plan
I'm HORRIBLE at drawing and felt embarrassed to give this to him (and to share it here) but it was so helpful for our project. I'd recommend you doing something like this too, if you are planning an outdoor landscaping project.
Dry River Bed Landscaping and Flagstone Patio Quote
After meeting at the stone quarry to talk about the boulders, smaller rock, flagstone, etc., I got the quote. The quote for the front yard landscaping idea, which included installing the flagstone patio, the dry creek bed landscaping (large boulders and mid-sized river rocks), cleaning out the landscaping beds, and continuing the stacked river rock down the driveway (including all materials, labor and equipment) was $8,150. We were happy with that quote so we decided to have the work done.
Scope and timeframe to install the front yard dry creek bed landscaping
The project took a full week with at least two people working on it. It's honestly something Luke and I could have never DIY'd.
They brought in big machinery to clean all the large landscape beds out, regraded some of the yard and landscape beds, checked on/repaired French drains, dug out boulders/river rock that we already had that were buried, etc. All of that was just to prepare the space for the new hardscaping.
Each day was something new and it was so good to be at the house while they were working because I made slight tweaks to the plan after seeing each new piece installed.
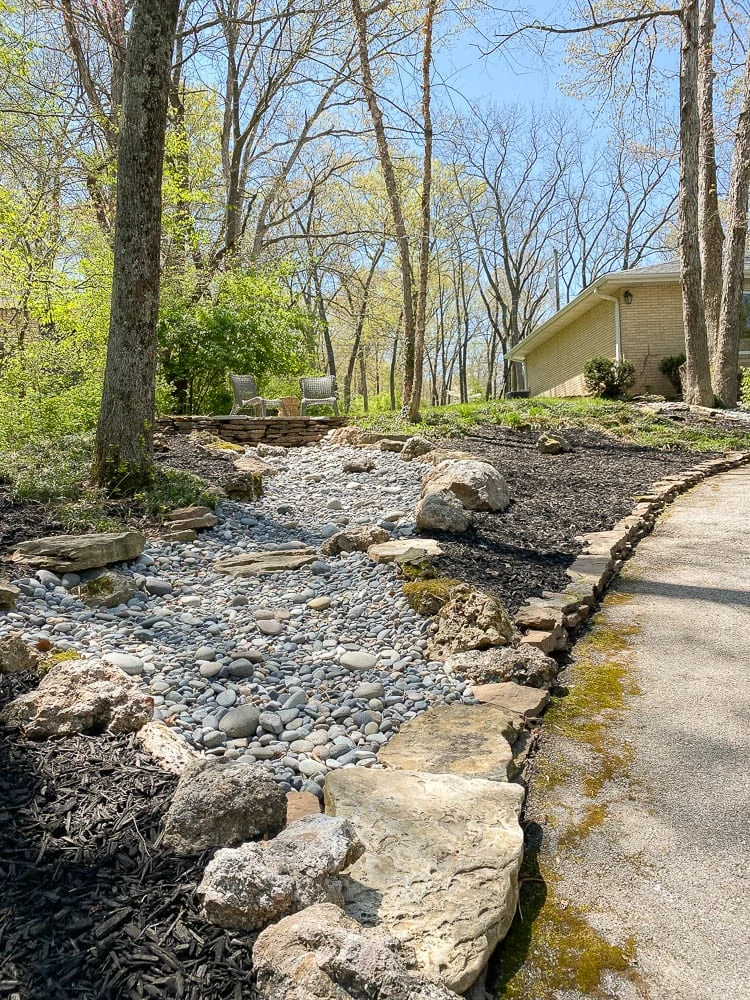
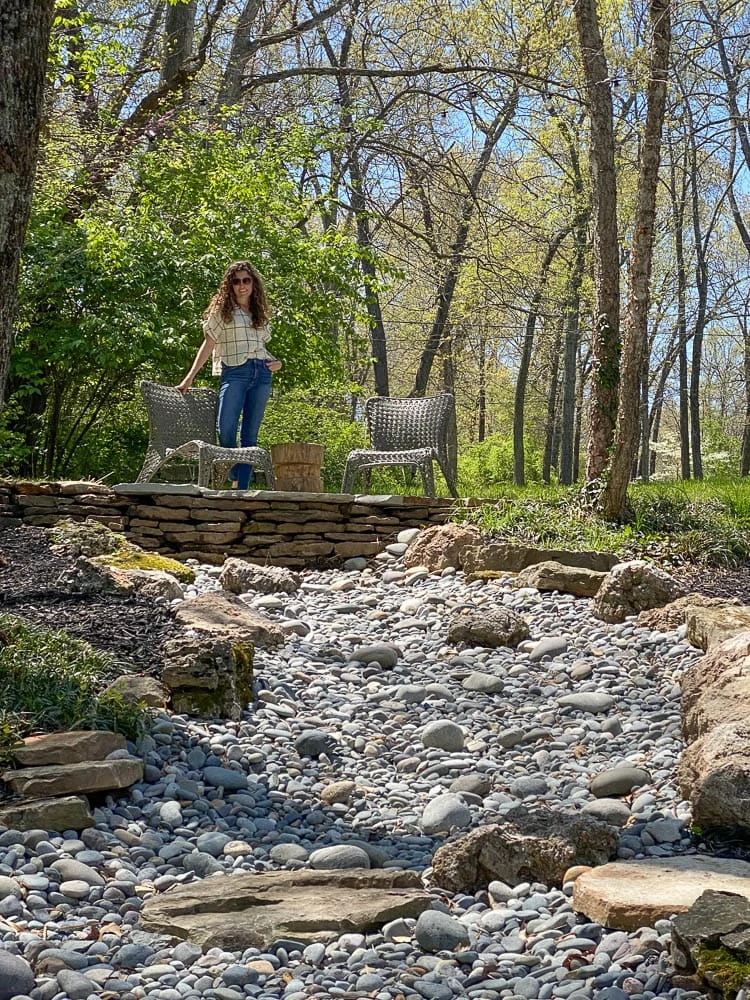
All the added river rock landscaping really transformed the space. I asked that the dry rock creek be installed so it looks like it flows from the flagstone patio and it looks better than I could have even imagined.
I wasn't sure how to end the dry creek bed at first but, ultimately, decided that it would look fine curving towards the driveway. That was also beneficial because we have a french drains that run under the creek bed and so we could hide those by ending the rock landscape at the driveway.
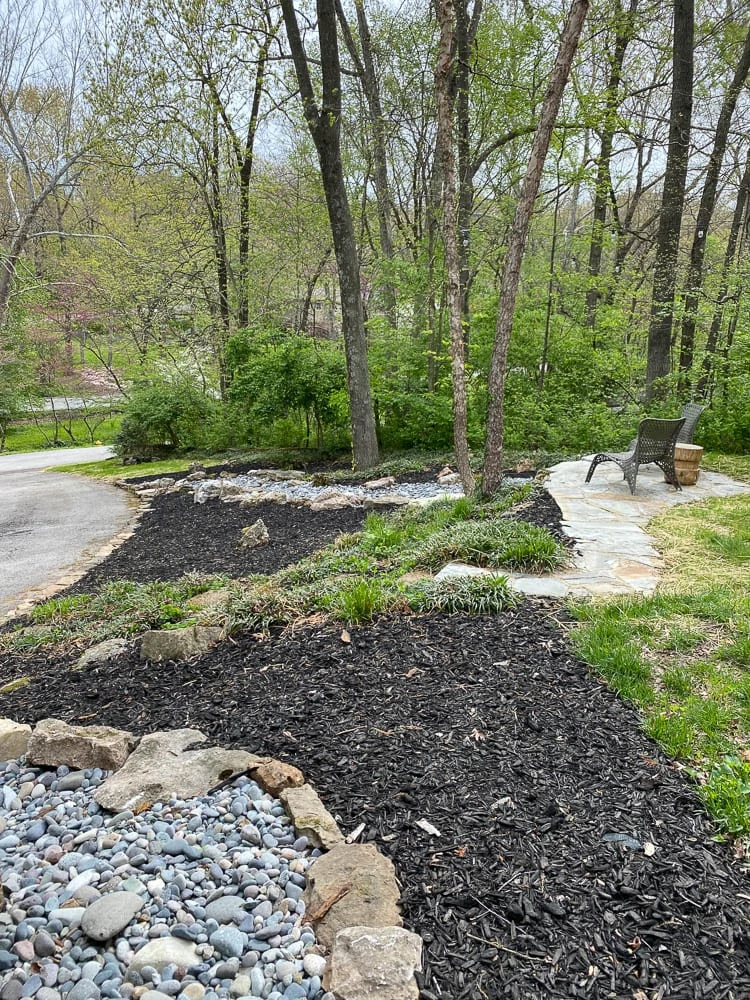
Landscaping with river rock and mulch to complete project
As we were getting closer to completion, I realized that I overlooked a few things for the project. We needed a bunch of mulch (I ended up choosing dark brown/black mulch but here's some red mulch landscaping ideas to consider) to cover the areas that they cleared and grass to be added where we wanted to be able to mow. I also wanted to carry the same river rock stones closer to the house in a bed so that it would give the landscaping beds some continuinity. Those things added on $1,045 to our price.
I know pricing is hard to figure out because it's really hard to tell scale of spaces without seeing them in person. When I say that we have HUGE landscaping beds... trust me on this. They are massive.
Cost of rock landscaping alone?
I was trying to back in to my cost on rock alone for this project and, I think - between rock bed, a few boulders, the landscaped rock bed around the trees and the flagstone patio - we were around $4500 in materials alone (maybe a bit more).
Front yard landscaping idea cost from start to finish
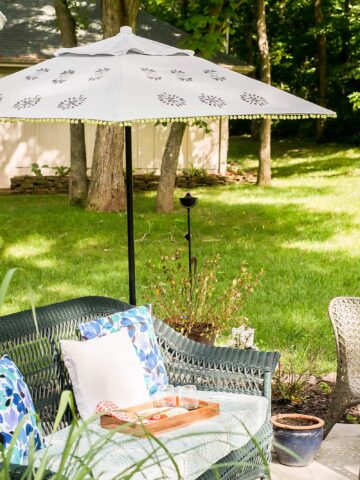
So, from start to finish, the dry creek bed, landscaping and the flagstone patio came to $9,195. I spent another $200 on string lights and a little table (here's a similar one) to go in between our lounge chairs.
We haven't had grass grow in completely, but here's one before/after.
Before and After Rock Creek
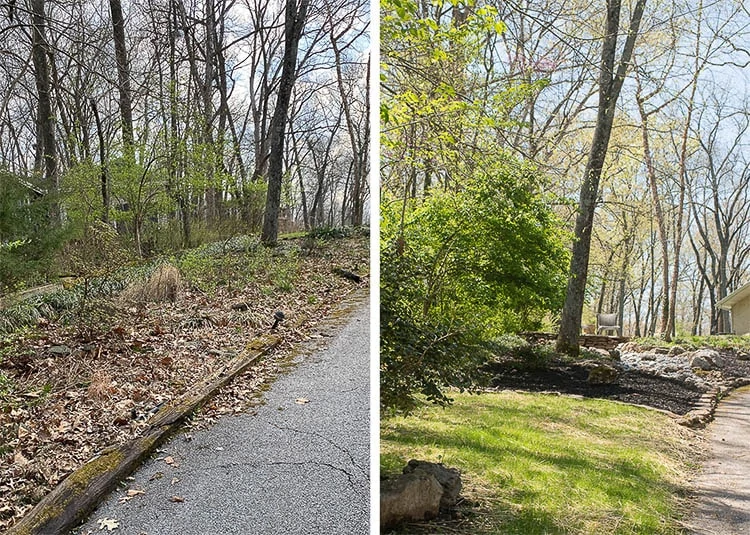
I'm standing about ¼ of the way up on driveway for this shot, so the grass landscaping bed continues on down the circle driveway further.
All in all, we are so happy with this project. As with all projects, I might have tweaked a small thing here or there, but I have no big regrets or wishes. And, the best thing is that we use the patio area almost daily! I just love to sit out there, talk to Luke or Greyson and people and animal watch. It was definitely money well spent!
Next up on the exterior is to add even more river rock front yard landscaping and have our driveway replaced (which is SOOOOO expensive and not a fun way to spend money).
What exterior projects do you have planned this year? If you tell me having your house painted, I'm going to be jealous! =)
Dry Creek Bed Landscaping for Front Yard

Check out our dry creek bed landscaping using large rocks and mid-sized river rocks on our sloped front yard. Lots of dry creek bed pictures, including before and after, plus pricing for the rock bed, how long it took to install and more!
Materials
- Large River Rocks
- Small River Rocks
- Large Boulders
- Landscape barrier material
- Mulch
- Sand
- Flagstone Rocks
- Concrete
- Sand
- French Drain
- Mortar
Tools
- Digger
- Shovels
- Big machinery
- Wheelbarrow
- Gloves
- Stamper
Instructions
- 1. Clear out existing landscaping.
- 2. Level areas that need leveling.
- 3. Build up area for flagstone patio.
- 4. Lay flagstone patio.
- 5. Bring large boulder rocks in to create the outline for the dry creek bed.
- 6. Fill the edges of the dry creek bed with mid-sized rocks.
- 7. Bring river rock in for the base of the dry creek.
- 8. Bring a few large boulders and mid-sized rocks in for the base of the dry creek and position for natural look.
- 9. Edge and line driveway with rock stacks, mortaring in between rocks for stability.
- 10. Add landscape barrier around trees where rocks aren't placed.
- 11. Top landscape barrier with mulch around the trees and any remaining unlandscaped area.
Notes
HAND DRAWN LANDSCAPE DESIGN PLAN
I’m HORRIBLE at drawing and felt embarrassed to do this (and to share it here) but it was so helpful for our project. I’d recommend you doing something like this too, if you are planning an outdoor landscaping project.
SCOPE CREEP HIT WITH WANTING A FLAGSTONE PATIO
I came across the idea of having a small flagstone patio installed on top of the rock creek. The placement of the rock landscaping between the flagstone and the dry creek bed seemed ideal for everything to just work together.
SCOPE AND TIMEFRAME TO INSTALL THE FRONT YARD DRY CREEK BED LANDSCAPING
The project took a full week with at least two people working on it. It’s honestly something Luke and I could never have DIY’d.
COST OF ROCK LANDSCAPING ALONE?
I was trying to back in to my cost on rock alone for this project and, I think – between rock bed, a few boulders, the landscaped rock bed around the trees and the flagstone patio – we were around $4,500 in materials alone (maybe a bit more).
FRONT YARD LANDSCAPING IDEA COST FROM START TO FINISH
So, from start to finish, the dry creek bed, landscaping and the flagstone patio came to $9,195.

Lynn Spencer
Ashley,
I have Dry Creek bed envy! It looks fantastic and you are going to love that little patio. Enjoy the Spring and Summer out there!
Ashley Mayes
haha, thanks Lynn! It feels like a little private oasis. =)
Dorth
I am so impressed. But the cost - wow!
Ashley Mayes
Thank you! Yes, the cost is a lot! We knew that it would be expensive because of the size of the yard so keep that in mind. But, anytime, you are using more expensive materials... that cost just goes up.
Karen
Where did you get your cute chairs, the area is beautiful!
Ashley Mayes
Hi Karen,
Thank you! We got the chairs about 6 years ago at Lowe's and I wish I could rebuy them. They aren't offered any longer but if I ever find a good look-a-like, I will share.
Patricia A Morgan
I have a natural slipped backyard and everytime it rains a river runs through it down to our pond. I'm thinking with just a little digging and a load of rock, I would rock it. I can bring in some flagstone for some of the drop off areas. Can't wait to hear that water flowing.
Ashley Mayes
It sounds like you could have a natural waterfall! That would be amazing. I hope you make it happen .