• Skip to primary navigation
  • Skip to main content
  • Skip to primary sidebar
Bigger Than the Three of Us
  • Our Home
  • DIY IDEAS
    • DIY IDEAS
    • DIY Open Shelving Kitchen Guide
  • Shop
    • Shop Our Home
    • Shop My Closet
    • Vintage Home Decor
    • My Current Favorite Rugs For Sale
    • Pieces I’m Loving
  • Podcast
  • Travel
  • The Three of Us
    • Privacy and Disclosure
menu icon
go to homepage
search icon
Homepage link
  • House Tour
  • Floating Shelving Guide
  • DIY Projects
  • Shop
  • The Three of Us
    • Email
    • Facebook
    • Instagram
    • Pinterest
    • YouTube
  • ×

    Hallway Bathroom Tile : Part 1

    October 24, 2013 by Ashley Mayes 7 Comments

    I posted this on Instagram last week:

    instagram picture of bathroom carpet in progress

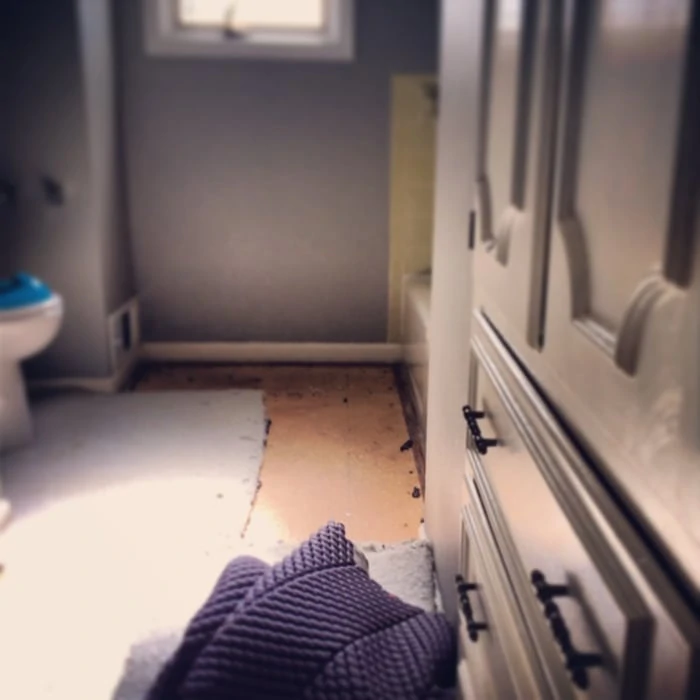
    I decided one afternoon to take some of the carpet out of Greyson's bathroom. We've been talking about tiling his bathroom, but have been wavering back and forth on when...well I decided to go for it. I only took a strip of the carpet out the first day because I wanted to: A). See what Luke thought and B). Be able to use the bathroom.

    Well, all was good with Luke (as expected) so the next afternoon I took the rest of it out.

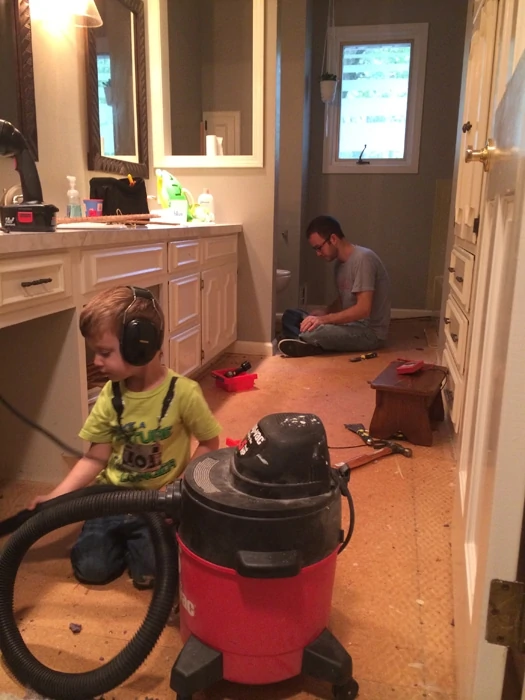
    Then, the boys helped get all the staples and carpet tack strips up. After that we gave it a good vacuuming.

    putting the toddler to work vacuuming

    Because we had carpet in our bathroom, we had to take out the particle board that was under the carpet. While working on that this happened:

    breaking hammer

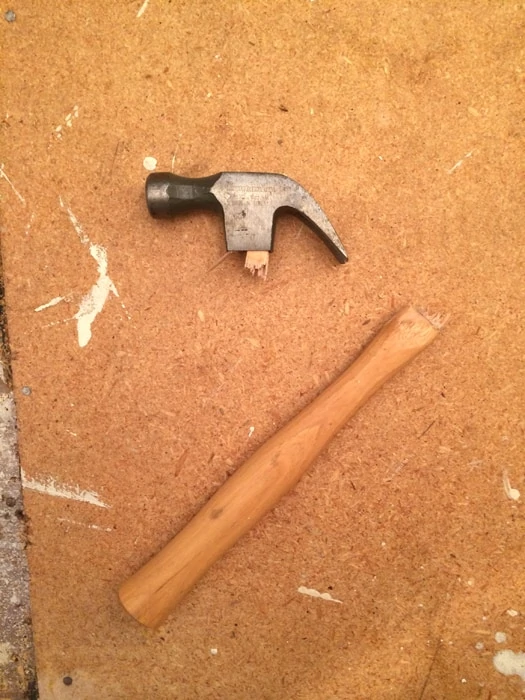
    I didn't even realize that could happen. Call me crazy, I guess. We had to make a trip to Lowe's to get a jigsaw, another hammer and a chisel.

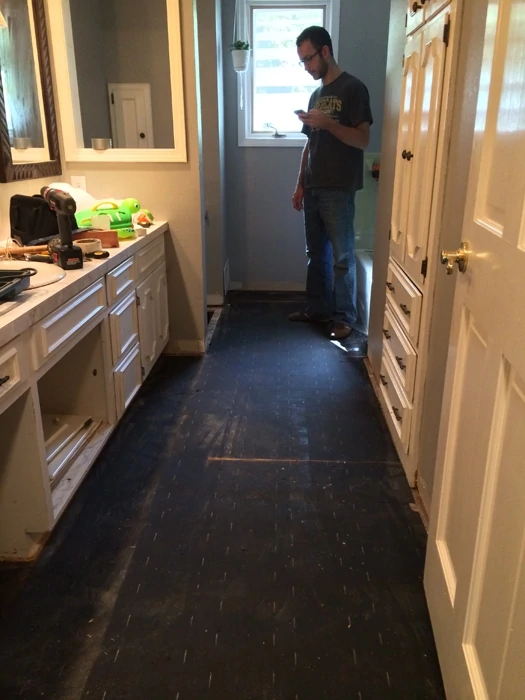
    We took the toilet out and then got busy taking up the particle board. After we had the right supplies to take the particle board up it went pretty fast. As expected, our subfloor was rotted underneath the toilet area (skip the next picture if you don't want to see it).

    rotten subfloor

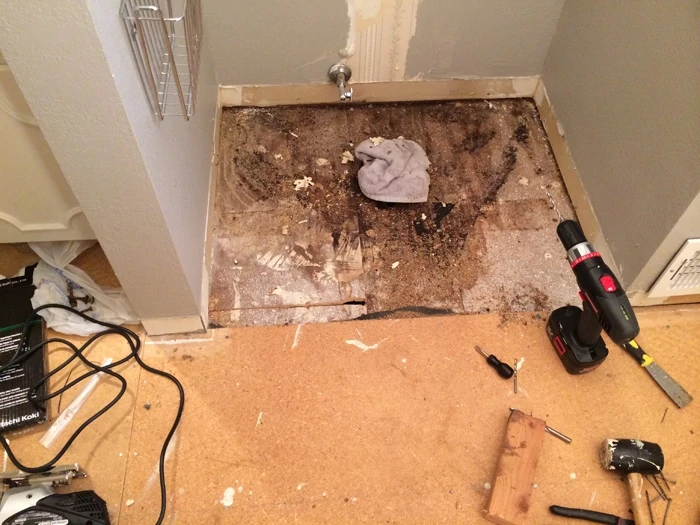
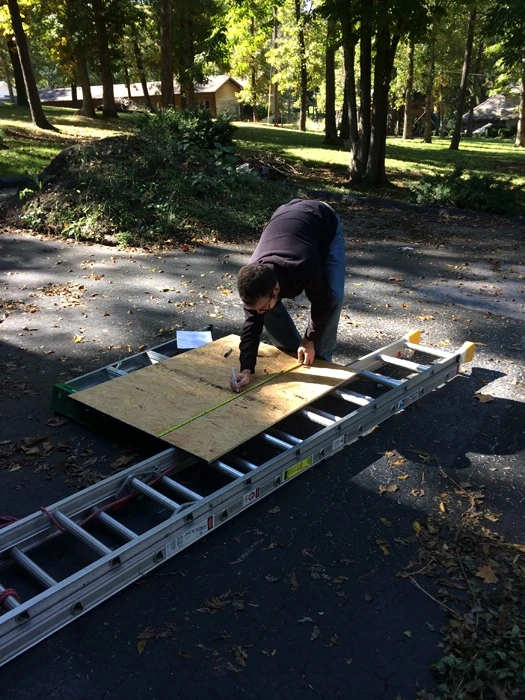
    But, the rest of the subfloor looked great. So, Luke cut the rotten subfloor out and then we had to go get new plywood to replace it with. Well, this should have taken one trip to the hardware store but it actually took three. We misunderstood, at first, and thought we need to replace the ½" particle board. So we bought ½" plywood (our first trip to buy wood). The plywood we needed was 9/32" but we decided to try the ½" before buying something else. Then, after measuring it and putting it in we realized that it wasn't level. I went to Lowe's to get the right one and told them that I had ⅝" plywood (we missed the measurement by 1/32"). They sold another piece to me. Come to find out it was too thick. After all that, we found out that Home Depot actually caries the correct measurement. So, another trip to the hardware store yielded the right piece of wood. Apparently it's good to measure plywood in 32nds of an inch. Who knew!

    Once we got the right sized plywood, Luke measured it and got it cut.

    replacing rotten subfloor

    He reinforced the support beams around the new plywood. Then we placed the original water barrier back down.

    subfloor all up and moisture barrier down

    Then we started measuring and putting in the cement board. The cement board was pretty easy to do after we got the hang of it. All we did was make sure the seams of the board didn't go directly on any seams of the plywood.

    cement board down

    almost done with cement board

    12 hours later finished with part 1....

    cement board install complete

    So, I think if you knew what you were doing this part of the process probably would have only taken 4-5 hrs. We had to do multiple trips to the hardware stores and also went in circles with putting in the new subfloor. After all was said and done though, we learned a lot. Next time, it won't be too bad.

    Stay tuned for Part 2.

    Share
    Pin
    Tweet
    Email
    Print

    More Home Renovation

    • paint storm door before/after
      How to Paint Storm Door & Update Window Muntins
    • stair risers
      Stair Risers: Everything You Need to Know
    • All About Replacing Cabinet Doors + New Cabinet Doors
      All About Replacing Cabinet Doors + New Cabinet Doors
    • ductless mini split heat pump
      Cost for Ductless Mini Split and Heat Pump

    Keep In Touch...

    Sign up for my weekly emails to see new projects, plus what I'm doing behind-the-scenes.

    You can unsubscribe anytime. For more details, review our Privacy Policy.

    Thank you!

    You have successfully joined our subscriber list.

    .

    Disclosure: This post may contain affiliate links. I receive a small commission at no cost to you when you make a purchase using my link.

    About Ashley Mayes

    Founder & Creative Director

    Reader Interactions


    Comments

      Leave a Reply Cancel reply

      Your email address will not be published. Required fields are marked *

    1. Yvonne @ Sunnyside Up-Stairs

      October 24, 2013 at 1:54 am

      Your hard work will pay off and in a short time, you'll forget what those hours and multiple trips felt like, I think. =D Looking forward to seeing Part 2!

      Reply
      • Ashley Mayes

        October 24, 2013 at 7:26 am

        Thanks Yvonne!

        Reply
    2. Julia @[email protected]

      October 24, 2013 at 6:11 am

      Love how the entire family got busy.
      Looking forward to the end result.

      Reply
      • Ashley Mayes

        October 24, 2013 at 7:27 am

        Thanks Julia! I'm looking forward to the end result as well. =)

        Reply
    3. Charlotte @ couldntkeepit2myself

      October 24, 2013 at 8:51 am

      Love the picture of your two boys working hard, so cute! I'm sure you are happy to have all that carpet up. Can't wait to see the tile down!

      Reply

    Trackbacks

    1. Bathroom Sources & Price Breakdown - Bigger Than the Three of Us says:
      June 15, 2015 at 10:01 am

      […] – Part 1, Part 2 and Part […]

      Reply
    2. Tile :: Part 3 - Bigger Than the Three of Us says:
      June 15, 2015 at 8:30 pm

      […] up on our tile progress with part 1 and part 2. So, we are calling the tile DONE. That feels so good to say that and it feels even […]

      Reply

    Primary Sidebar

    Bigger Than The Three Of Us - Family of Three

    Follow Me On

    • Email
    • Facebook
    • Instagram
    • Pinterest
    • YouTube

    Favorites

    Footer

    ↑ back to top

    About

    • Privacy Policy
    • Disclaimer
    • Terms & Conditions

    Newsletter

    • Sign Up! for emails and updates

    Connect

    • [email protected]
    • Instagram
    • Facebook

    As an Amazon Associate I earn from qualifying purchases.

    Copyright © 2023 Bigger Than the Three of Us All Rights Reserved