

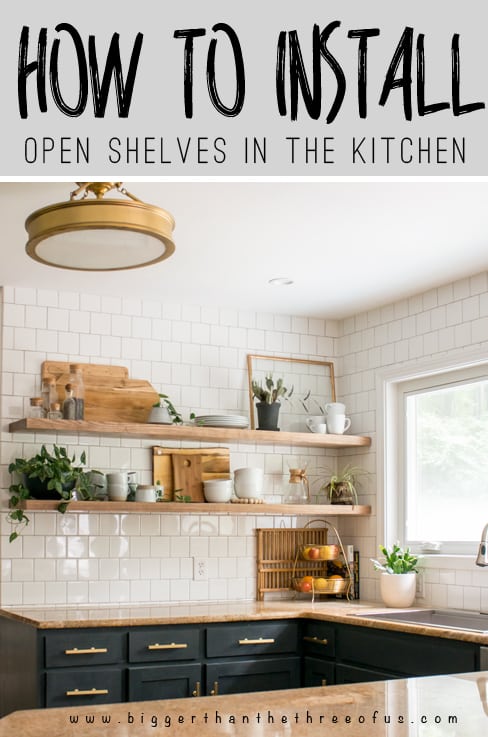
Have you ever wanted a full tutorial on how to install floating shelves? Here is all you need to know for installing floating shelves with floating shelf hardware. Plus, I'll share details on other types of kitchen shelf brackets, what type of wood to use for wood shelves, how deep to make your kitchen shelf and more!
When I first started dreaming of a kitchen renovation on a budget, I knew I wanted wall mounted shelves. I was comfortable taking down most of my upper kitchen cabinets (which is honestly the first step to determine if kitchen shelves are a good option for you!) and felt like floating wall shelves would really add a pop of visual interest to my space.
As I started narrowing down what I liked and didn't like about other hanging wood shelves, it quickly became obvious that liked the look of long floating shelves; ones that were thin and not chunky wood. It was important to me to have hidden shelf brackets for the shelves but also to have really heavy duty floating shelves that would hold a lot of weight.
So, after lots of research, I'm sharing how to hang floating shelves!
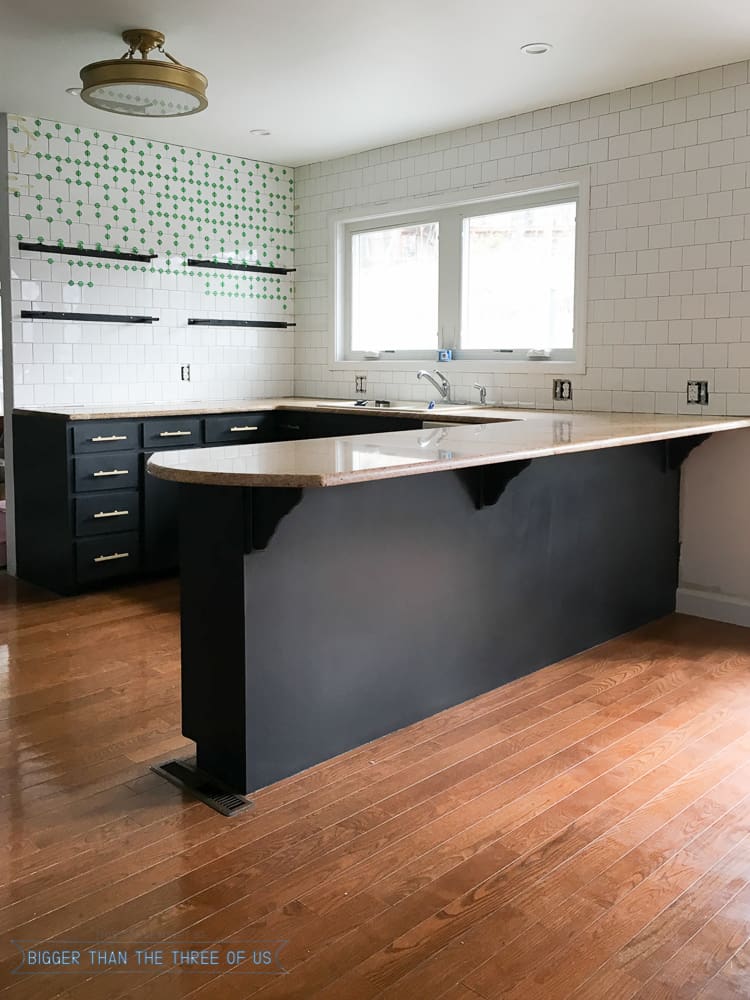
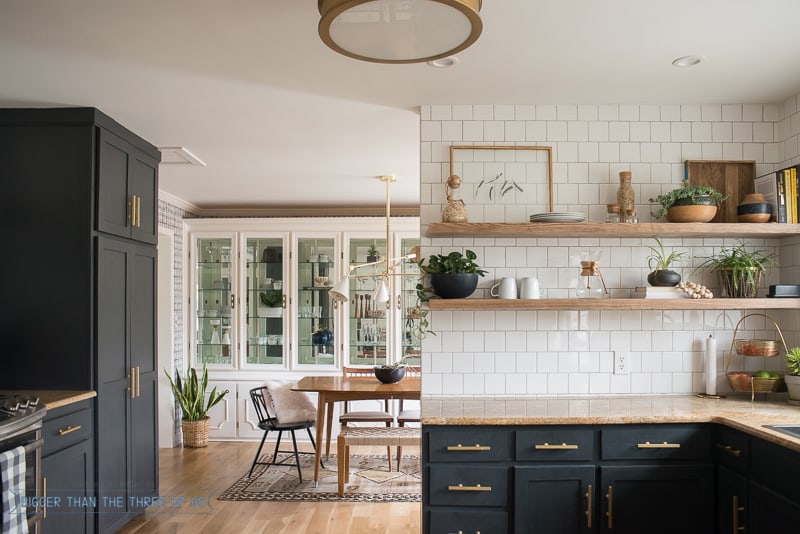
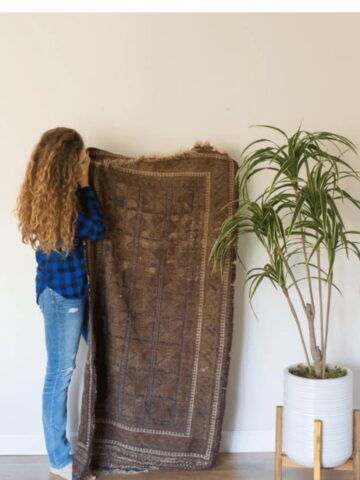
My DIY Kitchen Shelves featuring blind shelf supports

If you want a similar look to what I have in my kitchen, continue reading. =)
Back in 2016, the concept of large floating shelves was new. There were a lot of things on my end to figure out, such as: width of wood, where to buy the wood, installing the floating shelves and more! I'm going to share everything I learned along the way in hopes that it helps you out! Plus, make sure to hit my shelf guide if you want to see more DIY open shelving kitchen ideas!
Let's get to it! First things first, you need to make sure you are ok with not having upper cabinets in place of hanging wall shelves. Ask yourself...
Are floating kitchen shelves a good fit?
If you want styled kitchen wall shelves and have extra storage available to you elsewhere, then definitely think about adding wood floating shelves to your space. However, if you love the look of a kitchen with shelves instead of cabinets but value your cabinet space, then really think about how you'd use the floating wall shelving before going for it.
Personally, I love our large floating shelves, BUT, I don't have a lot of kitchen dishes and baking extras. It's just something to think about as you are making the decision to get rid of closed storage for the suspended shelves.
If you decide that they are a good fit for you, then the next decision you need to make is...
Choosing How to Hang Wood Shelves
You can choose to hang floating shelves like I did with a floating shelf mount so that you don't see any hardware holding your wood shelving up.
You can also choose to use brackets for the shelves that would mount on the tile and visually and structurally hold the shelf up.
Either way of installing the wood shelves is great, it's really just up to you and what you find more aesthetically pleasing.
There are a few different options for how to hang floating shelves. We looked at this tutorial from House Updated and really liked it but just weren't confident in our ability to get it straight.
After quite the search fest, I finally found a supplier who makes heavy duty shelf brackets for kitchen shelves. SilicateStudio, on Etsy, makes hidden mounting brackets specifically for lots of different types of wood shelving, mantles, etc.
If you want large floating shelves exactly like mine, here's a quick video of the process and the full tutorial is below.
*Affiliate links below. Thanks for supporting this blog.
Heavy Duty Shelves Supplies
- Heavy duty Shelf Brackets (4)
- Measuring Tape
- Heavy-Duty Anchors
- Mallet
- Drill
- Wood Shelf (search locally at an "exotic wood store")
- Stud finder
Custom Floating Shelves Size, Wood, Etc.
I was looking for a wooden floating shelf (x2) that was 6' long. I wanted my shelf to accommodate a full-size plate, so the wood for the shelves would need to be about 11" deep. I don't love the look of thick wood shelves, so I was also trying to get the thinnest wood possible for the shelf brackets while also making sure that the shelves were going to be heavy duty.
So, I bought (4) shelving brackets for two 6' ash wood boards. I wanted deep floating shelves to accommodate all my dishes so the depth of the wood was just over 11". The thickness of the wood you use needs to be thicker than the shelf bracket. My wall shelves are 1.5" thick which just cover the bracket.
All of this took some time to source, for sure. My recommendation is to get an idea of the size of shelves that you want, then look at recommendations from SilicateStudio on the amount of brackets you would need. Before purchasing the brackets, visit a custom wood store (also called "exotic wood stores") and look at their options for wood. Show them the bracket specifications and make sure it'll all come together how you are wanting.
Once you have the brackets bought and the wood sourced, it's time to install!
The heavy duty floating shelf brackets have hanging guides. It's basically up to you to find your studs and position brackets in the right place on the wall that correctly matches up with the holes you've drilled or had drilled in your wood shelves. Let me show you more and explain!
How To Install Floating Shelves With Floating Shelf Hardware
- Decide where you want the kitchen wall shelves to hang on the wall.
- Using a stud finder, mark the studs where the shelves should sit and install the brackets for the shelves. Make sure to hit studs with your brackets when you can and then use heavy duty anchors to secure the bracket to the wall when you can't hit a stud.
- Using a drill press (we hired this out at the wood store that we bought the hardwood shelves at), drill in on your wood shelves to create holes for where the brackets will slide in to the wood.
- Slide the shelf over the shelf brackets. It should be a very tight, firm hold.
If are installing floating shelves over tile, then let me explain more about how we did this!
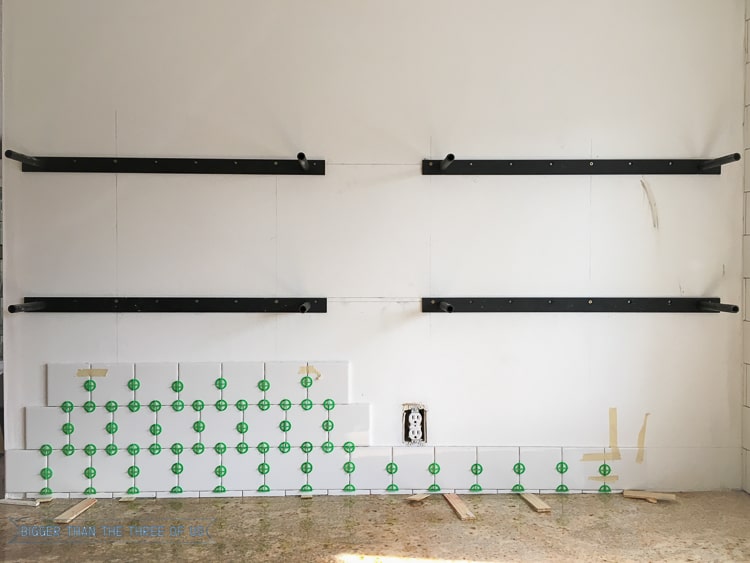
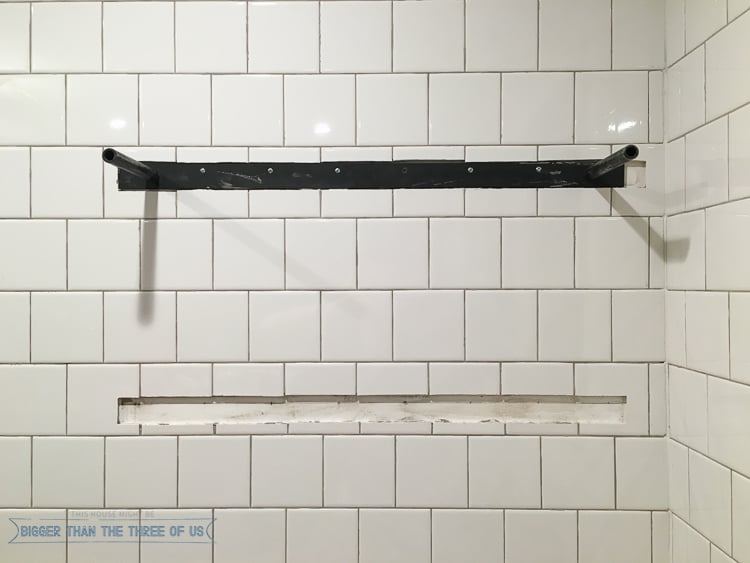
We installed the brackets at 20" from the countertop and 33" up from the countertop. I have a whole post on different options for shelf height options, so definitely check that out to understand what would be best for you.
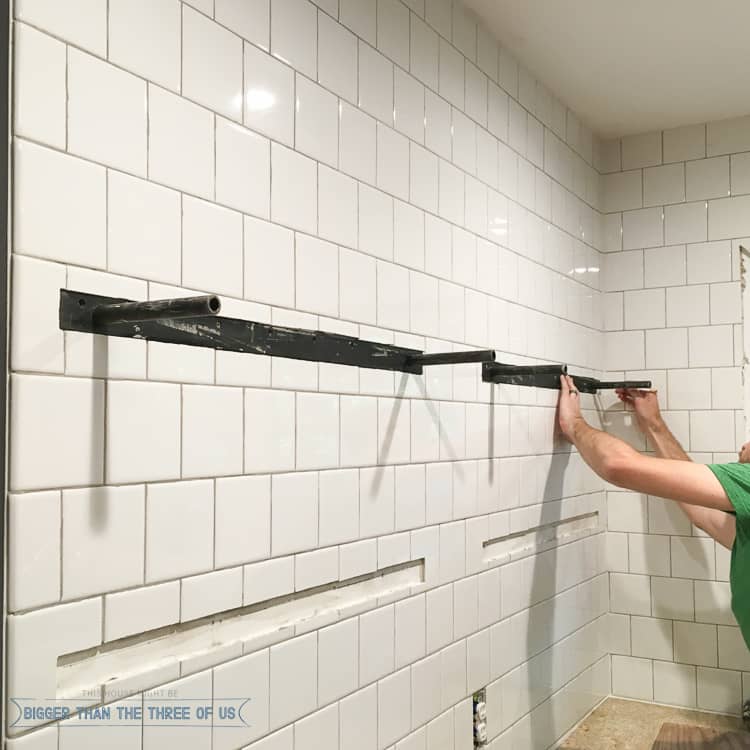
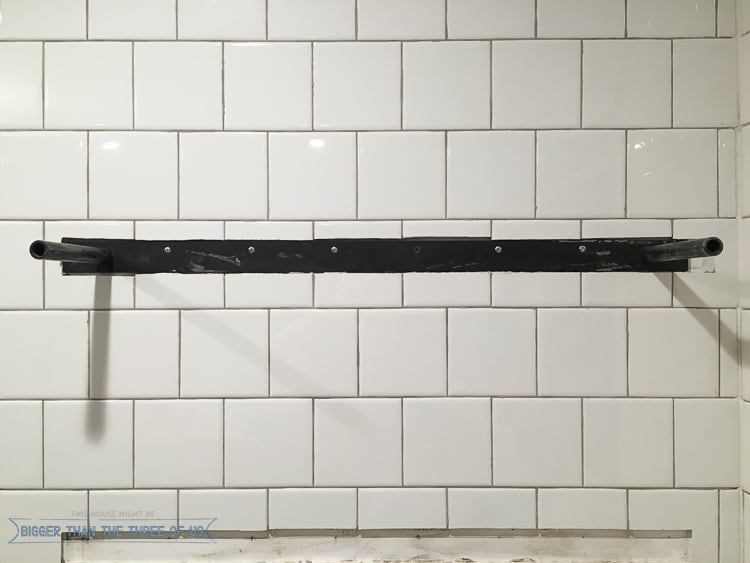
As you can see, we chose to hang the brackets before the tile and then cut tile to around each bracket. We felt like this was the easiest option and would give us the cleanest look.
We finished the tile and then grouted with the brackets still up. Next, we pulled the shelf brackets down to make a template for where we needed the wood store to drill into the wood shelves for the exact fit on the wall.
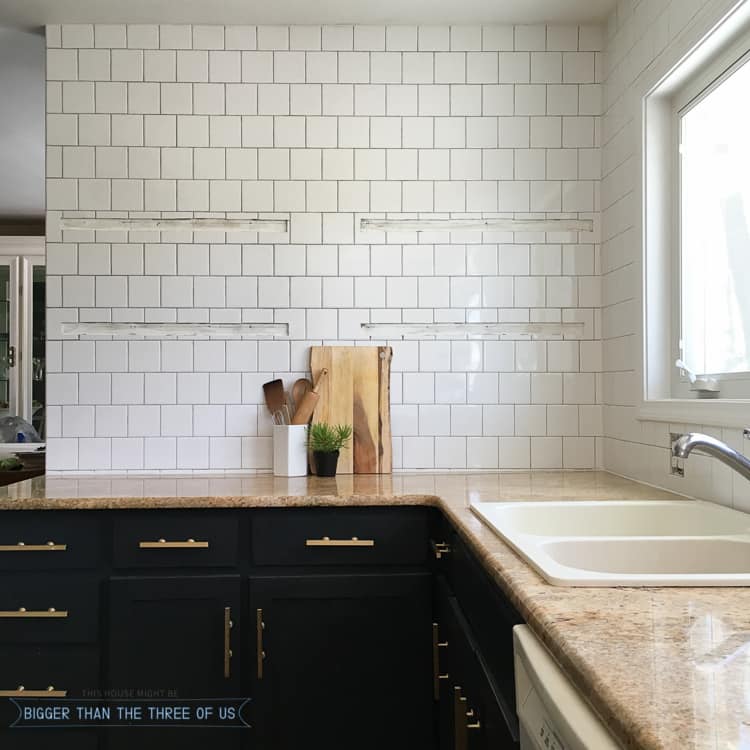
We had the wood holes bored and then were ready to hang the floating shelves.
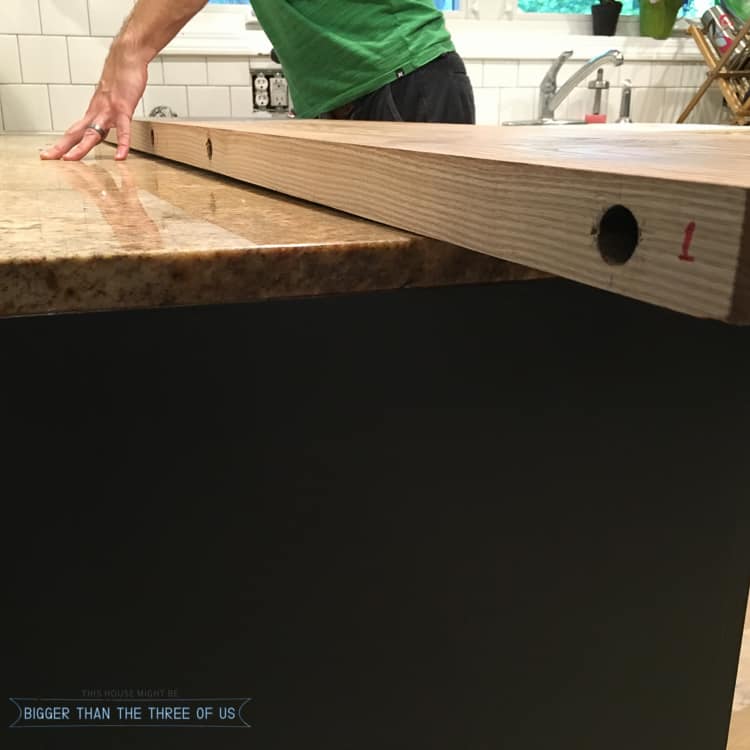
Luke had measured and diagramed out the wood with which bracket went to what (the brackets were just a tad off from each other). So, when we went to hang the brackets back up, we had to pay attention to which bracket went where.
Each bracket had two screws that hit studs. We used heavy-duty wall anchors in the areas where we couldn't hit studs.

For the drywall anchors, we used these:
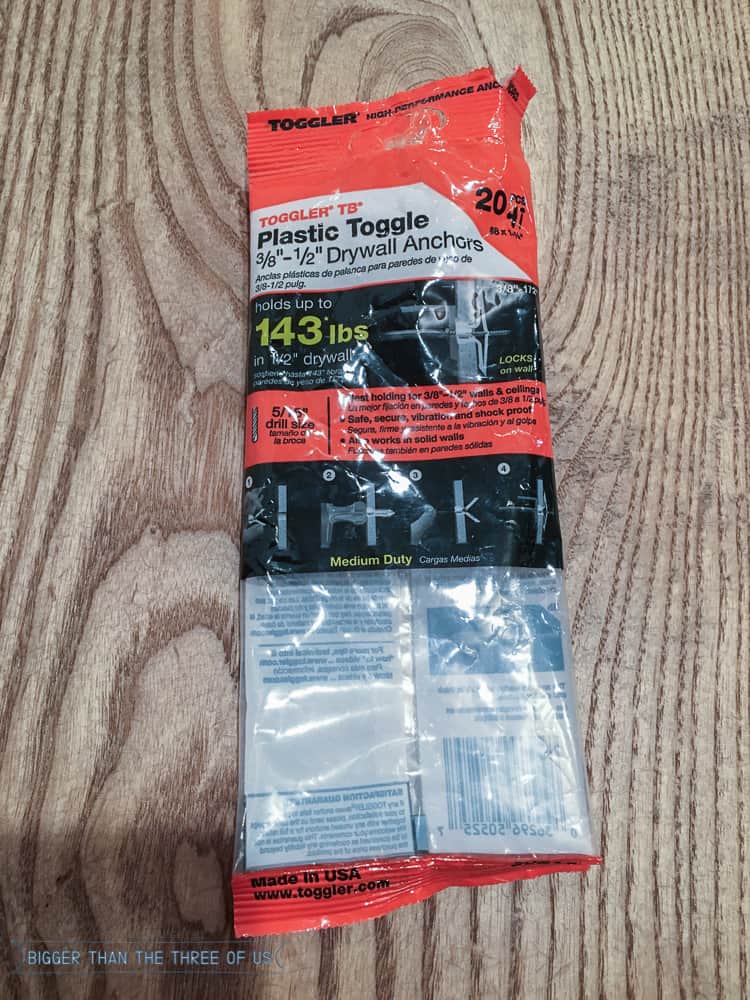
Since they say they hold up to 143 lbs and we used (6) plus two stud screws... I felt pretty confident that the DIY floating shelves were going to stay put!
Getting the wood on the brackets was quite the experience. The wood shelving weighs quite a bit because they are large floating shelves. You'll definitely need an extra set of hands for this if you decide to go with longer shelf sizing like we did.

To secure the shelf, we wiggled and pushed it on and then finally tapped both shelves in with a mallet. We were confident that, once we got the wood shelfs up there, they weren't going anywhere.
I didn't seal the wood originally, but I did talk about sealing it awhile back. I'd recommend sealing from the get-go and not do as I did. Here's the post about sealing the wood for the shelves.
Don't forget to check out my kitchen shelf guide if you have more questions or leave a comment below and I'll try to answer.
How To Install Floating Shelves With Floating Shelf Hardware

Have you ever wanted a full tutorial on how to install floating shelves? Here is all you need to know for installing floating shelves with floating shelf hardware. Plus, I'll share details on other types of kitchen shelf brackets, what type of wood to use for wood shelves, how deep to make your kitchen shelf and more!
Materials
- Shelf Brackets (4)
- Wood Shelf (search locally at an "exotic wood store")
Tools
- Measuring Tape
- Heavy-Duty Anchors
- Mallet
- Drill
Instructions
- Decide where you want the kitchen wall shelves to hang on the wall.
- Mark studs where the shelves should sit and install the brackets for the shelves. Make sure to hit studs with your brackets when you can and then use heavy duty anchors to secure the bracket to the wall when you can’t hit a stud.
- Using a drill press (we hired this out at the wood store that we bought the hardwood shelves at), drill in on your wood shelves to create holes for where the brackets will slide in to the wood.
- Slide the wood shelves over the brackets. It should be a very tight, firm hold.
- *If you are installing floating shelves over tile, see notes below.
Notes
As you can see, we chose to hang the brackets before the tile and then cut tile to around each bracket. We felt like this was the easiest option and would give us the cleanest look.
We finished the tile and then grouted with the brackets still up. Next, we pulled the shelf brackets down to make a template for where we needed the wood store to drill into the wood shelves for the exact fit on the wall.
We had the wood holes bored and then were ready to hang the floating shelves.
Luke had measured and diagramed out the wood with which bracket went to what (the brackets were just a tad off from each other). So, when we went to hang the brackets back up, we had to pay attention to which bracket went where.
Each bracket had two screws that hit studs. We used heavy-duty wall anchors in the areas where we couldn’t hit studs.
We wiggled and pushed it on and then finally tapped both shelves in with a mallet. We were confident that, once we got the wood shelfs up there, they weren’t going anywhere.
How To Install Open Shelves In The Kitchen (Pin for Later!)
If you liked this post, then you may like:

Amanda
It looks great! I love how your kitchen is coming together!
Ashley Mayes
Thanks Amanda! Slowly but surely!
Charlotte W
I love floating shelves, and I especially love that these can hold the weight! They look great. Can't wait to see everything together.
Ashley Mayes
Thanks Charlotte! I think they are up there pretty good.
Steffie
Where did you get the holes drilled to fit the brackets? I have the wood pieces but don’t have a drill press
Ashley Mayes
Hi Steffie,
A woodworker can do that for you. We took it to an "Exotic wood store" which carries lots of hardwood varieties and they do that type of thing for a small fee.
Megan
This looks great! What finish did you use on the shelves?
Ashley Mayes
We used a light walnut with a satin poly. Thanks!
Jenn
So glad to find this post! I'm installing open shelving currently. I hope you still love yours ♥️
Brit | House Updated
Two very important things here - 1) I love the wood you chose, it looks so great! and 2) this seems so straightforward I'm so glad you shared this process - nice work girl! xo
Ashley Mayes
Thanks Brit! A bit pricey but yes, it was pretty straightforward.
Julia@Cuckoo4Design
The wood looks amazing with your cabinets and tile. And it's awesome how sturdy the hidden hardware makes them.
Ashley Mayes
Thanks Julia! I'm thrilled with finding the hardware.
Stephanie @ Casa Watkins
Adore your shelves!! I really wish I could have these in my kitchen.
Ashley Mayes
Thanks girl! We used to have uppers and I'm really loving the more open look.
Glen
Great project! Only thing I take issue with is using veggie oil as the finish - vegetable oils go rancid after a few weeks so it's going to smell pretty sour and gross. Mineral oil would be a better choice (or a mineral oil/beeswax mix, which is a common food-safe finish used on wooden cooking utensils.) Or if you want a more refined looking finish that isn't going to stain or rub off on anything you put on the shelf, try tung or danish oil. It's really not much extra work than rubbing straight oil into the wood.
Ashley Mayes
Oh, I didn't use vegetable oil. I used minwax stain followed by poly.
Larkin Olson
This is an amazing kitchen! What color paint, and which brand & finish did you use? I must use this Paint!!! Haha:) Thanks!
Ashley Mayes
Thank you! The cabinet paint is Benjamin Moore Advance. The color is actually cracked pepper by Behr. We had it color-matched at Benjamin Moore. The color is a fun smokey blue/charcoal/black depending on the time of day/light.
Carol @ CAD INTERIORS
I'm definitely a fan of floating shelves, and am considering adding a few longer shelves to both sides of our living room fireplace. I love the wood you chose for your kitchen shelves, and the floating option keeps things looking cleaner and more streamlined. The wood adds so much warmth and texture to the space!
Ashley Mayes
You should do it! I love it.
Angie @ ambient wares
Wow, these shelves are everything I would want but, then I'd have to get pretty (non-chipped & matching) dishes! Ha! Seriously, great job and so very easy to understand.
Ashley Mayes
Haha! My dishes are just from Walmart! Nothing special over here.
Linda
I LOVE the look of floating shelves and yours are gorgeous. For the "be honest" part, I think cupboards with doors fit more into them while still looking clean and neat. With floating shelves, once you get passed the shelves with dishes and glassware, I feel they look best with not a lot of "stuff" on them - like the picture of your shelves with the bread boards, 2 cups and the plants, etc. It takes up the same amount of space as about 4 cabinets or 2 cabinets with 4 doors and probably 3 shelves in each. So, my personal opinion is: I love the look but don't see them as functional for me (and my "stuff").
Ashley Mayes
Thanks Linda! I think they are definitely not for everyone! My mom never has enough storage so she needs all the extra cupboards she can get. For us, I'm a bit of a purger so it totally works.
dawn
Love the look of your shelves, especially in your house or anyone else house but mine! My hubby does the cooking and unfortunately he likes to fry everything. I have a hard enough time keeping the cupboard doors and the top of all surfaces in the kitchen and dining room grease free. I cannot imagine adding open shelving any where near "my husbands" kitchen.
Ashley Mayes
Thanks Dawn! I think that's the key though.. loving it but knowing if you could love it in your own home. Frying gets everywhere so I totally feel ya on that. At least the hubs cooks, right?!
jessica kay
I love them!! I'm actually doing floating shelves too but cutting into the wood to hide the brackets since our subway tiles wont go up far enough to hide both brackets.
Question--where can I find the wood?!?!? I've been all over looking at reclaimed barn wood but they aren't deep enough to put my plates on. TIA
Adam
The end product looks amazing. Which minwax stain color and poly did you use? How many coats?
Thanks!
Ashley Mayes
Thank you! I think I used weathered oak - just one coat. Matte poly.
Jonathan
Would you please share how you determined how high off the countertop to hang your first shelf, as well as how high above the first shelf for your second? Thanks. Yours look great and we would like to duplicate it.
Ashley Mayes
Hi Jonathan,
Sorry for my delay in responding. The lower shelf is 19 inches from the counter and the higher one is 33 inches.
Courtney
What color is your countertops?
Ashley Mayes
I'm not sure.... they were here when we bought the house. Definitely a speckled brown/cream/black granite.
Kelly Brown
I love those shelves! Where did you find them?
Ashley Mayes
Thank you. We sourced the wood locally from an exotic wood store that's open to the public.
Shonee
Yes, I love these! They turned out great. Totally pinning for later! Thanks
-Shonee
Ashley Mayes
Yay! Thanks Shonee!
Steve
Love the handles on the cabinets, have not seen gold anywhere I have looked so far. The shelves brought me here, I am in the middle of doing 6 now and needed to find the brackets.
Beautiful job.
Ashley Mayes
Thank you!
Rachel
Hi there - I am in the process of installing these types of floating shelves but i'm having trouble figuring out how to do the holes in the boards. Did you have someone drill yours for you? If so, was it a contractor? lumber mill? friend? Any suggestions would be really helpful.
Thanks so much!
Rachel
Ashley Mayes
Hi Rachel,
We had the holes drilled (with a drill press) by the custom wood store that we bought it at. It cost around $40 and was so worth it!
Patrick Martin
Very nice! I installed chunky solid oak floating shelves recently for almost free. Found the wood in the dumpster and had most of the hardware.
I routed out the back of the shelves enough to fit a 1x2. For the 1x2 I counter sunk lag bolts which would be support posts like the brackets you purchased on Etsy. Screwed the 1x2's to the wall and then slide the shelves on. I added a couple small screws through the top on the shelves into the 1x2 to hold them into place good. Finished with some mineral oil.
Thanks for sharing,
Pat
Ashley Mayes
Thanks Patrick! So, yes... love the way you did yours! Your skillset is better than mine so I had to take this option but seriously...you saved a ton of money by doing it the way you did!
kristin
Nicely done! We're in the midst of making a "beverage bar" -- extending the kitchen space a little. We really want to do floating shelves, so thanks for showing how you make it happen. Your place looks amazing!
Ashley Mayes
Thats so exciting Kristin~
Kathryn
Beautiful shelves! We are trying to do the same thing, but are having trouble making them stable. Do yours wiggle up and down at all? Thanks!
Ashley Mayes
Thanks! I'm sorry to hear that yours have movement. Our's are a VERY tight fit on the hanging hardware. Like, we had to use a mallet and protection to get them on the hardware. Do you think your holes in the wood are too big or do you think the movement is caused from the brackets hanging on the wall?
For our wall space, we hit a few studs and had to do a few in heavy-duty drywall anchors. They are super sturdy feeling though.
My best guess would be that the bore holes are too large for the brackets but I'm not sure. Did you contact the bracket seller to inquire?
Hope you get it figured out!
Katie
Love the floating shelves!! Thank you for this post. Where is your drawer/cabinet pull hardware from?
Ashley Mayes
Thanks Katie! They are lewis dolin bar pulls. Get the direct link on the bottom of this post: https://biggerthanthethreeofus.com/kitchen-reveal/
Stacy
Is the stain on your shelves Weathered Oak or Walnut? We are doing the exact same project and I can't decide on a stain to save my life
Ashley Mayes
Hi Stacy, It's Weathered Oak. =) With a matte poly.
Tj
Sounds like they are spaced 12 inch aprt. Top to top? Is that enough space? We are considering 16 inch spacing.
Ashley Mayes
Hi Tj, From the bottom of the top one to the top of the bottom they are are 12 inches. So, you have 12 inches of storage. We love the height.
Dama
Hi, wanted to thank you for all your cool diy ideas you share with us!! I was also wondering what type of wood your shelves are?
Ashley Mayes
I believe they are Ash. =)
J
Hey Ashley! I love your blog. How do you keep the shelves from getting too dusty? Do you have to dust up there a lot?
Ashley Mayes
I dust them every other month or so or whenever all the dishes are dirty and they are empty. They really don't get too bad!
Beth
Looks great! How far is the first shelf from the countertop and what is the height dimension between 1st and 2nd shelf?
Ashley Mayes
Countertop and shelf heights are labeled right here: https://biggerthanthethreeofus.com/floating-kitchen-shelves/
Enrique Garcia
Hello,
Awesome tutorial! Can you share where you purchased your wood from?
Ashley Mayes
I got it from a local wood store in town. If you search "Exotic Wood store" then I'm sure some will pop up wherever you live.
Giselle
Did you measure out where your studs were before buying the bracket? Just curious if that had any part in the specific size of wood you wanted.
Ashley Mayes
Hi Giselle. No, we did not measure out the studs. I sent the wall specifications and the wood thickness specifications to Silicate Studio on Etsy to clarify whether I needed the mantle size or the shelf size brackets. The brackets come with a ton of holes for hanging. When they arrived, we put them up on the wall into studs and that determined the holes for drilling into the wood.
Elizabeth
I have tile backsplash on my entire wall currently but I would love to use these brackets. Do you think putting these brackets over tile would be okay? Or do they need to be against the Sheetrock?
Ashley Mayes
I think they would be fine but they need to go into the studs. So, that's the only tricky thing.
Jaime
Hi did you make the shelves yourself? Love them!
Ashley Mayes
Hi Jaime,
No, we bought the wood. It's Ash and we bought it from an exotic wood store.
MS
Would suggest that you cut away the drywall in front of the stud and screw directly to that. The drywall is not providing any "hanging power" and by connecting directly to the stud (with no drywall in the way) you avoid the drywall actually squishing and the shelves becoming less sturdy as time goes on...
Ashley Mayes
Hi Mark,
Honestly, the fact that we were able to go through the drywall into a stud is good enough (in my opinion). If you cut the drywall out, then you'd probably have to do that for the whole bracket which would be quite the annoyance. I'm sure you could do it either way though!