

Today is confession day. Yep. I have a confession to make on the open kitchen shelving. This confession is going to help you NOT cut corners with your kitchen shelves when you put them up.
We all make mistakes. We all cut corners. We are all human and this is my way of showing you all that. You love me for it, right?! Ha, hope so! So, here we go... How I Cut Corners with the Kitchen Shelving.
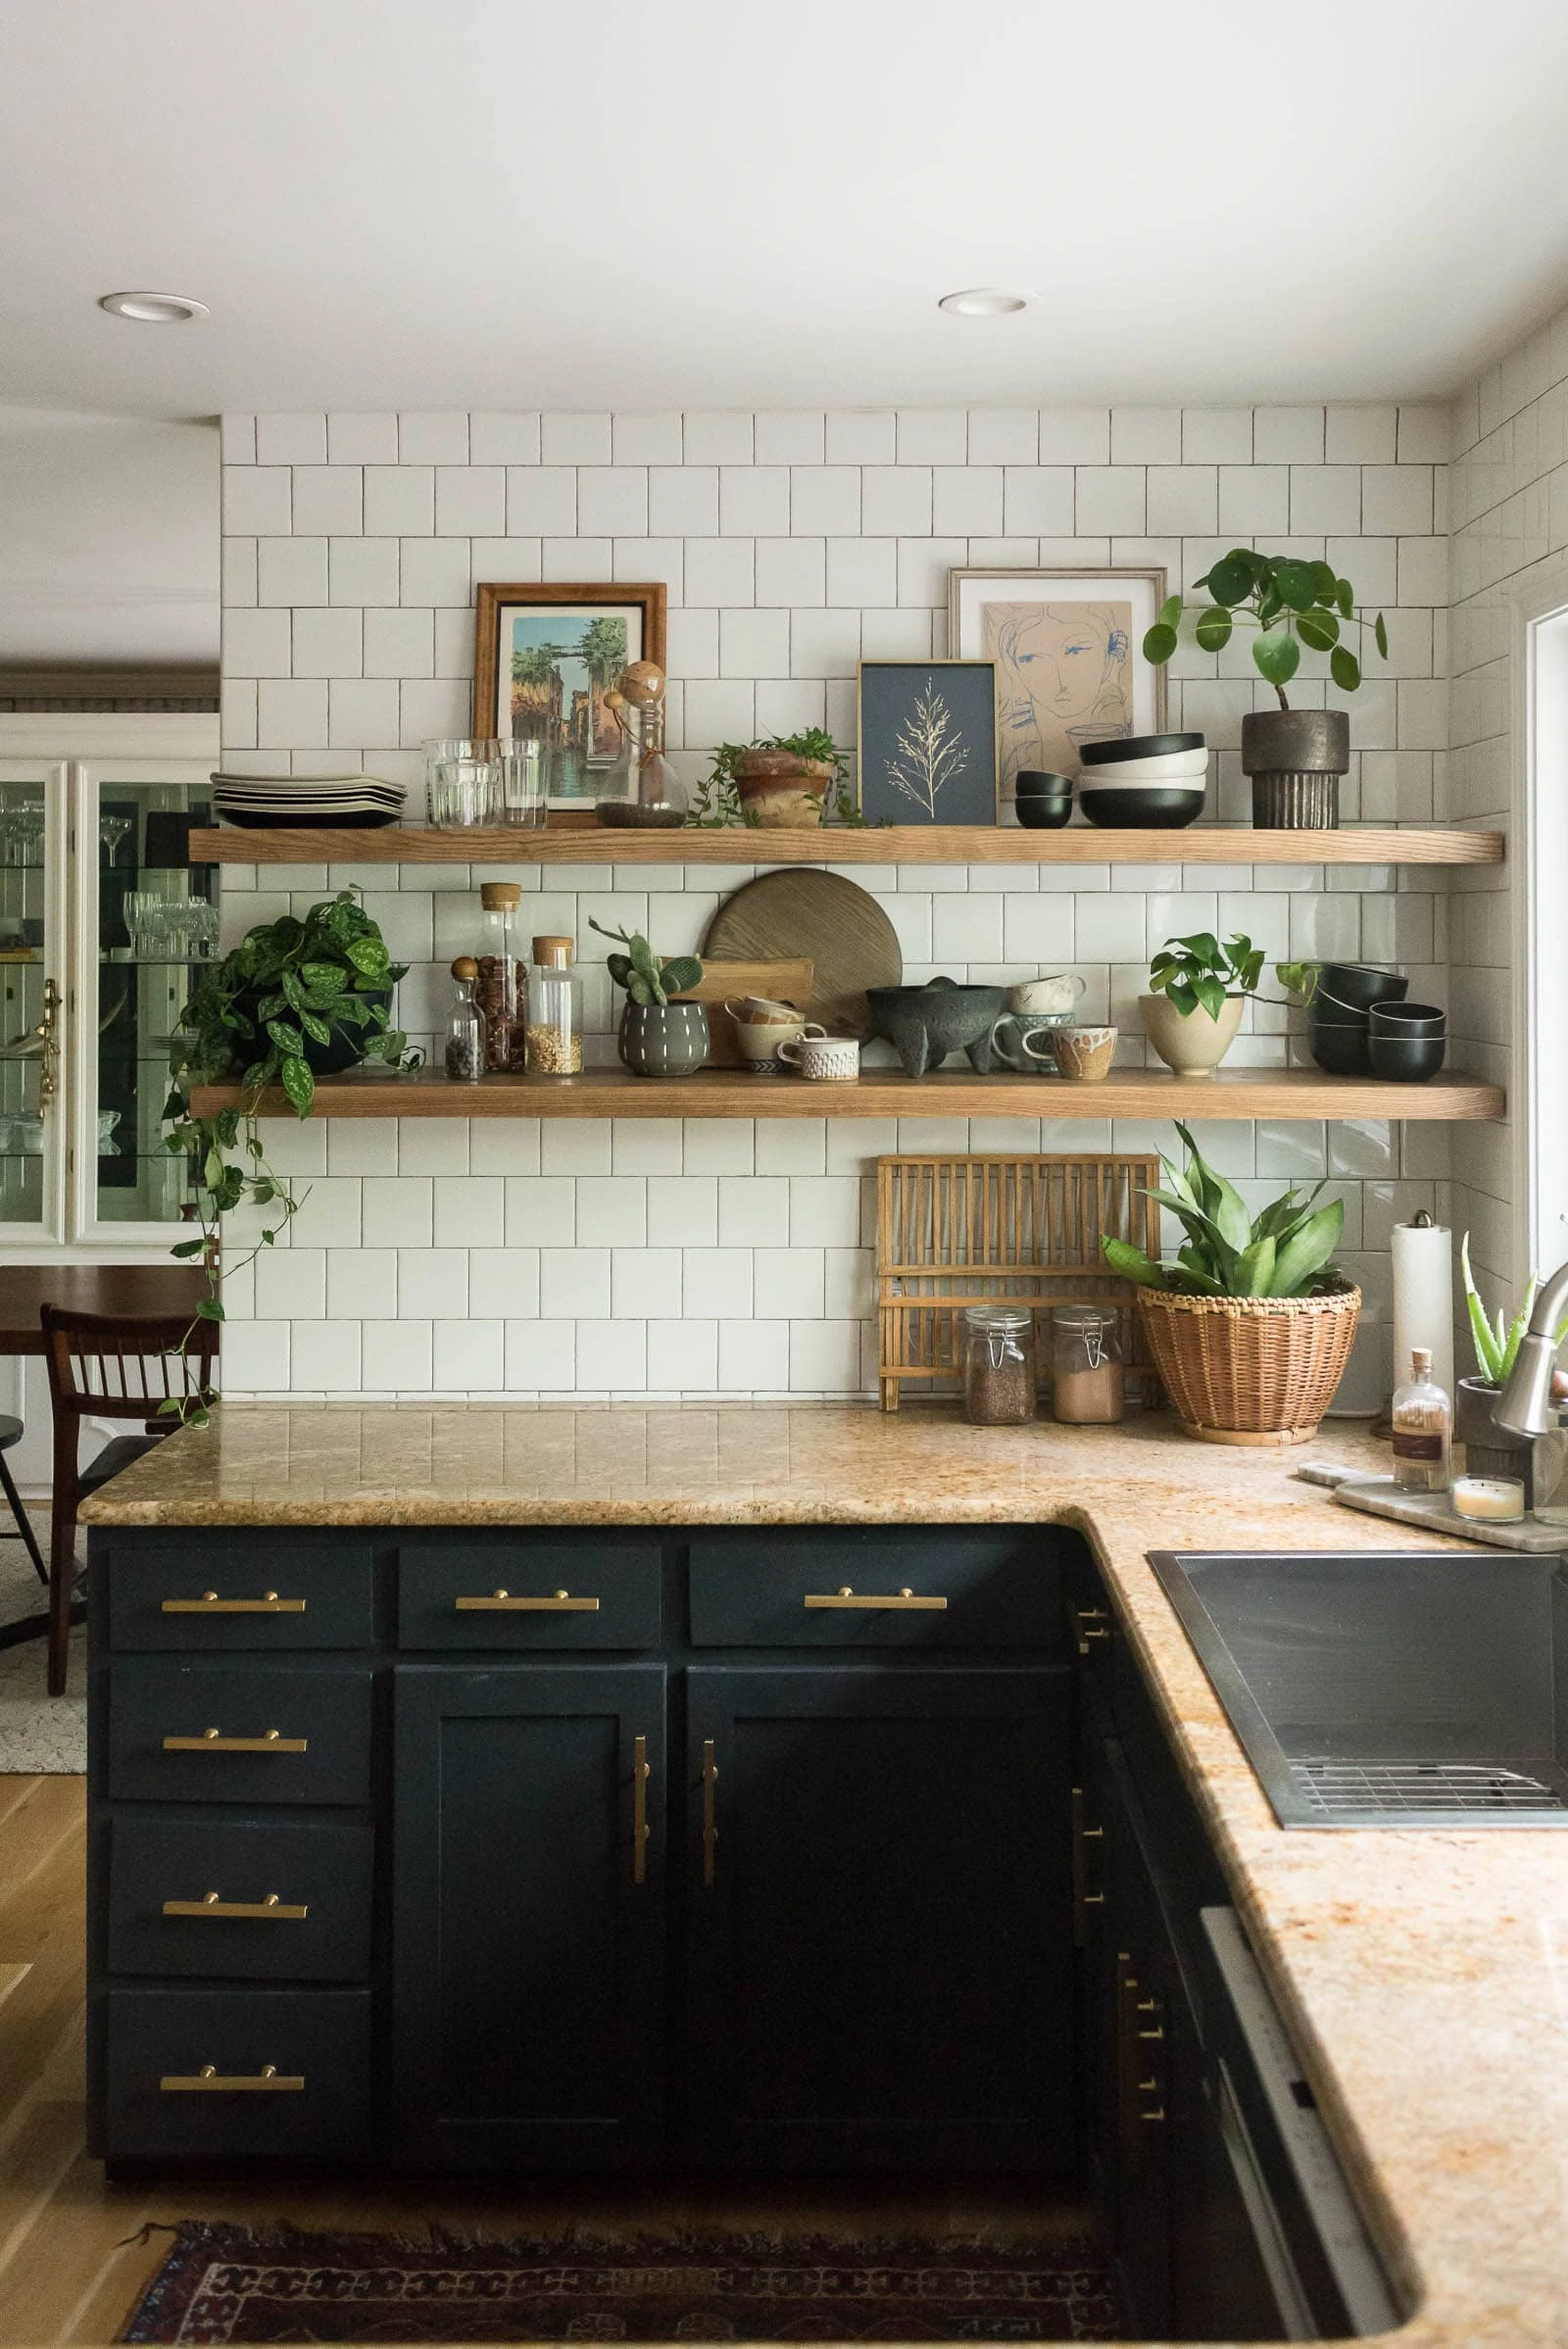
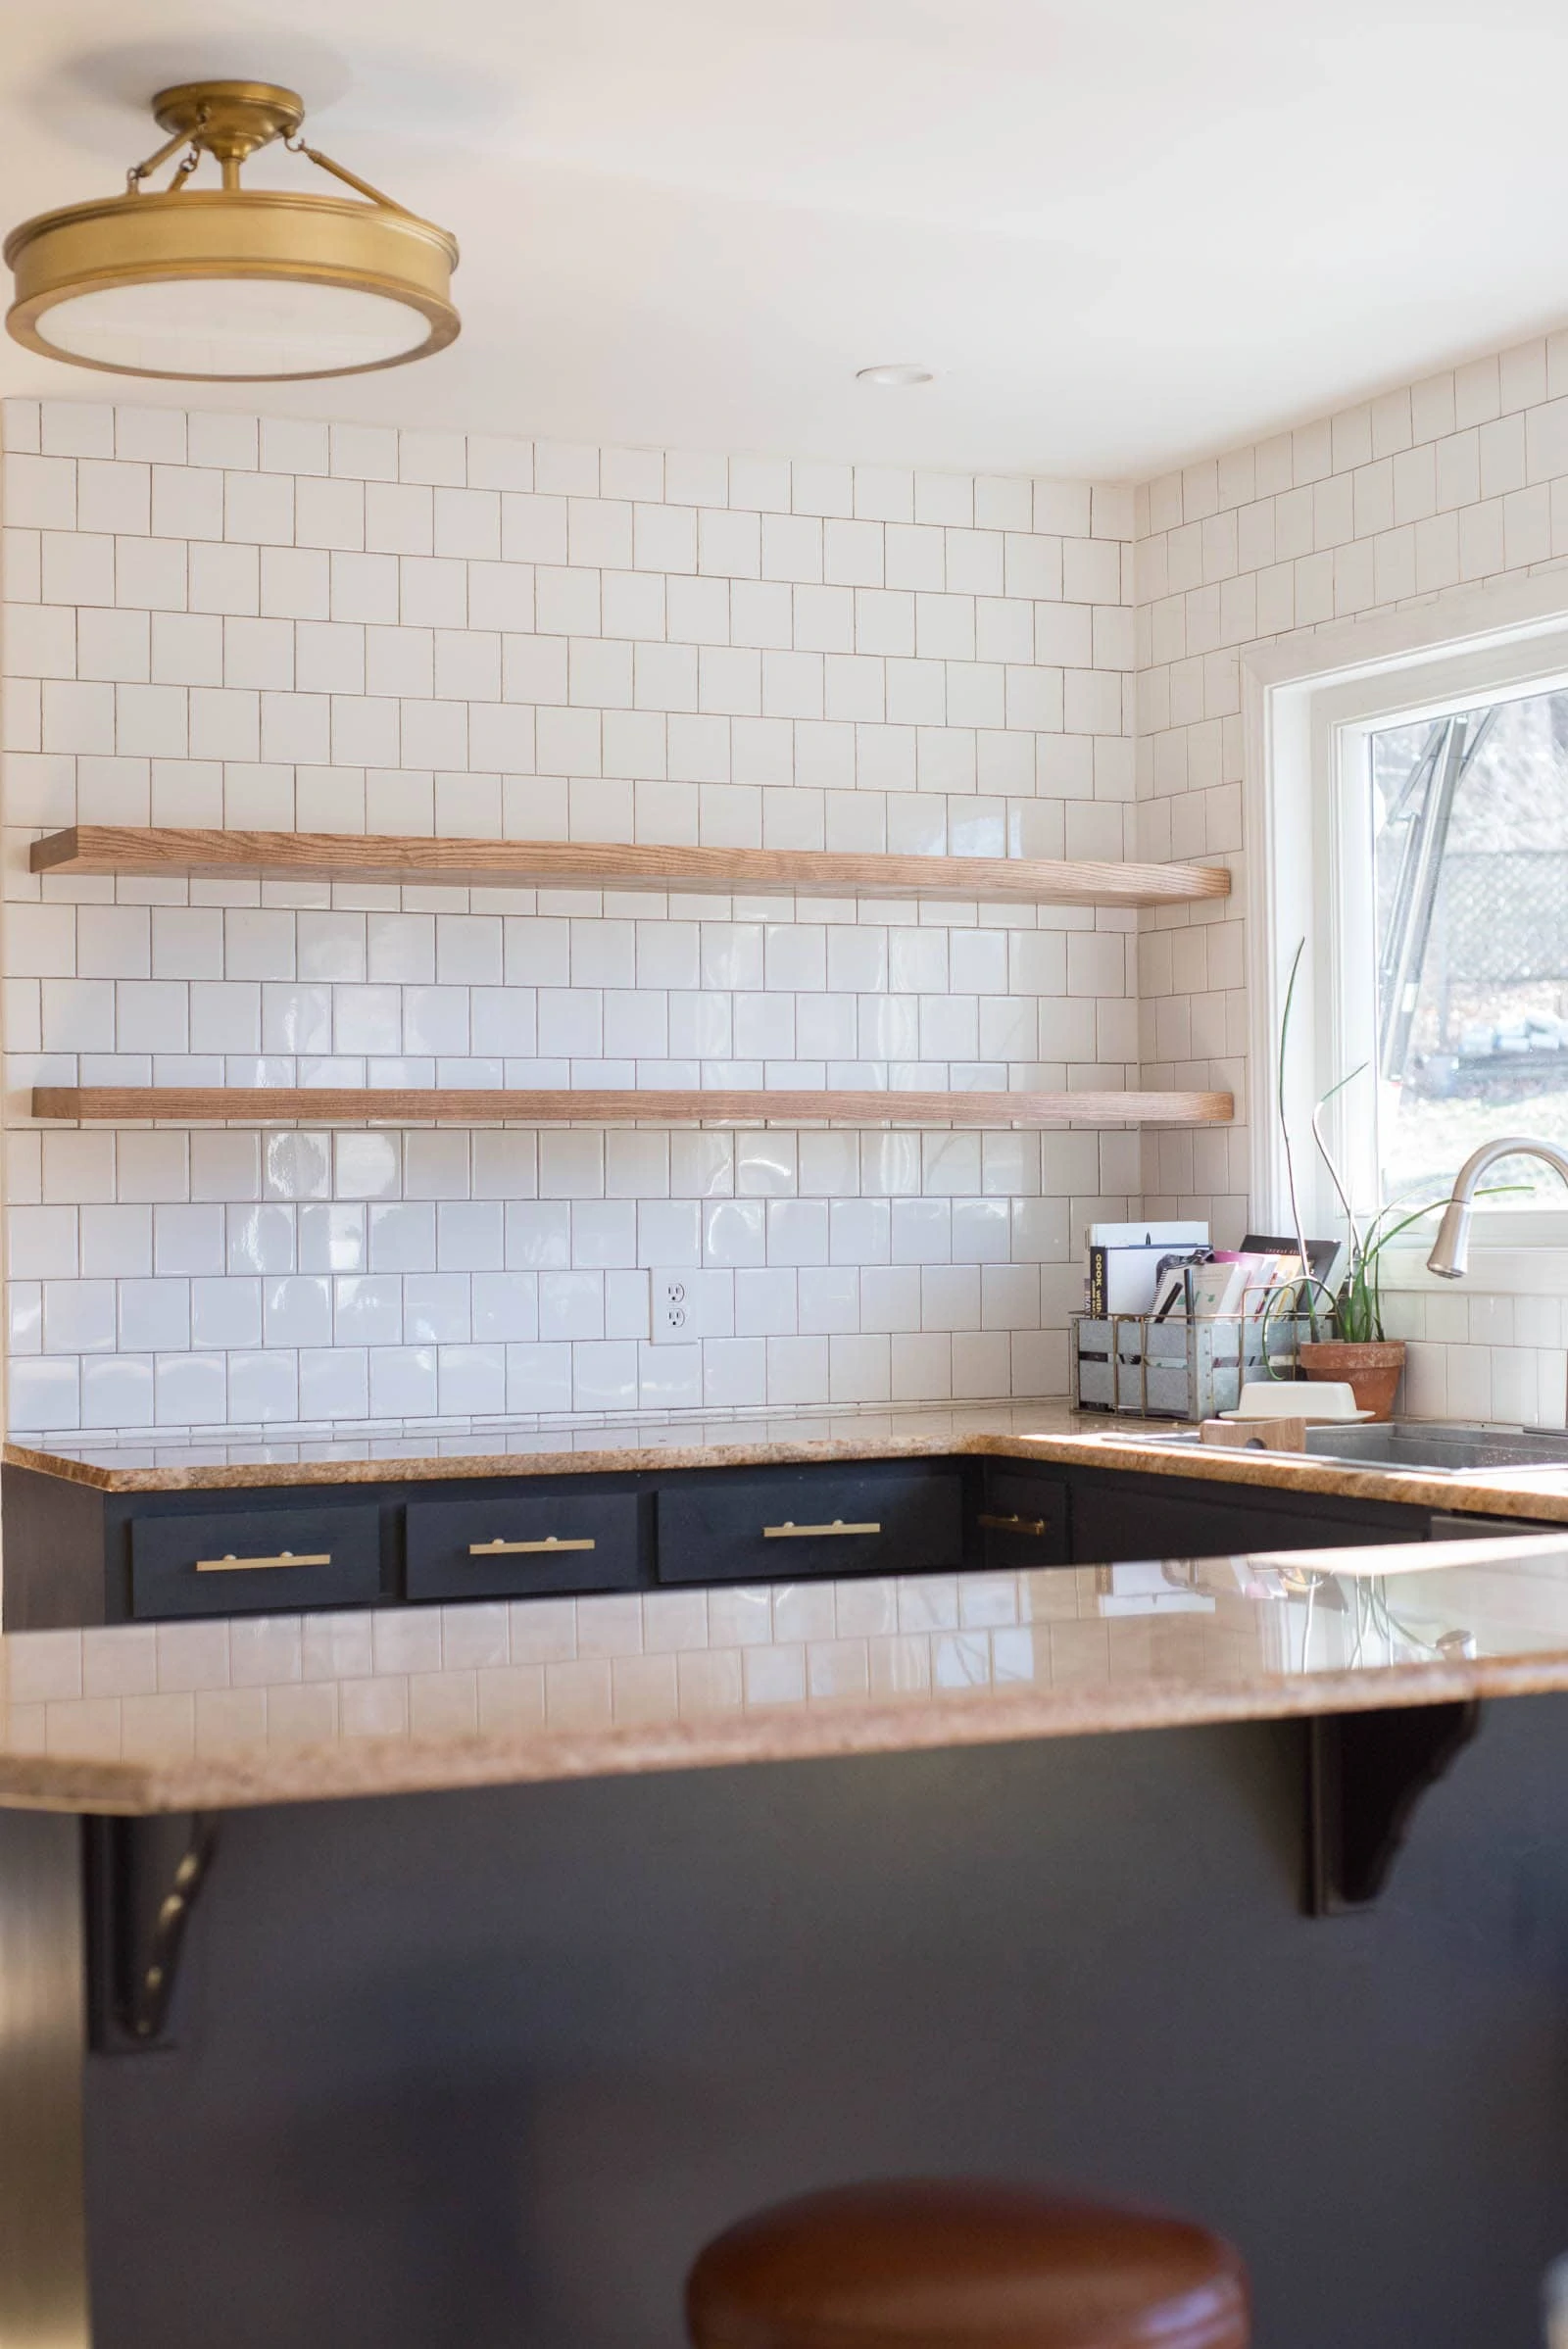
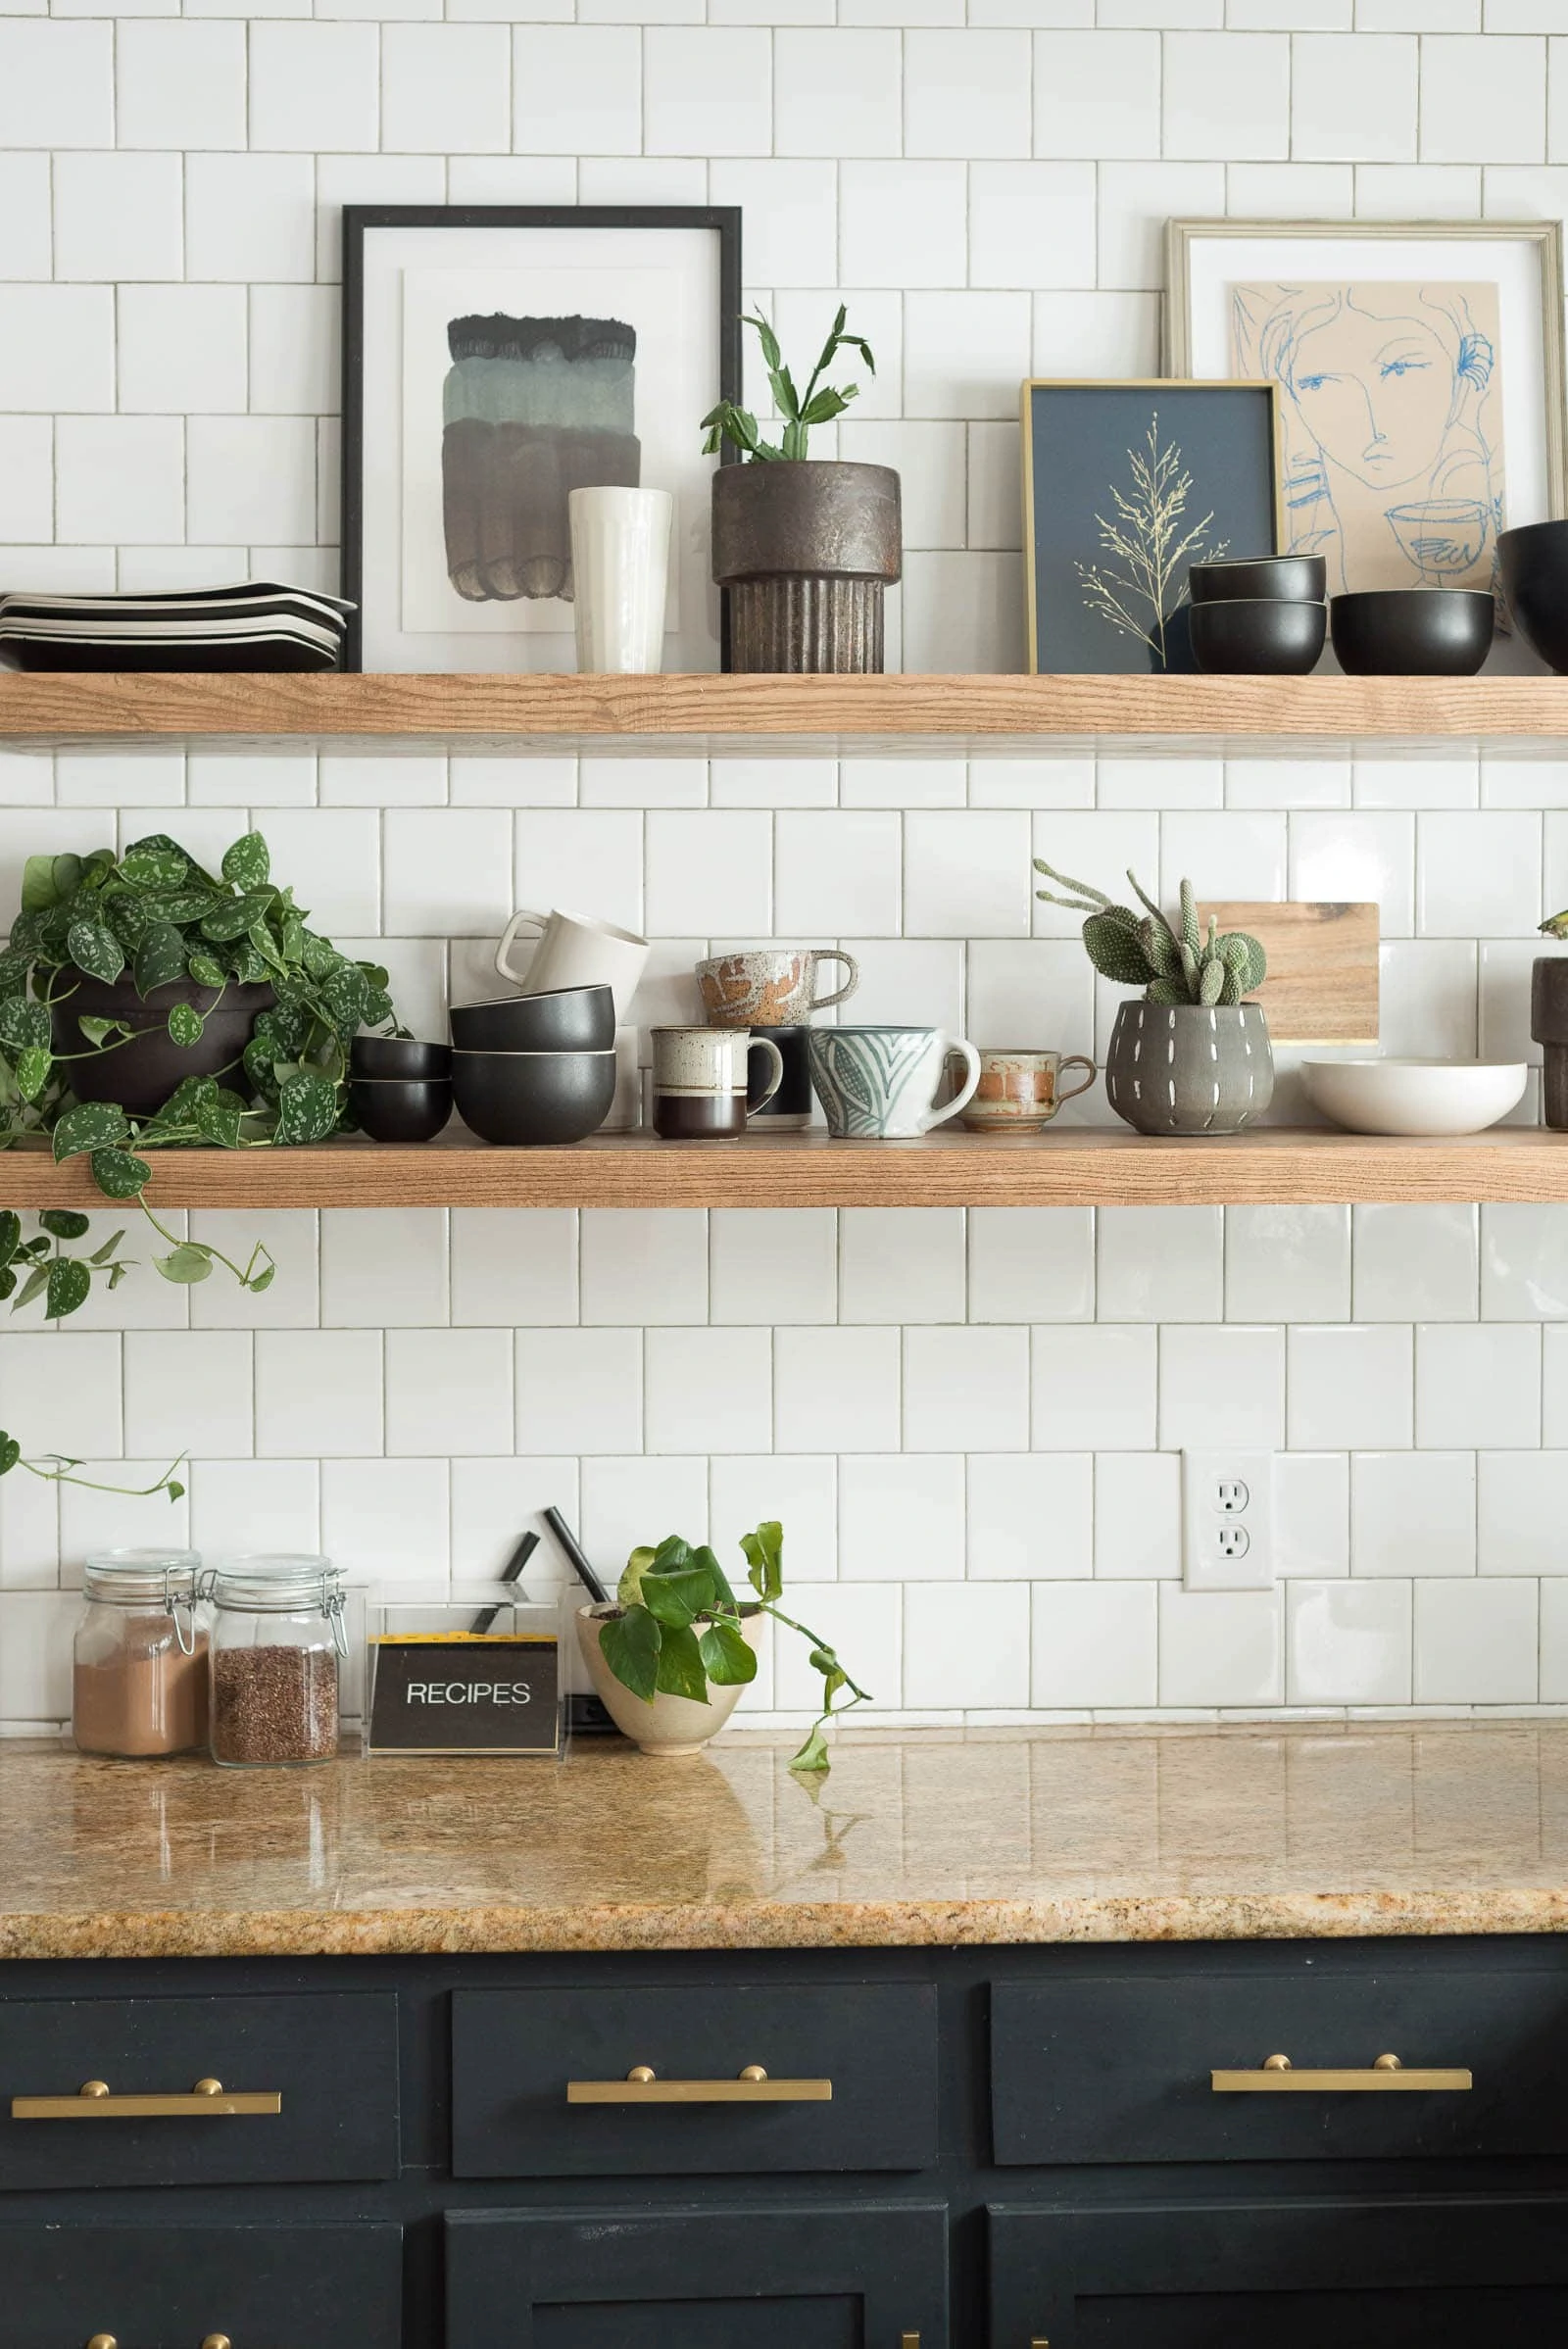
If you don't know, Luke and I installed the shelving ourselves. See our tutorial for the Heavy-Duty Floating Kitchen Shelves if you missed it the first time. Or, if you need measurements for your open shelves, or anything else, I have a big open shelving guide that will give you lots of information.
The install wasn't too hard but it was also before anyone online was installing their own open shelves. So, we had to kinda figure them out was we went. Once we got them up, it was very exciting. It felt like it had been a long time coming because, really, the kitchen remodel took us a long time. The shelves were basically one of the last things to get finished.
*Affiliate links below. Thanks for supporting this blog. Click to read my privacy and disclosure.
Lewis Dolin Brushed Brass Pulls | Shelf Brackets | Brass Light
Luke and I hung up the shelves and then I was in charge of staining and finishing them. Well...
I might have cut a corner and decided not to put poly on the shelves. My thought process was that they weren't going to get messy. Well, that's kinda right and kinda wrong. You see, weirdly enough, they don't accumulate lots of dust. I know, strange! BUT, as much as I'm careful about what I'm putting on them, this happened:
Do you see the coffee cup rings? There are two of them side by side.
Well, to be frank, I was annoyed with myself but not heartbroken about it. BUT, I am smart enough to realize that I'm lucky that nothing terribly bad happened to the shelves.
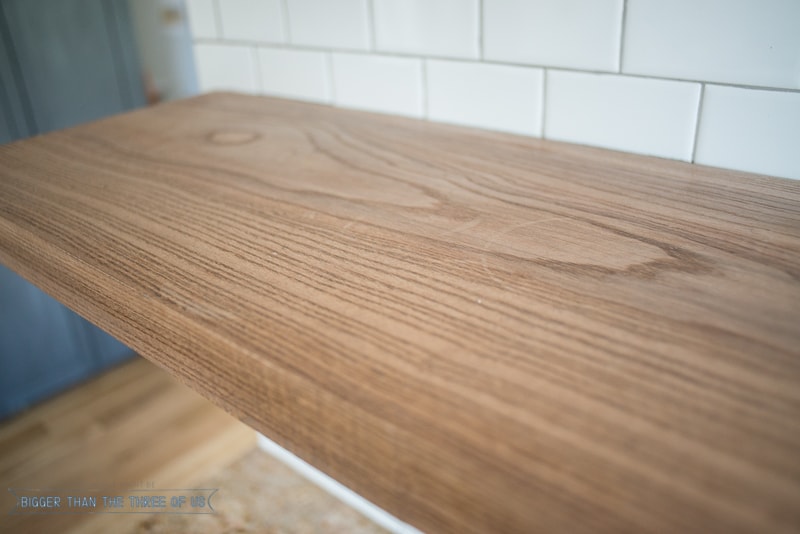
So, after reaching out to Brit over at House Updated (she's my go-to for asking questions or chatting design) she encouraged me to go with matte poly.
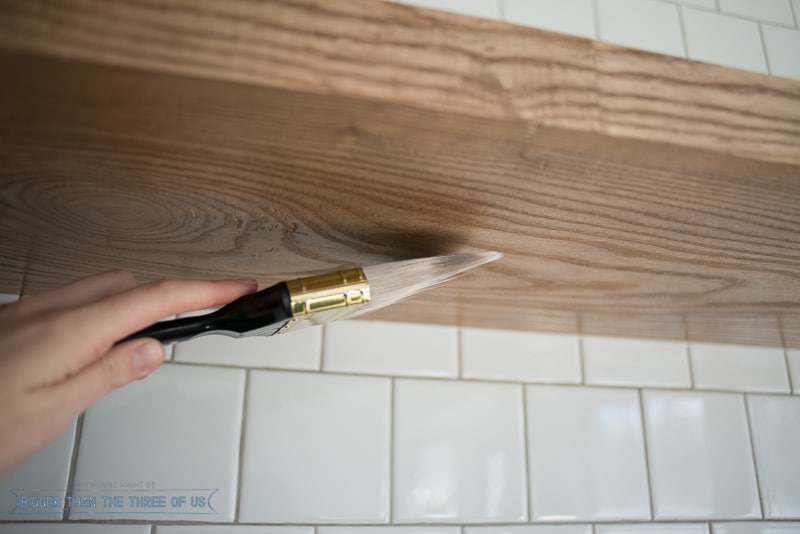
How to Finish Open Kitchen Shelving
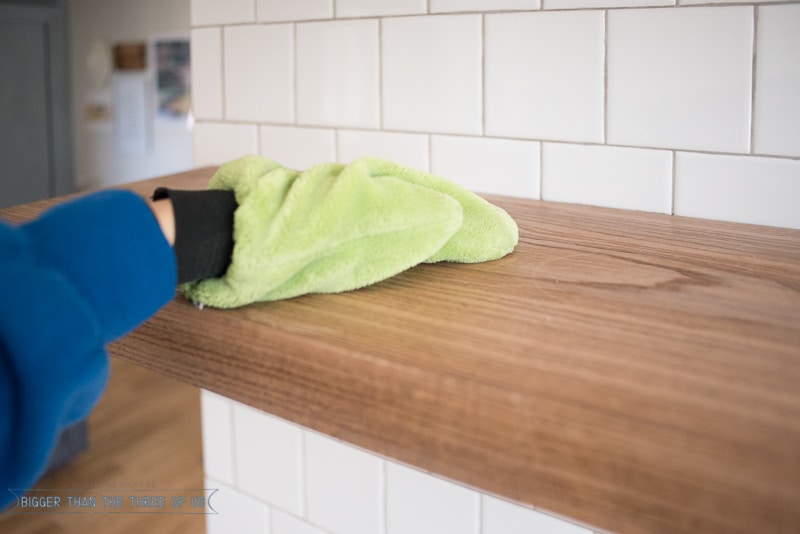
- Wipe the shelves down with a clean microfiber cloth
- Prep your supplies. You will need a paint brush and Polycrylic. I used Minwax water based Polycrylic.
- Brush a light coat of Polycrylic on all sides of wood showing. Allow dry time.
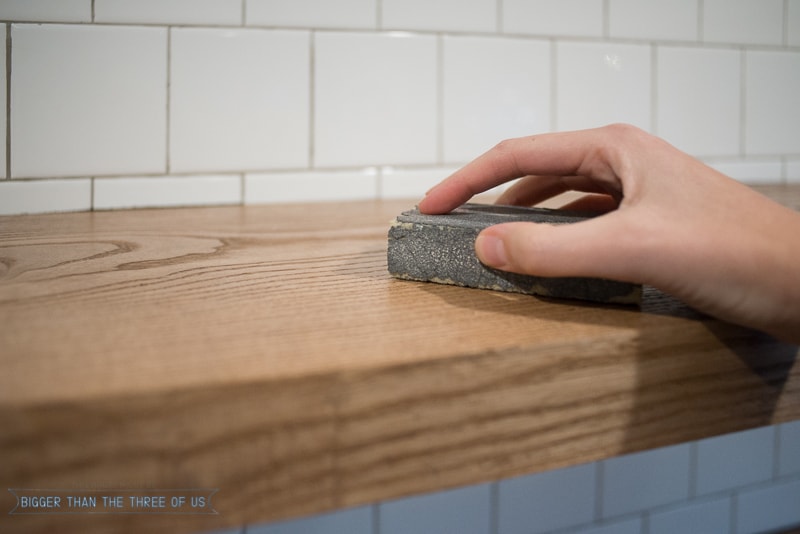
- Once dry, sand gently with a sanding pad. Wipe down again with the microfiber cloth. Apply another coat of Polycrylic.
- Let dry and abide by curing times before putting any dishes on your shelves.
What about the coffee cup rings? Well, I left them. They really don't bother me. If you had staining on your shelves and you wanted to get the staining out then you would have needed to sand them before you applied poly. Here's a great tutorial on sealing butcher block that would help you do this process for your shelves!

So, I encourage you to not be like me and to do things right the first time.
}


Brit | House Updated
So glad you finished up your shelves and they look great! I like your styling skills. 🙂 And thanks for the shout-out - I'm so glad we have each other to talk about all this stuff!
Ashley Mayes
Thanks Girl! Of course!!
Carol
What type of wood did you use? What stain or is it natural?
Tracey (From KY)
Shelves look so good! Love them!
BTW, saw your story in IG about the living room situation.:) You should paint the return vent cover the same color as your wall. That way it won't stand out quite as much. I did that to all of mine and it looks so much better, but of course still not as good as if they weren't there at all.
You don't need to take the covers down off the wall either. Just get a hand brush and give it a couple of coats.
Ashley Mayes
Thanks Tracey! I LOVE the idea to paint the vent cover the same color as the wall!! Totally doing that soon!
Jessica
You do such an incredible job that I can never tell. I know how you feel though. I cut cost by painting my living room floor and I regretted it since. We plan to lay flooring and already have the wood cut, but now that has to go elsewhere (in another room) and I do not have the moola to fork over more wood for the living room. I only show the pretty, but trust me if you saw the ugly, you would be like whoa!
Ashley Mayes
Thanks Jessica! I hate that you regret painting it! I bet that was a chore to paint it in itself! We have major ugly too, so you aren't alone!
Julia@Cuckoo4Design
I use the same poly cycle for projects and love it. And love your kitchen 😉
Ashley Mayes
It's so simple to do... just wish I would have done it right the first time.
Toni | Small Home Soul
It's such a drag when stuff like that happens in our new kitchen. I'm glad it's something you can change now and protect them from future damage. I didn't realize water hand dripped off the counter and onto the top of one of my cabinet doors. It swelled the seam a little, what a burn. Thankfully it's not visible when the door is closed.
Ashley Mayes
Exactly! We drip water off the sink all the time! I hope ours doesn't swell but then again... we just need to tell ourselves that we are living in our homes and things like that just happen.
Steve C
What color and brand paint is on the cabinet?
Ashley Mayes
It's Cracked Pepper by Behr color-matched so I could use Benjamin Moore Advance.
Abby
Love your shelves; do you mind sharing the ceiling height and how many inches above the counter your first shelf is?
Ashley Mayes
8ft ceilings and 18 inches from the bottom of the bottom shelf to the countertop.
Sara
Hello! Your work is beautiful! Do you mind sharing what type of wood you used for the shelving??
Ashley Mayes
Thanks Sara! We used Ash.
Carol
What is ash wood? A type of oak? Walnut?
Ashley Mayes
Hi Carol,
Ash is a wood species that is generally harder than oak.
Cassandra
Love the shelves thanks for posting this it’s so helpful! Was wondering where the flush mount light is from? I love it and have been looking for one for my kitchen!
Ashley Mayes
Thanks!! Here it is (affiliate link): https://rstyle.me/n/c584rxb5yhf
sheri l cabral
where did you get the shelves or if you made them please share how and what wood, etc...
Ashley Mayes
Hi Sheri,
I made a floating shelves guide! Here's the link: https://biggerthanthethreeofus.com/project-gallery/diy-open-shelving-kitchen-guide/
You'll find that it answers all your questions + some that you probably didn't think of!
Thanks!
Meredith
Do you remember the stain color you used on the shelves?
Ashley Mayes
Hi Meredith,
It's weathered oak by Minwax.
Lisa K
Hello! I have been loving and stalking your kitchen remodel #goals.
I wanted to use subway tile but can’t figure out the color grout I like. Yours looks perfect can you please share the color of the grout? Thank you
Ashley Mayes
Hi Lisa, Thank you! We used oyster gray found at Home Depot.
Mark Norman
Such a genius and creative ideas I found in your blog! I love your kitchen and the shelves look great! I might do something like this very soon as well.
Thanks for sharing this with us.
Heather Terese
Can you tell me the green paint color of the lower cabinets? They are gorgeous!
Ashley Mayes
Hi. They are actually called "cracked pepper" and if you search my site, I've used them all over in different applications. They don't pull green in person but it really changes with the light.