

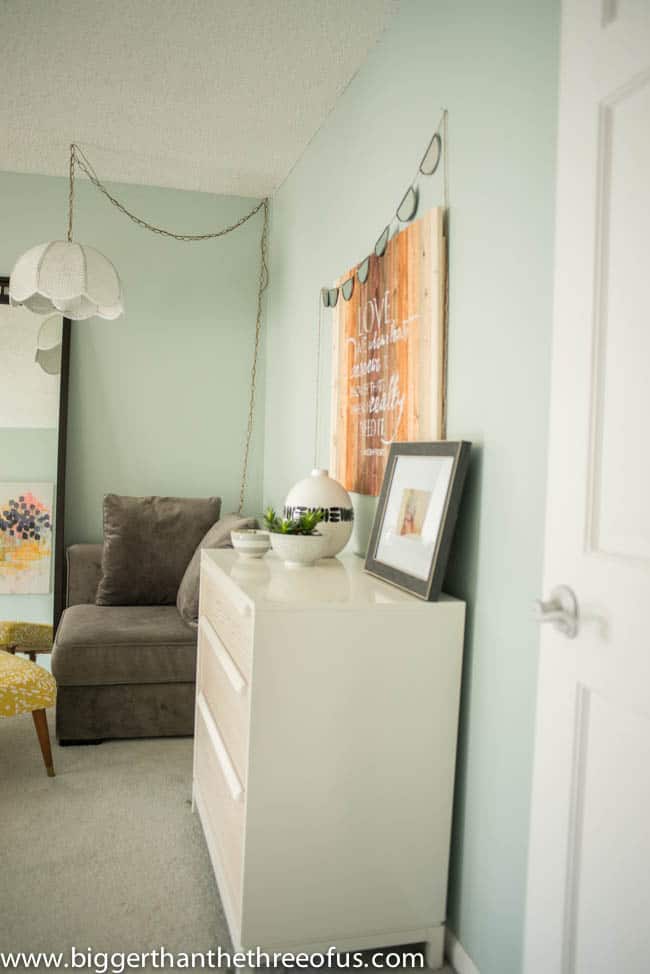
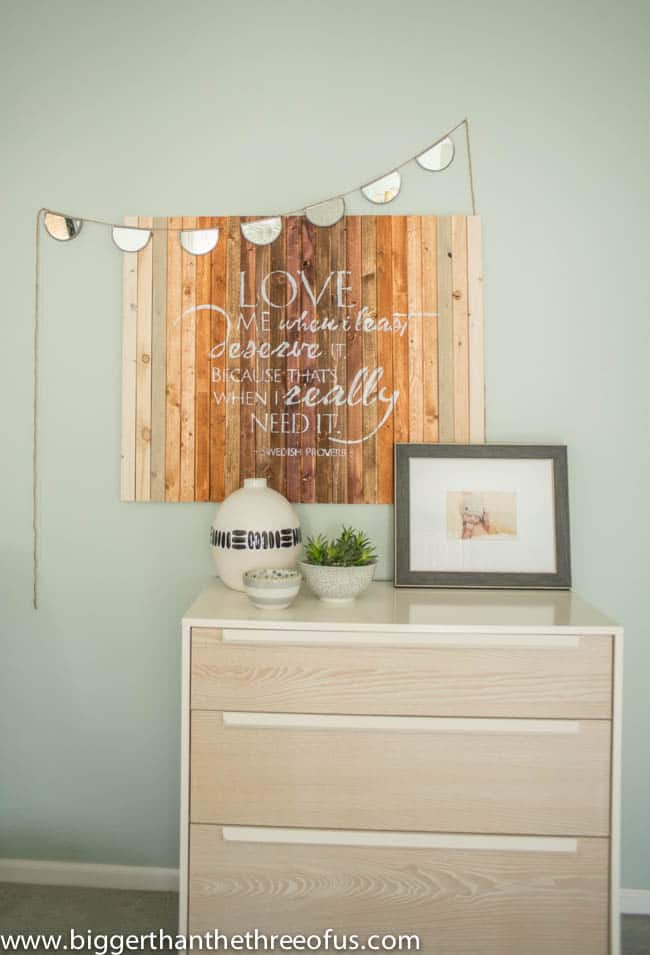
A few weeks ago during Thrift Score Thursday, I menionted that I wanted to add some wood tones to our bedroom. I did that by adding the bowls that I thrifted.
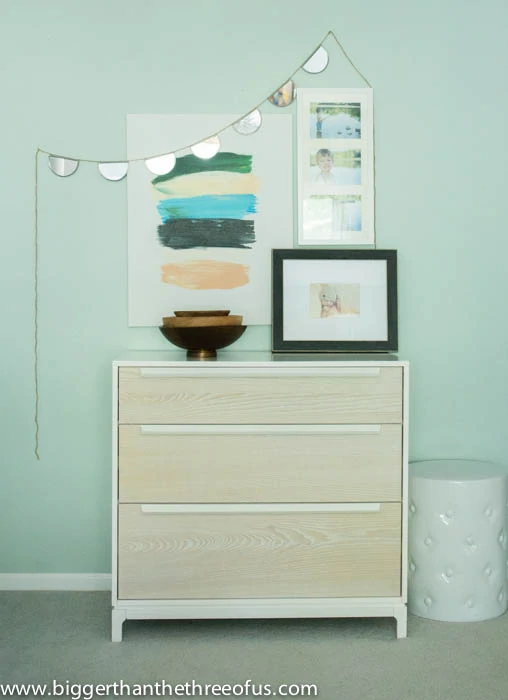
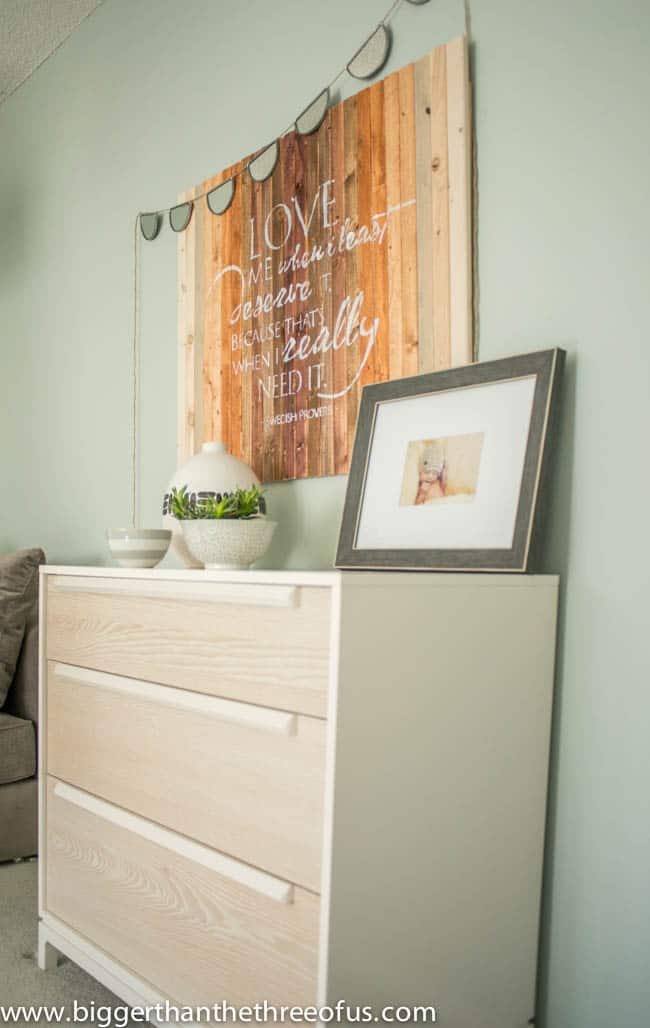
But, I had in mind that I would like a piece of art with wood tones to make a focal point. It was further in my mind when I stole that brushstroke painting that Luke painted (above) and placed it in our gallery wall in the living room. So, for the past month or so, the little dresser has stood without art. It's been sad!
When WiseDecor contacted me to see if I was interested in working with them, I thought it was the perfect opportunity to jump on adding that warmth to our bedroom that I felt was missing.
I have always been a huge reader and I think that goes hand-in-hand with my love for quotes. Seriously, all through middle school and high school, I had journals of quotes. I would print them out and paste them in (with old-fashioned glue). =) That love affair with words and quotes has continued. I have a few around my house (Pride and Prejudice printable, Travel the World Printable, nightstand art, etc.), but I'm always looking to add more in a way that fits with our style.
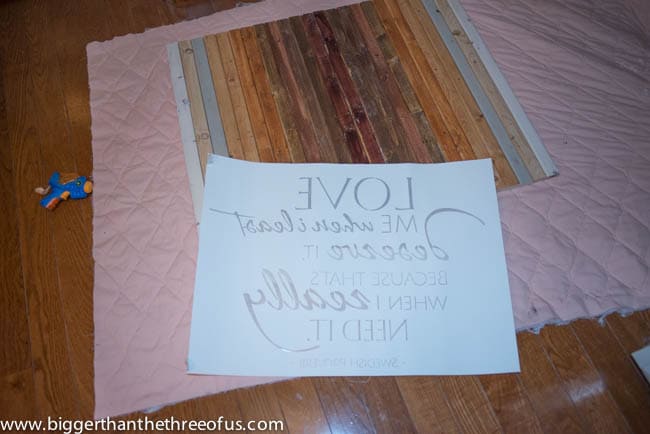
I looked through all of WiseDecor's transfers (and they have a ton!), but I didn't find one that really spoke to me. I had a few quotes in mind that I loved, so I was able to have a custom stencil made out of one. The process was simple. Submit the quote and pick out the lettering. They have a designer put it together for you in the sizing that you want and then you proof it. I was the annoying customer (like usual... that is totally me 100% of the time), who said, "hmm, I like it but it's not 100% me. Can we do this or this?" Thankfully, that was a non-issue and, after the final proof, we were ready to go. Well, at least on the stencil portion of the project.
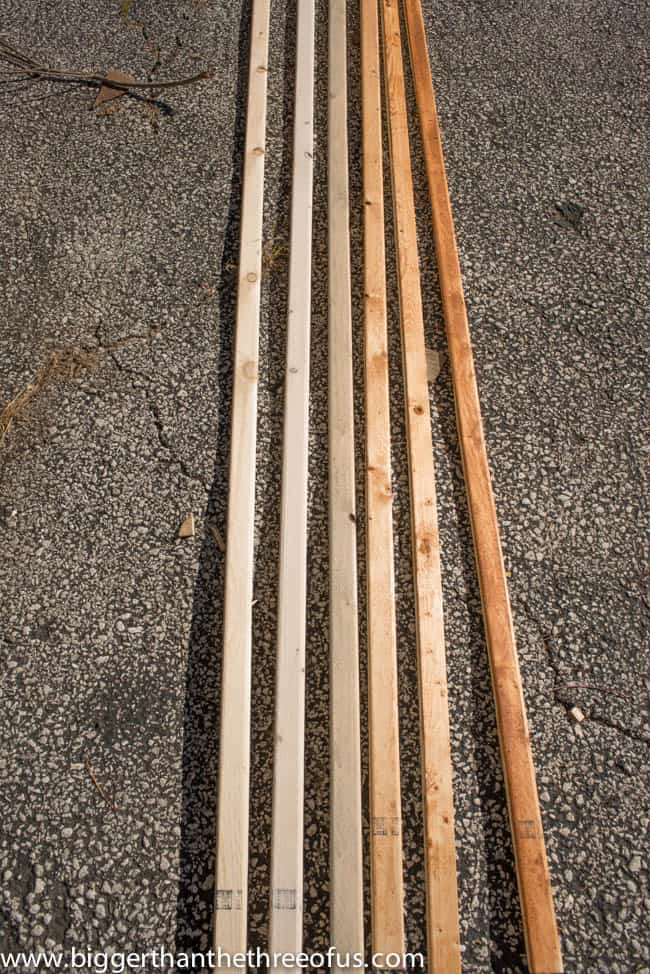
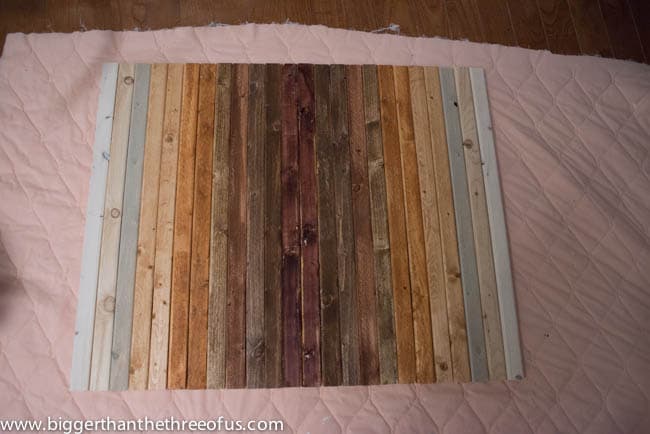
I had this terrific idea (can you read my sarcasm) to do a custom piece with different color boards that were stained and different sizing to make some really cool abstract shape. Let's talk about the staining for a bit and then I'll get to the shape part.
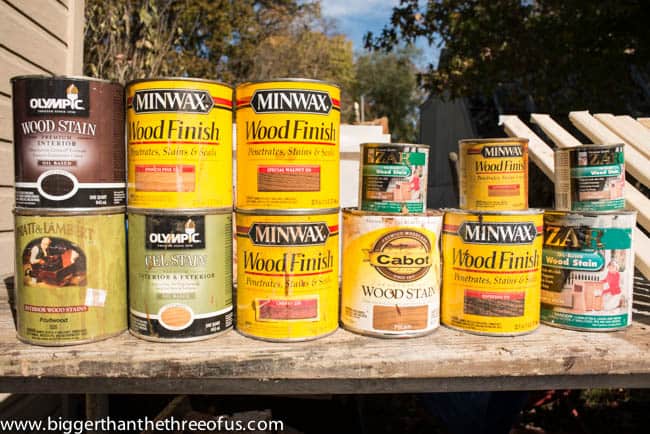
Since we own about three cans of stain and I didn't want to buy multiple cans just to have one board stained a different color, I asked my Grandpa if I could come over and use some of his stain. He seriously had like 60+ cans. I was totally jealous!
He was a bit appalled by the "quality" (hmm, lack of quality... bottom of the barrel) wood that I picked out. I assured him that I totally knew what I was doing. LOL.
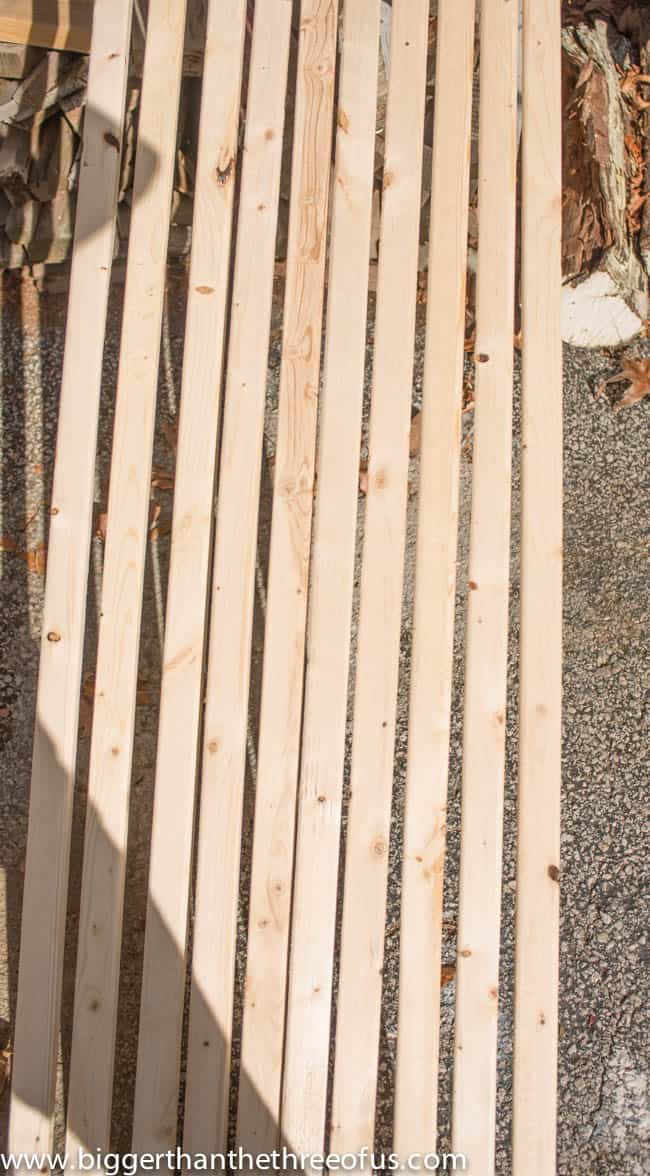
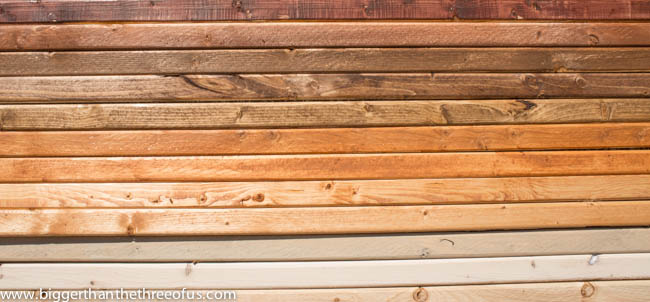
Anyways, we choose stains from light to dark.
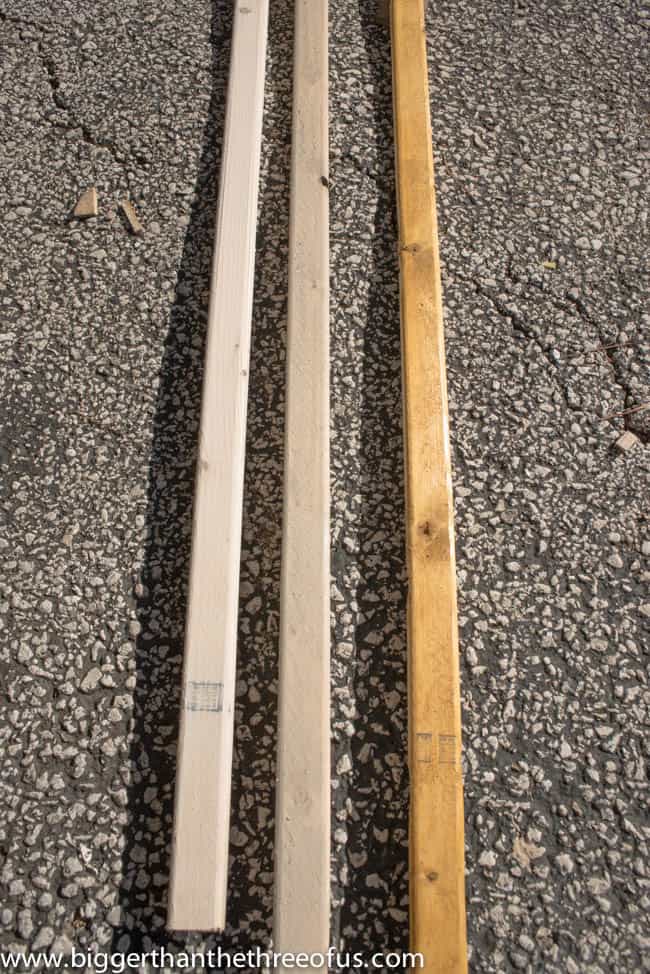
I just kept applying stain and, a few times, one ended up begin the wrong color. We just sat that one aside and saved it for later.
The couple that were the wrong color, we sanded lightly and just stained darker.
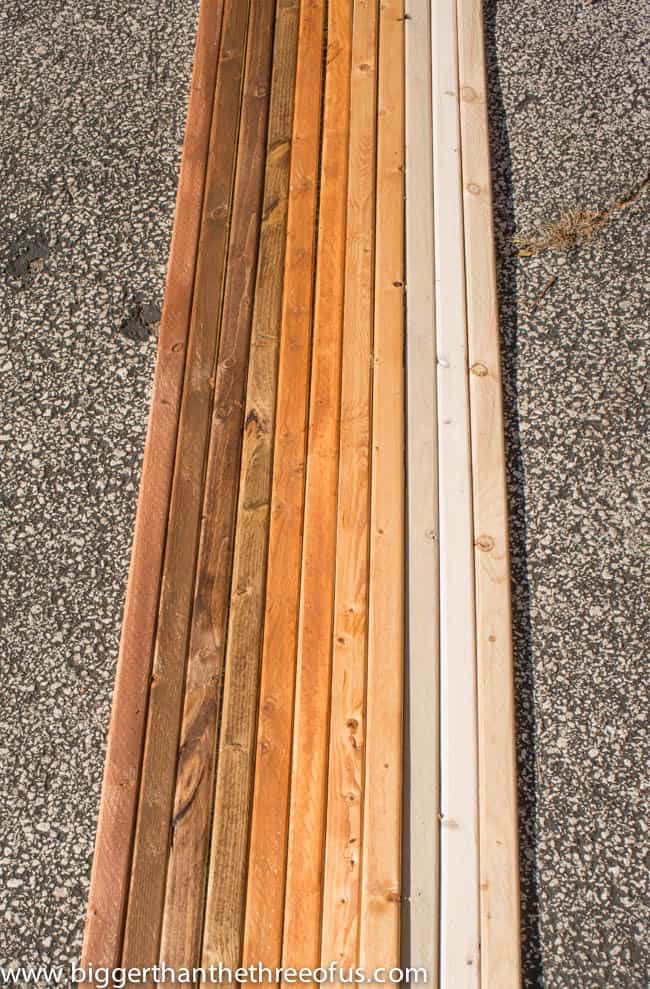
I was going for an ombre effect.
Let's get to the cutting part. Luke did all kinds of crazy geometry (I think I got a D in that class, so you know I wasn't doing the math) and it looked so good on paper. Then, come to find out our miter saw could not handle the angles. No matter. We figured out how to make a fence for the miter saw. Basically that allows us to cut at a sharper angle with another board up against the saw. The fence gets screwed into the saw and then you make the cut. Well, to make a long story short, it totally would have worked if we wanted to flip the fence after every cut. Basically screw in, cut the board, screw out, screw in the other side, cut the board and repeat. That would have had to be preheated 14 times. I was beyond frustrated at this point and just wanted to get the thing done. So, still loving the ombre effect, I said just cut the boards straight and lets go with that.
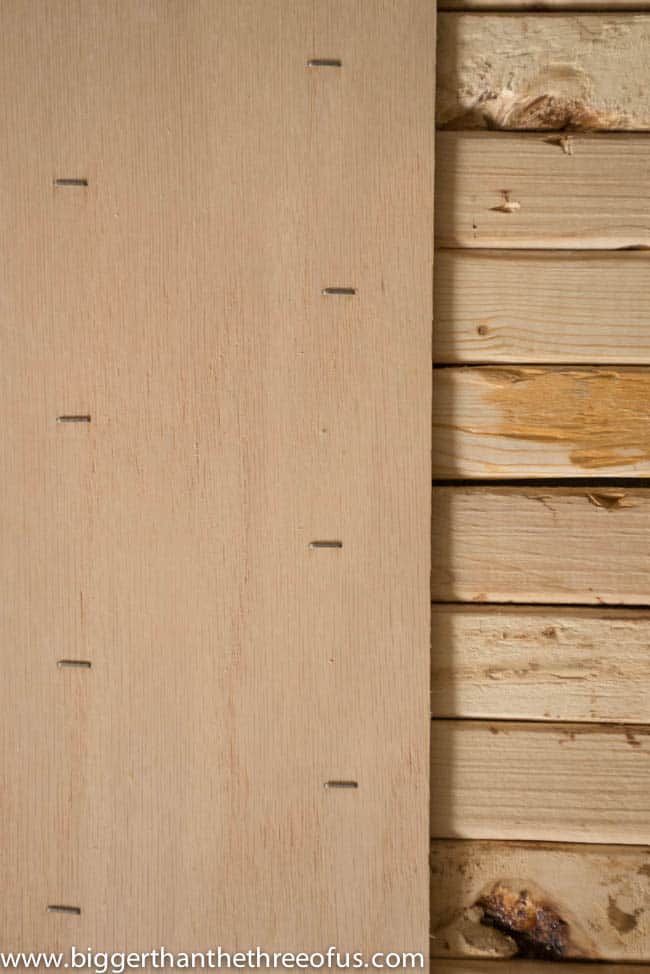
He cut them larger than the stencil. We adhered them to a thin piece of plywood using staples. We shot the staples in through the back so that they didn't come out through the front of the stained boards.
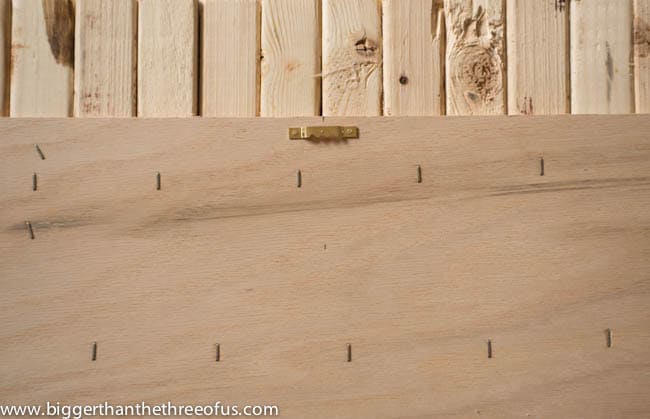
I don't have a close-up of the brads, but we went back through and reinforced with staple brads.
Whew, are you still with me? =)
At this point, we had to move indoors and work late (hence the terrible pictures). Sorry guys.
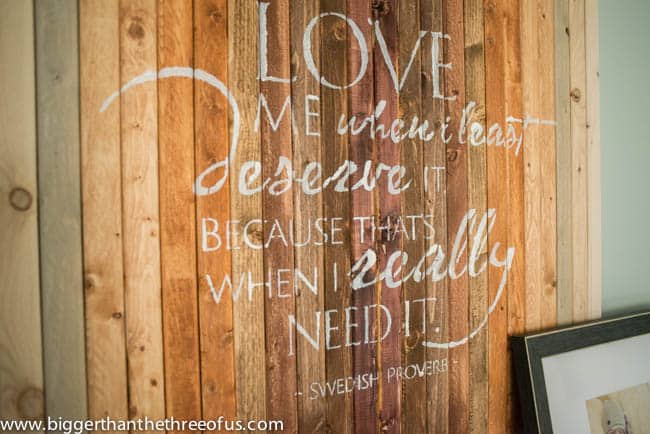
We Luke followed the instructions for the stencil and centered it on the wood.
We taped it down and he got started painting. He went pretty light with a small paint brush (like a canvas painting paintbrush) and was just overly careful about not getting underneath the letters.
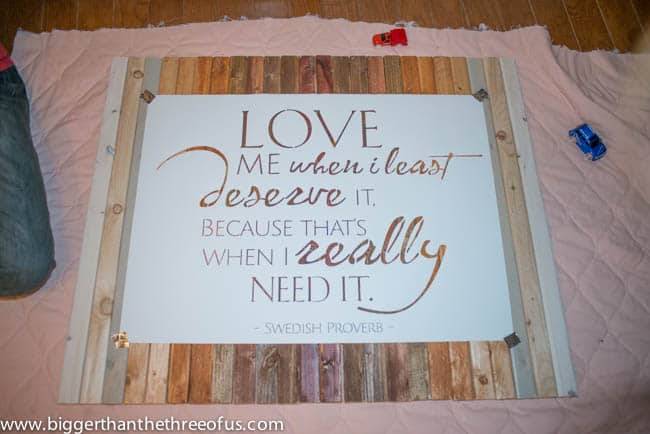
Stencils are for flat surfaces and our wood art was definitely not perfectly flat so we knew that there would be some variation.
I totally love the variation though and I think it fits with the 'rustic-ness' of the wood.
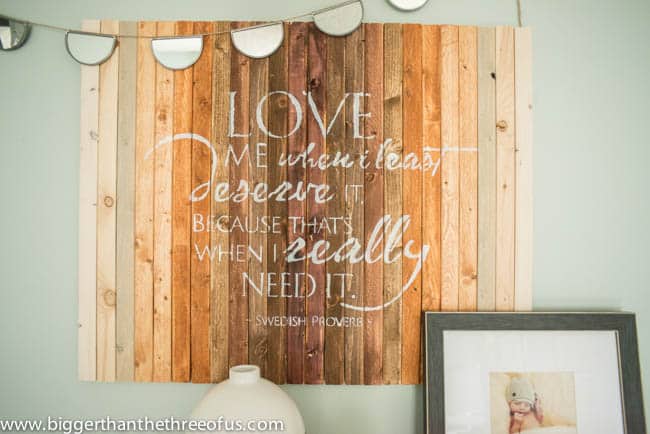
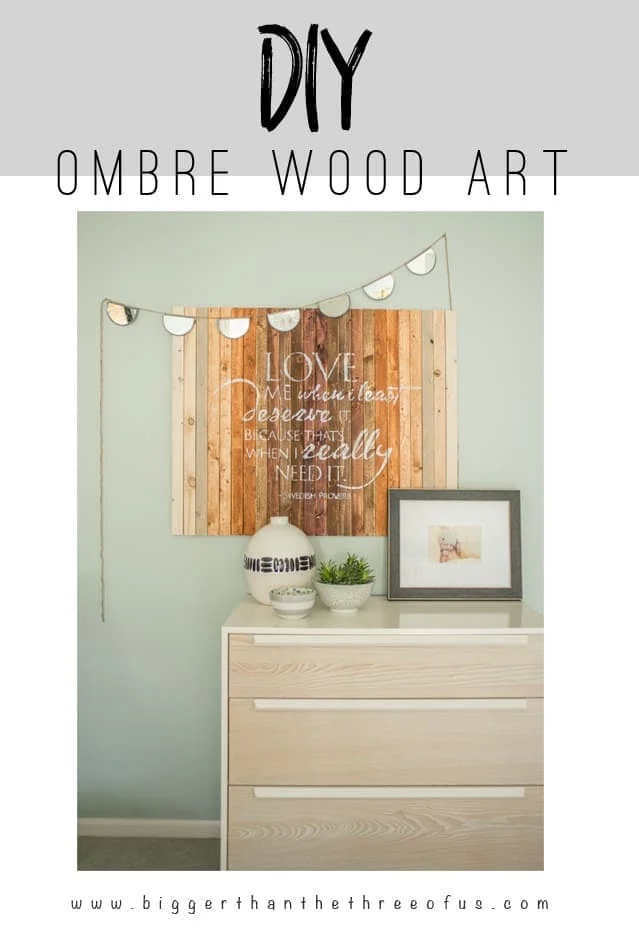
I think the wood staining is super neat and a bit different for this type of project. What do you guys think?
DIY Ombre Wood Stencil Art:
WiseDecor provided me with the stencil, but all reviews and thoughts are 100% my own.
WiseDecor would like to offer one of my readers a $75 credit. How exciting is that?
Use the Rafflecopter below to enter!
Linking up to:
Found and Foraged, C.R.A.F.T., Your Designs This Time, The Makers, The Winthrop Chronicles, Home Stories A-Z, Hit Me With Your Best Shot, Outside the Box, Work It Wednesday, Think and Make Thursday, Fry Sauce and Grits The Domestic Heart, Liz Marie Blog, The Inspiration Gallery, Creativity Unleashed - The Bold Abode, Remodelaholic, Whipperberry, The Creative Collection, Tatertots and Jello, and Frugal Crafty Blog Hop.
}

Charlotte W
Love the quote! And the ombre effect turned out really neat.
Ashley Mayes
Thanks Char!
Julia@Cuckoo4Design
Love the combination of quote and ombre wood art.
Ashley Mayes
Thanks Julia!
Jennifer @ Brave New Home
Your little vignette is really evolving and looking great. I drool over that dresser every time!
Ashley Mayes
Thanks Jennifer! That's funny that you say that. I think that dresser is going to move to our guest bedroom soon. I feel like it just doesn't quite work in our bedroom. I think the problem is that I went with a 'cool' type colors and I'm finding that I really love the 'warmth' of collected wood dressers. Who knows. It might stay. Sorry to ramble!
Shelly
Love the quote Ashley, and that was such a good idea to do the ombre boards like that. It turned out great! You're seriously creative girl! I just started cohosting a link party called On Display Thursday that starts at 9p CST on Wednesdays; it would be totally awesome if you shared this at my party! Just sayin!
http://www.thedomesticheart.com
Ashley Mayes
Thanks Shelly! I'll definitely stop by on Thursday and link up. Thanks for the invite!
Jeannie Buechele
I am totally in love with the different shades of color stain you used. I can't wait to try and make one for my home 🙂
Ashley Mayes
Thanks Jeannie! Go for it!
Anu
This is really lovely. Love the way you styled it with the bunting and that sweet photo!
Ashley Mayes
Thanks Anu! I found that bunting on Etsy last year and just fell in love with it!
R. Lynne
Wonderful idea! the ombre effect is really a unique touch!
Ashley Mayes
Thanks Lynne! I've had an itch to try out something ombre and this fit the bill!
Anna
so cute! I love quotes as well, cannot wait to try something similar!
Ashley Mayes
Thanks Anna! Make sure to enter the giveaway for your chance to win!
Alexis @ Persia Lou
This is awesome, Ashley! I love the ombre effect. Nicely done!
Ashley Mayes
Thanks Alexis! I think the ombre added something a bit different. =)
Cheryl
Turned out great. Love the differing tones of wood!
Ashley Mayes
Thanks so much!
julia mcintosh
I am in love with the ombre! Beautiful job!
Ashley Mayes
Thanks Julia!
JaneEllen
The colors of stains blend very nicely to give it great look. The boards you used give it different look also, love it. The saying is great, makes you think a bit. You both did a great job. I'd get impatient to get on with it too. Once something gets started I want to keep on and finish.
I was working on projects last night for craft show on 12/13 and hubs hollered at me to get my shower and come to bed. It's hard for me to quit once I start. Afraid I'll lose idea of what I'm making. WE have to have photos of all we're selling by 11/30 with application, it's juried show. I just found out about it on Monday. Will get done what I can and that'll have to do it. Making holiday stuff as we have plenty of regular projects made, shelves, etc.
Love your project, turned out fantastic. Happy season
Ashley Mayes
Thanks JaneEllen! I hope your project turns out well!
Sarah @ Little Red Brick House
Oh my gosh, this is so awesome, Ashley! I love the ombre! It's so stunning.
Ashley Mayes
Thanks Sarah! I think the ombre added a little bit of flair... which I love. Thanks for coming by!
Leigh Anne
I love this Ashley! So pretty!! Thanks for sharing at Think & Make Thursday. We don't have a party next week due to Thanksgiving but the following week your project will be one of my Bright Idea features!! Have a Happy Thanksgiving!
Ashley Mayes
Thanks Leigh Anne! You have a happy one as well!
Carrie This Home
I love this! It adds such a warm tone to the bedroom and it's a sweet reminder to be graceful to the ones we love (or to remind them to be graceful with us!) I entered the giveaway and would love to try one of these stencils out!
Thanks so much for sharing this at the Frugal Crafty Home Blog Hop! I will be featuring this post at our next party!
Ashley Mayes
Thanks Carrie! I love the saying. Just perfect. Thanks for the sweet comment and I can't wait to be featured. =)
Bre @ Average But Inspired
This is SO cool! I totally love it! The different stains are gorgeous and make the art so interesting! Thank you so so so much for sharing it with us at On Display Thursday!
Ashley Mayes
Thanks Bre! I just love the different stains.
Kyla @HouseOfHipsters
YES! YES! YES! I'm jumping up and down over here! Ever since your tease on IG I've been wondering what you've been up to! THIS IS AWESOME and we better see it tonight on Found & Foraged lady! It's crazy cool!
Ashley Mayes
Thanks Kyla! I didn't link it up this week but will for sure next! =) The party looks like it's going great!
Cristina
Love the ombre effect and the words! Well done!
Ashley Mayes
Thanks Cristina!
Carmody
Beautiful Project!!! I also love the travel stamp stencils by Wise Decor.
Ashley Mayes
Thanks Carmody! I'll have to check those travel stamp stencils out!
Annette
I would use this in my guest bedroom that I plan on redecorating.
Ashley Mayes
Sounds awesome!
Amanda @ Dwelling in Happiness
This is so gorgeous!! Loving all those wood colors, so perfect!!
Ashley Mayes
Thanks so much Amanda!
Tasha @ Designer Trapped in a Lawyer's Body
I LOVE this, Ashley! I am featuring it Thursday at Think and Make Thursdays. Thanks so much for linking up!!!
Ashley Mayes
Thanks Tasha! Excited to be featured!
Leia @ Eat It & Say Yum
Wow, that is beautiful!! I'd love to recreate this for my own home.
Ashley Mayes
Thanks Leia! You should... it really wasn't hard!