

Learn how to make a DIY oversized canvas for large wall art or tapestries. This step-by-step guide covers frame building, canvas stretching, and float framing—all for a fraction of the store price. Updated for 2025.

Quick backstory: I made this 93" x 60" canvas for my living room because I couldn't find a store-bought version large enough. It took 4 hours and cost significantly less than custom framing.

The search for a large art canvas ...
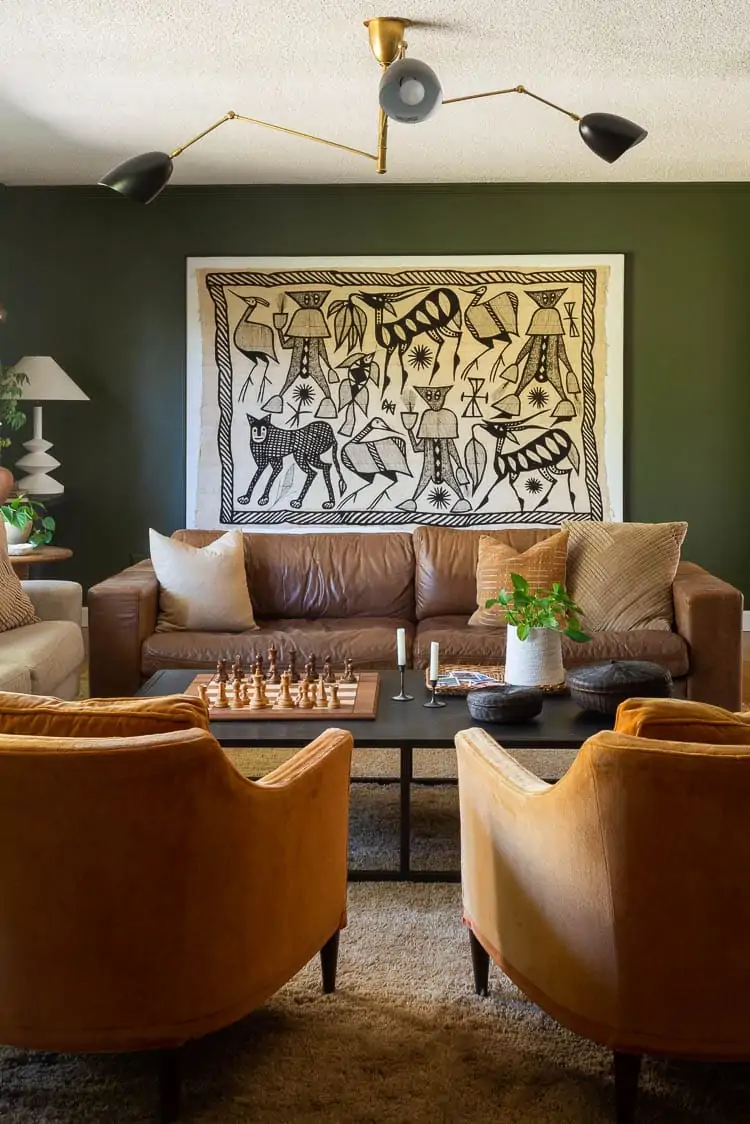
When I found my Korhogo textile, I was honestly stumped on how to display such a giant art piece. At over 5x7 feet, the piece was larger than any store-bought big art canvas that I could find.
I finally came around to the idea that I was going to have to make a DIY giant wall art canvas to mount my tapestry to. I'm sharing what I learned when I started to build the big canvas art frame, how to stretch a large canvas, tips on mounting a tapestry, making a frame for the art, and more!
I do want to share that this is less of a step-by-step tutorial and more of a general explanation of how to build large canvases, mount a big piece of artwork and then make a float frame.
We did this project over the course of a few months, not knowing exactly what I wanted as I was doing it, so I didn't think to take down exact dimensions and photos of each step.
Plus, if you are doing something like this, your textile, rug or oversized art will be a different size anyways so the exact dimensions of my piece won't help. What I did do though, is think through everything we used to make this piece so I could describe it here. I have quite a few photos that show how the frame came together, then photos of what the DIY canvas stretching looks like, etc. I think you'll definitely get an idea of how to do this project with the photos, nonetheless.
*Affiliate links below. Thanks for supporting this blog. Click to read my privacy and disclosure statement.

Steps to Build an Oversized Canvas Frame on a Budget
When you are thinking about supplies, you'll have to take into account how large you are wanting your art piece to be. Our frame dimensions are 93" x 60" which definitely qualifies as a big art canvas! Also, we framed the large canvas, so decide before buying supplies if you'd like to also make a frame around your large art piece.
Big canvas wall art supplies
- (2) 1" x 3" x 8" Common Board
- (2) 1" x 3" x 6" Common Board
- (2) 1" x 2" x 8" Common Board
- (2) 1" x 2" x 6" Common Board
- Wood Screws
- Drill
- Miter Saw
- Kreg Jig
- Wood Glue
- Pipe Clamps (tutorial on how to make these!)
- 84" Wide Primed Cotton Canvas (*I bought 6 yards)
- Trim Boards
- Finish Nailer
- Air Compressor
- Paint or Stain
Step to make a large canvas for painting
- Decide how large you want your large canvas to be.*
- Cut 45 degree angles on your common boards at the length that you need your frame to be to create a rectangle (if this is the shape you want your large art piece to be).
- Glue together and attach with screws (we used a Kreg jig here to put the screws in on an angle).
- See details on adding the middle bar below*
- Add vertical supports on the sides.
- Lay out the canvas face down (making sure to have a clean floor) and place the frame on top of the canvas.
- Cut and then staple the canvas around the frame, similar to how you would upholster chairs.
- Cut trim boards to frame the big canvas art to size. You will be cutting these at 45 degrees. Paint or stain and then attach with a nail gun.
*To start out with this project, you need to have a tapestry, rug or piece of art that you want to frame. I knew I wanted the canvas to be around 4-6" larger than my textile on all sides.
Tips for building a giant art piece
To actually build the frame, we looked at a few of the backs of art pieces that we had in our home and just went off of those to build the frame.
With the measurements that I shared above, we cut common boards with 45 degree angles on the miter saw to create a rectangle. We glued those together and attached them with screws. Then we started creating angled pieces to make each corner stay square. We used the Kreg Jig to put in screws for the angled pieces. At this point, the large art canvas still didn't feel completely sturdy so we added a middle bar* and more angle pieces from the middle bar.
*I will say that you DON'T want to add a middle wood piece like we did if you are not going to cover the canvas front with a textile or large piece of art. The wood bar DOES show through because the canvas is pulled tautly over it. I'm honestly not sure how you would get around this if you are just wanting to build a large canvas to paint on.
We kept adding supports from the vertical sides to the horizontal sides until we felt like the frame was secure. If you had a smaller piece to frame, this would be much simpler, but this piece is massive so it takes a bit more work. Here's one of the best pictures I have of the frame itself.

Once you have the frame, layout the canvas face down (making sure to have a clean floor). Cut and then staple the canvas around the frame, similar to how you would upholster chairs. If you want more information on how to do this, check out my post on how to reupholster chairs!

When you are learning how to stretch the material, a trick that we learned was to use a random board (see above) to help you pull tighter around your frame. This is a two person job. The canvas needs to be pulled tight and stapled down.

Attaching the tapestry
I wasn't sure how to attach the tapestry. At first, I tried double-sided tape. That kind of worked, but eventually it kept pulling away. After going back and forth over what to do next, I ultimately just hand-stitched the whole tapestry. The tapestry is HUGE but I had the stitching done in about an hour. It has worked great ever since I stitched it.
DIY canvas frame addition for more finesse
I decided that the piece needed just a bit of depth to the edges to make it feel finished. I found some small trim pieces at Lowe's (the thinest that I could find) and framed the canvas out. Here's a great tutorial for making a canvas float frame. I didn't take pictures when I was doing mine.

I painted my wood boards black and then attached it with a nail gun.

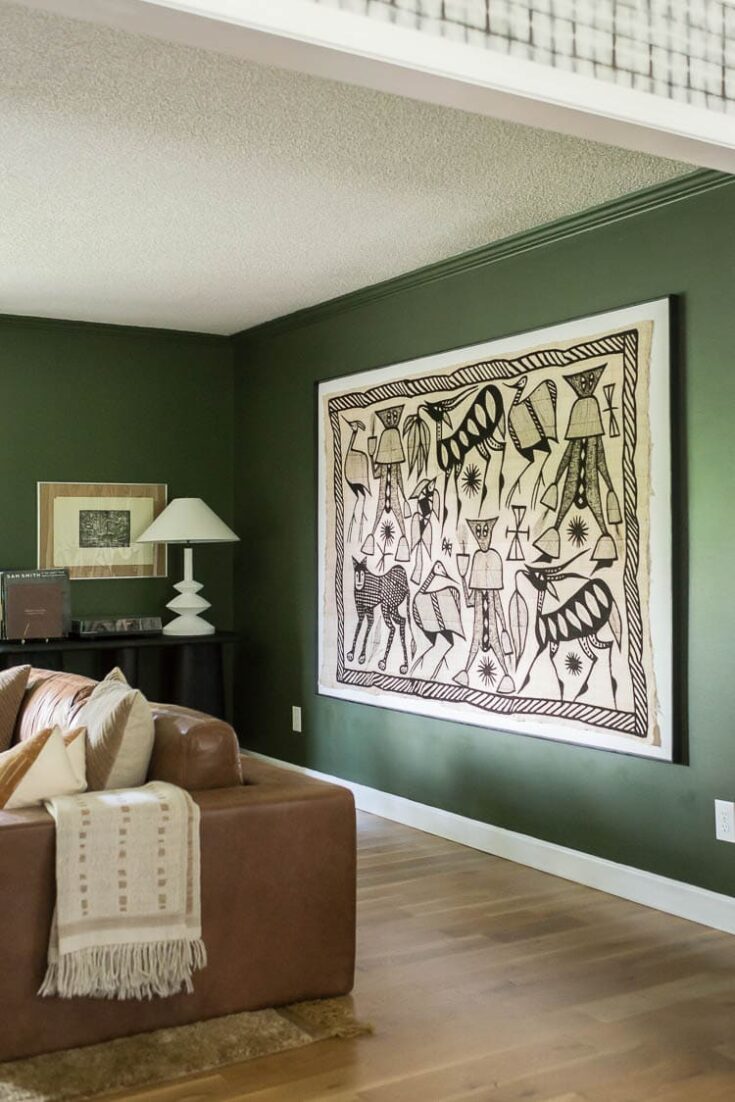
From across the living room, you can't tell that there's a float frame on the canvas but when you get closer, it adds so much dimension. I think it just helps the oversized canvas feel complete.
I hope this was helpful in giving you ideas for extra large wall art for your living room! We just winged it and, honestly, it turned out great. You are bound to have a few questions, so let me see if I can answer a few that you might have.
It's definitely cheaper to make your own canvas and especially so when you are making a large piece of art. In my case, we couldn't buy a canvas large enough for our tapestry, so we definitely had to make it. If you are consistently wanting larger art pieces though, buying raw material to make your own frame will be cheaper in the long run.
You could use a pre-made cork board if you wanted to display extra large wall art, especially in a tapestry form. You also could get away with using cardboard, but again, the supplies you use will either elevate our extra large wall art or not. So, keep in mind what your end goal is with your canvas art ideas!
Yes, and I've repurposed one with gesso and it turned out great! Check out my bucket list art piece for all the details.
If you want a chunkier wood frame, you could do that as well. Here's a DIY Framed Wall Mural that shows a similar process with thicker wood and it looks really good.
How to Make a Large Canvas
Make a large canvas to display a wall tapestry or to paint large art. From how to put together the DIY canvas frame to stretching the canvas, learn how to get started with this DIY canvas art tutorial.
Materials
- Wood Screws
- Wood Glue
- 84" Wide Primed Cotton Canvas (I bought 6 yards)
- Paint or Stain
- Trim Boards for Frame
- (2) 1x3x8 Common Board
- (2) 1x3x6 Common Board
- (2) 1x2x8 Common Board
- (2) 1x2x6 Common Board
Tools
- Drill
- Miter Saw
- Kreg Jig
- Pipe Clamps
- Finish Nailer
- Air Compressor
Instructions
- Decide how large you want your large canvas to be.*
- Cut 45 degree angles on your common boards at the length that you need your frame to be to create a rectangle (if this is the shape you want your large art piece to be).
- Glue together and attach with screws (we used a Kreg jig here to put the screws in on an angle).
- See details on adding the middle bar below*
- Add vertical supports on the sides.
- Lay out the canvas face down (making sure to have a clean floor) and place the frame on top of the canvas.
- Cut and then staple the canvas around the frame, similar to how you would upholster chairs.
- Cut trim boards to frame the big canvas art to size. You will be cutting these at 45 degrees.
- Paint or stain and then attach with a nail gun.
Notes
When you are thinking about supplies, you'll have to take into account how large you are wanting your art piece to be. Our frame dimensions are 93" x 60" which definitely qualifies as a big art canvas! Also, we framed the large canvas, so decide before buying supplies if you'd like to also make a frame around your large art piece.
*To start out with this project, you need to have a tapestry, rug or piece of art that you want to frame. I knew I wanted the canvas to be around 4-6" larger than my textile on all sides.
TIPS FOR BUILDING A GIANT ART PIECE
To actually build the frame, we looked at a few of the backs of art pieces that we had in our home and just went off of those to build the frame.
With the measurements that I shared above, we cut common boards with 45 degree angles on the miter saw to create a rectangle. We glued those together and attached them with screws. Then we started creating angled pieces to make each corner stay square. We used the Kreg Jig to put in screws for the angled pieces. At this point, the large art canvas still didn't feel completely sturdy so we added a middle bar* and more angle pieces from the middle bar.
*I will say that you DON'T want to add a middle wood piece like we did if you are not going to cover the canvas front with a textile or large piece of art. The wood bar DOES show through because the canvas is pulled tautly over it. I'm honestly not sure how you would get around this if you are just wanting to build a large canvas to paint on.
We kept adding supports from the vertical sides to the horizontal sides until we felt like the frame we secure. If you had a smaller piece to frame, this is much simpler but this piece is massive so it takes a bit more work.
Pin for later:


Abi
Was it hard to stitch through the primed cotton canvas - and did you do that after you stretched it around the frame?
Would you ever use un-primed cotton canvas?
And it looks beautiful!!
Ashley Mayes
Hi Abi,
It wasn't hard to stitch through at all. I'd recommend using a heavier weight thread and needle but honestly, it was easy! I don't think it would matter for this project if you used an un-primed canvas. You can always prime your cotton though too if you are worried about it. Thank you!
Laura
Did you use a specific type of stitch? Thank you!
Ashley Mayes
Hi Laura,
I didn't do a specific stitch... I'm a beginner when it comes to sewing! =)
PN
Hi, great tutorial. Do you have a close up of how you sewed? Did you do just the edges all through? I have no sewing experience so a pic of the stitch and how to make it blend with the tapestry would be great. Thank you!
Ashley Mayes
Hi, It's really hard to see the thread because it matches really well with the canvas. If you just search online for how to do a basic stitch by hand, some really good videos/tutorials will pop up! It's really easy. You can definitely do it with no experience.
Melissa
Where do you find cool textiles like this?
Ashley Mayes
Etsy! If you search for vintage textiles on there, you should see quite a few options.
Ginger
The reason why you can see the wood through the canvas is because you unfortunately missed a crucial step. All professional stretcher bars (which is what they are called) have wood the is angled away from the canvas on the side the canvas would touch the wood. So that middle support would actually not touch the canvas in a professionally done one. That’s how you wt around it touching….it doesn’t. FYI ☺️
John
awesume guide thank you. your canvas looks amazing. real grand feature. well done
From down under Aotearoa