

Our basement bathroom layout is pretty standard, but some of the bathroom plumbing is not. I'm sharing how we are designing around the layout of both the plumbing and the walls in today's post.
We are finally past most of the demo phase of our basement bathroom and I couldn't be happier. As I've been making decisions about the design of the space, I've found a lack of information about bathroom layout dimensions so I wanted to share about that.
We've also been planning a potential bathroom addition at our family cabin (for early next year) and I just had the hardest time getting my bathroom layout dimension questions answered. So, I thought that by sharing our basement bathroom with you today, I could share more about the design decisions that we are making because of the bathroom layout, plumbing layout and more.
AND... I'll share the design of the space too, because I know everyone loves to look at a pretty design board more than a demo'd bathroom with plumbing exposed! =)
Before we talk about the pretty stuff, let's chat about where we are at with the space and I'll share some of the before's with you. I put together a video walkthrough so you could see how it's all going down.
Bathroom Layout Before + Bathroom Demo
As you see, we have a ton of work to do, but there's progress. As I mentioned earlier, I wanted to share sizes with you. The basement bathroom rough-in is just over 4ft x 9ft.
The shower feels pretty small but I think part of that is because the shower plumbing is hung low. We plan to raise that up about a foot and I think it will help that part of the space to feel larger.
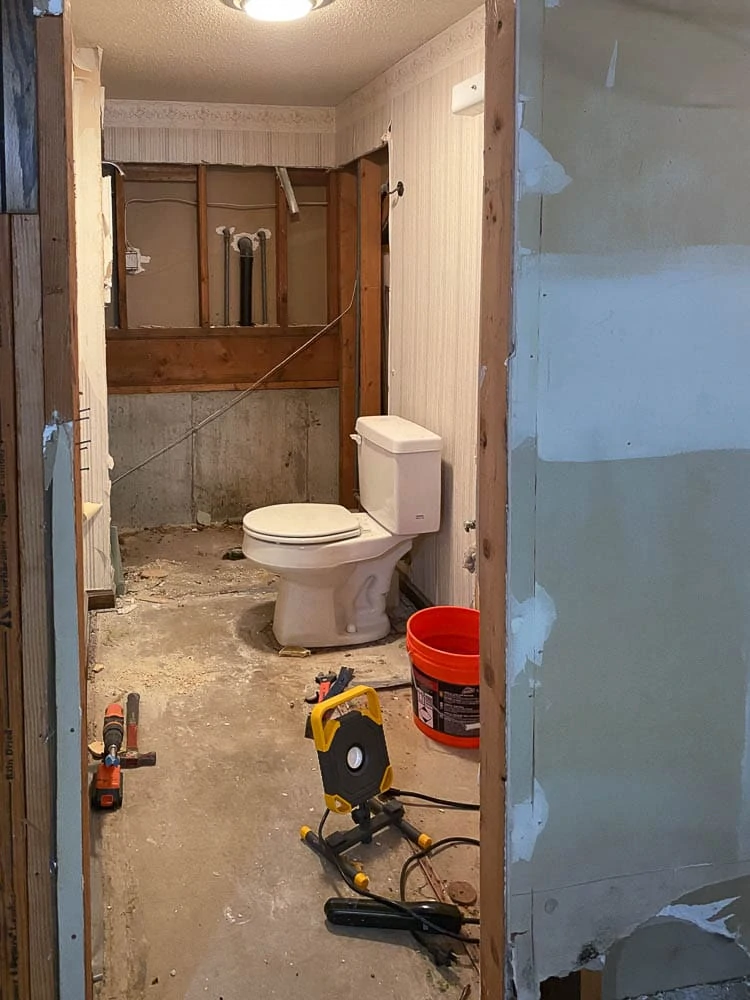
Unfortunately, the shower also has some plumbing complications. The exposed pipes that you see here are the water pipes to the laundry room. There's also another water supply line on the wall on the right. I suppose this isn't a horrible plumbing complication but it definitely limits where we can put in a shower niche.
Let's chat more about...
Layout Dimensions
This bathroom is just over 4ft by 9ft. For this space, we ordered a vanity that is 46.5 wide. I measured the old vanity and it was 45". I know this larger one will be a tad tight but I felt like it was the best option for our space.
As far as how the bathroom is laid out, it's pretty standard! The door will swing in and to the left. Immediately on your right will be the vanity, followed by the toilet and then the shower. I WISH the shower plumbing was laid out on the right side of the room but it's on the left. This means that I can't have a stagnant shower glass pane because you wouldn't be able to squeeze in the shower between the side of the toilet and the shower itself. So, although I have a single glass pane on my design board, I will have to have a door that opens in (or maybe even slides because I'm not sure that there's enough clearance for the shower head).
As you can tell, I still have quite a few decisions to make on the whole space. Honestly, it feels a bit overwhelming so I've tried to make a few decisions per week and am trying to feel ok with that.
*Affiliate links below. Thanks for supporting me. Click to read my privacy and disclosure statement.
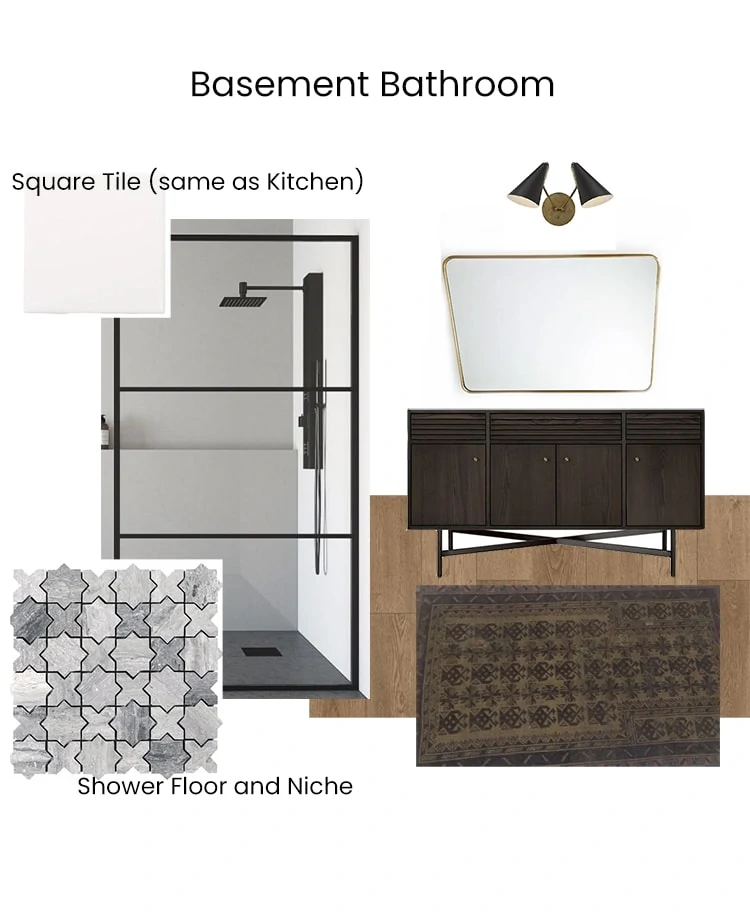
Basement Bathroom Design Plan
At first glance, it might feel like the shower is all in the cool tones and the vanity and mirror is all in the warm tones. I think that IS the case, but I do think that both will pull together with finishes in the end.
So, next up... we have asbestos abatement. The popcorn ceiling tested for 4% chrysotile asbestos. We've had other asbestos removed in the house so we know the procedure and it's expensive but worth it. So, the asbestos abatement is scheduled for this week and then after that we should be ready to start on the shower. Wish us luck!
}


Ash
I think once you add your towels and bathmats etc over near the shower you'll really even it out. Can't wait to see it - love the shower floor tile!
Ashley Mayes
I'm hoping that is the case! Thank you!!!