

See this unique black bathroom featuring black tile, powder room decor, and more!
I'm beyond thrilled to share our black tile bathroom with you guys. If you've been following along since the first post on this space, thank you! What I had hoped would be a three to four month project, ended up taking us ten months (but who's counting, right?).
I'll be sharing a bunch of before/after photos of the powder room, plus how we tiled the black bathroom walls, powder bathroom renovation costs, and more.
Hilariously enough, I forgot to vacuum the floor after we installed the towel rack. Don't look too closely behind that trash can! Oops!
So, before I jump into the modern powder room, including what we did and why, let's walk down memory lane.
Before photos of the powder room
The main door to the right is the powder room door. That door couldn't open completely while having the dryer door open, too. It's a very tight space and we knew we needed to address that in the bathroom renovation.

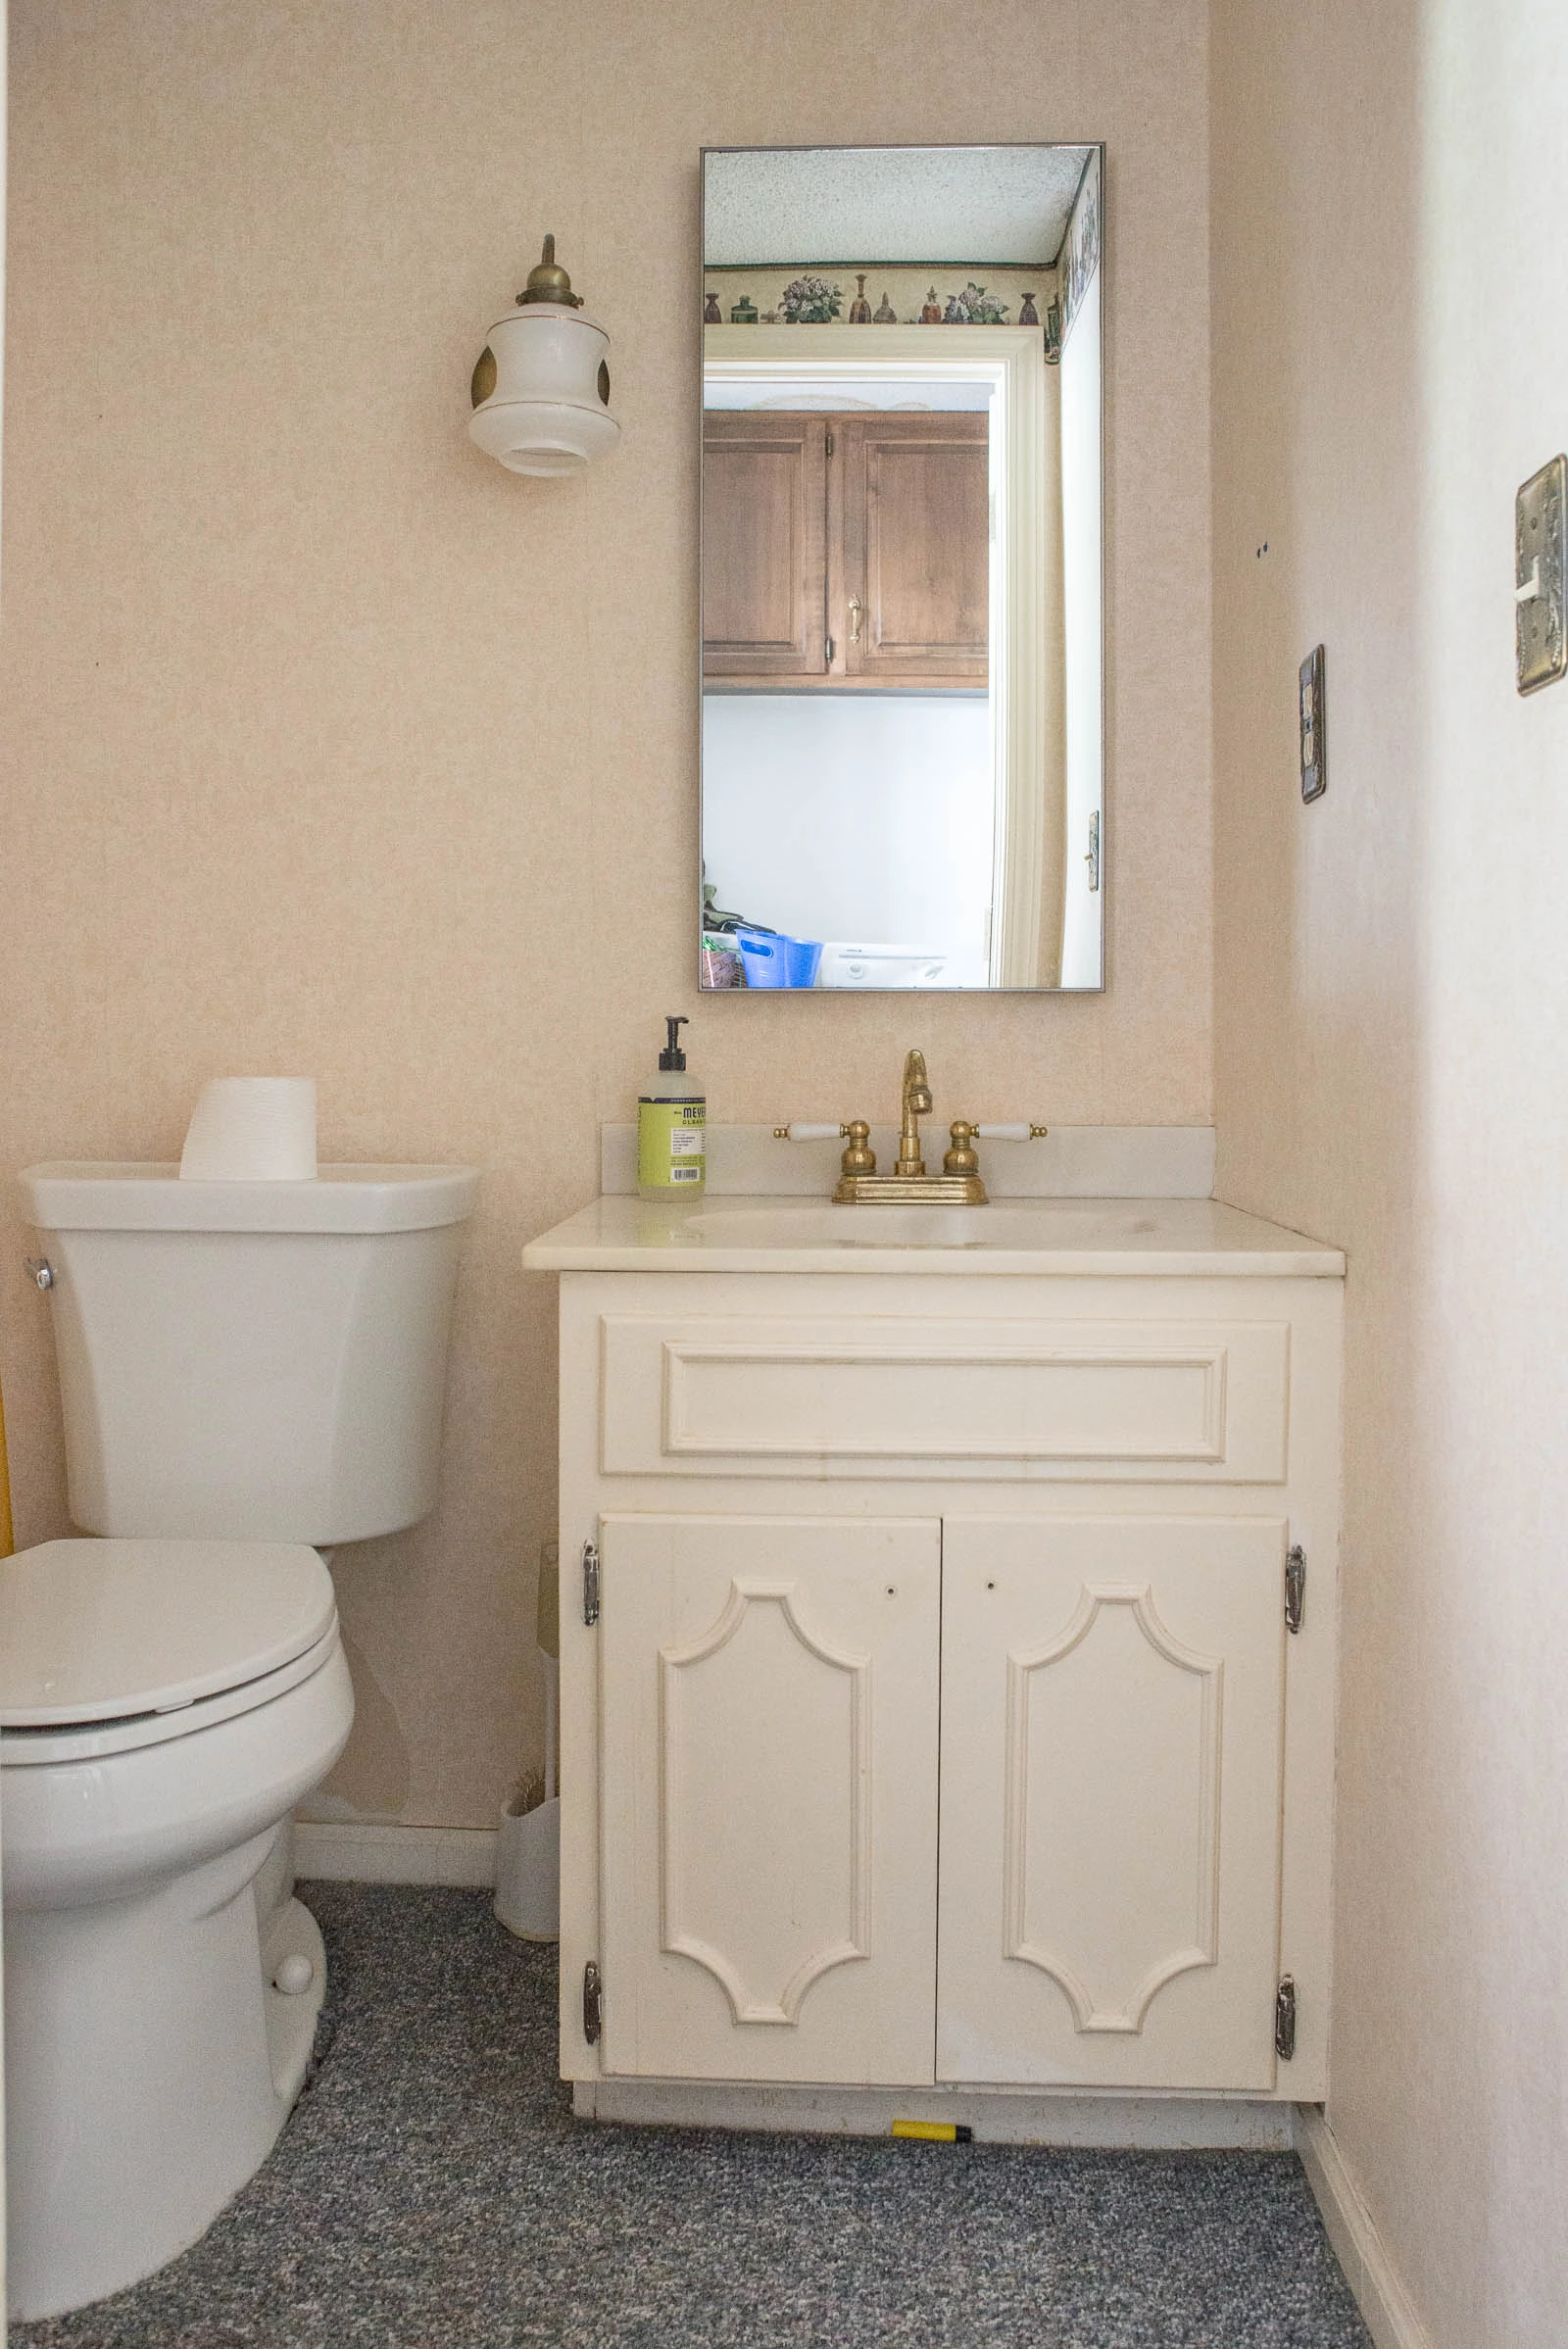
Of course, the flooring had to go as well as just about everything else.
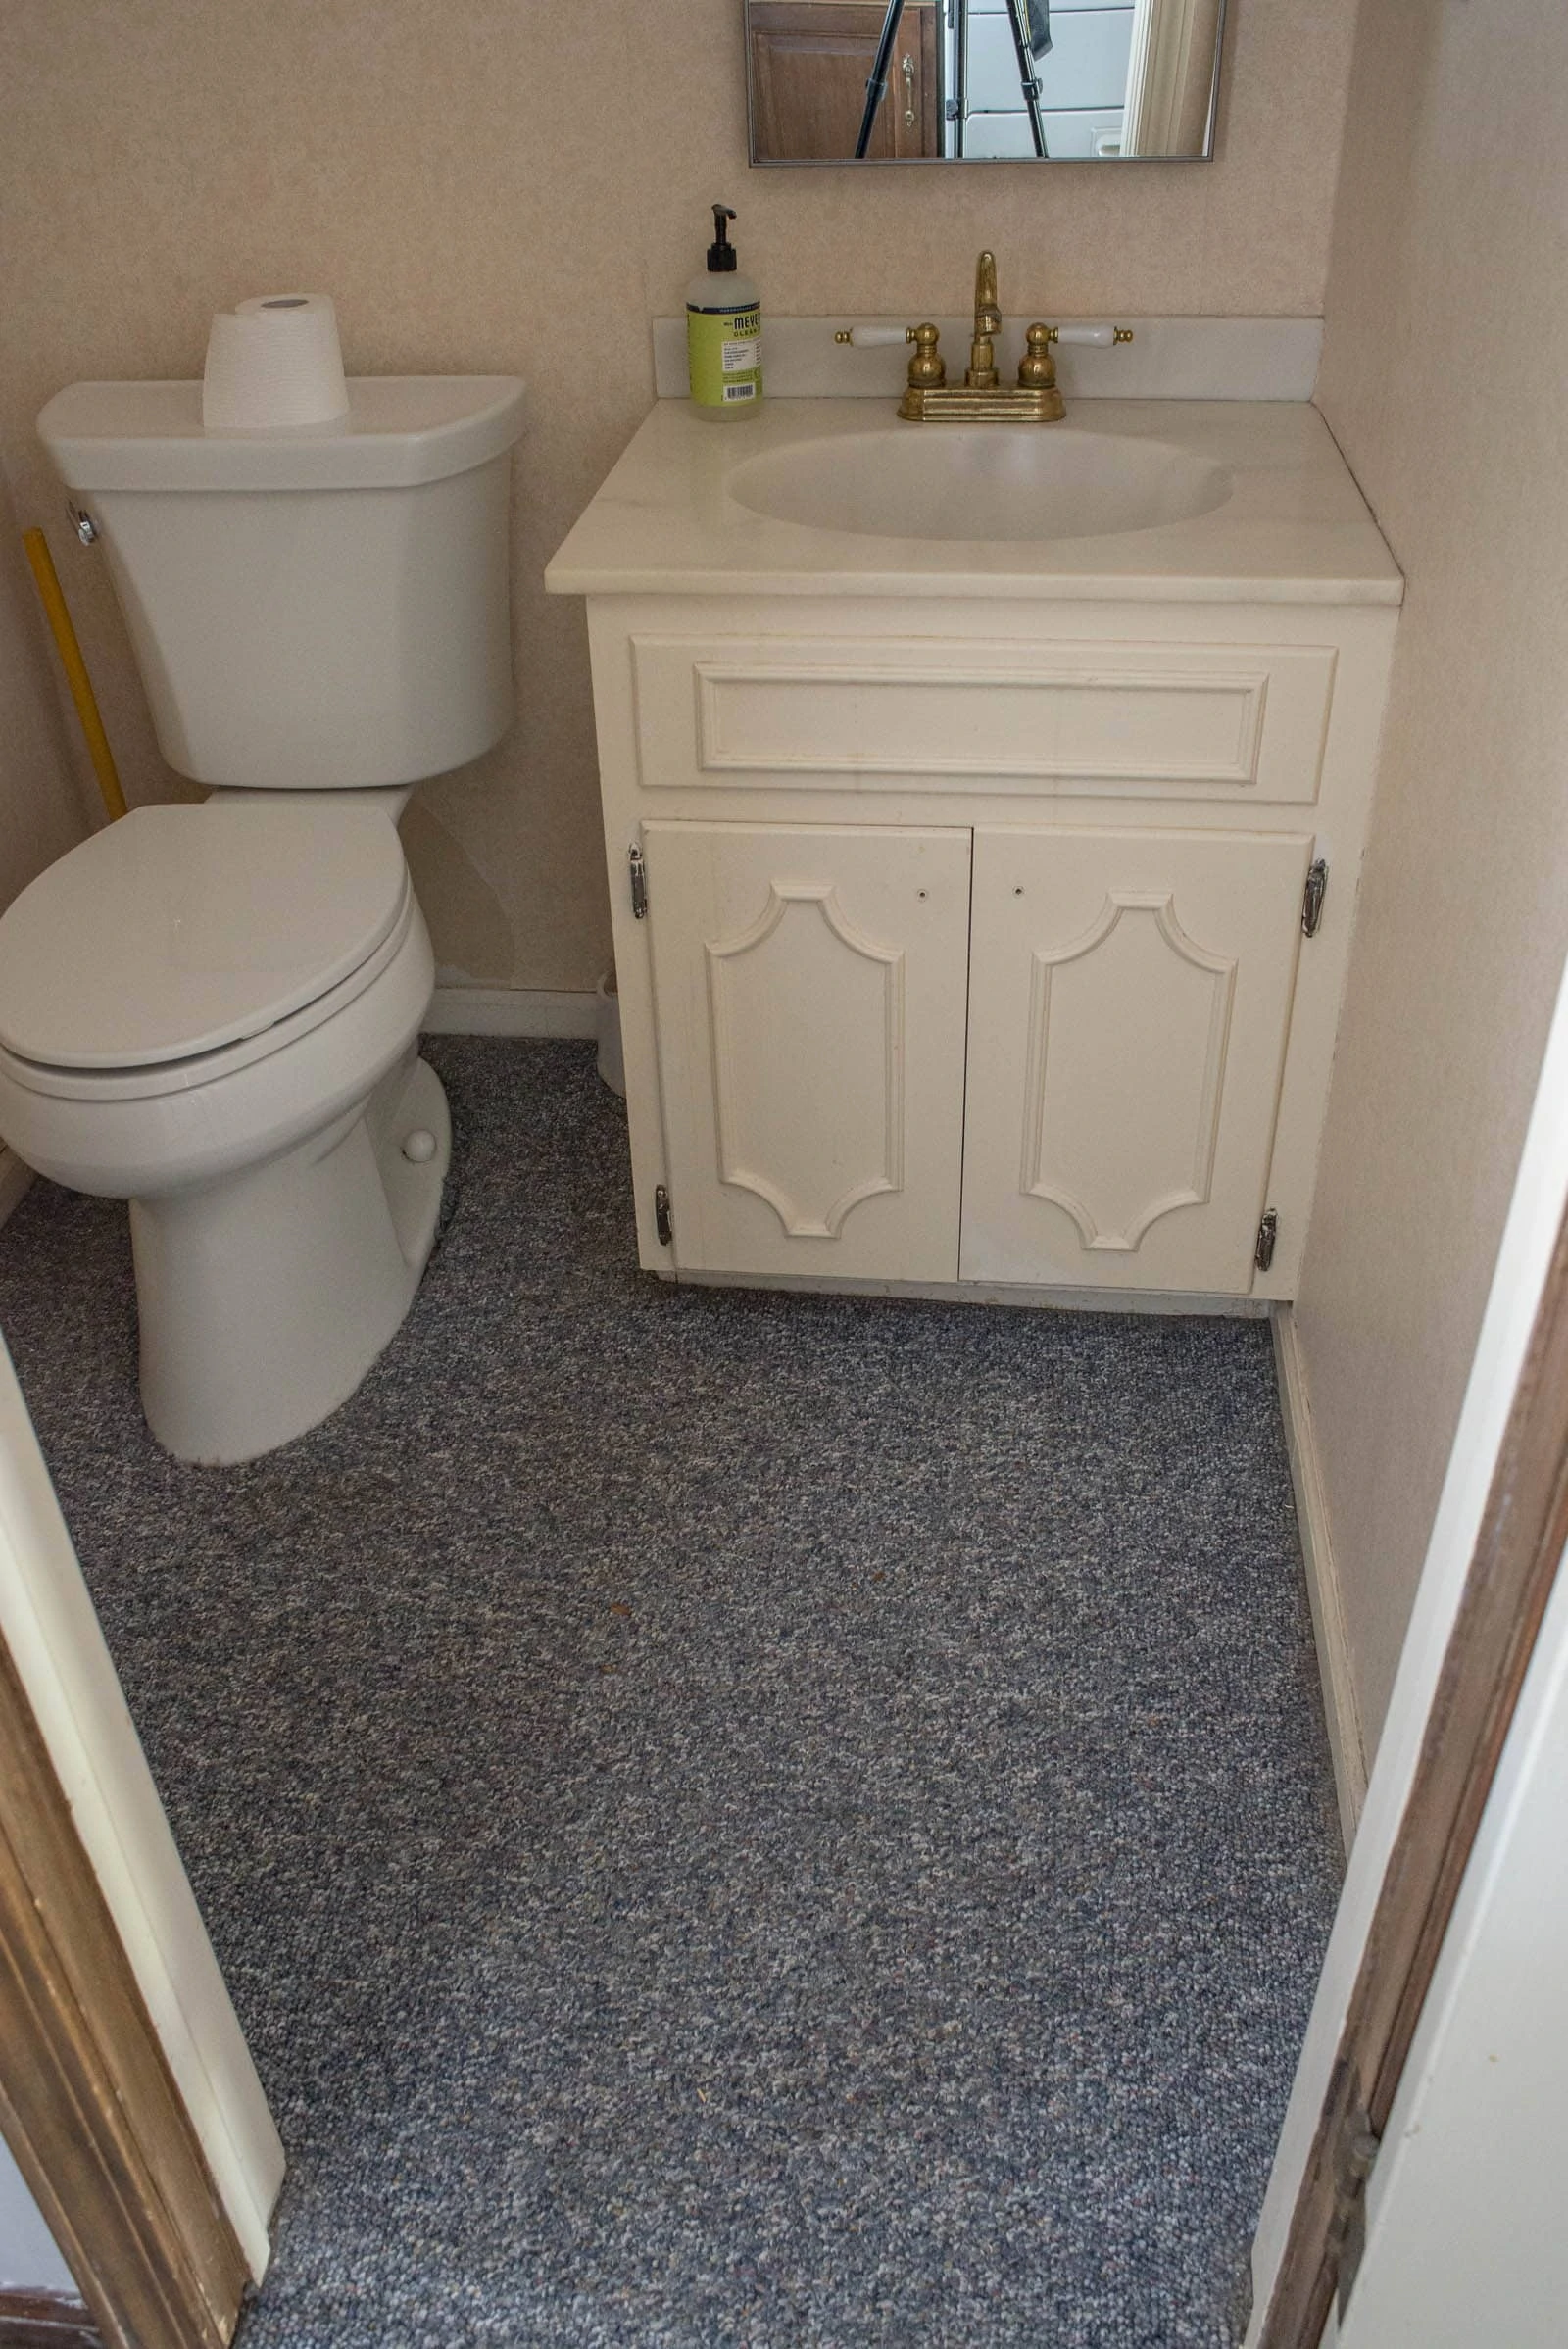
We were "lucky" enough to have four bathrooms with carpet when we first moved in to this house. "Lucky" right?!
Unique Black Bathroom Powder Room Remodel
Like I mentioned above, the space is very tight. We knew we needed to address that and we figured the best way to make more space was to add a pocket door. I don't love pocket doors in general because I feel like they are less functional than a typical door; but, in our case, the pocket door is MORE functional because it makes the laundry room more functional. I can actually open the dryer door now without worrying about whether the bathroom door is shut or not. Yay!
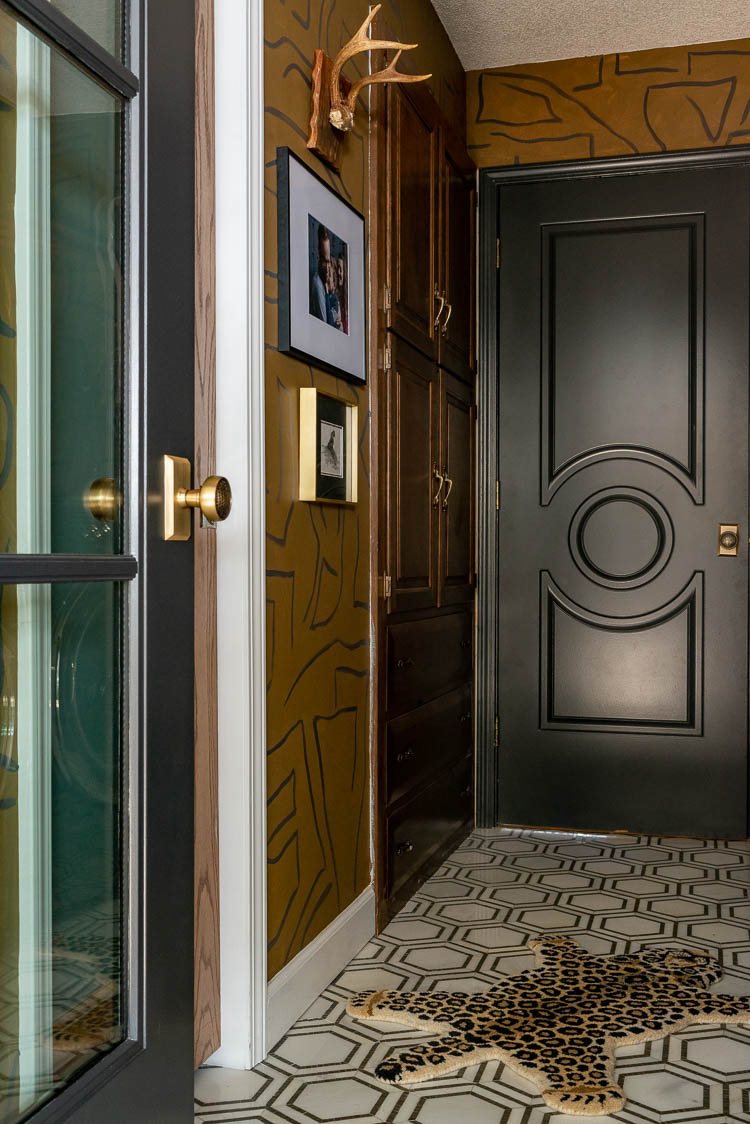
Light Filtering Pocket Door
We ultimately decided to hire out the install of the pocket door because the door frame needed to move over a bit and, at the time, it just seemed more efficient for us to hire it out. The labor and supplies for the pocket door ran just under $1,000.
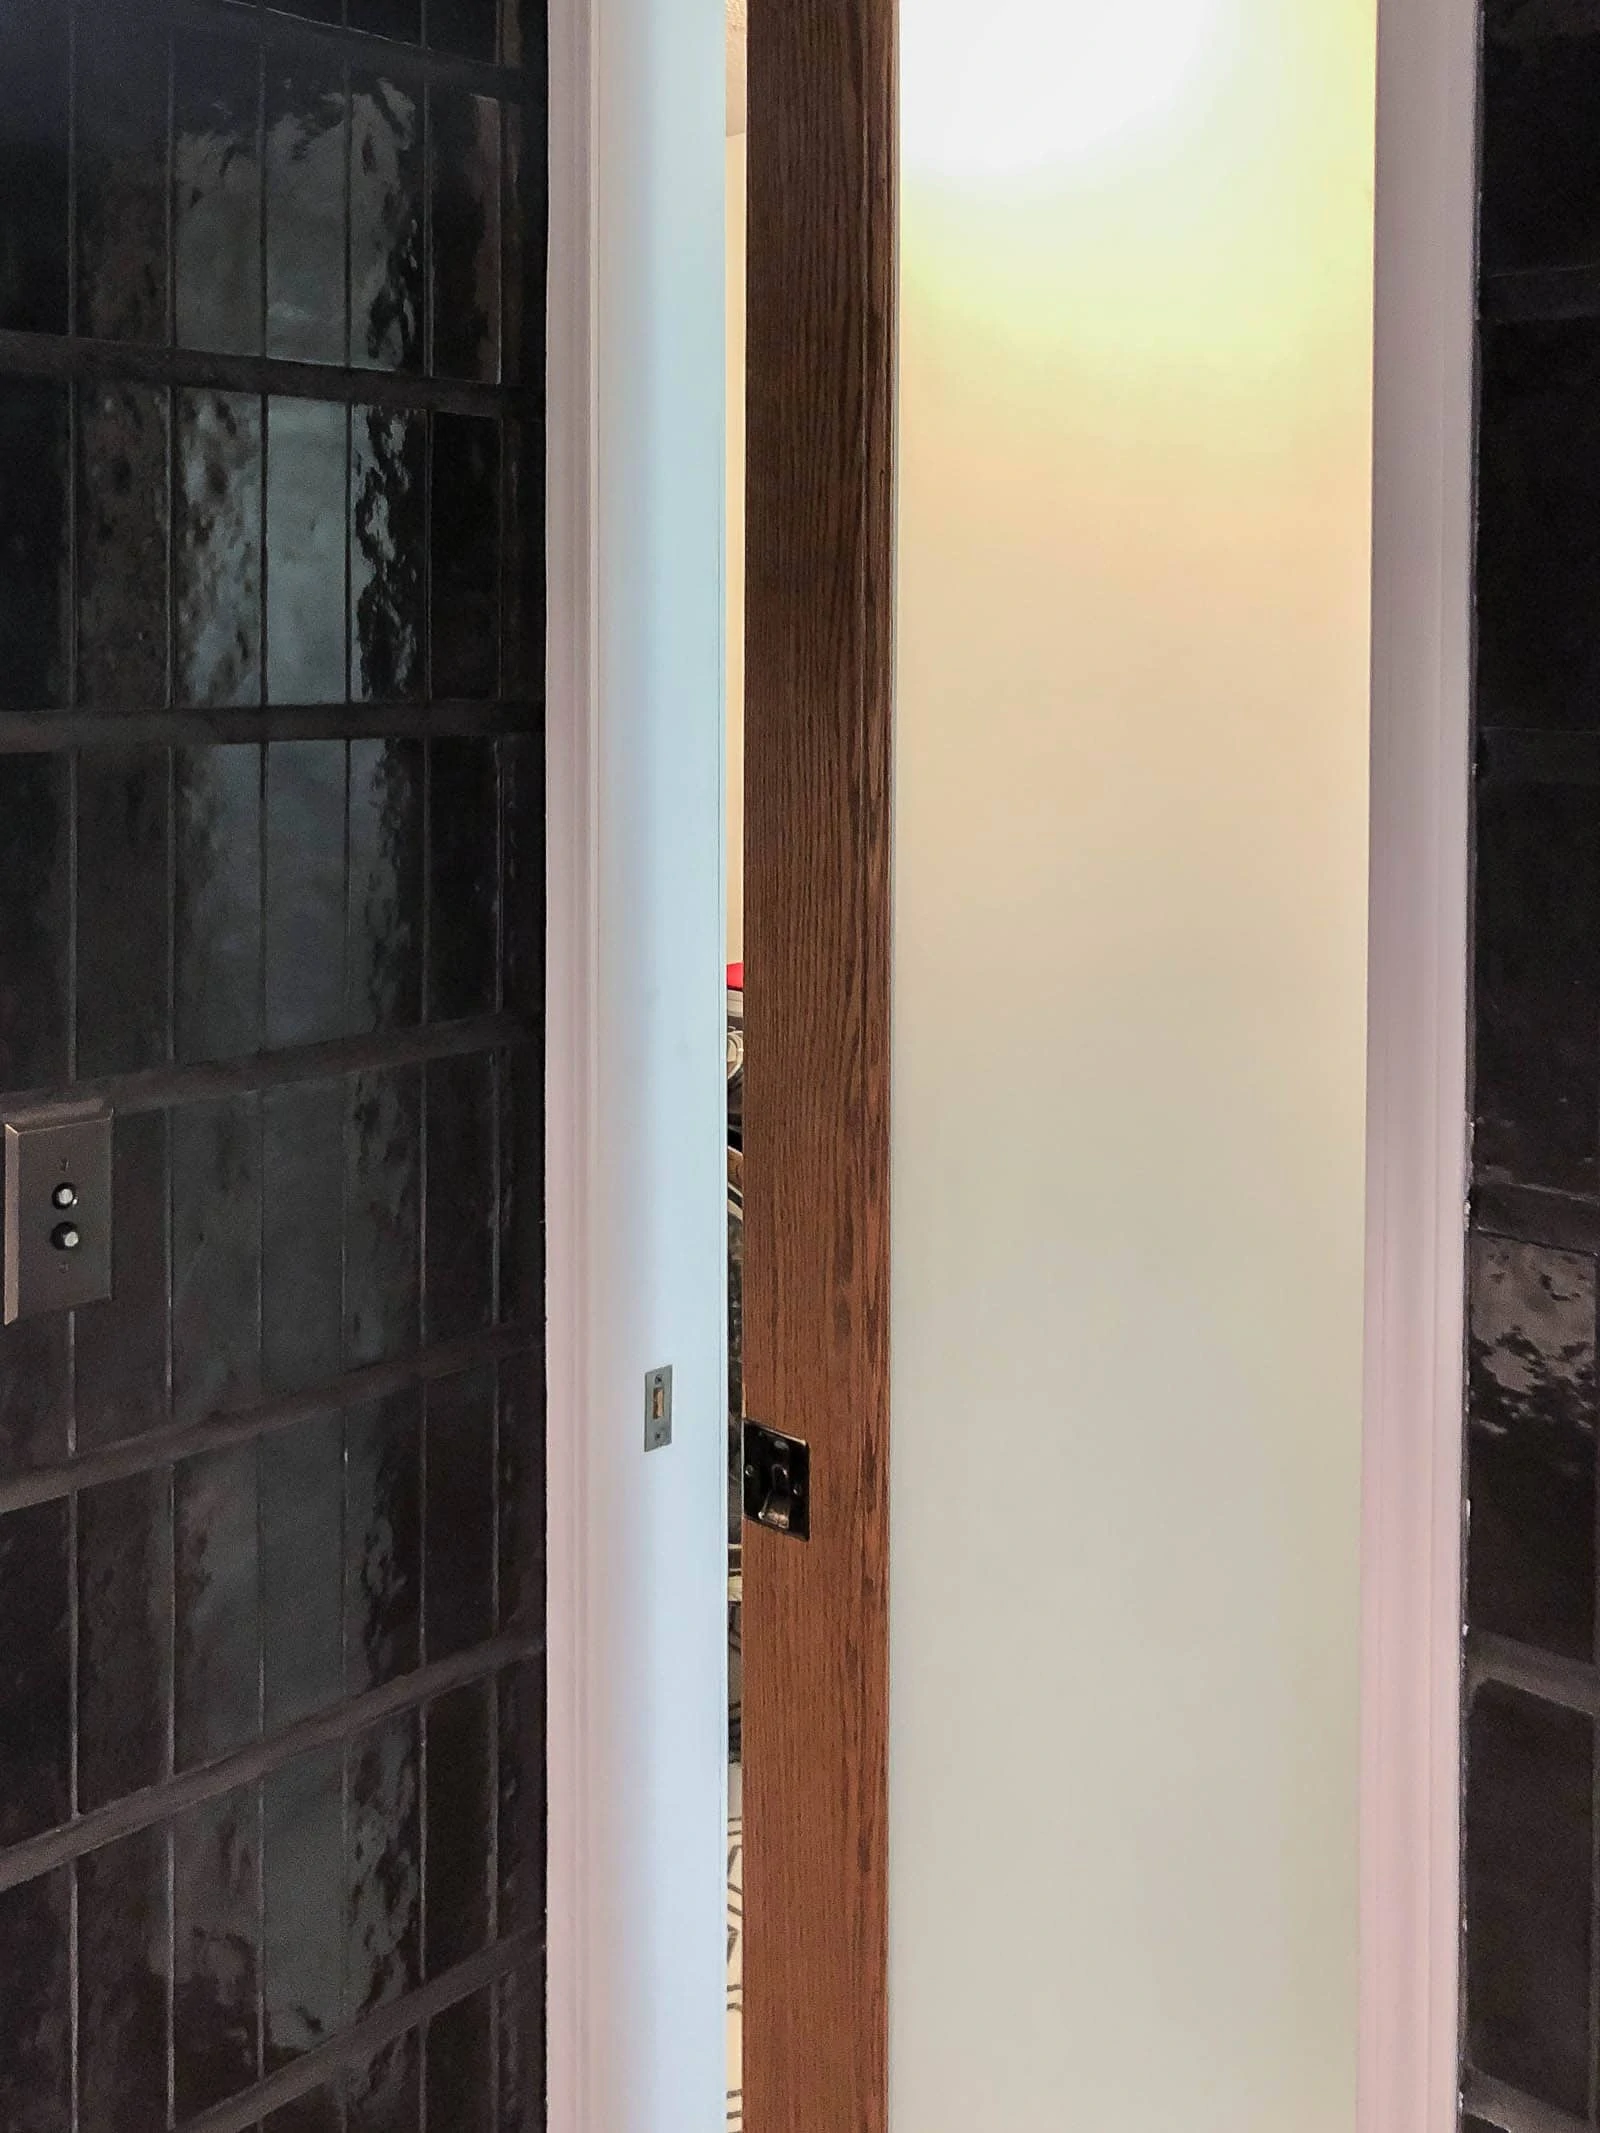
We chose to go with a light-filtering door hoping that it would help offset some of the black tile in the space. The powder room is not a well-lit space at all but I do think the frosted pocket door helps it not feel like a cave.
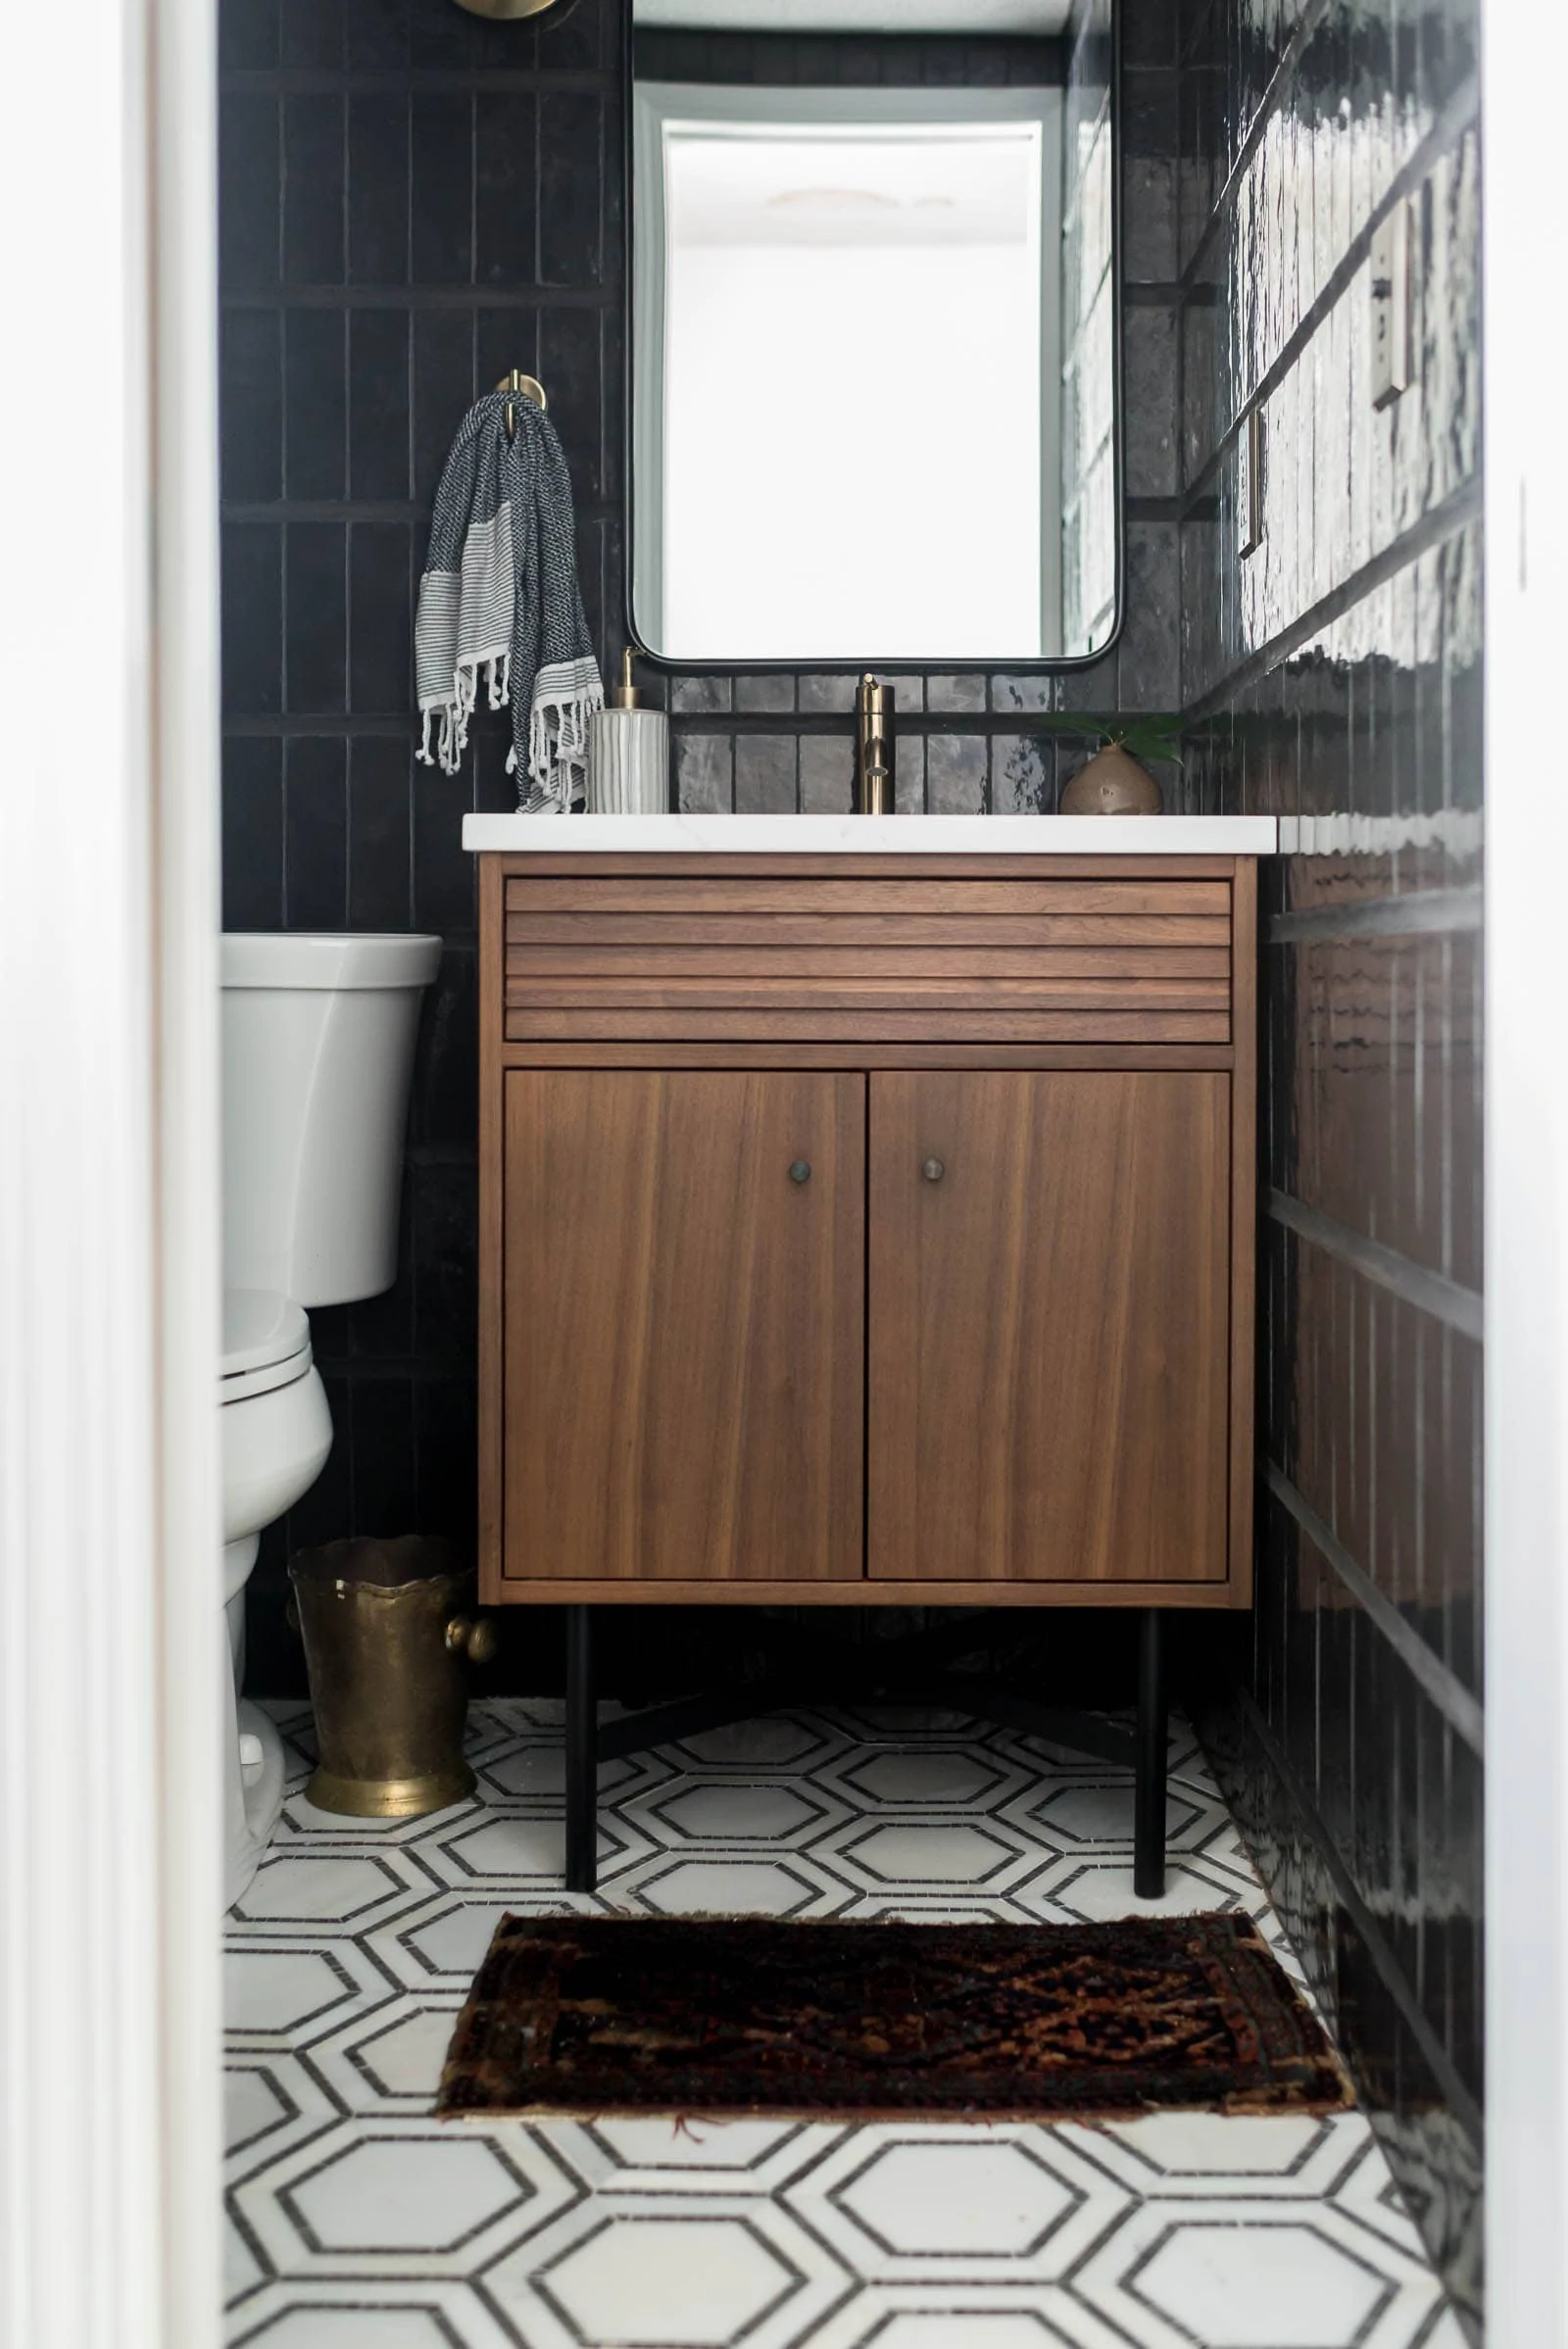
Choosing black bathroom walls
The space doesn't get a lot of light and there's no way to add a window. Instead of fighting that, we decided to lean in to installing black tile and going for the wow factor.
The bulk of our money and time was spent on the modern bathroom tiles. I fell in love with the hexagon marble floor tile and bought that first. There wasn't a natural break between the bathroom floor and the laundry room floor, so we tiled all of it.
We had one slight issue with it and that was that we stained the marble, accidentally, in a few spots but I was able to fix that with a homemade marble cleaning solution. Laying the marble wasn't bad after we got the hang of how to cut it and how to deal with the individual marble mosaics around each hexagon. There were a few times that we got confused on the pattern (it looks like it doesn't have a pattern, but it does) and we laid the marble down backwards. Ultimately though, we didn't run into that many issues.
*Affiliate links below. Thanks for supporting my blog. Click to read my privacy and disclosure statement.
Ideas for tiling small bathrooms
Floor to ceiling tile ended up being such a great idea for our modern small black bathroom. The space was small enough that it didn't require a lot of product and, also, felt like it was a good choice to take a design risk on.
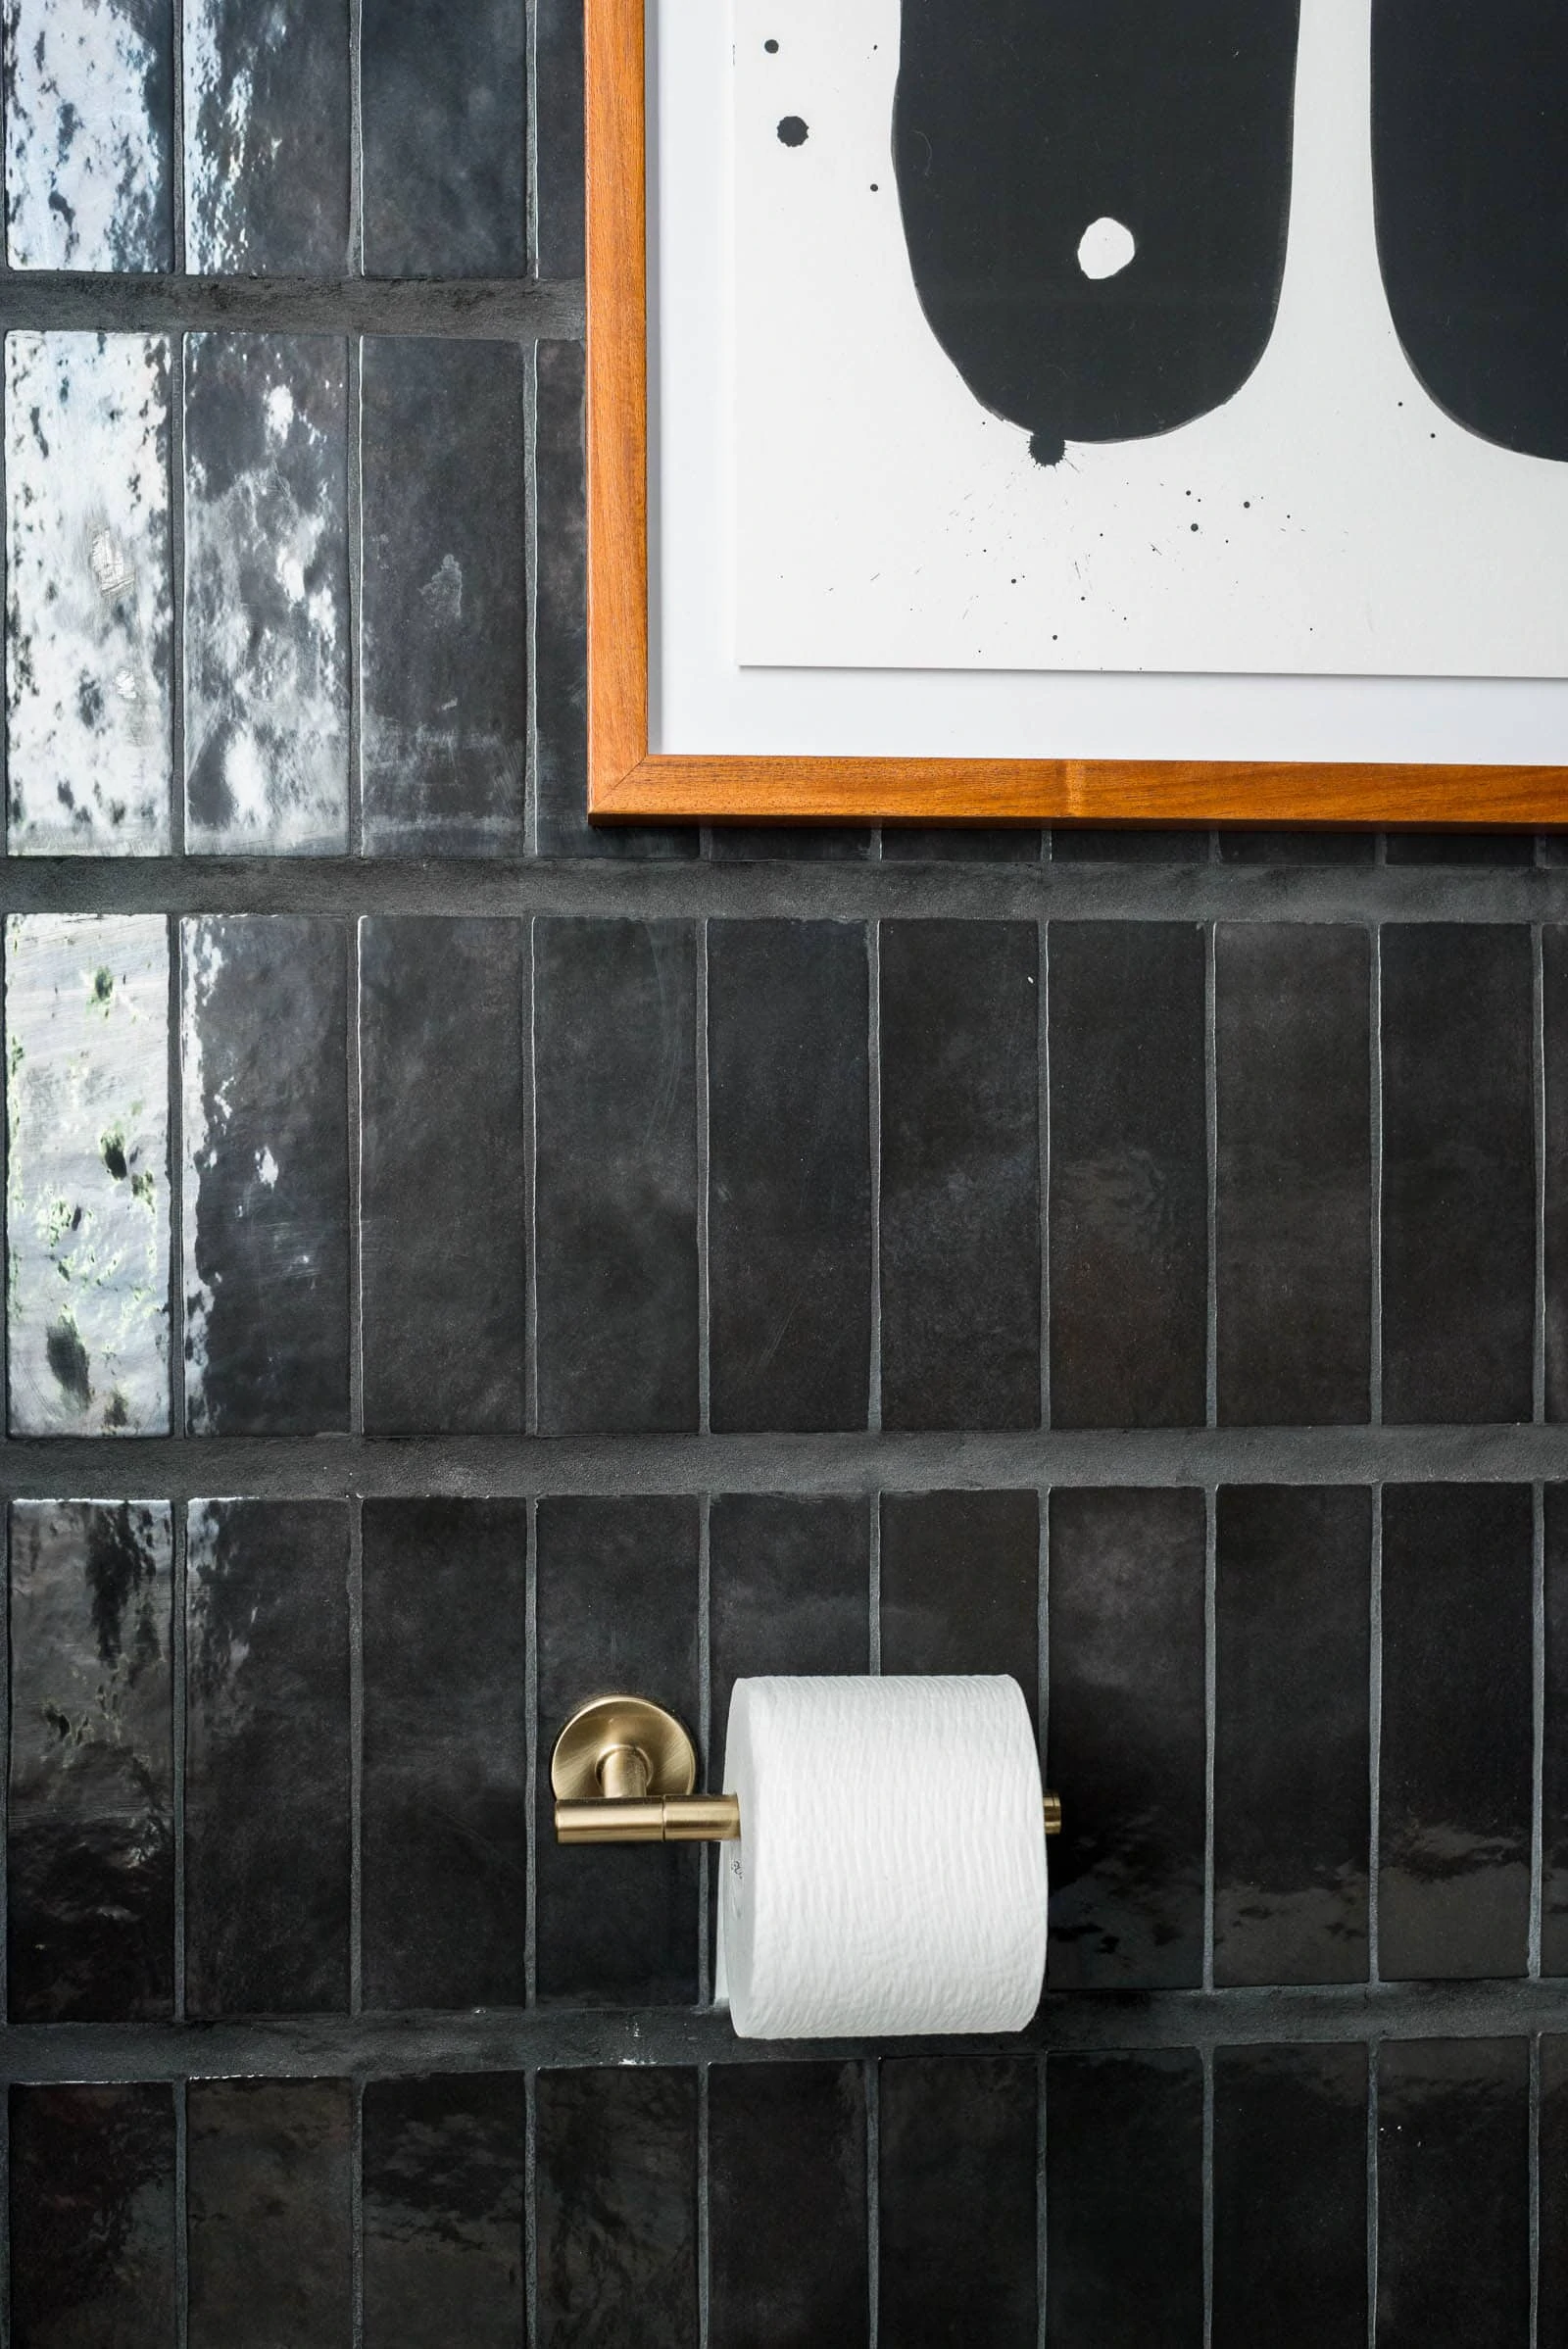
I wanted to do something unique with the black tile walls and ultimately decided to install the vertical black wall tile with an oversized grout line. I think it looks amazing but it was a JOB.
How to lay tile with an oversized grout line?
To lay tile like that, you have to install support boards for every single row. Those boards have to be installed and left installed until your mortar dries. Then, once you go through that whole process (which takes A LONG TIME), then you get to try your hand at grouting a traditional grout line as well as an inch and a half grout line. You need different grout consistencies for both of those.
I wouldn't recommend laying tile how we laid it unless you are aware of the time investment that you need. I'd say that whatever time investment you need to lay a typical backsplash, then times that by five and you'll have the time needed to lay this one.
I really think some of these ideas for tiling small bathrooms are super fun and really make such an impact in a small space.
Our black tile has a handmade look to it, but I don't think it's actually handmade, or maybe it is; not sure! Anyways, there are some major variations in the tile which I personally love.
Choosing a pre-made walnut vanity
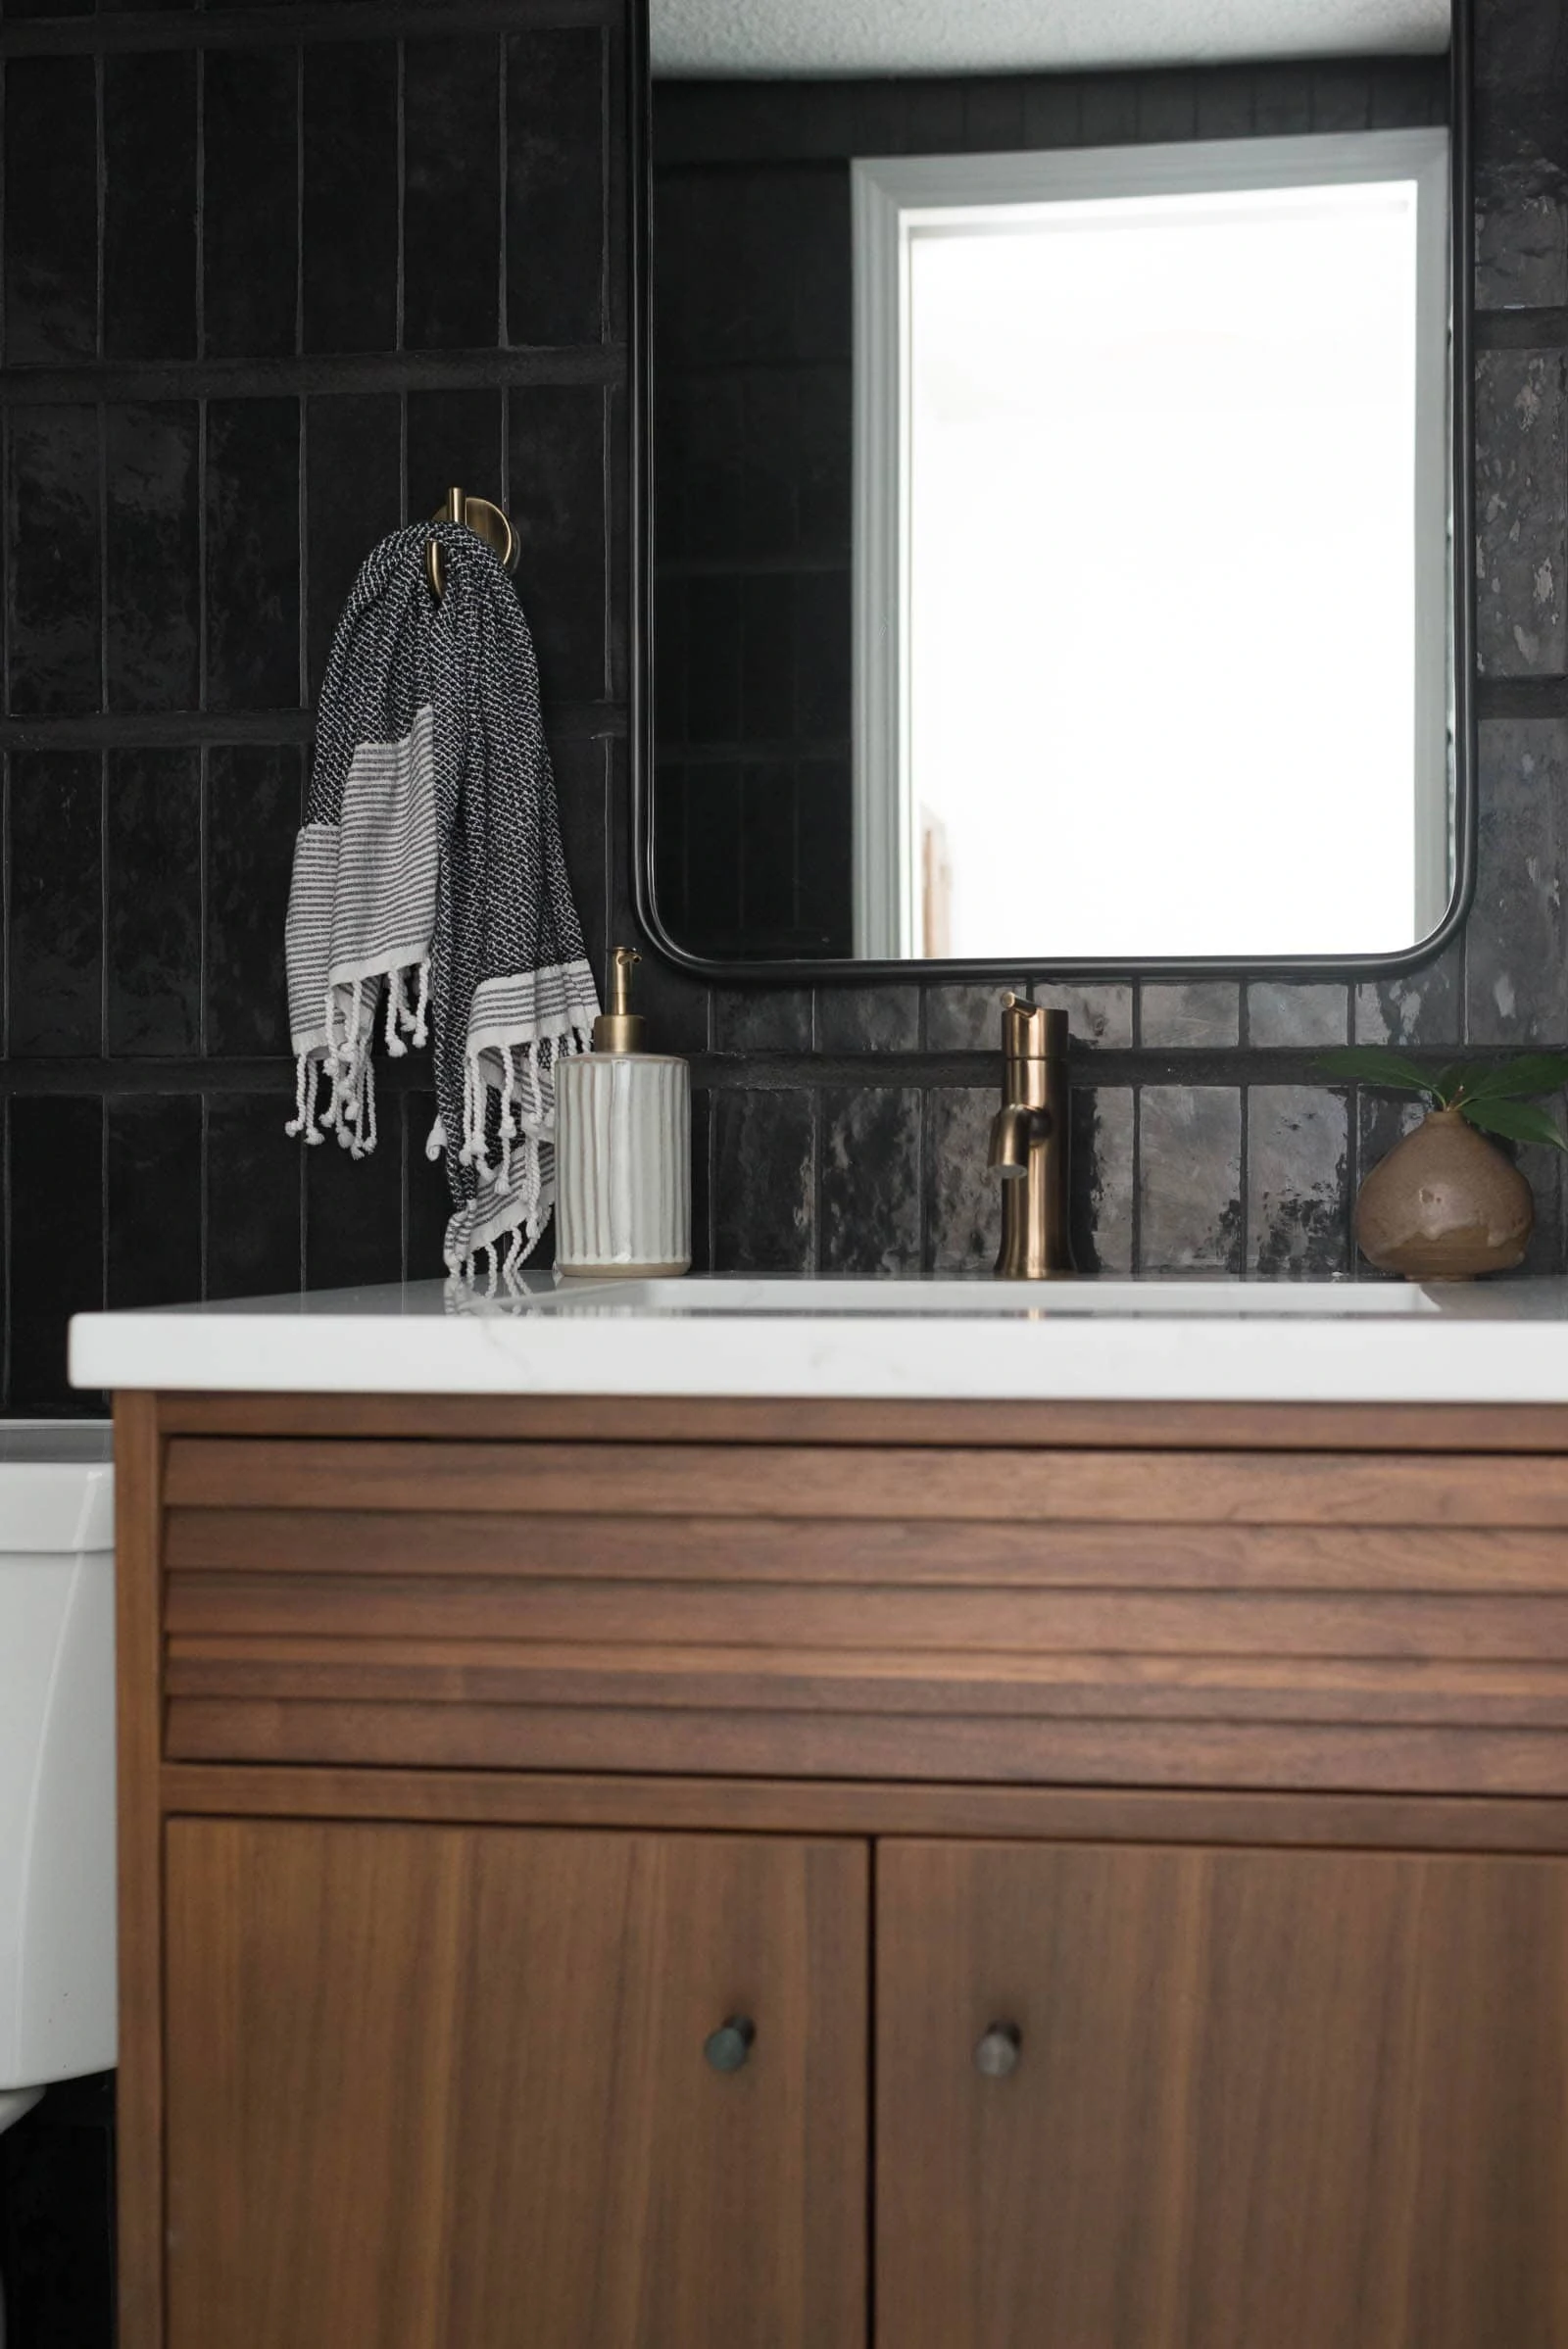
The next big thing that I decided on was the vanity. I had bought a modern vanity off of overstock, and blogged about it in this post on modern vanities. Ultimately, I felt the color of the vanity wasn't what I wanted. Well that and I wanted a heavier wood. I ended up selling that one for a loss and buying a gorgeous walnut vanity from Room & Board. It's beautiful and I think the darker wood really works well with the tile.
Choosing a vanity countertop
The vanity didn't come with a countertop. I went to a few quartz countertop companies in town and finally found the perfect white and gray quartz countertop remnant.
When you need a countertop for a small vanity, remnants will be your best friend! Mine cost around $200 with the fabrication. I actually planned on doing a wall-mount faucet but had some issues with the plumbing for it, so I had to take my countertop back to the fabricator to have the faucet hole drilled out too.

Choosing brass fixtures for a black and gold bathroom
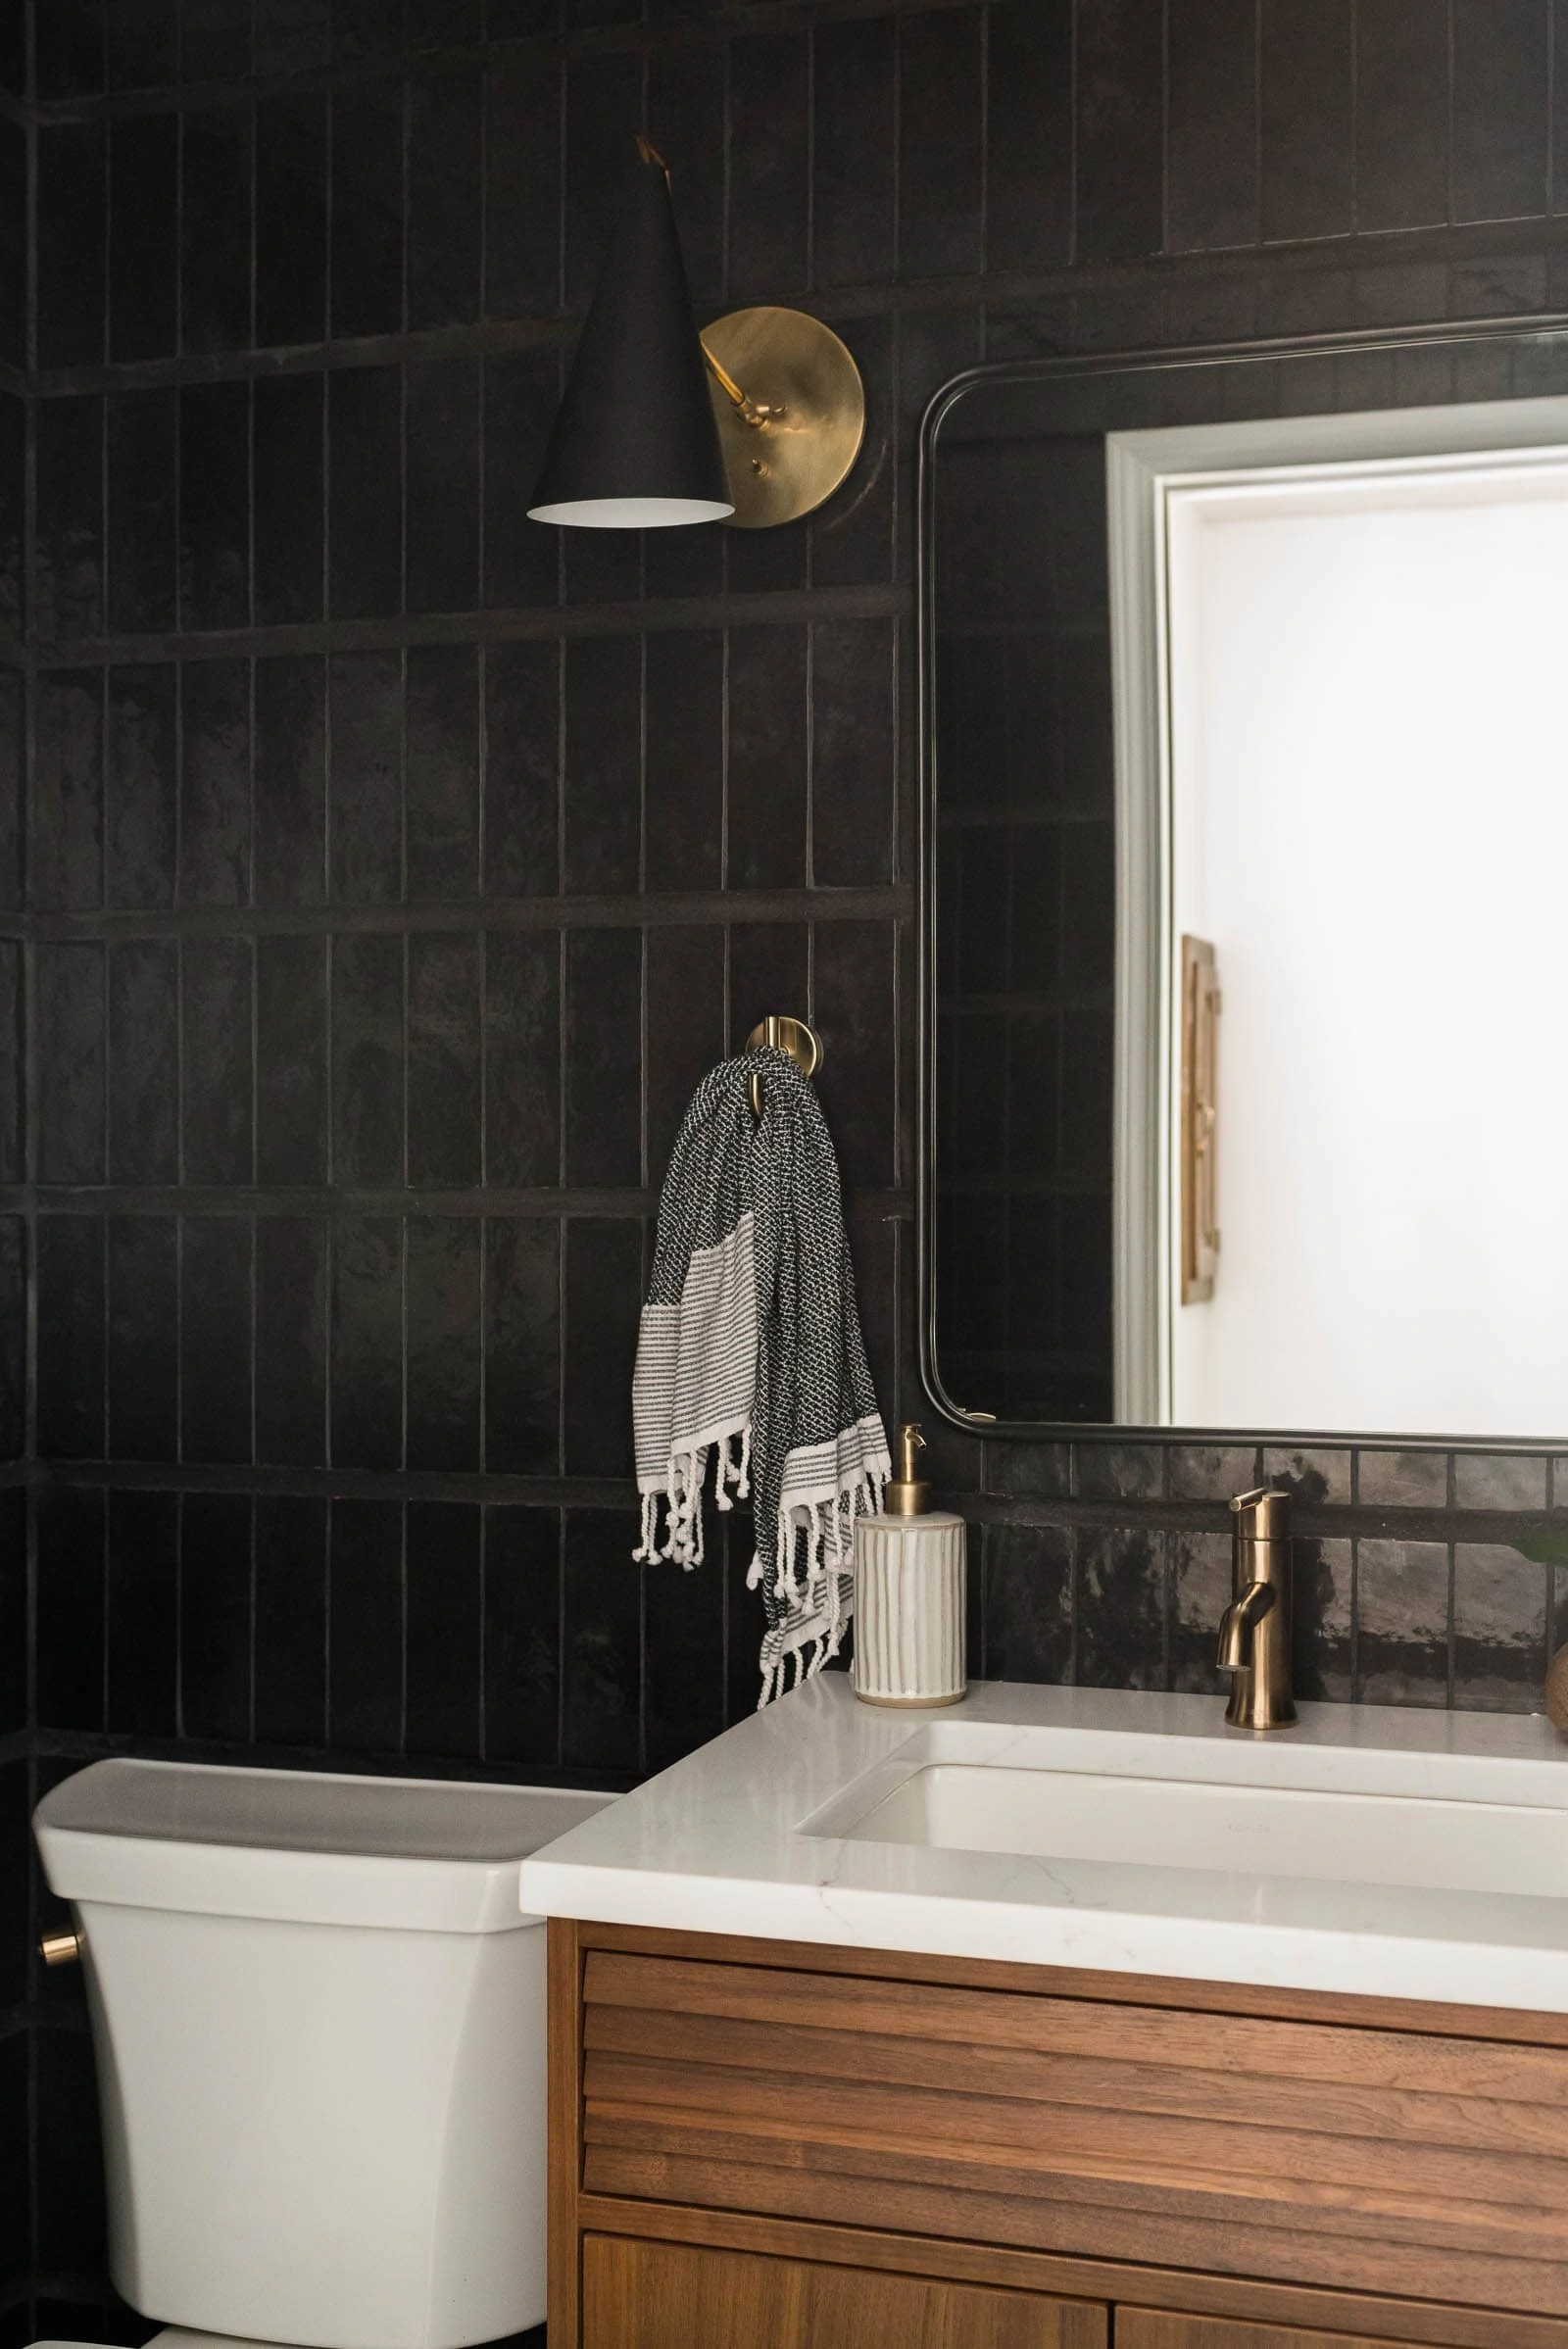
For plumbing fixtures and bathroom fixtures in general, I went with brass. I love continuing to add brass in my spaces. I think it adds the warmth that this space definitely needed.

I even changed out the toilet knob to a brass one. It's a detail that I think is so fun!

Powder room decor and bathroom accessories
The sconce in the space is black and brass and, if I'm honest, gets a bit lost in the space visually but I love the lines of it. You have to really look at the sconce to see it, but I love it anyways.
The trashcan was an issue! It's such a tight space between the vanity and the toilet and between the toilet and the wall that I couldn't find a trashcan to fit! After returning a few that wouldn't work, I started thinking about using a planter pot there and went to go look in my stash for one. Instead of a planter pot, I found my late grandmother's vintage ice bucket. I couldn't decide if I felt bad for using it as a trash can, but ultimately, I just decided that it makes me smile every time I go in there to see it BEING USED, that I'm just going to use it!
I opted for a towel hook instead of a towel bar or ring because of the minimal space. The towel is one that I've had for years and just gets better with age. The soap pump is a pretty, handmade-looking piece from Target.
I debated on the mirror for awhile and actually bought two of them to try to figure out what I wanted. Ultimately I decided on the slim, minimal, black bathroom mirror and I couldn't be happier.
The last few accessories that I brought in are: a vintage rug, a handmade ceramic vase that I picked up from a flea market and my boob art from Suzy Lindow. I like a bit of quirk in my spaces and I smile every time I see that art. My mom thinks it's weird, but I'm here for it. Are you?! =)
Modern Powder Room Accessories and Sources

Modern Powder Room Remodel Cost
- Black Tile for wall $800
- Hexagon Marble Tile (includes laundry) $1914
- Supplies (caulk, mortar, nails, switches, etc) $400
- Vanity $1285
- Light $550
- Black bathroom mirror $250
- Art + Framing $250
- Decor : $125
- Pocket Door $292
- Pocket Door Labor + Supplies $850
- Faucet $235
- Plumbing Issue $250
- Countetrop + sink 300
Approximately $7500
Is that more or less than you expected? Just curious!
Well, I think that wraps up the Modern Powder Room Renovation! We are thrilled to have this project done. I pinch myself every time I walk by. That's how a project should end up right, right?!
}


Robin from Frugal Family Times
Gorgeous, Ashley! It was worth the work. I love your tile choices. 🙂
Ashley Mayes
Thank you Robin! I was a bit nervous that the tile choices were too bold but I really love how it turned out.
Lauren
It’s so fabulous! Love! Great job! Worth the wait!
Ashley Mayes
awww, thank you Lauren!
Jill
I definitely don’t think $7500 was worth it, that’s a lot of money for such a small room. But, if it makes you happy then sure.
Ashley Mayes
Thanks Jill! It was definitely a bit higher than I expected!
Jesseca
It looks great Ashley!!!! So much work to do that tile, but it is stunning. Also, it makes me feel better that my bathroom remodel is almost 5 months in (I had it planned for 6 weeks).
Ashley Mayes
Thanks Jesseca! Oh man, I totally feel you on how long the renovations can/do take!
Create/Enjoy (@suzannahstanley)
It's gorgeous!!!! Love the black tile, the vanity, the floor tile... so rich! Amazing job!!!
Ashley Mayes
Thanks Suzannah!
Charlotte
What a transformation! Love all of it, each material is so unique but it ties together so well. Great job. I think your cost is really pretty good for doing floor to ceiling tile, especially with the extra cost of the pocket door.
Ashley Mayes
Thanks girl! I didn't take out the cost for the floor in the laundry room, so it's a bit deceiving I suppose.
Gloria
Every minute of time was worth it on that tile, it’s so good !!! great job !
Ashley Mayes
Thank Gloria! I think so too!
Lauren
Love this! What grout color and brand did you use for the wall tile?
Ashley Mayes
Thank you Lauren! We used sanded grout (bought by the bag) at Lowe's in black.
Robyn Rebecca
It's so YOU now. I love it! That tile is perfect.
Ashley Mayes
Thanks Robyn! I think so too! I was a bit worried that it was too dark and bold but I think it works well when you pan back and take in the spaces around it.
Jess
It turned out so gorgeous. I love how you installed the wall tile. I love your honesty about the difficulty too.
Ashley Mayes
Thanks Jess! Haha, yes! I wanted people to really understand what they were getting into if they decided to tile it like that.
Diane Bélanger
It is stunning! What a statement the black tiles make. I love the way you installed them. You must be very happy with the result. It was certainly worth all the work.
Ashley Mayes
Awww, thank you Diane! Installing the tile was SUCH a pain, but yes, we are happy!
Amy | Delineate Your Dwelling
LOVE how this space turned out. That floor tile is just about the best thing ever and I adore the vanity and fixtures you choose!
cassie bustamante
it's stunning, ashley! just love what you did and the tile choices!
Julia@Cuckoo4Design
So freakin good Ashley! I couldn't love it more! Drooling over here.
Lauren
This is so good. I just found it on the Chris Loves Julia round up. I love the dark tile, the vanity (swoon) and pretty much everything else. Well done! Asking what others think about the cost is a bold move - our money habits are so varied and people can have strong responses. We budget our money vigilantly so that we can afford to do things like this - because it is worth it to us. I just remodeled my master bath which is this size, plus a shower. Tiny! It looks amazing (my only wish is this vanity over the Godmorgon hack we did). Ours cost about the same as yours. I know of your blog from your famous kitchen remodel, which I believe was pretty DIY. Kudos for a really chic and sophisticated space. I love it.
Ashley Mayes
Hi Lauren, Thanks for your comment and for coming over to say hi from Chris Loves Julia. I agree that asking what other people think about budget is interesting, but I do love to hear what people think. The kitchen remodel was DIY... crazy to think that we did that a few years ago.