

Do you need to know how to fill hinge holes because you've taken off doors and the hinge slots are visible? I'm sharing a step-by-step tutorial for just that!
Just a quick heads up if you are a regular follower here, this project was done a few years ago so some of the photos of our son's room will represent that. We were in the process of building the built-in reading loft then and that's how we came to needing a way to fill empty hinge slots.
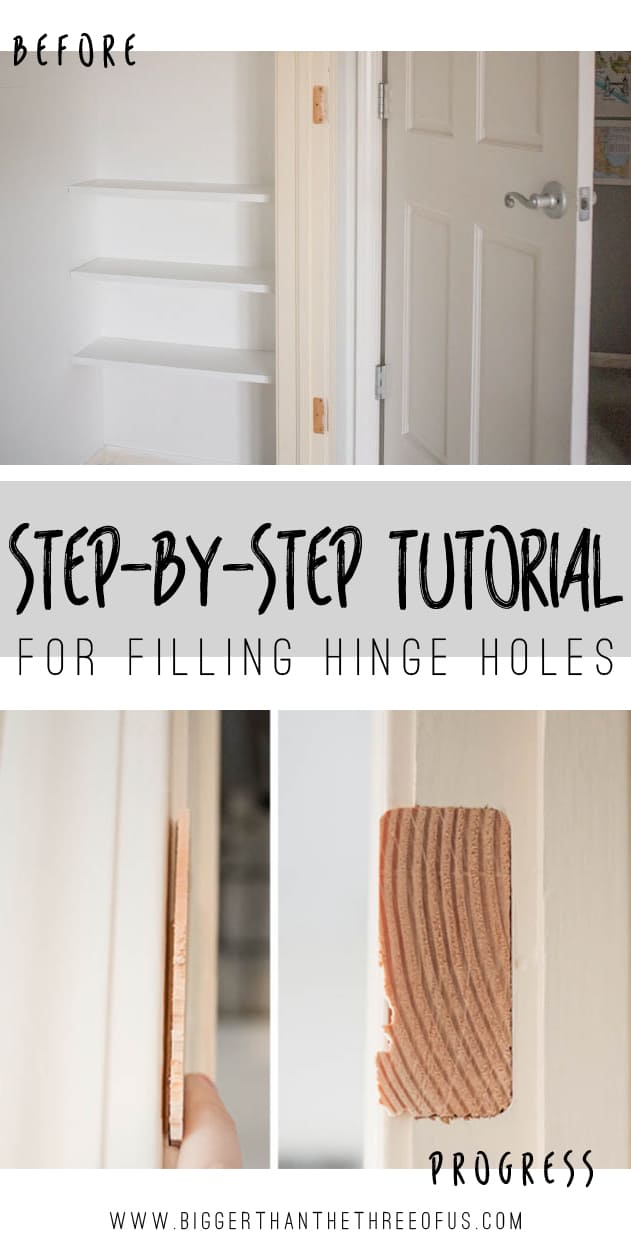
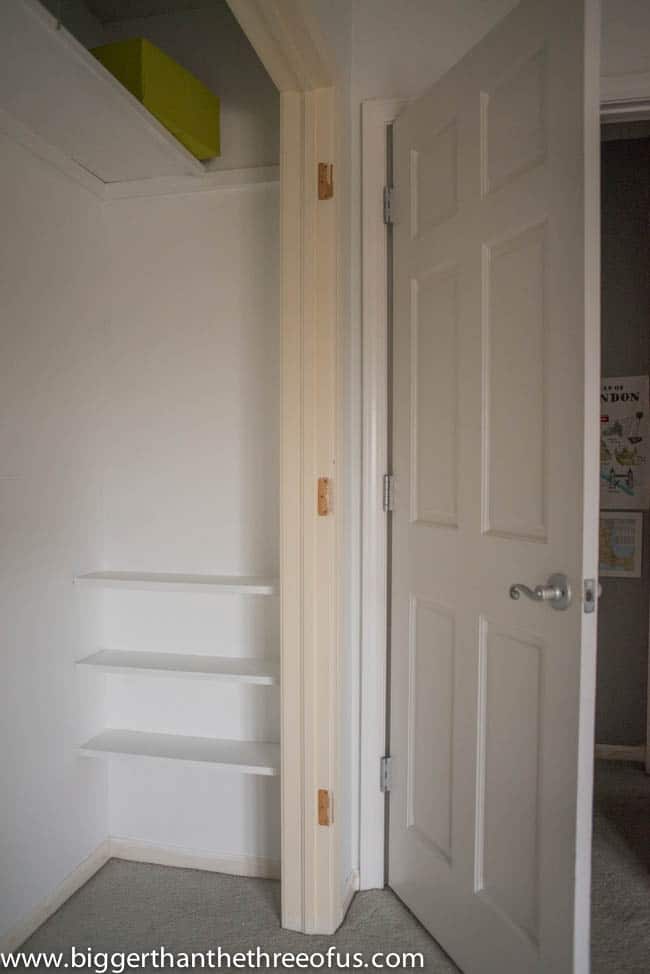
After taking off the doors of the closet in our son's room, were were left with hinge holes that needed to be filled. We had never done this type of thing before but figured we could get the hinge slots filled with scrap wood instead of replacing the trim.
So, if you are wondering...
Can you fill in door hinge holes?
Yes, you can. It's relatively easy to cut a piece of wood to fill the hinge slot in a doorframe.
Before Filling Hinge Slots
Pretty unattractive, right? In our bathroom, a few years ago, we took the shortcut and just painted in the holes. It doesn't look pretty, but what do you expect when you take the shortcut, right?
Because of that project and others recently, we are trying not to take the shortcuts; or at least not to when it matters. This project is visible and it's going to be such a cute area, so we didn't want a "bad" DIY to detract from that.
Alright, let's get to the project!
Supplies Needed for Filling Old Hinge Positions
- Piece of Scrap Wood of choice (more on that below!)
- Pencil
- Hinge from mortises to use as a guide
- Miter Saw
- Box Knife
- Sandpaper
- Wood Glue
- Brad Gun and Nail
- Orbital Sander
- Wood caulk
- Paint
Selecting Wood for Filling Hinge Mortise
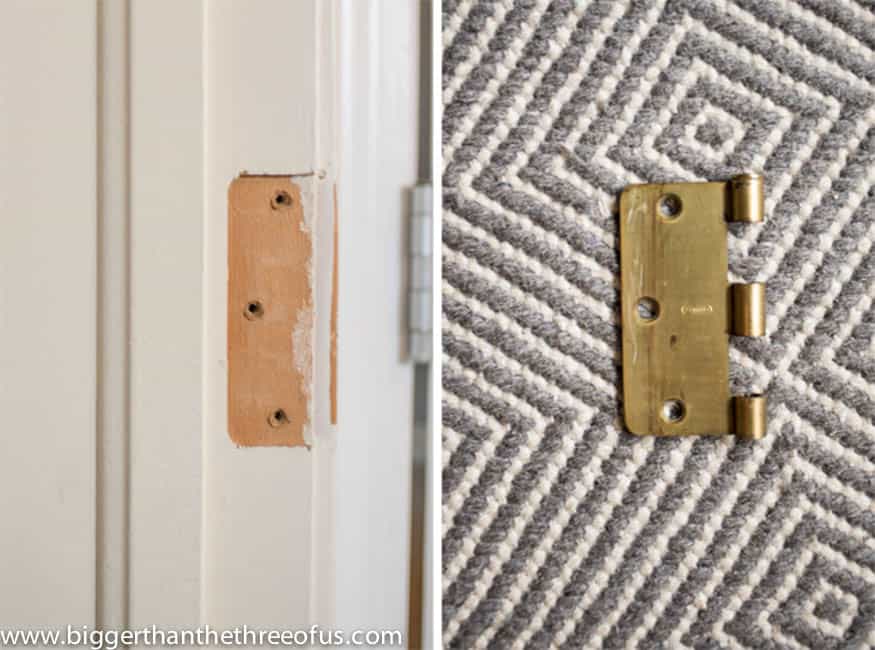
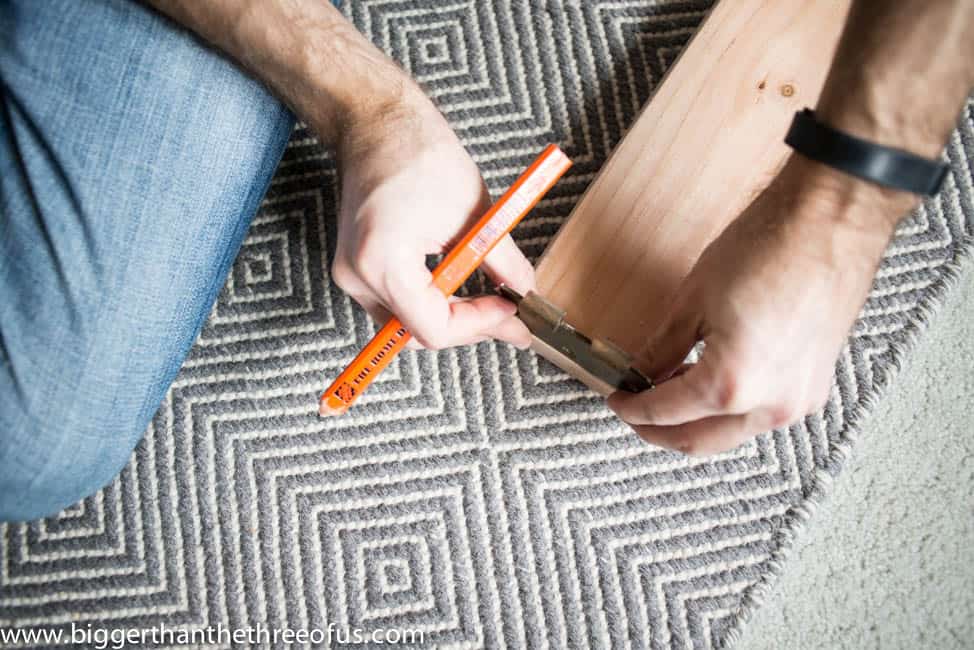
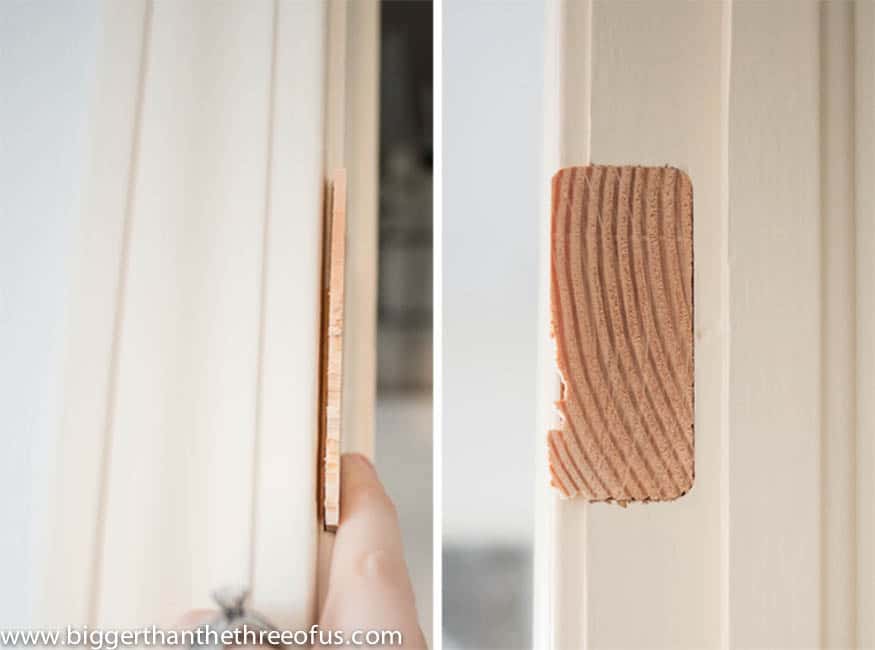
After measuring the hinge and playing around with scrap wood for the sizing, Luke realized that the hole was almost EXACTLY the same size as the end of a 2x4. Because our woodworking skills and tools at the time of this project were beginner, he thought it would be best to use the end of a 2x4 to fit in the hinge mortise.
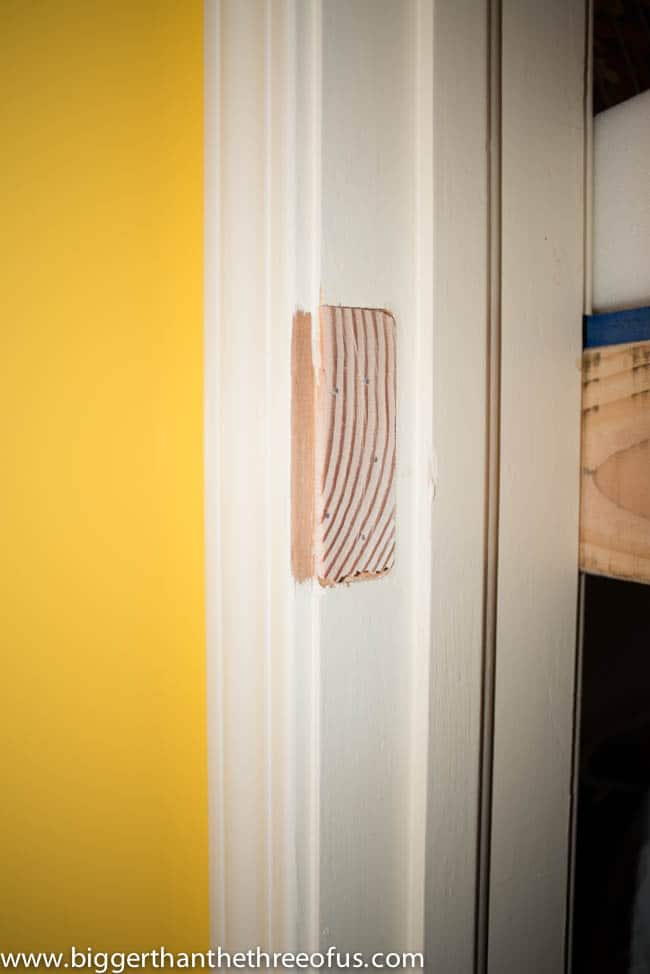
One thing to note about this choice is the pattern of the grain. Because we decided to cut down the 2x4, the grain of the 2x4 was very visible. If you want to elevate this project more (and we would do this today as our skills have developed since then), we would use the face of a piece of wood to fill the hinge hole instead of the butt cut of a 2x4 piece of wood. You'll see more of what I'm talking about below.
How to Fill Hinge Holes or Hinge Slots
- Using the hinge as a template for depth, trace across the 2x4.
- Using a miter saw, cut the 2x4 at the depth of the trace.
- Check for fit on door frame before continuing.
- Trim with a box knife and sand to get a perfect fit.
- Apply wood glue and use a brad nailer to tack in to place.
- Let dry.
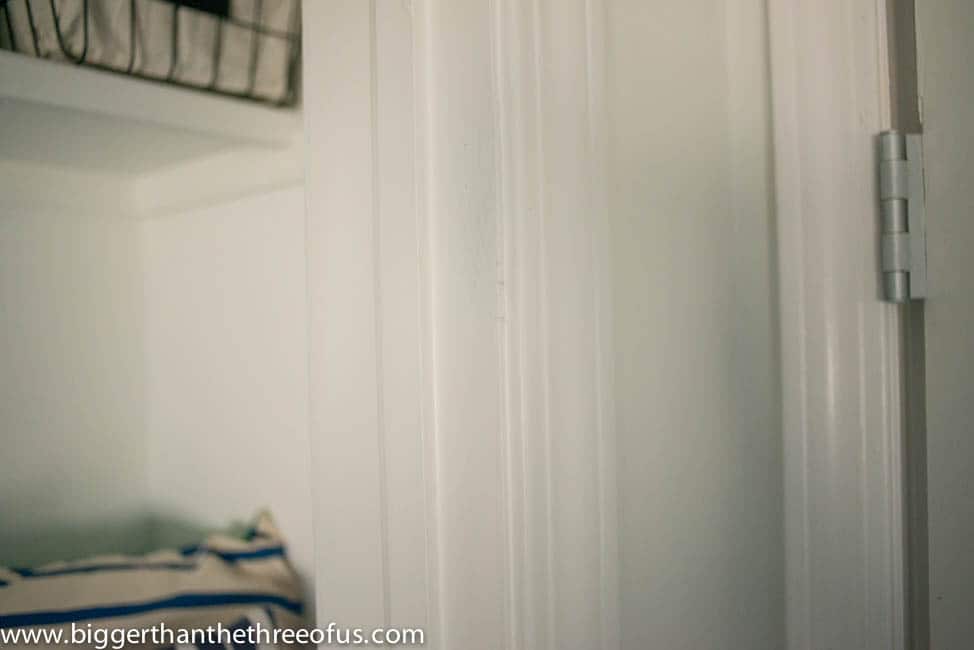
- Sand (we used an orbital sander for this).
- Apply a good primer.
- Caulk if needed.
- Finish with top coat of paint.
They turned out really well for how we did the project. In person, the grain isn't very noticeable at all. If you are looking for them then you can find them, but I don't think most people will be looking for our hinge holes. LOL.
As I was updating this post, I did see that you can buy hinge filler plates. If you don't feel confident enough to try this project at home, measure your hinge slot and then purchase plates like these.
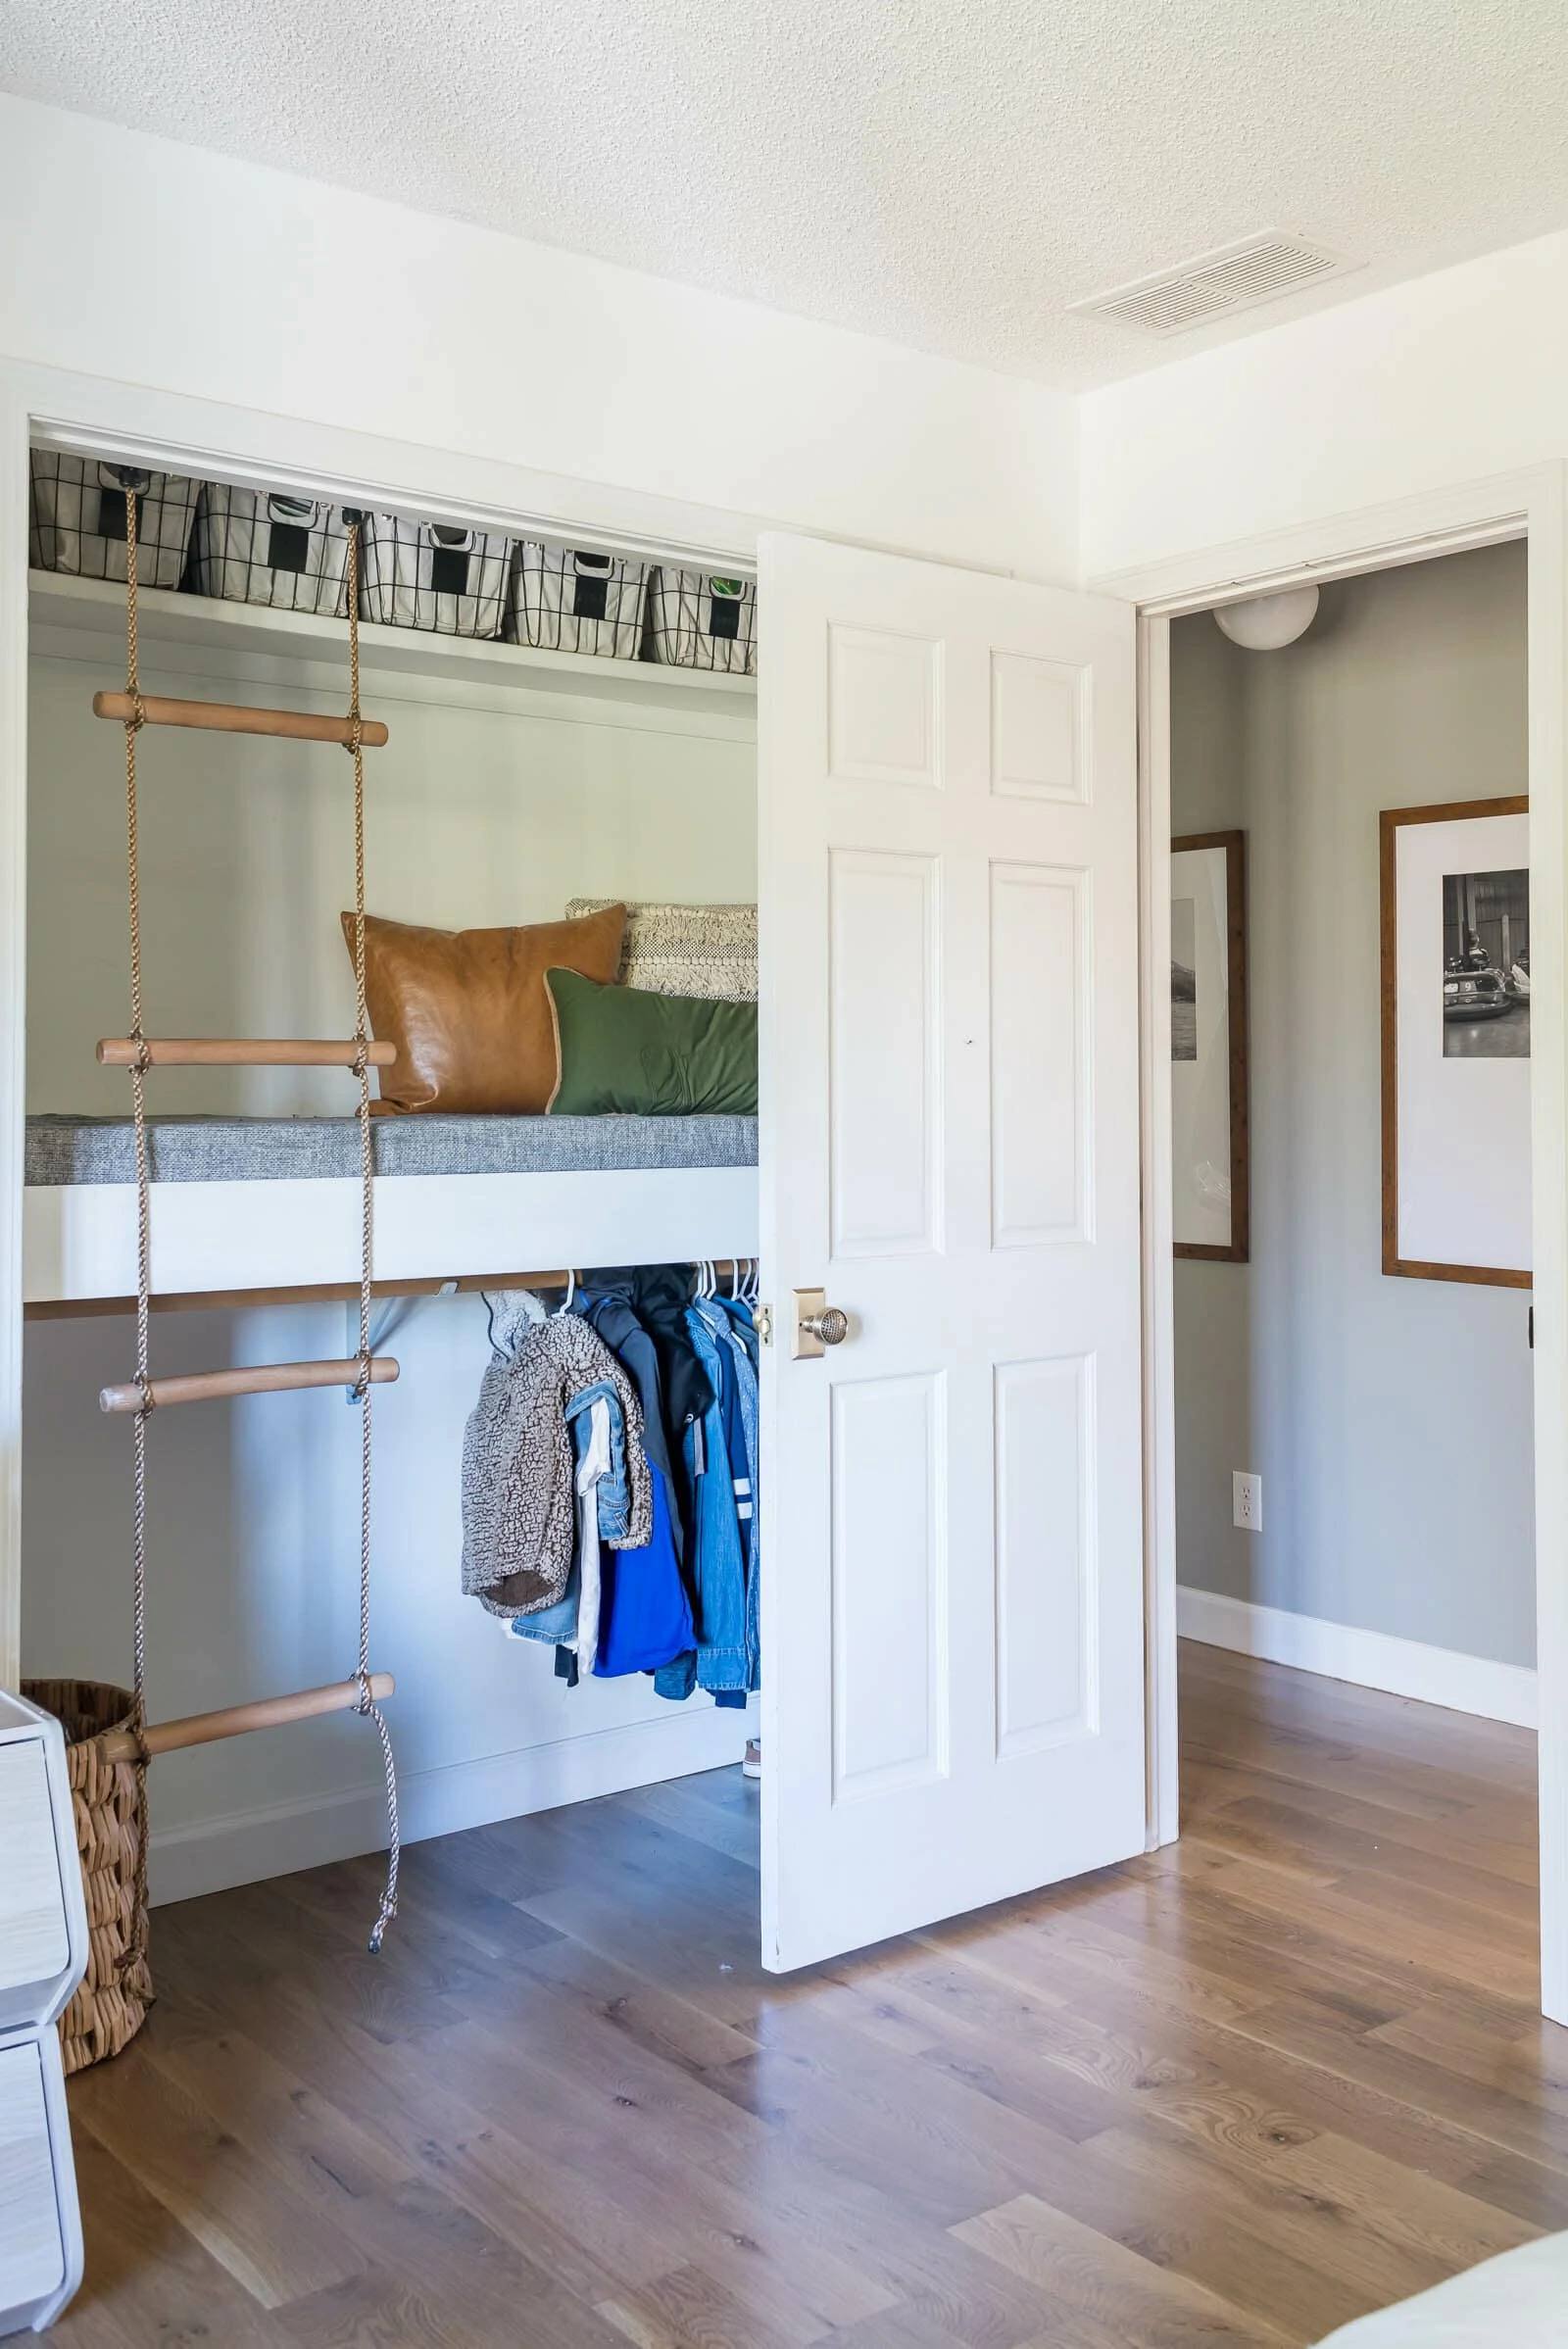
Closet Reading Loft with Wood Trim
Like I mentioned earlier, the need to fill the hinge slots came about because we created a reading loft in our son's room. Here's how the whole loft area with the filled hinge holes turned out!
I hope you feel like you can tackle a project like this! The more you try things, the better you'll get. You can do it!
How to Fill Hinge Holes
Do you need to know how to fill hinge holes because you’ve taken off doors and the hinge slots are visible? I’m sharing a step-by-step tutorial for just that!
Materials
- Piece of Scrap Wood of choice (more on that below!)
- Hinge from mortises to use as a guide
- Wood Glue
- Wood caulk
- Paint
Tools
- Pencil
- Brad Gun and Nail
- Orbital Sander
- Miter Saw
- Box Knife
- Sandpaper
Instructions
- Using the hinge as a template for depth, trace across the 2x4.
- Using a miter saw, cut the 2x4 at the depth of the trace.
- Check for fit on door frame before continuing.
- Trim with a box knife and sand to get a perfect fit.
- Apply wood glue and use a brad nailer to tack in to place.
- Let dry.
- Sand (we used an orbital sander for this).
- Apply a good primer.
- Caulk if needed.
- Finish with top coat of paint.
Notes
SELECTING WOOD FOR FILLING HINGE MORTISE
After measuring the hinge and playing around with scrap wood for the sizing, Luke realized that the hole was almost EXACTLY the same size as the end of a 2×4. Because our woodworking skills and tools at the time of this project were beginner, he thought it would be best to use the end of a 2×4 to fit in the hinge mortise.
One thing to note about this choice is the pattern of the grain. Because we decided to cut down the 2×4, the grain of the 2×4 was very visible. If you want to elevate this project more (and we would do this today as our skills have become better), we would use the face of a piece of wood to fill the hinge hole with instead of the butt cut of a 2×4 piece of wood. You’ll see more of what I’m talking about below.


Julia@Cuckoo4Design
It's awesome! You can't even tell.
Ashley Mayes
Thanks! It is a pretty simple but yet effective fix!
Christine
Wow! Looks great! You can't even tell the hinge was there!
I always worry about that when I think about removing doors.
Ashley Mayes
Thanks Christine! If you look very closely then you can tell that they were there, but it looks great! You should go for it!
Corinna - For My Love Of
This is one of those things I wouldn't have ever thought about needing to do, but yet I see so many people just nonchalantly pull doors off of closets and now I'm wondering if they just ignored the hinge holes or what?
Ashley Mayes
Ha! I know! I think most people use wood filler (which we tried a few years ago), but the results are just not the same.
Brynne@TheGatheredHome
Ha! You caught me red handed... I'm in the middle of a project like this and I just painted over everything! I wasn't sure if we will want to put the door back up when we sell though, so I guess it's a good compromise. You're right though - it would look soooo much more polished if I filled them in! Great idea!
P.S. I'm really loving the capital letters font you used for your pin graphic... Do you mind telling me what font it is?
Ashley Mayes
LOL! Seriously, we did that as well and it was fine. But, for this project, we don't have plans to put the doors on...ever. Cracks me up though!
It's Mouse Deco. =)
Kyla @HouseOfHipsters
So this is a pretty amazing tutorial! I would have guessed you'd putty them in! Thanks momma!
Ashley Mayes
Putty just doesn't look the same... trust me I know from past experiences. Lol.
Jennifer @ Brave New Home
I'm about ready to get started on a similar project and was just planning on using a bunch of wood filler...I guess I know better now! It seriously looks flawless!
Ashley Mayes
You can use wood filler, but it the results are quite the same. We used it on a previous spot and filled, sanded, filled and sanded. It works, but doesn't look as seamless as the 2x4 with caulk. Thanks!
laura
We just removed some of our shutters and have similar holes. I'm going to measure the hinges. Either way, this should work on these hinges! laura
Ashley Mayes
Awesome! Let me know how it works!
Kirsten
Genius! Thank you so much! I'm taking the closet door off in my daughter's room soon and this is exactly what I need to cover those holes! Pinning!
Ashley Mayes
Yay! Glad to have helped!
Bob
Thinking about using an angle grinder to cut off hinge to make the edge flush with the door jam, then paint over after reinstallation.
Ashley Mayes
That's a way to do it!