

They say patience is a virtue, but after 140 hours working on our striped hallway, I think "obsession" might be a more accurate word.
After living with our gray hallway for 10+ years, I knew I wanted a change. I thought about what I wanted for months and kept coming back to tiny stripes in a color palette that felt right for us. I ordered a number of wallpaper samples because I knew that even though wallpaper would cost more, it would be faster and easier than painting tiny stripes.
Well, I could never find the "right" wallpaper sample so I asked Luke if he would be willing to paint stripes in the hallway. He had no idea what he was agreeing to in terms of commitment or time investment. Oops. Honestly, neither one of us would have thought that the stripes would be as time consuming as they were.
Want to see before we get into details?! It turned out so good!

The Vision vs. The Reality
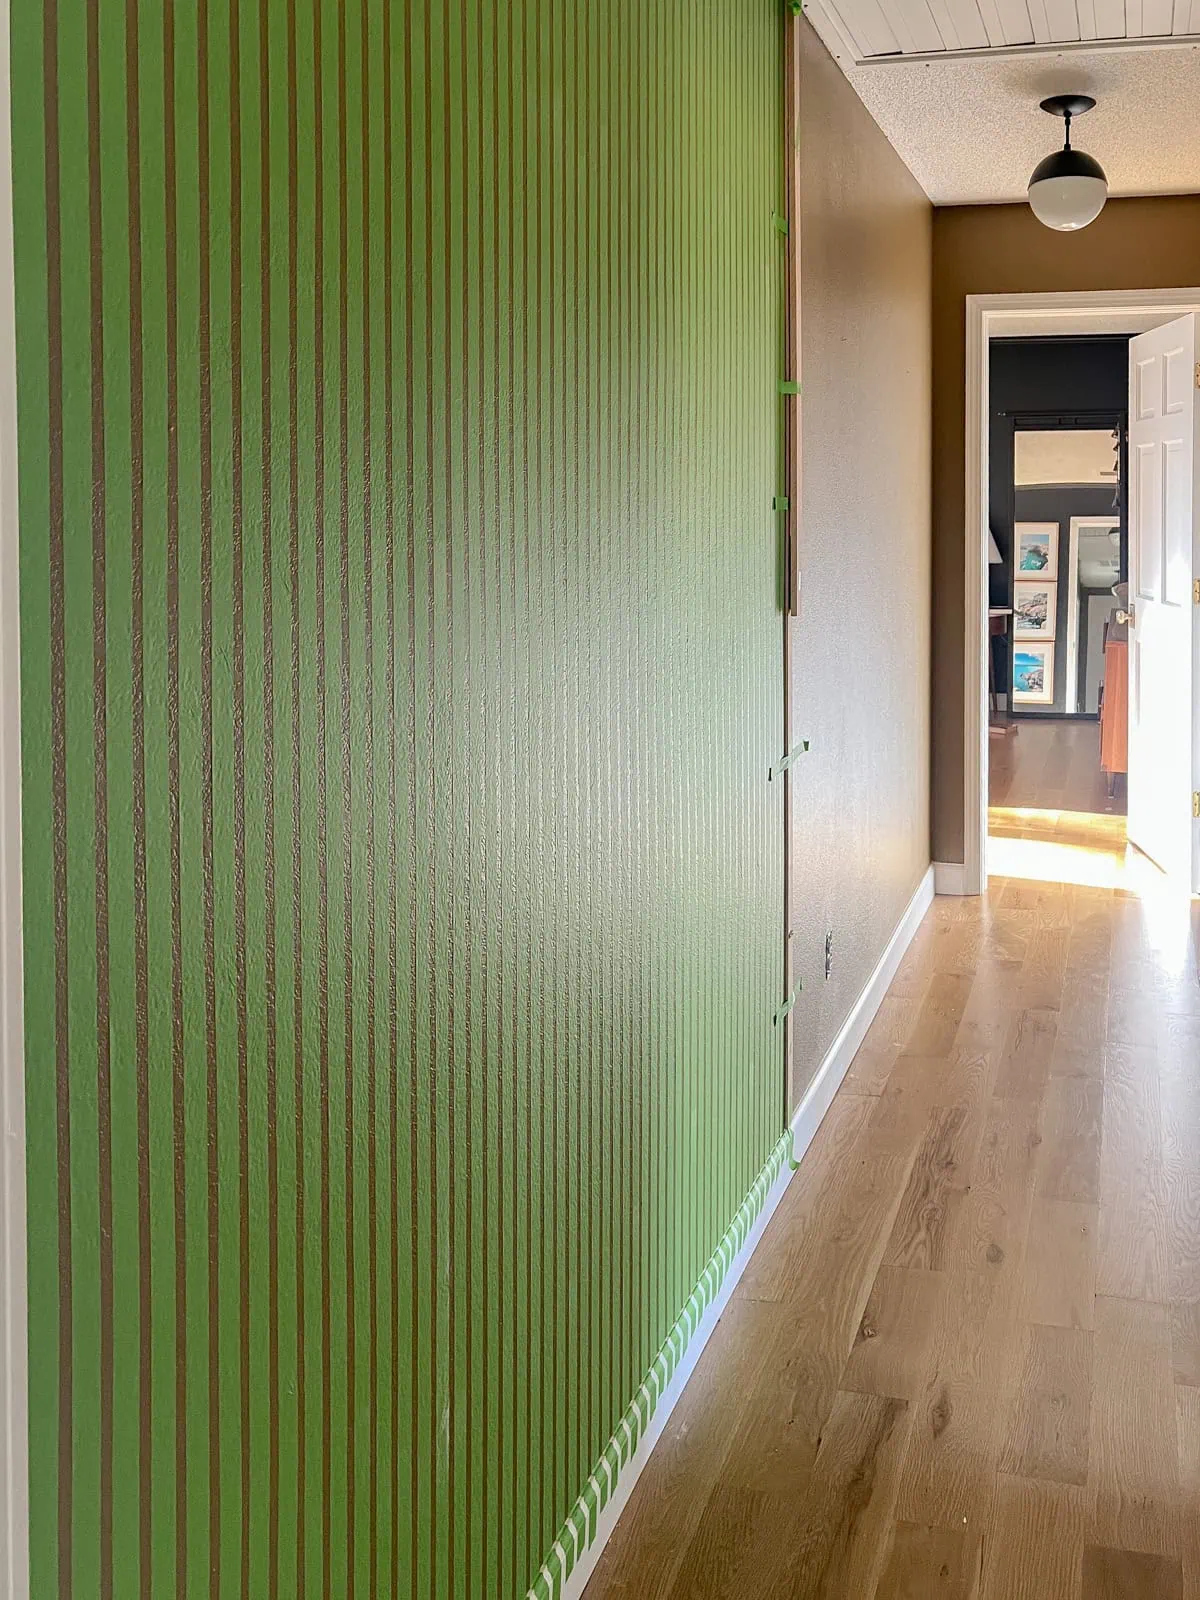
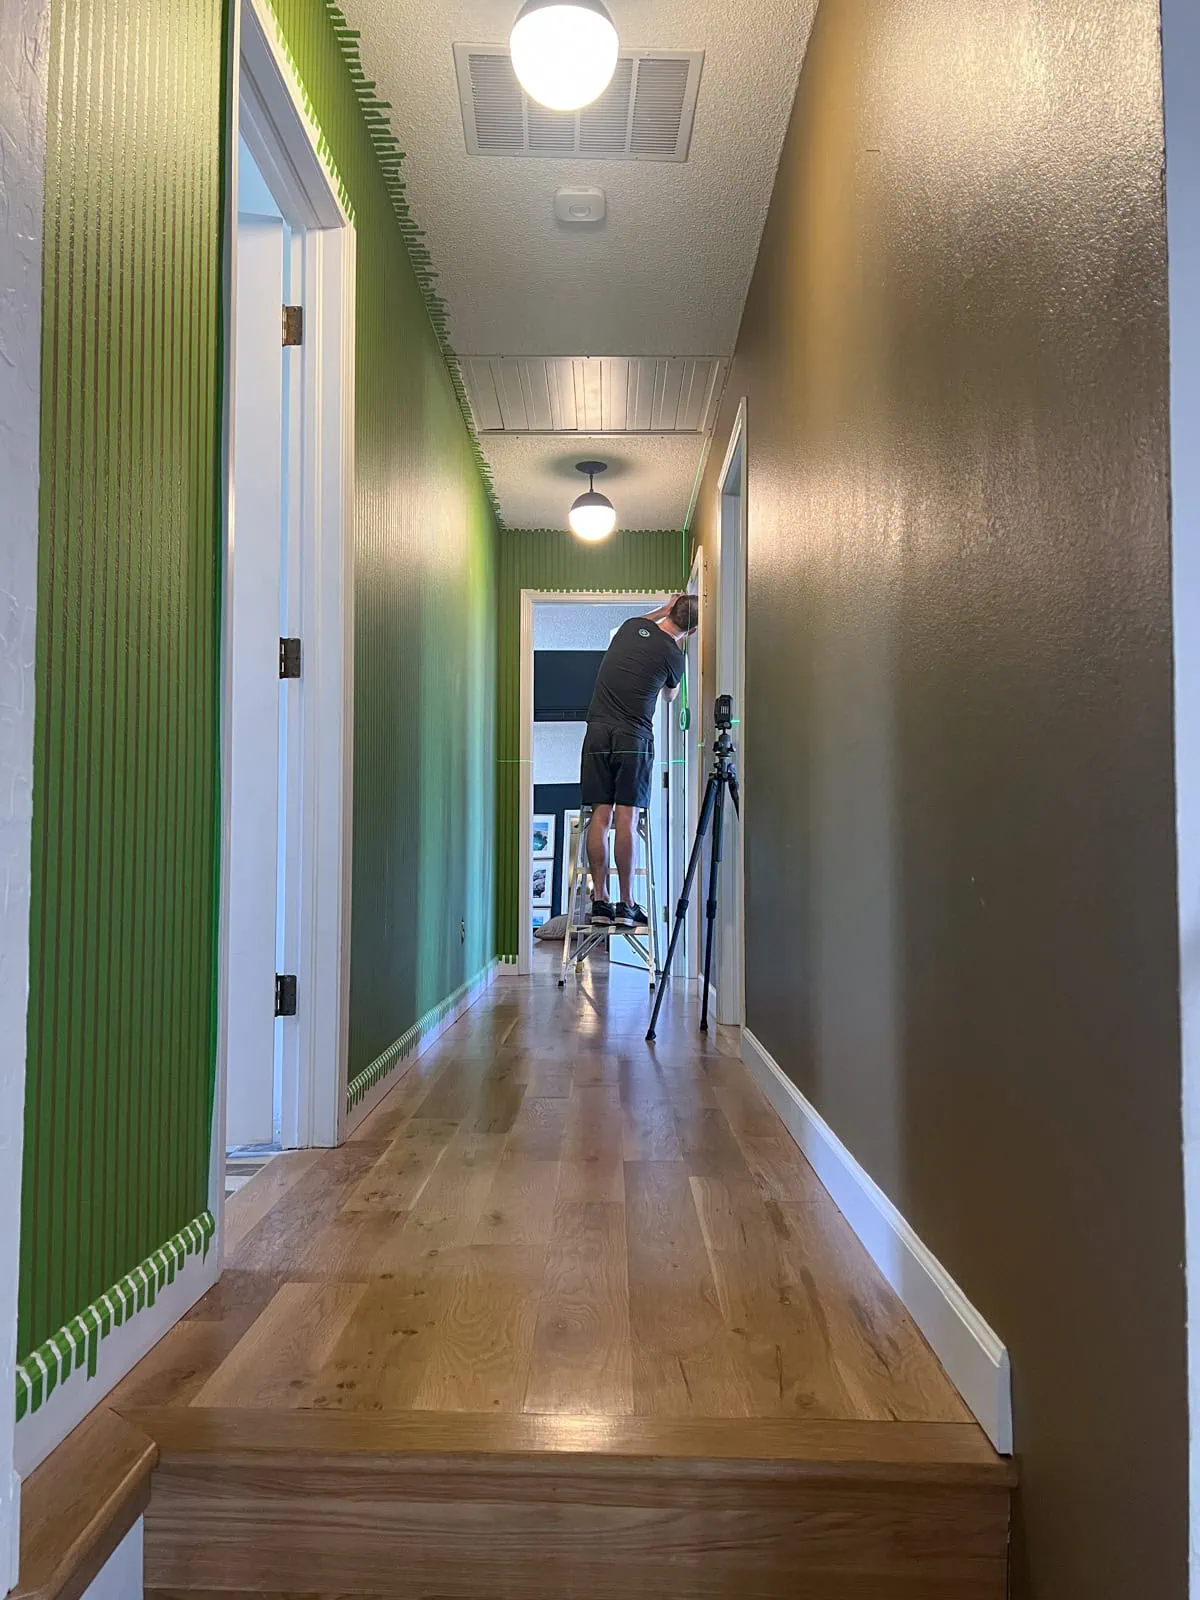
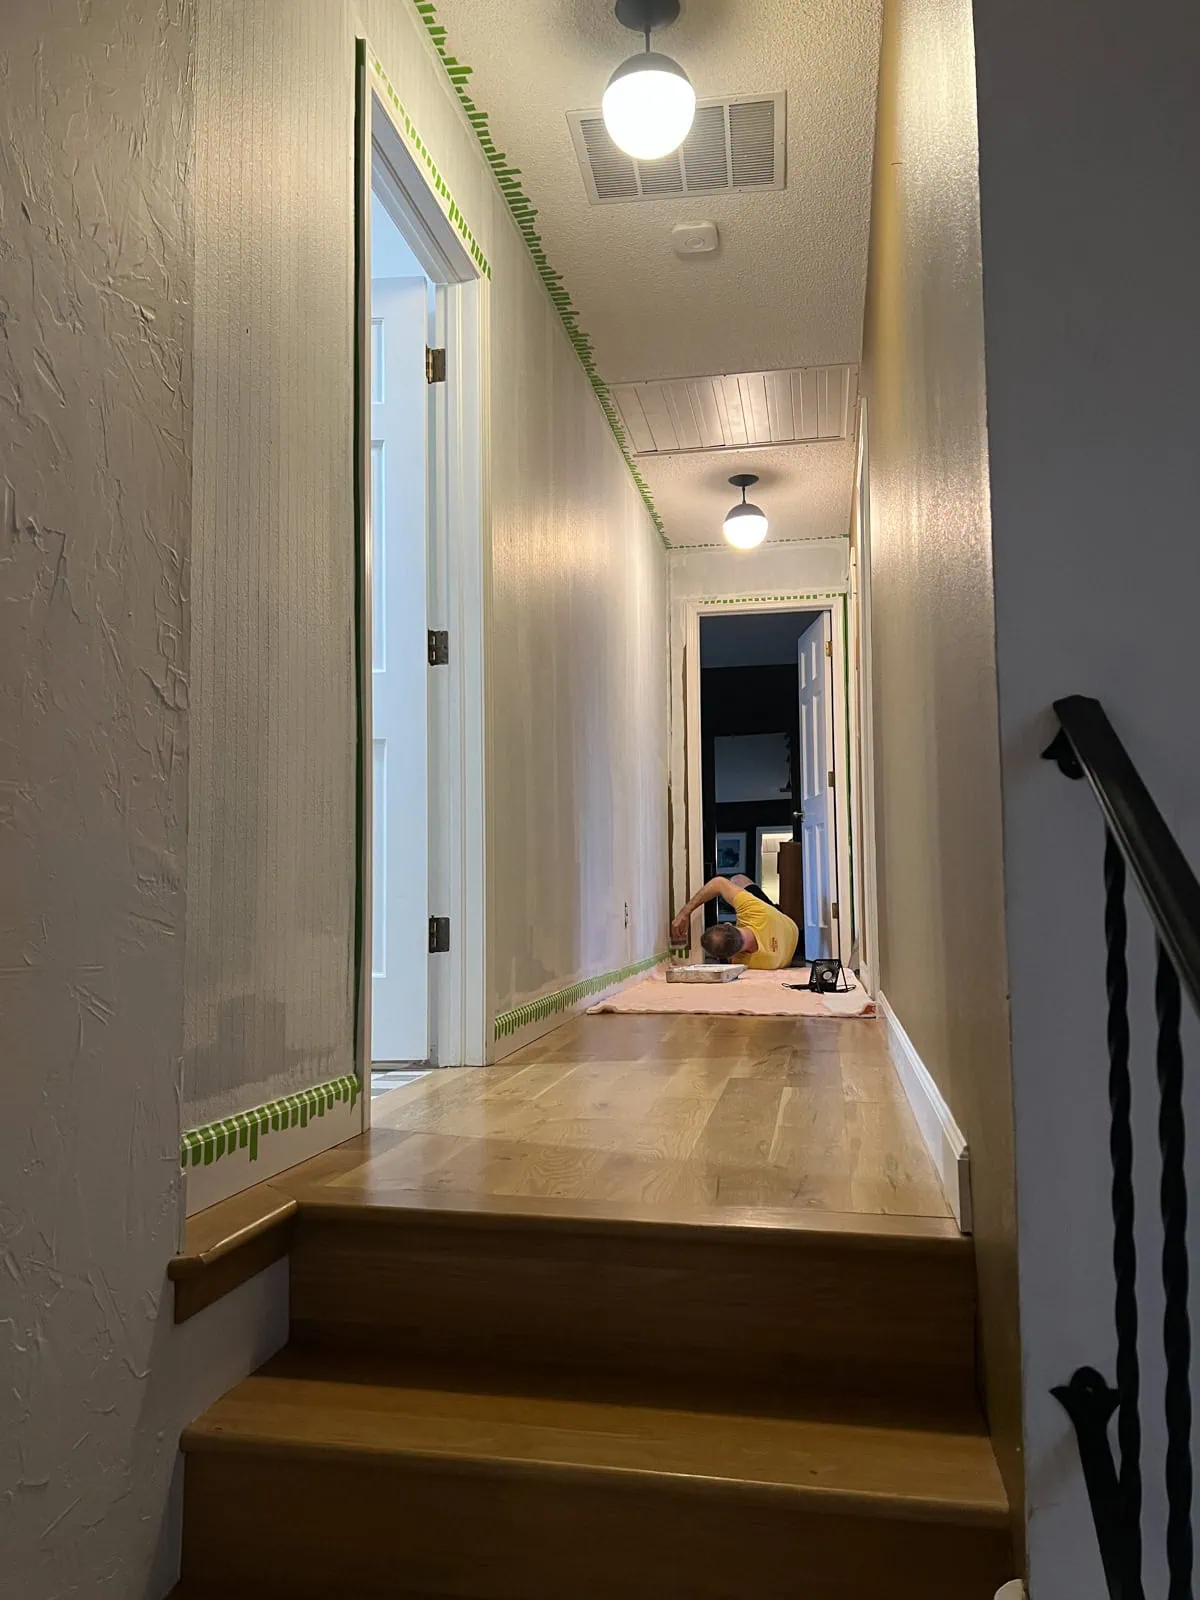
We underestimated the sheer scale of the project. A long hallway means hundreds of linear feet of tape, constant measuring, and a lot of time spent on a ladder.
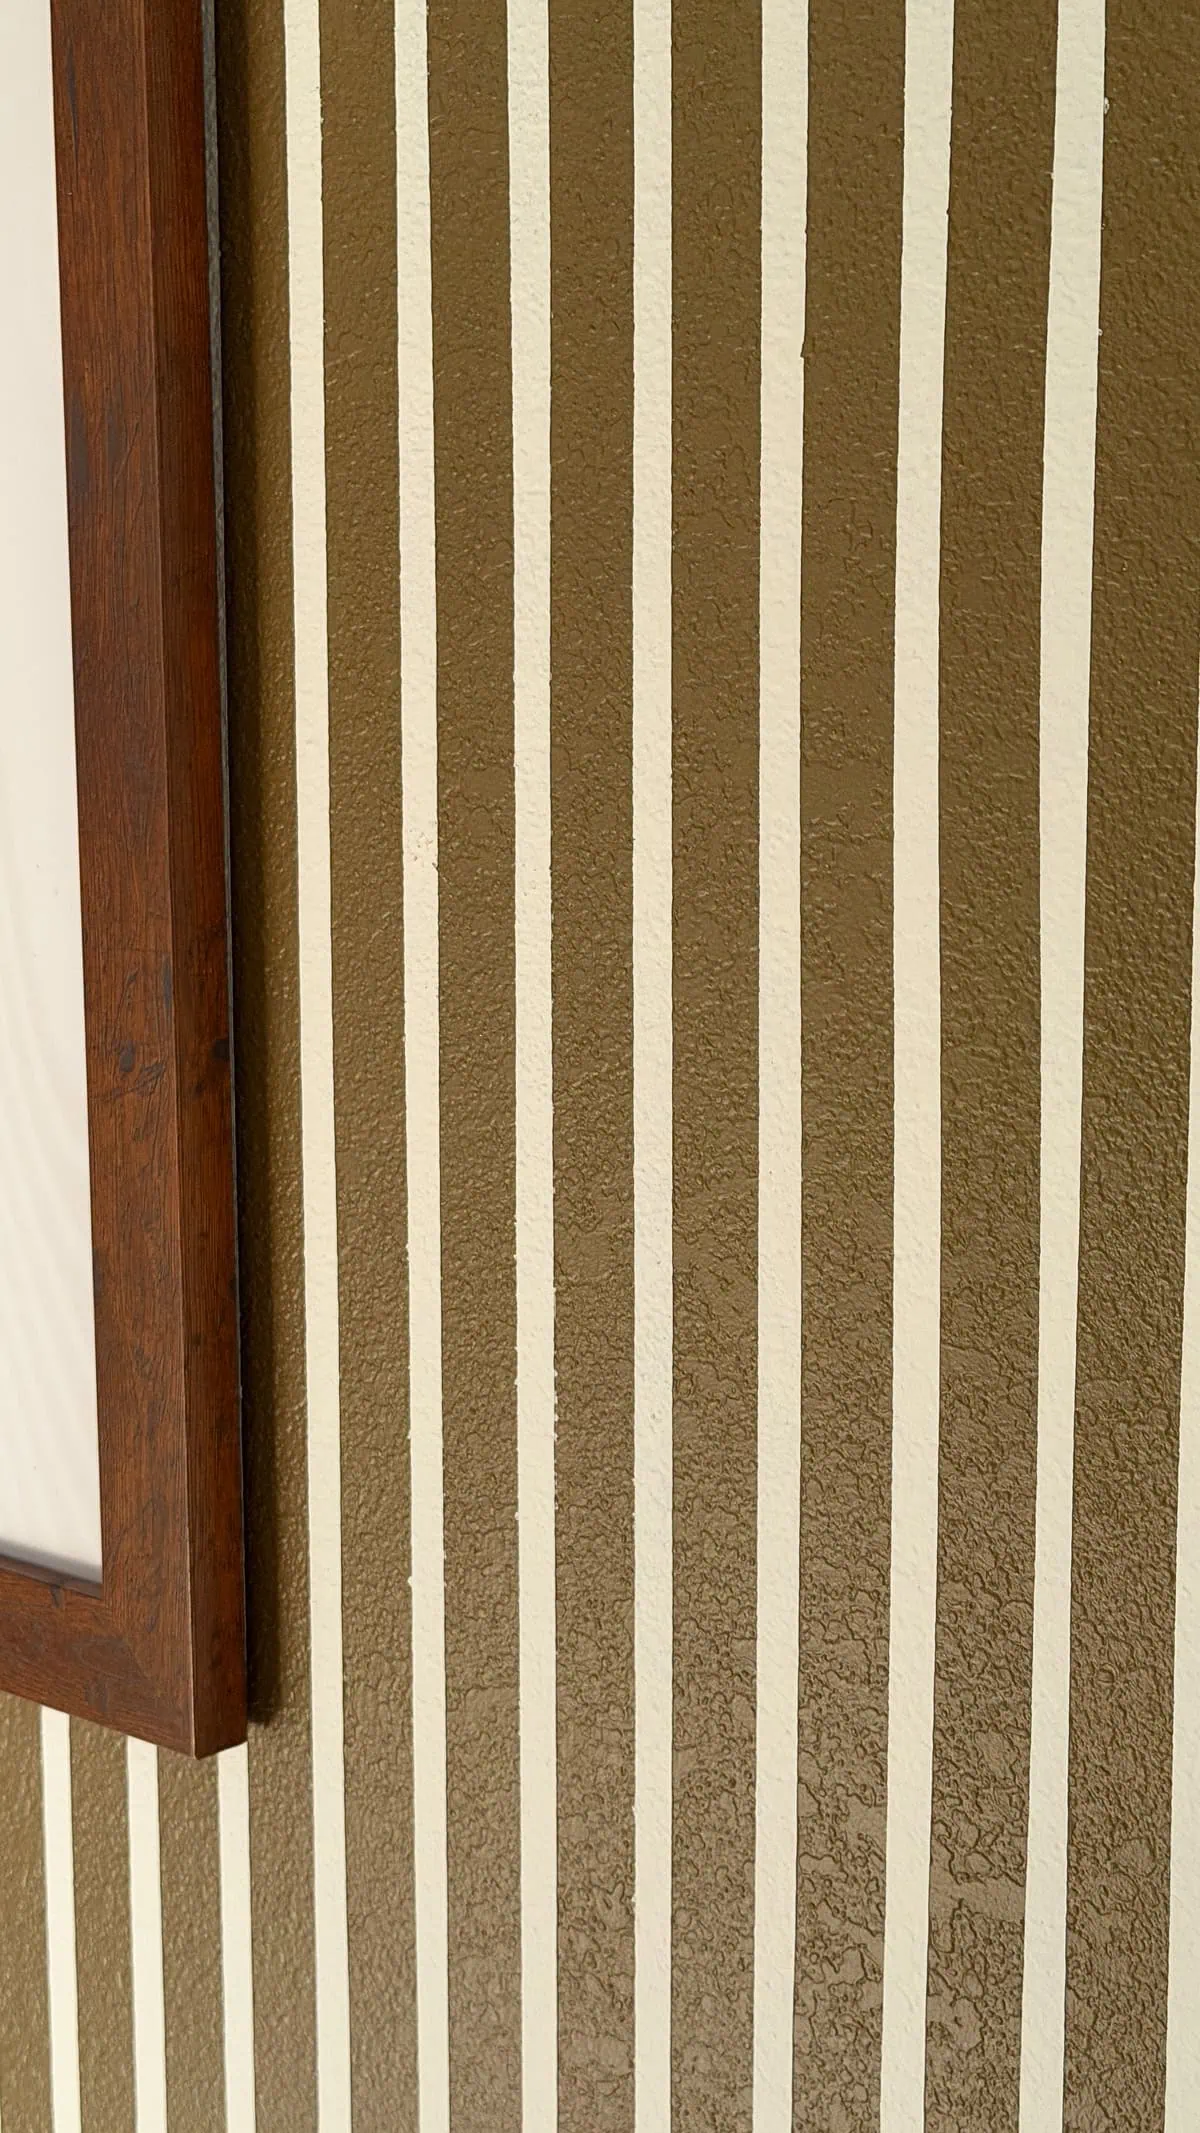
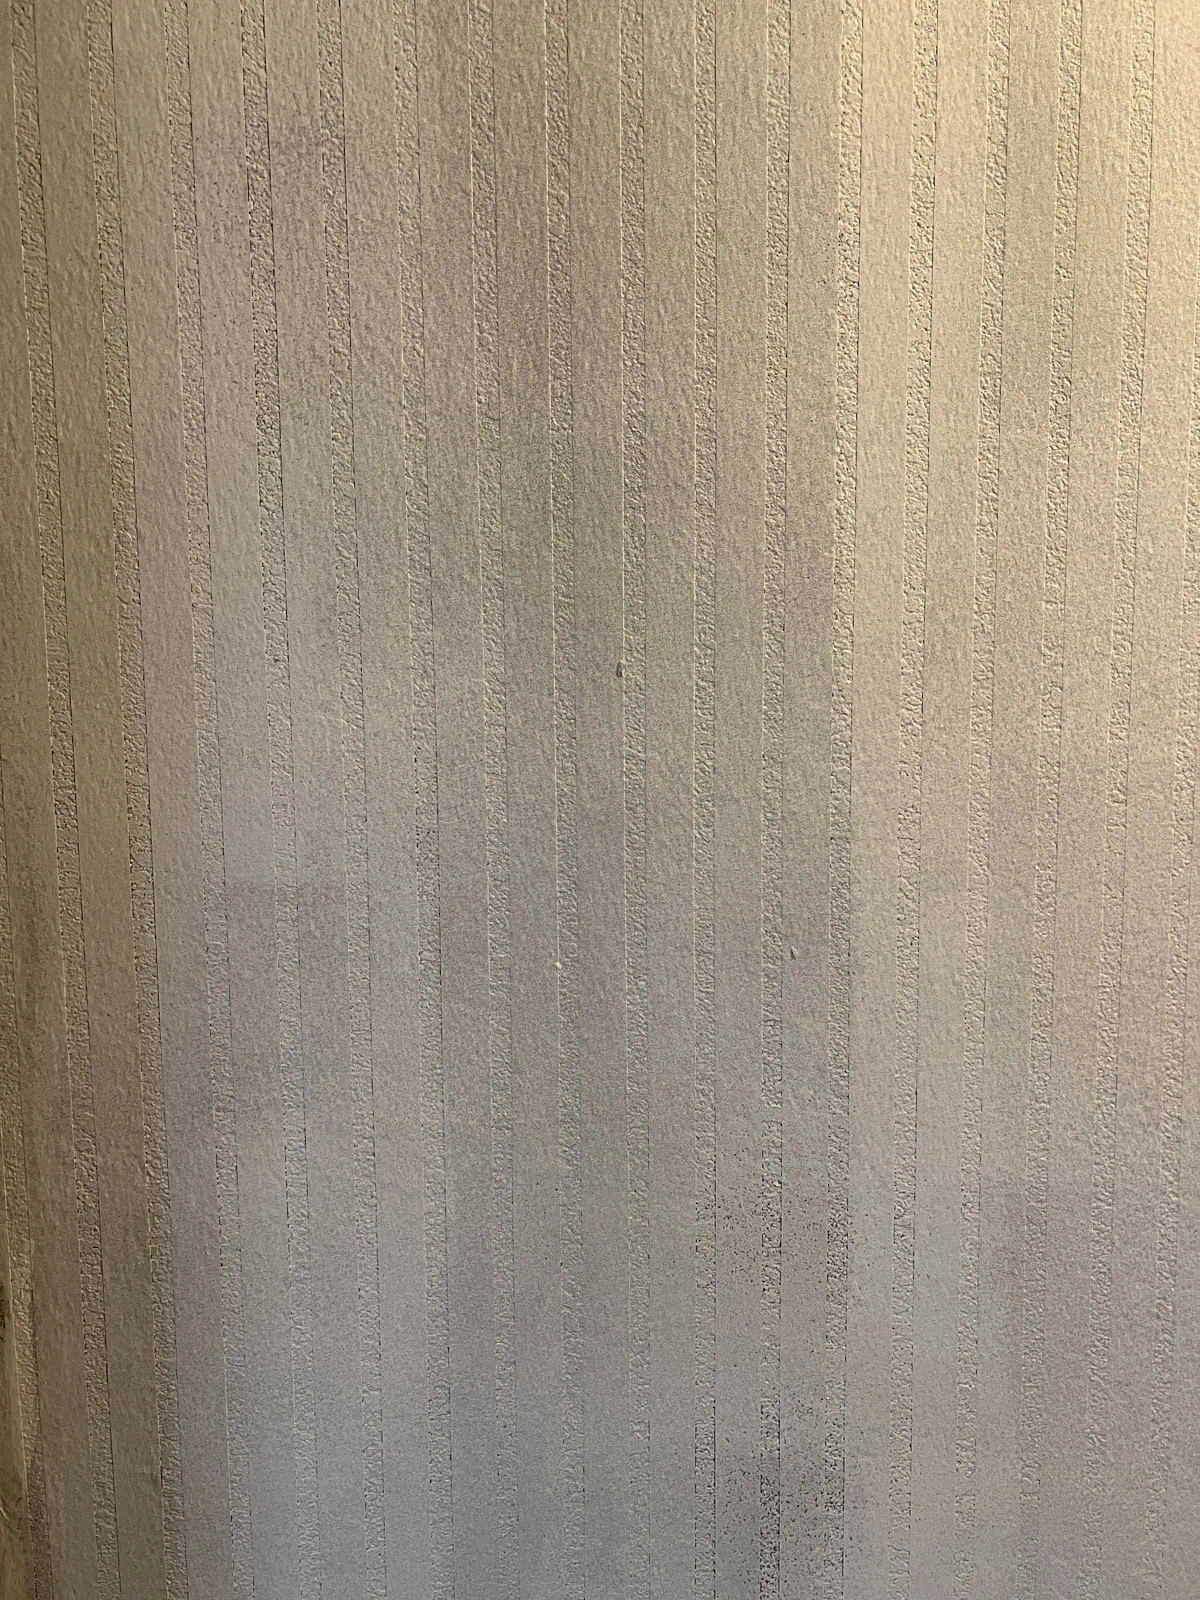
If you’ve ever tried to paint stripes on a textured wall, you know the nightmare: paint bleed. To avoid it, Luke had to be meticulous. We did end up having some paint bleed but it's because of the textured wall and you have to look really closely at an individual stripe to see it. Overall, the tape plus second coat of base color did great and I think the imperfections look like they are meant to be there.
Our Secret Weapons for Crisp Lines
To get those "factory-finish" lines, we relied on a specific four-step process:
- The Laser Level: Forget a measuring tape and a pencil. We used a laser level to ensure every single stripe was perfectly plumb across the entire length of the hall. Without this, the "drift" would have been noticeable by the time we reached the end. We did have "drifts" even with the laser level because no walls in this house are straight. Luke corrected for this when he found them and one time, had to take a few hours of stripes off the wall to fix the issue.
- Frogtape: We used miles of Frogtape. I tried to keep all the containers but since this project took a year to finish, I got tired of holding onto them. Sorry. But, I'm guessing that it took about 30 rolls of Frogtape. We used the .94x60yard medium adhesion multi-surface ones.
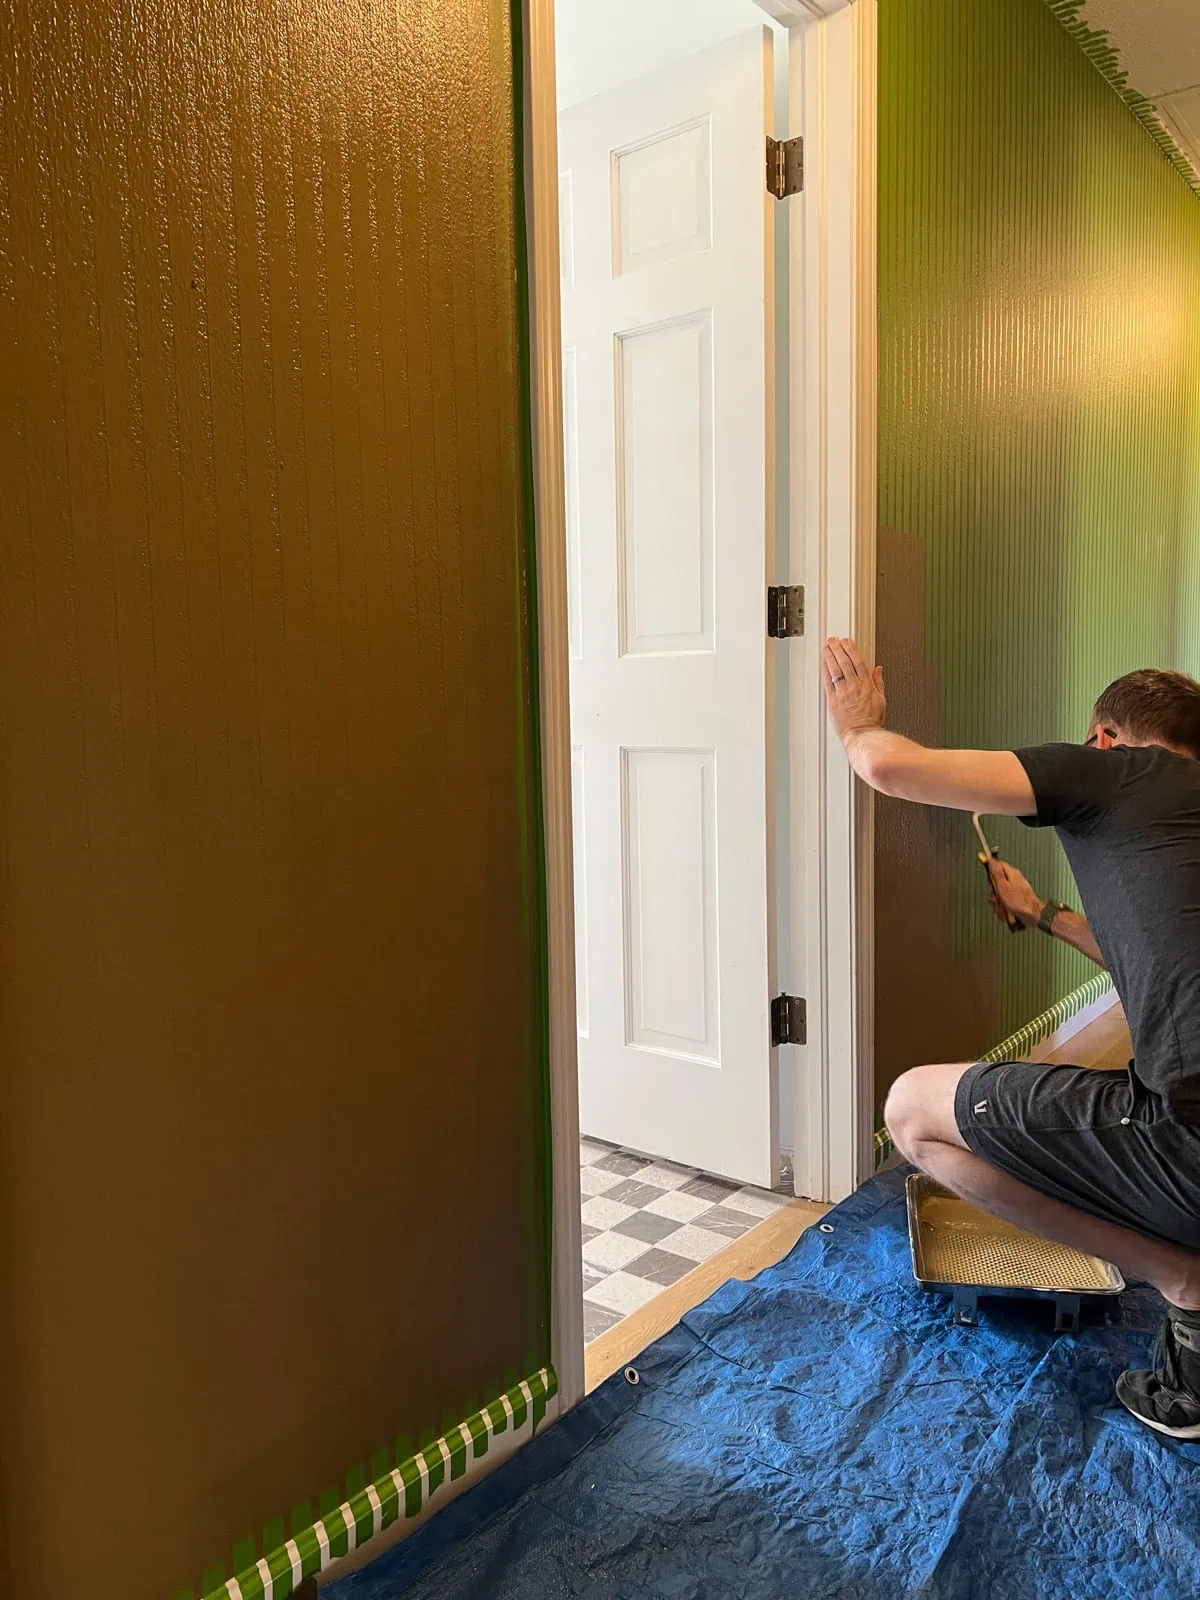
- The "Seal" Technique: This is the game-changer. After taping, we painted over the edge of the tape with the base wall color first. This "seals" the tape; if any paint bleeds under, it’s the color that’s already there!
- The Top Coat: Once the seal was dry, we rolled on our stripe color.
The Breakdown of the 140 Hours
Why did it take so long? It wasn't just the painting; it was the prep:
- Measuring & Mapping: Ensuring the stripes wrapped around corners and door frames seamlessly.
- Taping: Applying tape to a textured surface requires firm pressure to ensure a seal.
- The Multi-Step Paint Process: We had to paint the walls their new color first and needed two coats. Then, once the tape goes on, you roll over the tape and edge in with the base wall color to "seal" that coat. Then, once that is dry, you can paint your final coat (again, two coats).
- The "Big Reveal" Pull: Removing the tape slowly to ensure no drywall peeling. I pulled the tape (yay, me!) and I found that pulling one by one, directly downward, resulted the the least amount of chipping.
The Results
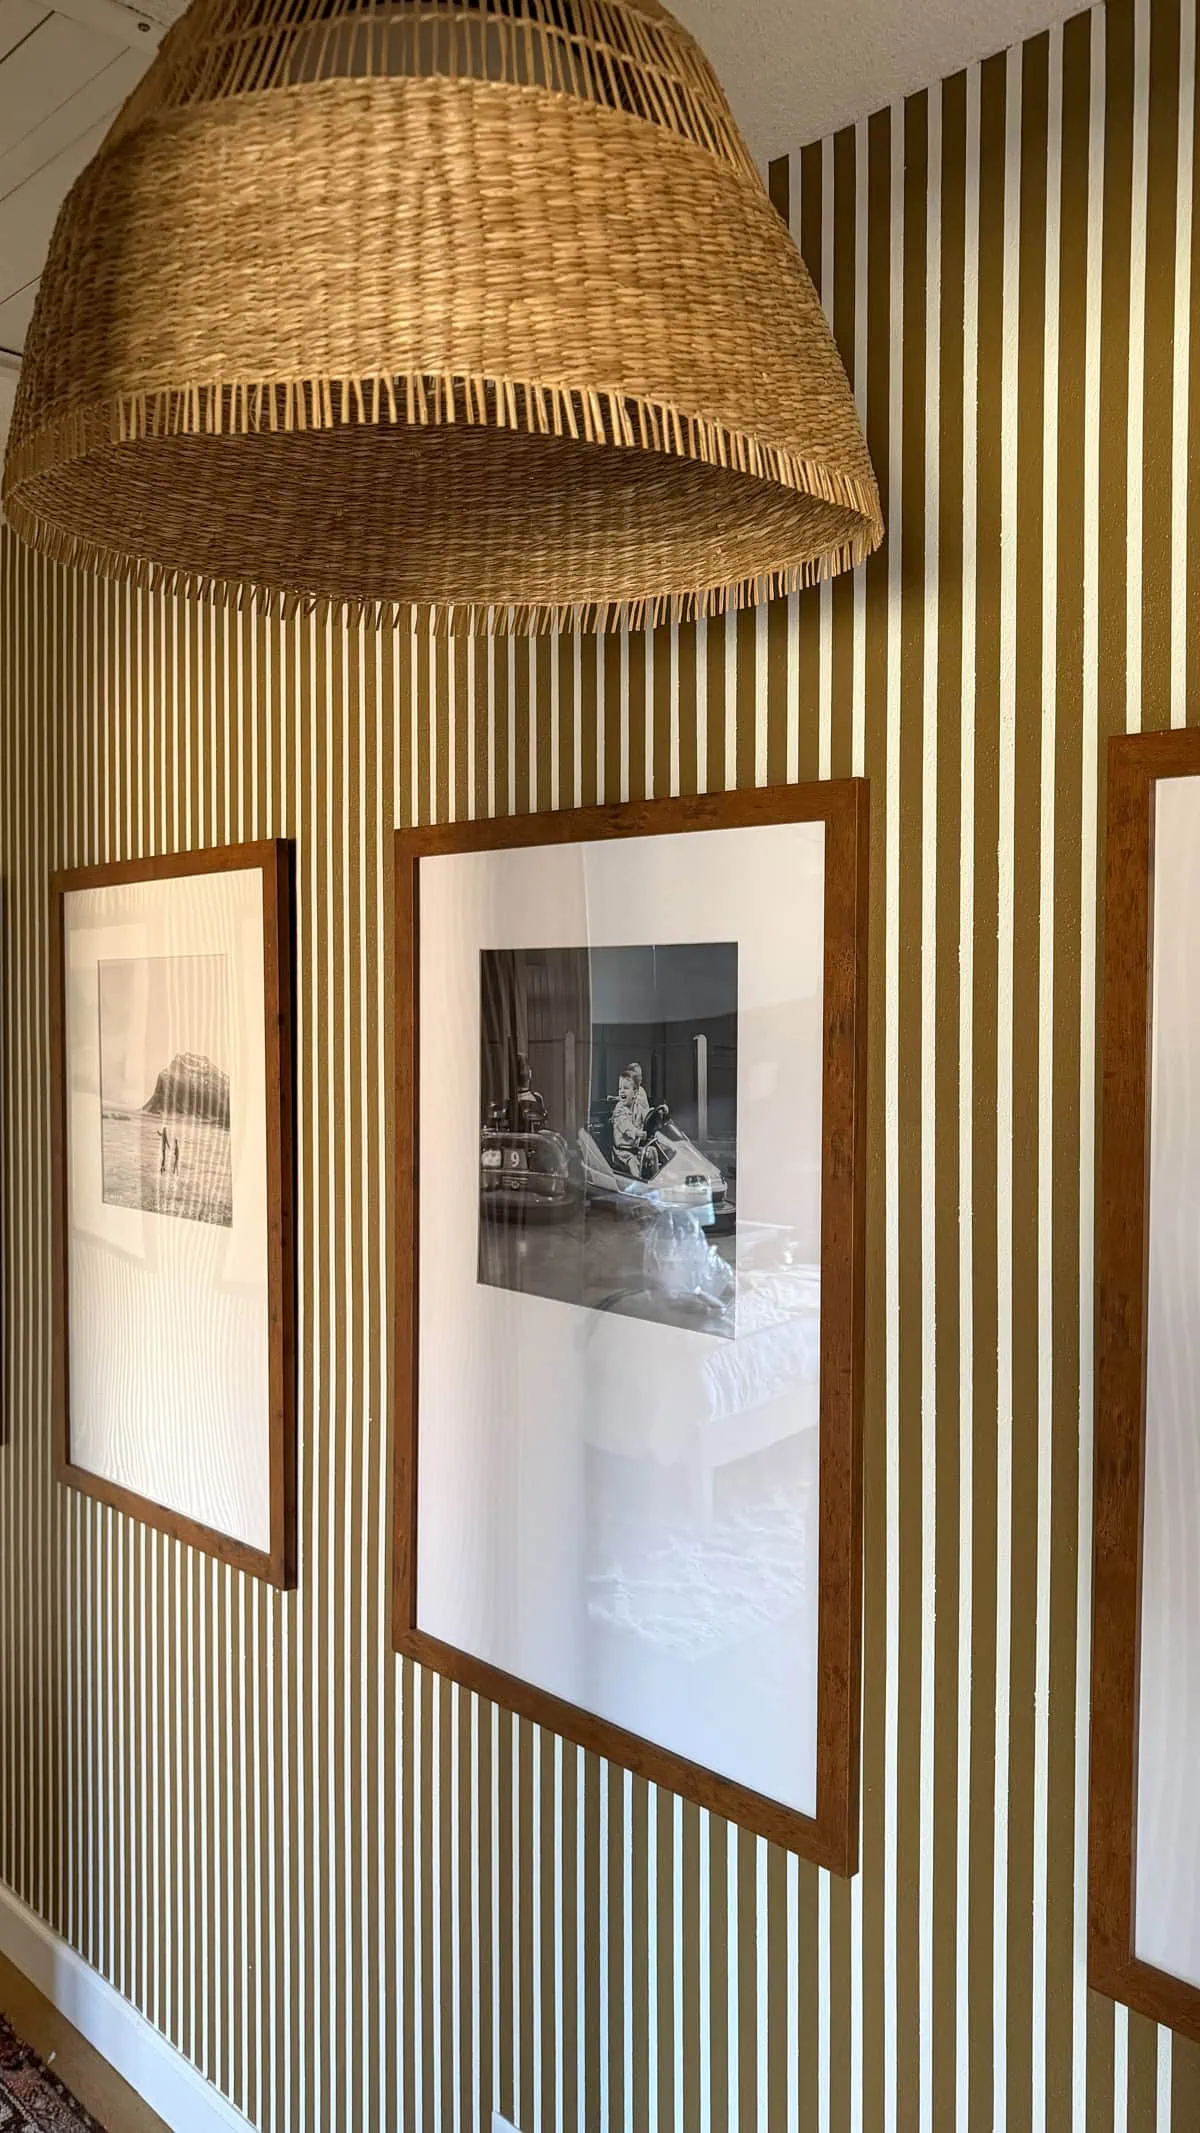
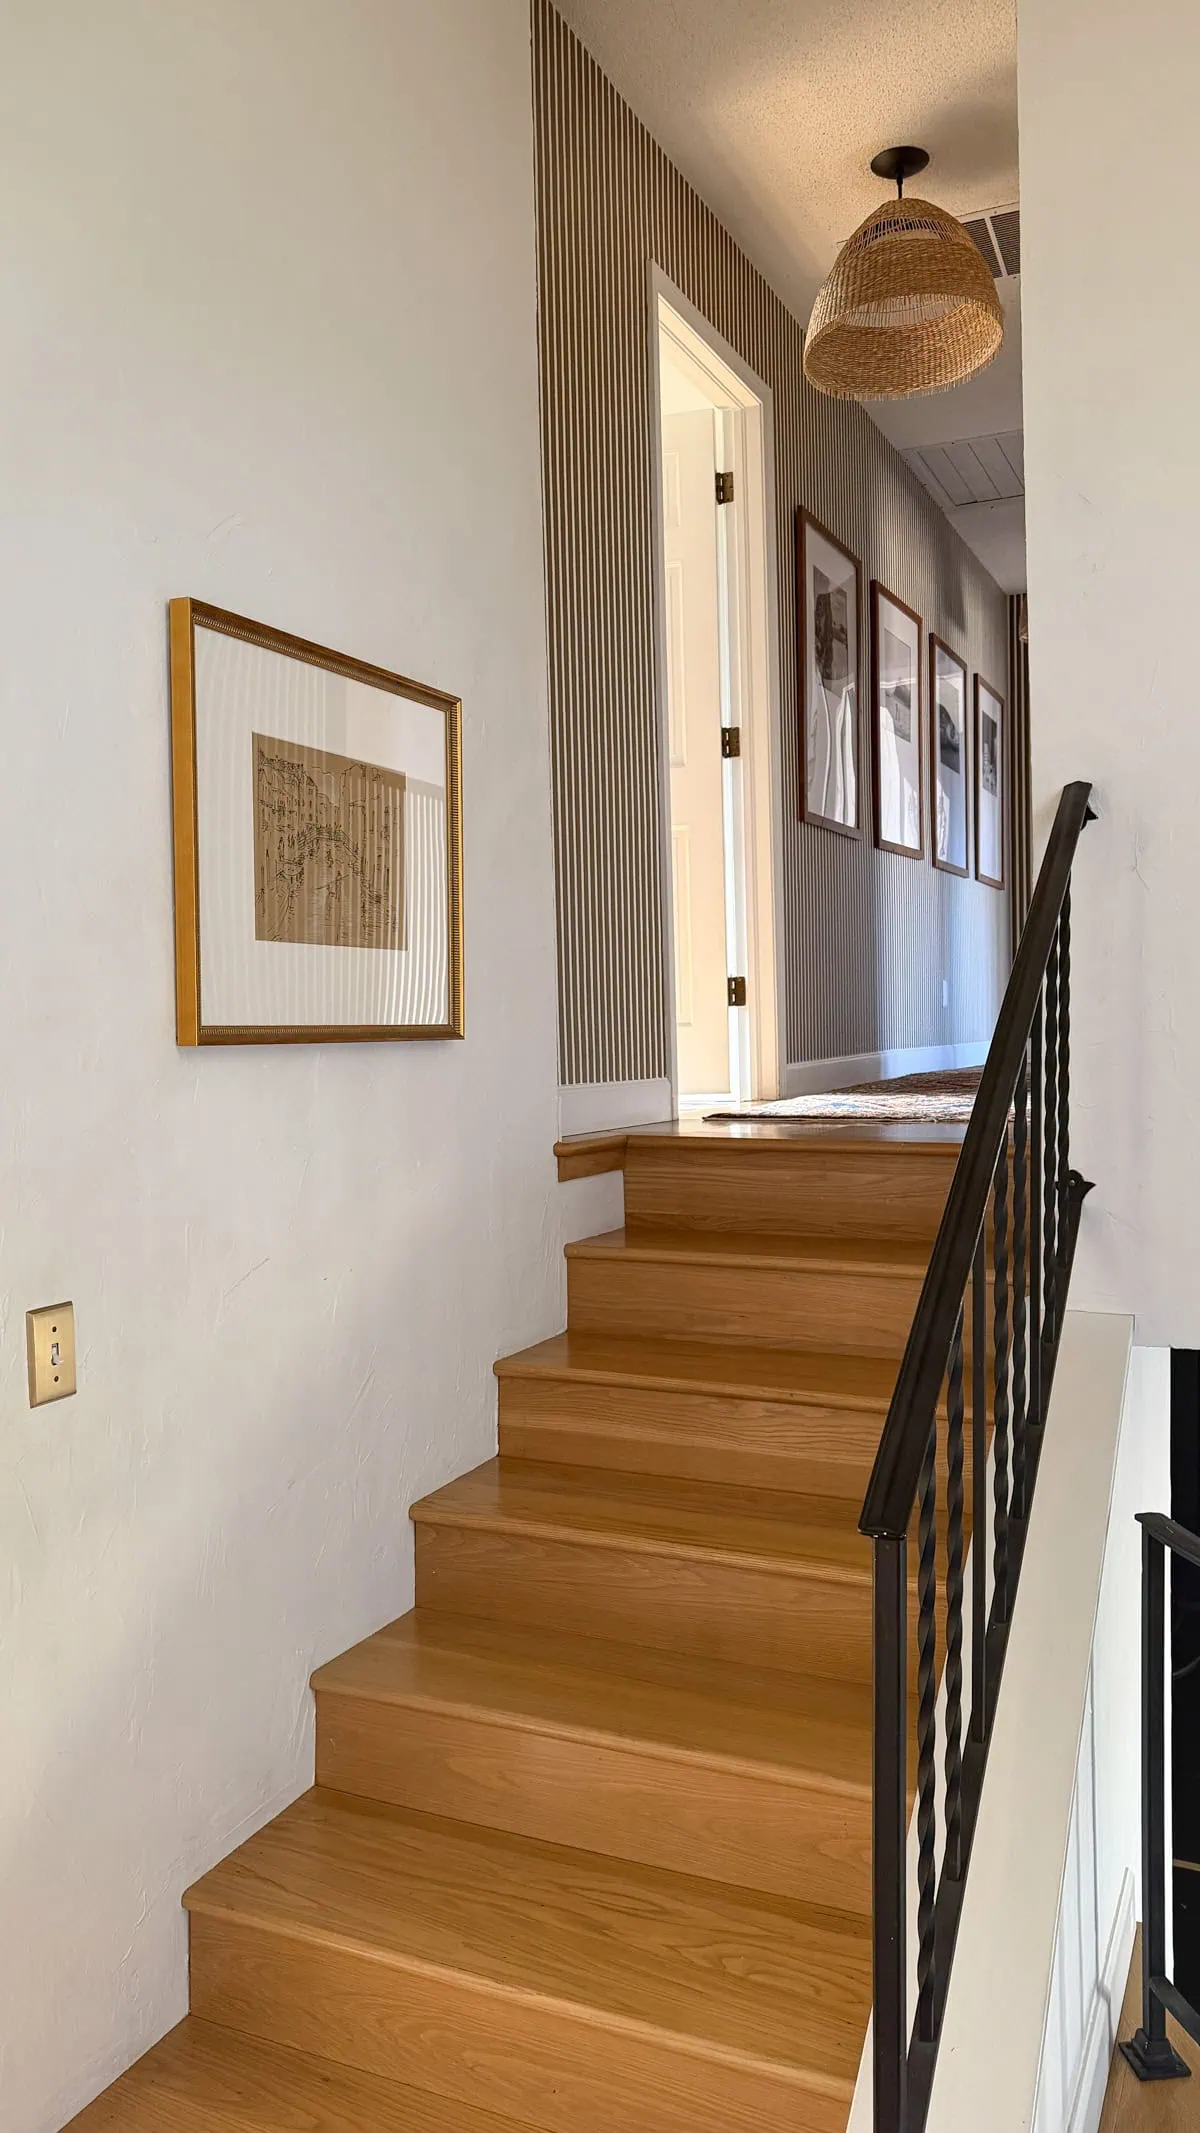
Was the stripe hallway worth the 140 hours? Absolutely. The hallway no longer feels like a transition space; it feels like a gallery. The stripes lead your eye down the length of the home, making the space feel taller, more intentional, and incredibly custom. The lines are so sharp you’d think they were wallpaper. Would I recommend this to you? Absolutely not. It took FOREVER.
Pro Tip: Would only recommend doing this project if your space is smaller than ours OR if you are willing to use larger tape and/or larger width between your stripes.
Lessons Learned in the Stripe Hallway Project
- Texture isn't the enemy: You just have to work with it, not against it. Sealing your tape is non-negotiable.
- Quality tools matter: A cheap level or low-quality tape would have doubled the frustration.
- Take the time: It’s better to spend 140 hours doing it once than 40 hours doing it poorly and having to fix it.
Stripe hallway before and after!
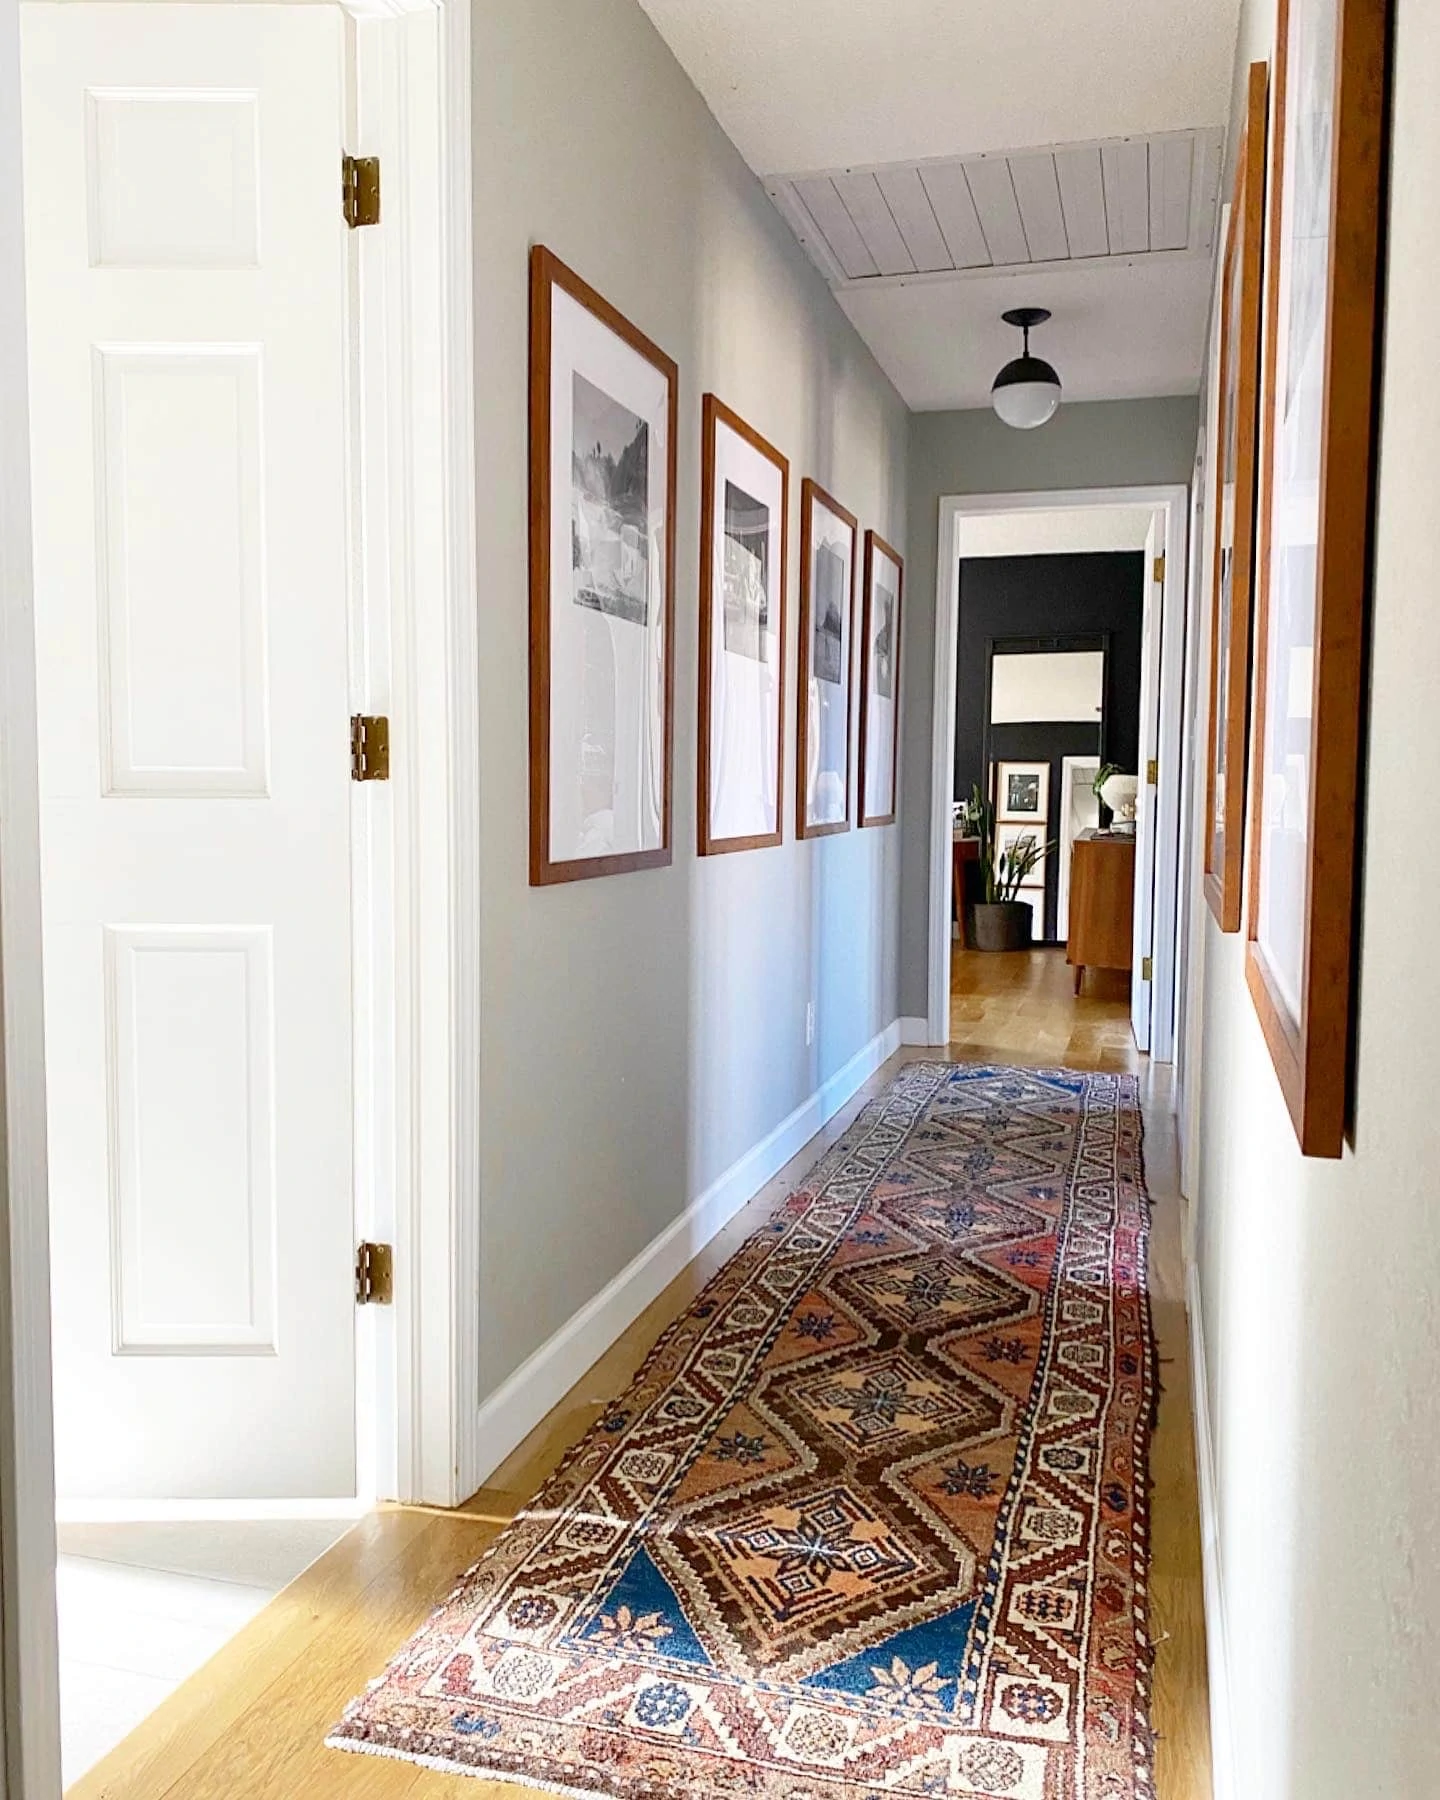
Warmer and slightly elevated in style and interest, right?!
As you can see, the only thing that changed other than the brown and white painted stripes was the light. I wanted to add some texture to the ceiling area and was able to find two massive baskets on FB Marketplace.
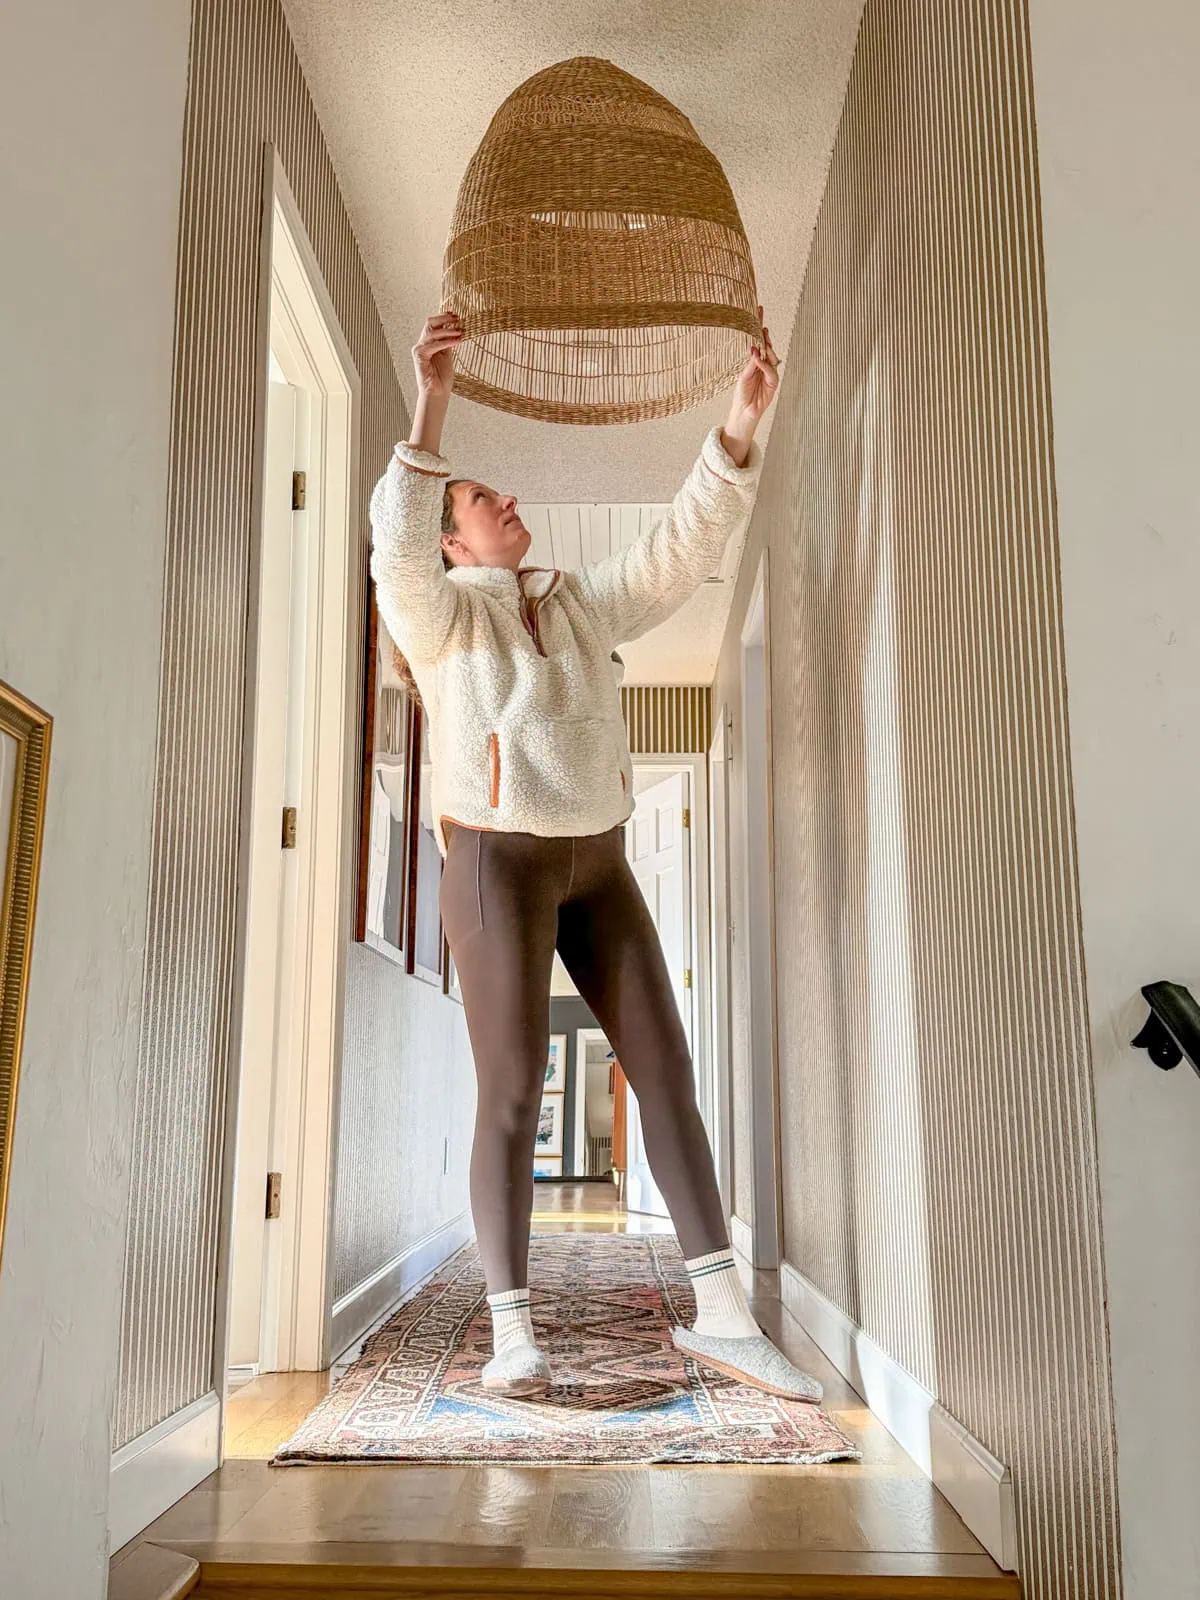
I didn't measure and when I got home, I realized how massive they were. But, I had the idea to just cut about 8" off the bottom and see if they would work that way. We hung them over the original lights and they totally add a bit of whimsy to the space.
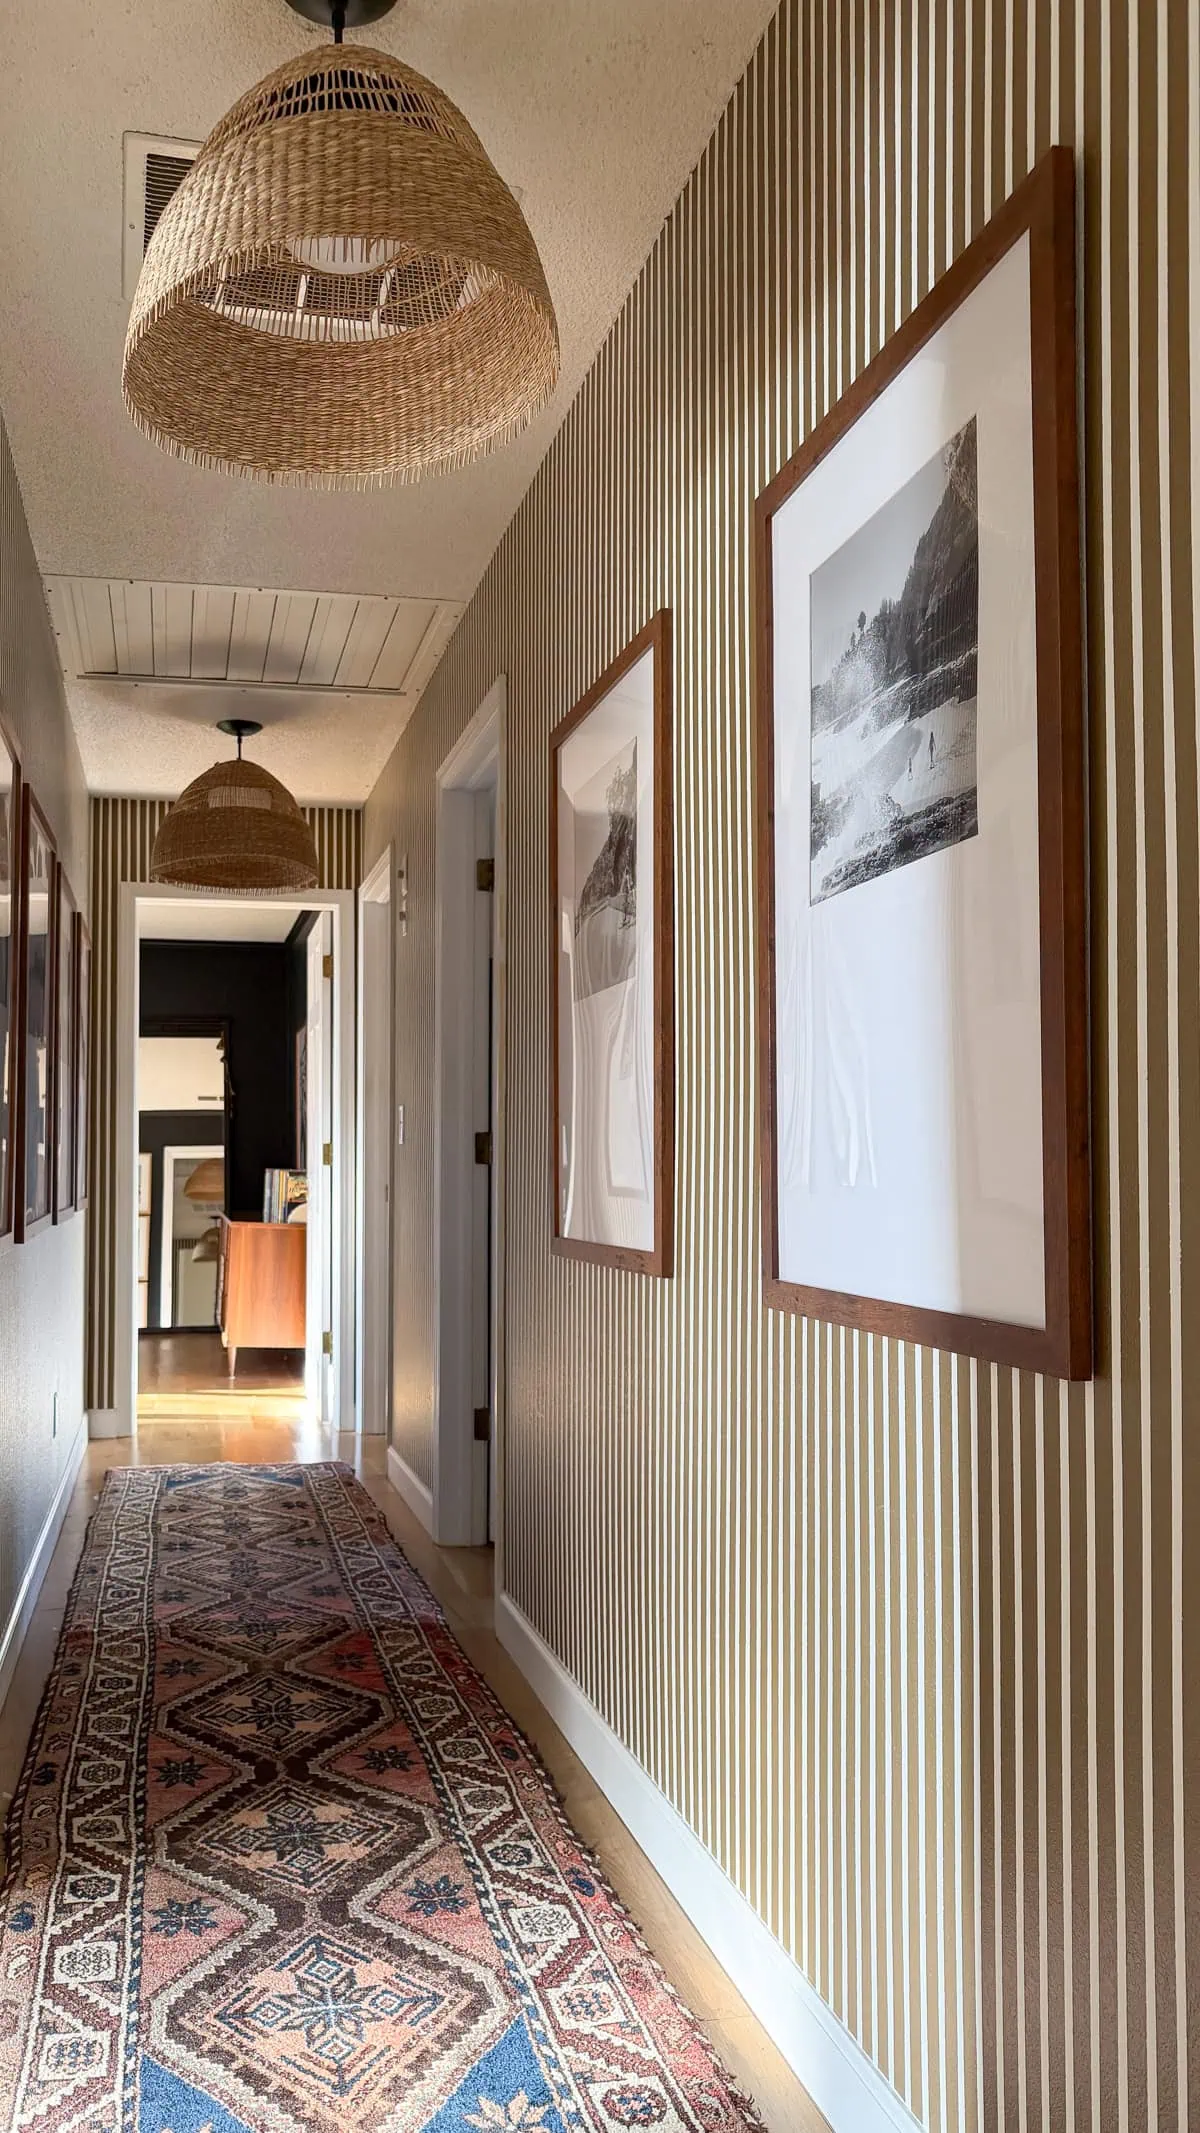
Interested in those travel gallery frames? The frames are inexpensive poster frames from Michaels. Luke and I made the mat boards ourselves but you could always have an art store do this for you if you didn't want a DIY project.
The runner rug is a vintage, one-of-a-kind rug, but I have a board on Etsy that has similar rugs.
}


AlisonG
Does Luke think it was worth it? Did you clear coat it to protect it? IT looks great!
Ashley Mayes
I asked him this last week and he said for him personally, he likes the wall pattern that he handprinted (it's more free flow style) in our laundry room. He went on to say that if I'm happy with it then it was worth it for him. We did not clear coat since it's just paint. It'll definitely be fine without that in the hallway. Thank you!!!!
AlisonG
Aww, sounds like Luke is a keeper! I am glad you a sending newsletters again, I missed getting them.
Valerie
WOW!!! … this is so awesome!!! You were right on point for all your choices! I would say it is def worth all the effort!
Ashley Mayes
Thank you! Glad we have it behind us but we do love it.
Lily
WOW! What a labor of love! We also have a long narrow hallway and this does look tempting, despite your warnings! If you don’t mind sharing, what are the dimensions of your hall? And that perfect warm brown paint color? Congrats on reaching the finish line of a tough project—the result is fantastic!
Ashley Mayes
Hi, The brown is wild caraway by Behr. I'm not home to measure but I think its about 23' x 4'
Peri
Love this whole look! Can you share the paint colors used for the stripes?
Ashley Mayes
Thank you! Wild Caraway by Behr and Simply White by Benjamin Moore
Peri
Thanks so much!!