

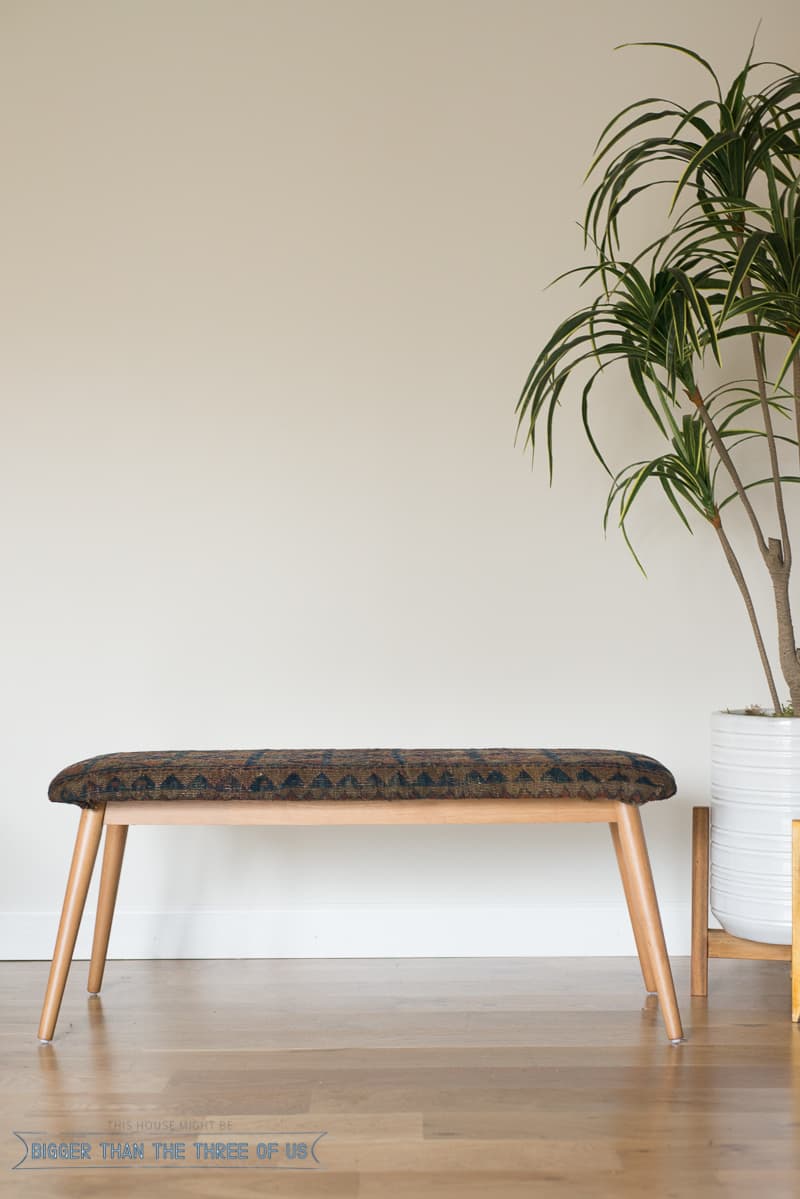
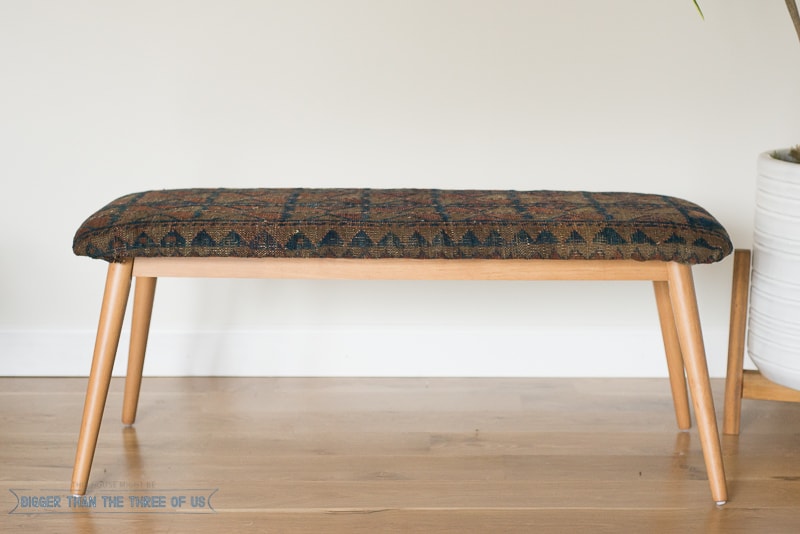
Hi Guys! Were you ready for Monday to roll around? I could take it or leave it, as weird as that sounds. We had a super-relaxing weekend but I'm also motivated to get back in the swing of things. Last weekend, we worked, worked, worked and this project was part of that. Although, a very short part of that. Today, I'm sharing my Vintage Rug Upholstered Bench Tutorial. I LOVE this project. I liked the added little flavor it gives in my space and I like how fast it was (seriously 10 minutes!).
If you've been following me for very long then you know that I'm not a perfectionist. I'm not patient enough or focused enough to do an amazing job on anything. I'm more of a half-asser (excuse the language) who is pretty happy with all my non-detail-oriented projects.
So, even if you aren't detail-oriented (like me) you can still do this project. Actually, you can do most projects. AND, if you are married to a perfectionist/detail-oriented person then you are golden (at least that's how I feel most times when I need something to be perfect).
All of that is to stay, let's just jump right in with this project - you can do it!
*Affiliate links below. Thanks for supporting this blog. Clicking on a link doesn't cost you anything extra. When you make a purchase, I get a very small commission that helps pay for this blog. Thank you! Click to read my disclosure policy.
Bench | Planter (similar)
Grab your supplies:
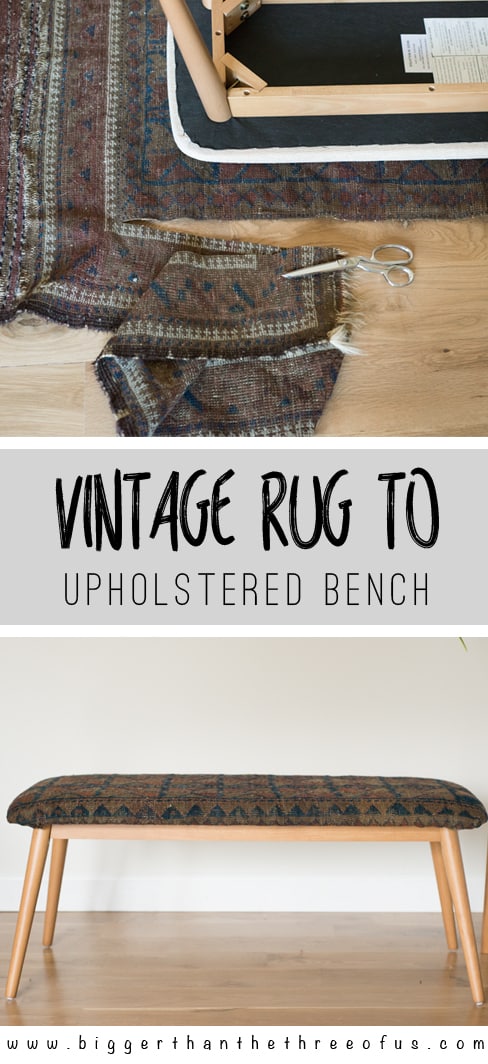
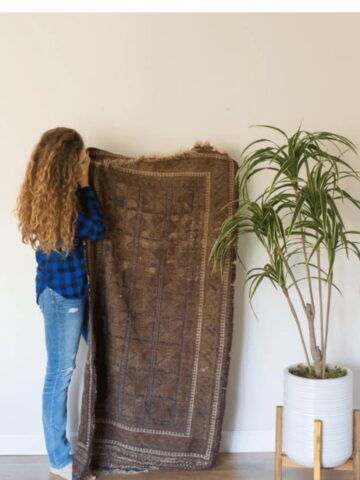
3 x 5 Rug
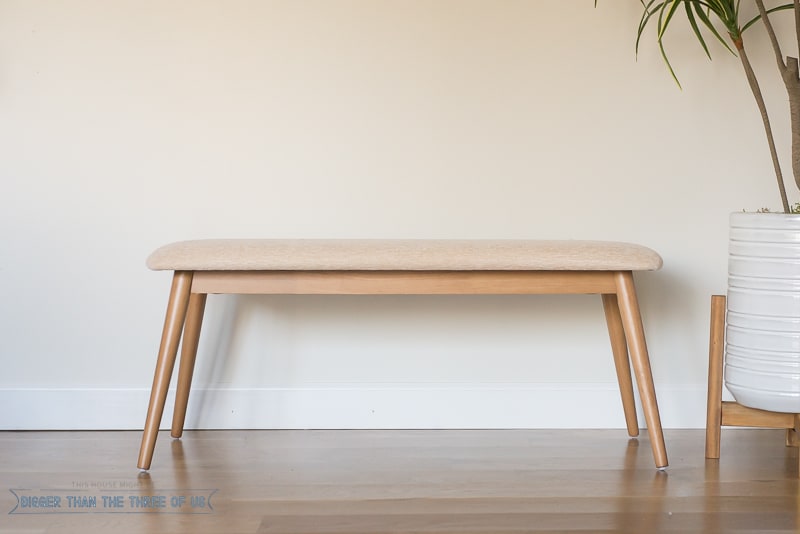
With your rug facedown, place your bench on your rug with the part of the rug on the padding where you want the rug to be.
![]()
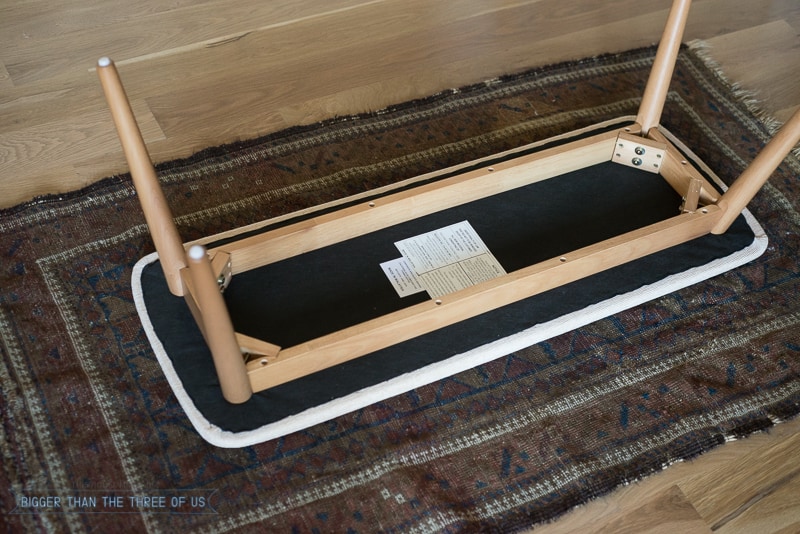
Start trimming your rug so that you give yourself enough fabric to fold over and staple.
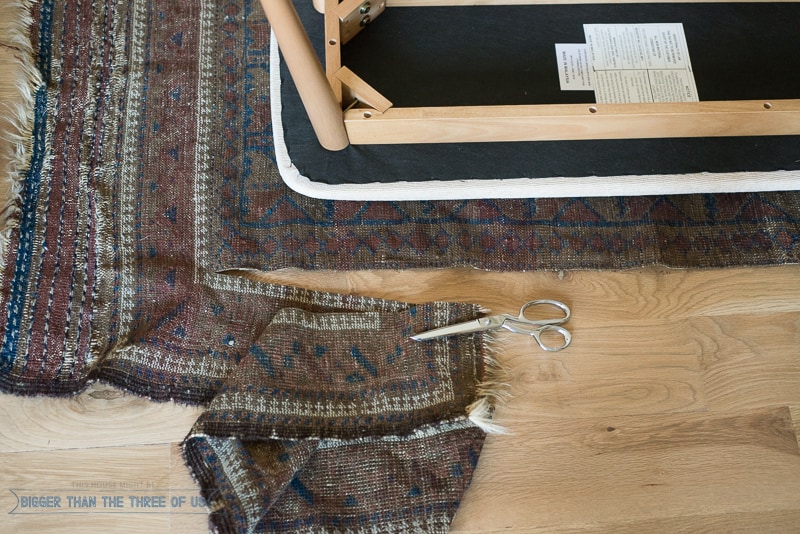
Working from the middle out, staple the rug into the bench.
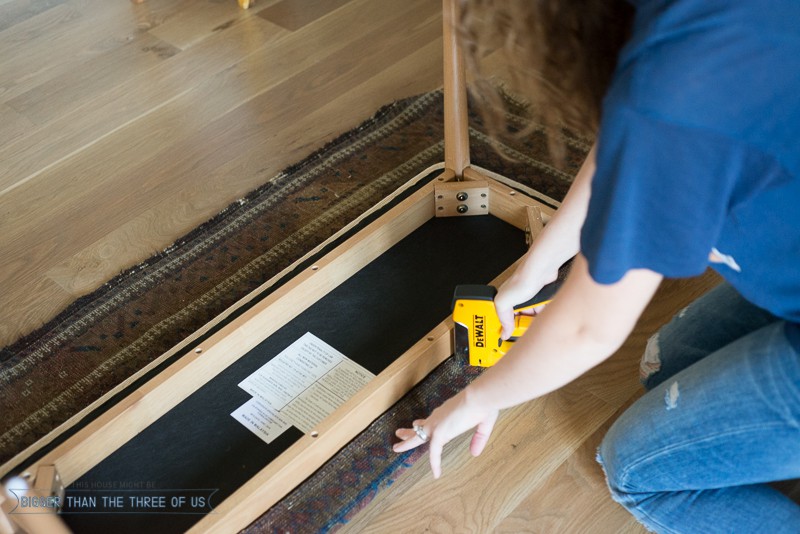
Personally, I like to work from the middle out about 8" on both sides and then double-check my work. Repeat that process, working outward, until all four sides have staples in.
Flip the bench over to make sure you are keeping your fabric lines straight. Flip it back over and finish stapling in the corners. For the corners, I like to pull and tuck so that the tucks happen on the underneath side.
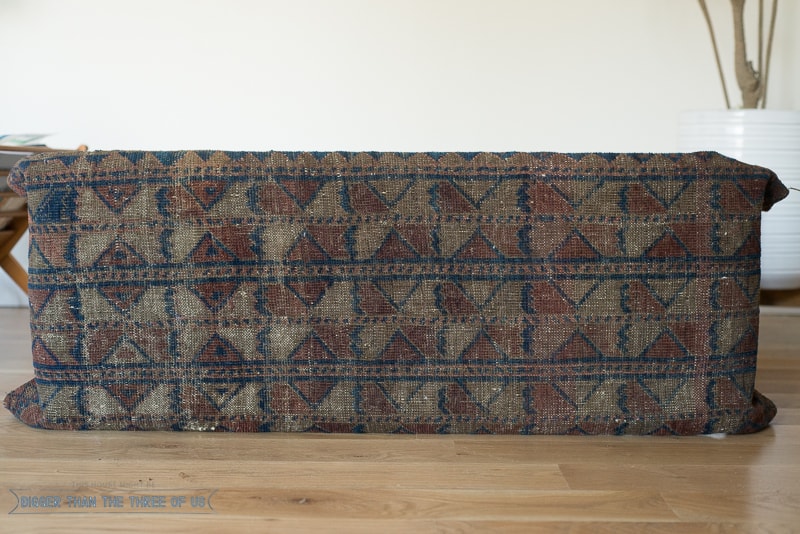
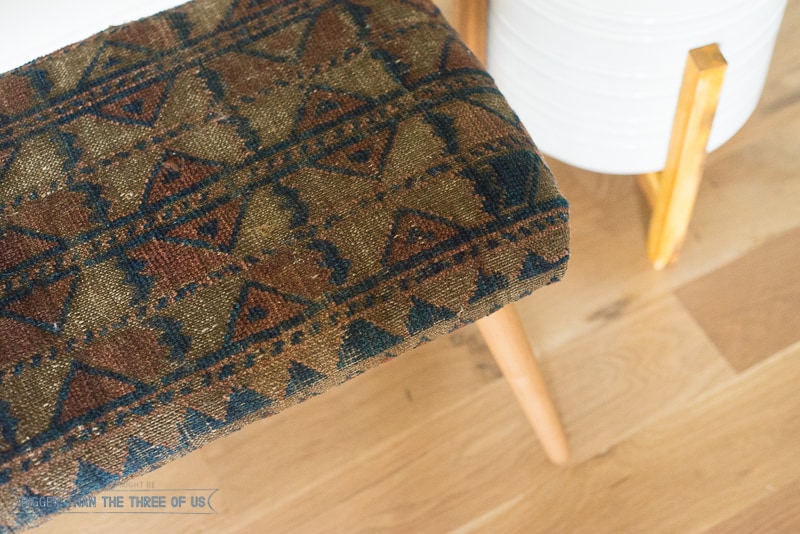
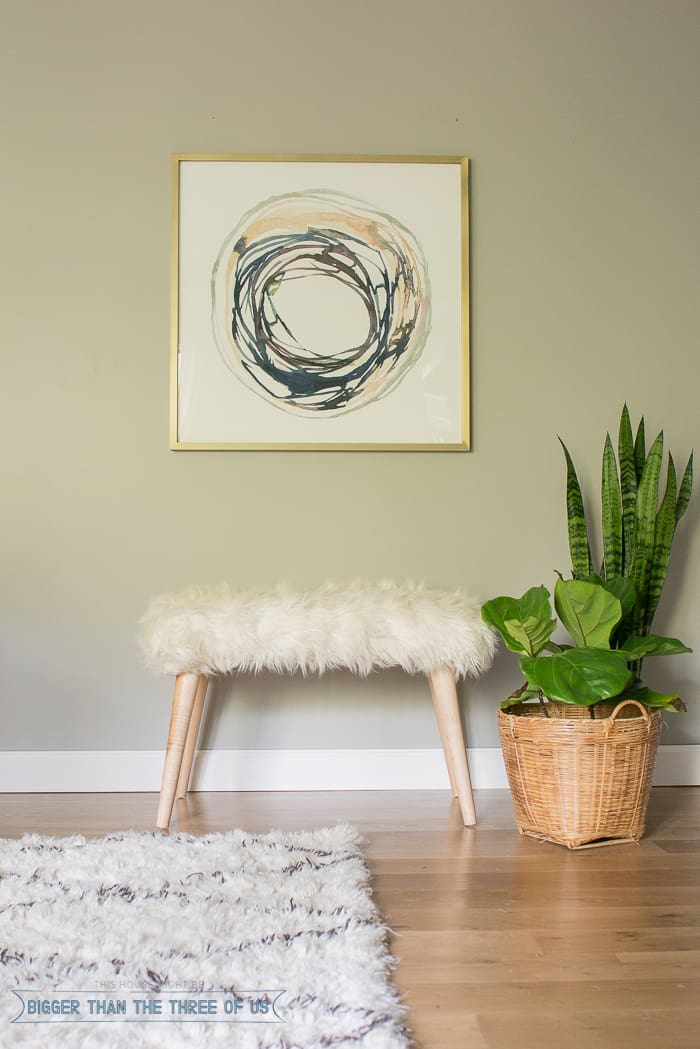
That's it! For a super-fast project, I think this one is great. I love the added texture and interest the rug brings to the bench.
I'll have to admit that it took me awhile to decide to actually cut the rug, but I'm so glad that I did.
*Tip: If you are using a vintage rug, make sure to clean it first. Check out my blog post on How to Clean a Vintage Rug.
Pin this:
If you loved this post then you may love:
or

Cassie Bustamante
it looks awesome, ashley! and i am so with you.... not a perfectionist! good enough girl over here! that should have been my blog name. 😉
Ashley Mayes
Thanks Cassie! Also, I'm totally glad I'm not the only blogger/DIYer that isn't perfectionist. Maybe we can start a new trend?!
Jessica
oh my wow!!! I was not expecting this! it looks lovely....and it is simple. I saw a worn persian rug at an estate sale for dirt cheap and I turned it down....next time I will be picking it up.
Ashley Mayes
What?! Say you didn't pass it up. So sad. ha. I've actually never been to an estate sale... Need to change that stat.
Jessica | house homemade
Such a good idea! Love it
Ashley Mayes
Thanks Jessica! I really love it.
Ariel
looks great!
Ashley Mayes
Thanks Ariel! I love how the vintage rug transformed the bench! It added so much to our bedroom reveal.
Jenny
I absolutely love repurposing things. No matter what it is, it has another purpose. I’m all for suggestions and seeing others work there items around. Good job on that rug covered bench!!!
Ashley Mayes
Me too! Thanks so much Jenny!