Learn how to update chandelier candle sleeves with paint. You can easily change the look of the candle covers which can give you a fresh, new, look on your chandelier!
Have you ever passed on a chandelier at a great price because you weren't sure how to update it? I know I've been guilty of that! Over the years, I've learned what works when it comes to making updates to lights. You can spray paint light fixtures themselves, add a pendant to an oversized glass shell (like I did with our kitchen pendant), and even change out the bulbs (think about opting for decorative bulbs instead of traditional bulbs).
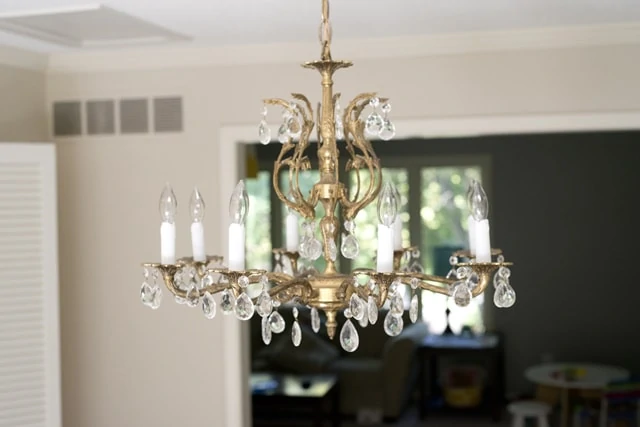
There are so many different ways to update lighting and today I wanted to share another one with you. Have you ever had a chandelier that has candle covers that are outdated? When we moved in, our formal dining room, had this brass chandelier with dingy candle sleeves. I didn't think much about them for awhile but then realized that updating the chandelier would be easy and all it really needed was to change the look of the candle sleeves.

All About Chandelier Candle Sleeves
Before we jump right in to the easiest DIY ever of changing the chandelier candle covers, let me back up a bit and explain a bit more about the chandelier socket covers.
What are the covers on a chandelier called and what do they do?
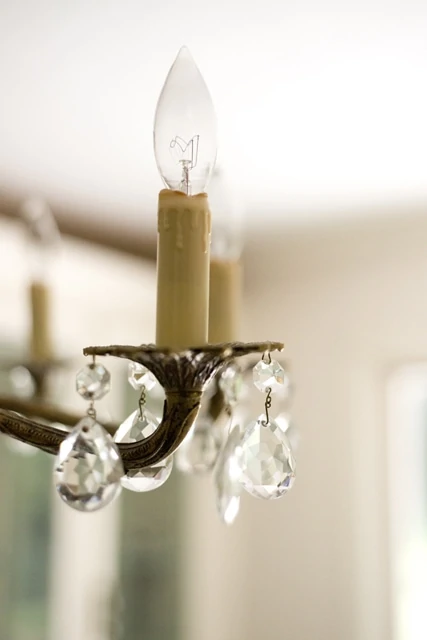
The candle sleeves are tube-like plastic that slide directly over the lamp socket to cover the electrical components of the light.
Replacing Chandelier Candle Covers or Updating Candle Sleeves?
Buying replacement chandelier covers is inexpensive but also, it's easy to update the candle covers with paint as I'm going to show you!
There are different types of chandelier candle options that mimic the old-time style of actually having candles that one would light in the chandelier. Some chandelier sleeves have "drips" that mimic candle wax dripping down and others tend to be plain.
Let me show you what my candle sleeves used to look like and then I'll go through the simple process of how to paint the chandelier candle covers.
Old and Dingy Candle Sleeve Before Photo
Supplies Needed for Updating Chandelier Sleeves
- Soap and Water
- Spray Paint
- Cardboard
- Nails

How to Paint Chandelier Covers
- Remove candle sleeves by first unscrewing the lightbulbs out of the chandler.
- Once lightbulbs are removed, gently push the candle covers up to take them off the light fixture.
- Clean the candle covers with soap and water and let dry.
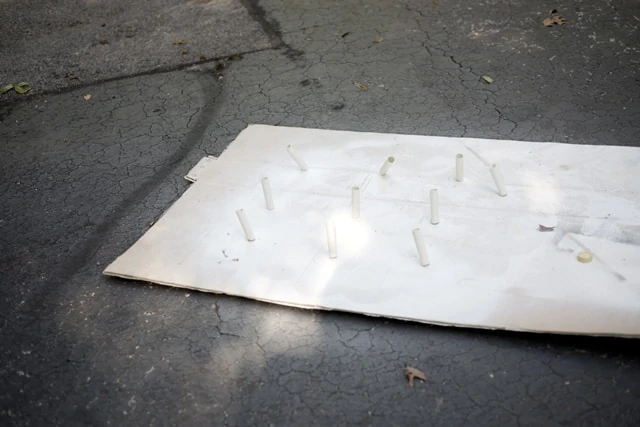
- Insert nails in cardboard and place one candle cover over each nail so the candle cover is propped upright.
- Spray paint the covers, using light coats and following dry times on spray paint can.
- Once dry, gently slip the candle sleeves back over each socket.
- Screw in lightbulb to socket.
That's it!
My candle sockets had a bit of the "drippy candle wax" look to them. Honestly, after I painted them white, that part just disappeared, which is what I wanted.
The total cost of making over the candle sleeves was $0 because I already had spray paint on hand. If you didn't have spray paint, then you'd be out around $5 or so.
If you have broken or cracked candle sleeve covers, you can replace the sleeves themselves. Make sure to measure your candle sleeves before buying new ones because there are different options for candle cover length. I like the idea of updating them if you can but if you can't here are a few options for buying new candle covers.
Affiliates below. Thanks for supporting this blog. Click to read my privacy and disclosure policy.
Buying Replacement Chandelier Candle Covers
I did see that you can buy the candle sleeves in brass! I wonder what that would have looked like on my chandelier?!

When I started to find my style in my home, I realized that although this project was such a good project, the overall vibe of the chandelier was a bit too fancy for my space. My mom loved the chandelier though, so it found a good home after we enjoyed it for a few years.
Here's how our dining room looks now:

Anyways, I hope you feel inspired to think about the little updates you can do within your space. Bringing something to life or modernizing it a bit can feel so rewarding. Plus, if you are on a budget, these types of updates can be done without breaking the bank.
How to Update Chandelier Candle Sleeves with Paint!

Learn how to update chandelier candle sleeves with paint. You can easily change the look of the candle covers which can give you a fresh, new, look on your chandelier!
Materials
- Soap and Water
- Spray Paint
- Cardboard
- Nails
Instructions
- Remove candle sleeves by first unscrewing the lightbulbs out of the chandler.
- Once lightbulbs are removed, gently push the candle overs up to take them off the light fixture.
- Clean the candle covers with soap and water and let dry.
- Insert nails in cardboard and place one candle cover over each nail so the candle cover is propped upright.
- Spray paint the covers, using light coats and following dry times on spray paint can.
- Once dry, gently slip the candle sleeves back over each socket.
- Screw in lightbulb to socket.
Notes
If you have broken or cracked candle sleeve covers, you can replace the sleeves themselves. Make sure to measure your candle sleeves before buying new ones because there are different options for candle cover length. I like the idea of updating them if you can but if you can’t here are a few options for buying new candle covers.


Ashley Mayes
Thanks! I'm still trying to modernize the room one step at a time. =)
Andrea
Brilliant. The little details make such a difference.
Your redesign is lovely, as well.
Ashley Mayes
Thanks so much!