Learn all about engraving brass at home, including: making custom brass name plates, using a Dremel to engrave brass and more!
A few weeks ago, I shared a super simple tutorial on painting picture frame mats. That project wasn't my first rodeo with updating photo frames though. Before that, came the tutorial for cutting your own picture frame mats. I really like the idea of taking something standard, such as a frame or a mat, and putting my own spin on it. Today's project is all about that... how I embellished picture frames with brass name plates.
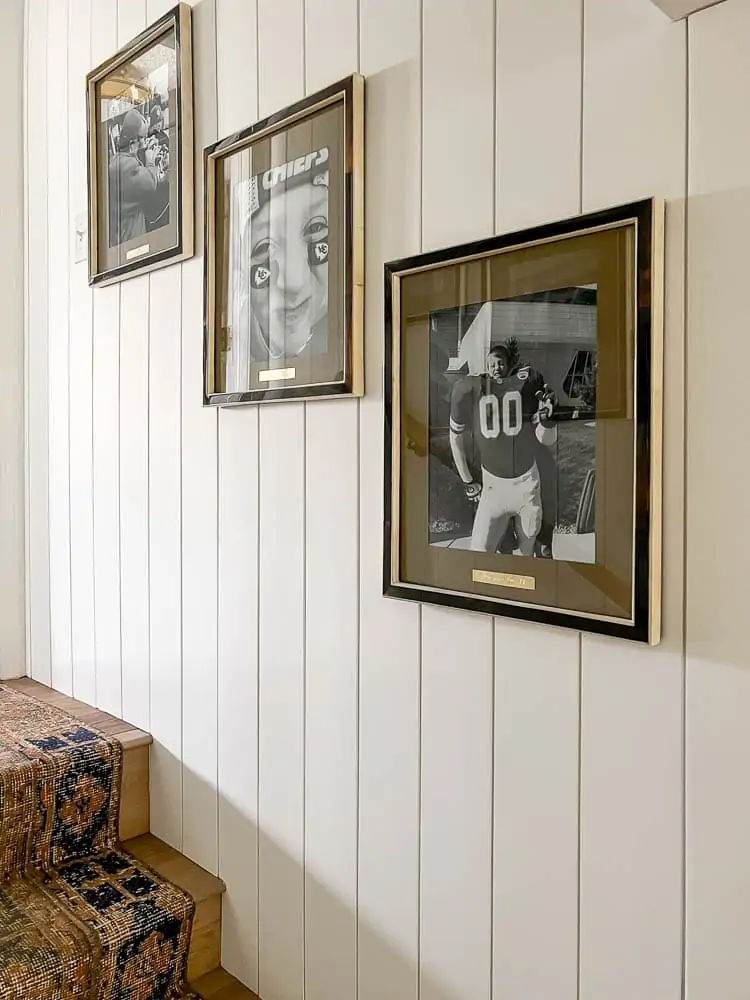
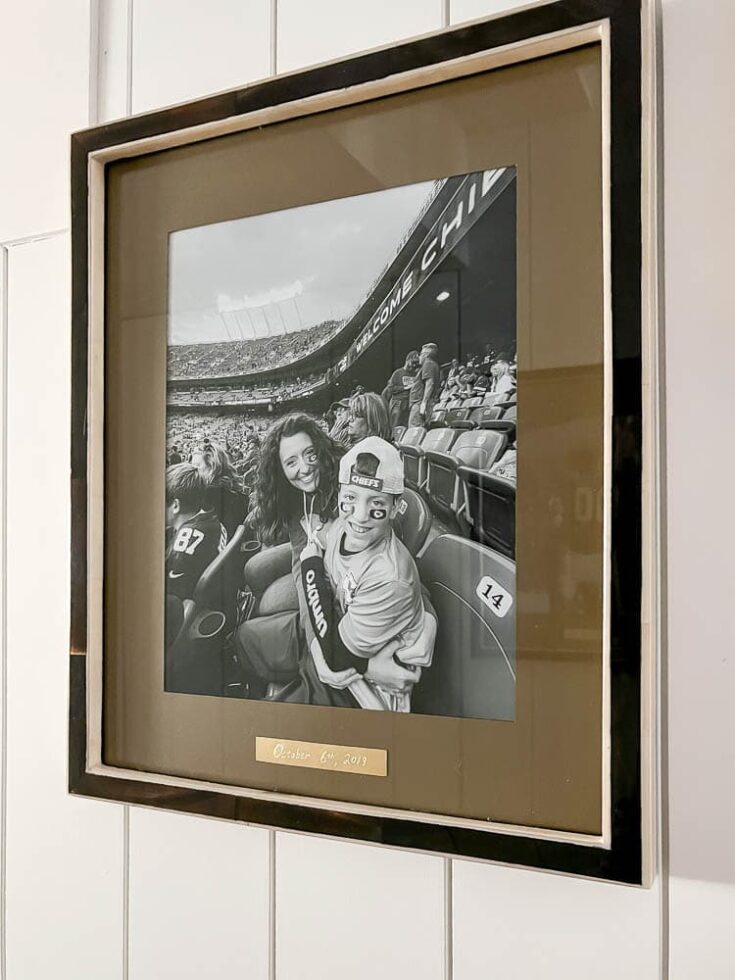
Originally, I was thinking I'd include some family portraits in the basement behind the sofa. As I've been tweaking that gallery wall, I just didn't love the look of family portraits mixed in with original art and mixed-media prints. But, that left me still wanting to see memories of some of our favorite tailgating and game-day experiences.
I decided that a small black and white portrait gallery wall would look good in the stairwell leading down to the basement. I painted the mat board but felt like I still wanted to embellish the frames in some way. Photos tell a story but, sometimes, it's great to have a date or name to help explain the story even more.
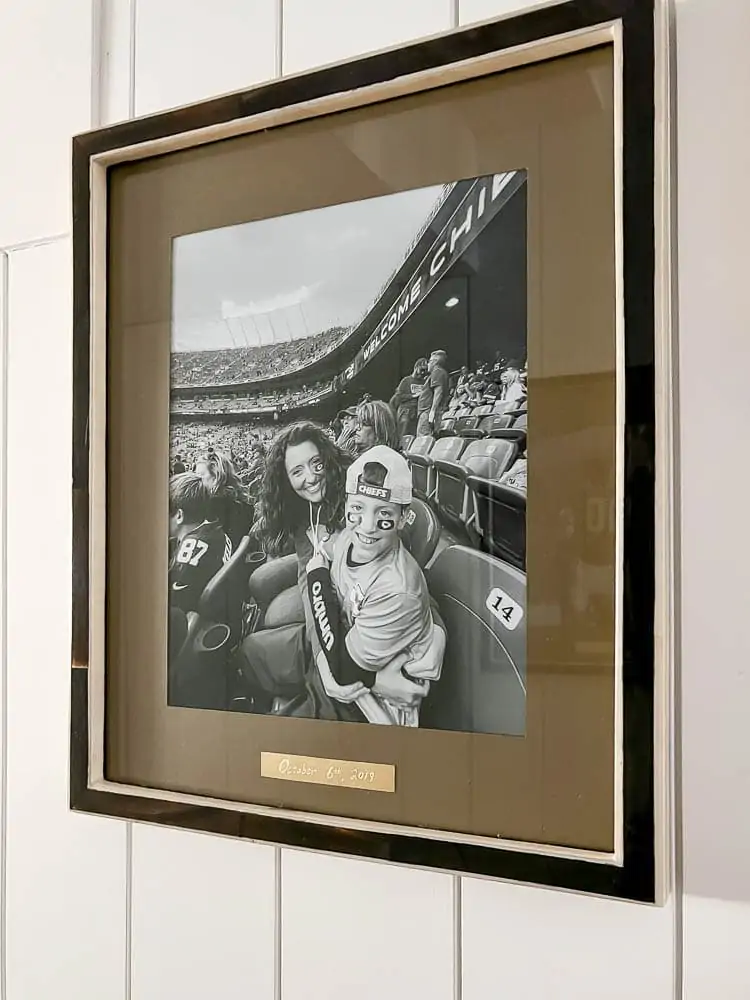
Engraving Brass for Brass Name Plates with Dremel Engraver
I've been saving unique picture framing ideas on Pinterest for months because I've been interested in making my art more special at home. I remembered that I'd seen some different ideas about handwriting name tags on frames and thought I might go that route but then I got stuck on the idea of metal engraving.
I'm sure you can picture trophies with engraved plates but those vibes are late 90s for sure. Then, I remembered that I had saved a photo of an engraved brass plate for a picture frame that I saw on Instagram. The vibe of that bathroom with the custom metal plaque on the frame was anything but 90s feeling. I loved it.
I knew that you could easily buy engraved name plates and even looked at options for buying them. We definitely have options locally that will do brass plate engraving with a laser but there are lots of stores online that will do them as well. The price wasn't horrible for custom brass engraving but it also wasn't nothing, if that makes sense.
Since I was originally thinking I might have Luke hand letter (I love his handwriting) tags or scraps of paper for each photo frame, that got me thinking about if he could do hand engraving instead. If you give a mouse a cookie.... =)
Guess what?! We already owned a hand tool and had Dremel engraving bits that came in a package with other bits. I ran the brass plate engraving project by Luke and he was up for trying it. So, off I went to source the brass plaques.
You can definitely buy different blank brass plates that are made for brass plate engraving. I'll link some options in the supply list, below. However, I decided to go a step further in this DIY just to see if I could do it and make my own blank brass plates for engraving. It was pretty easy and I enjoyed trying to figure out the process for cutting brass sheets. Let's get to the tutorial for making the blank brass plaques first and then how to actually use a handheld engraving tool.
Affiliate links below. Thanks for supporting my blog. Click to read my privacy and disclosure statement.
Supplies to Cut Thin Sheet Metal for Crafts
- Thin Brass Sheet Metal for crafts
- Miter Saw
- Clamps
- Scrap Wood
- Safety Glasses
- Sand paper
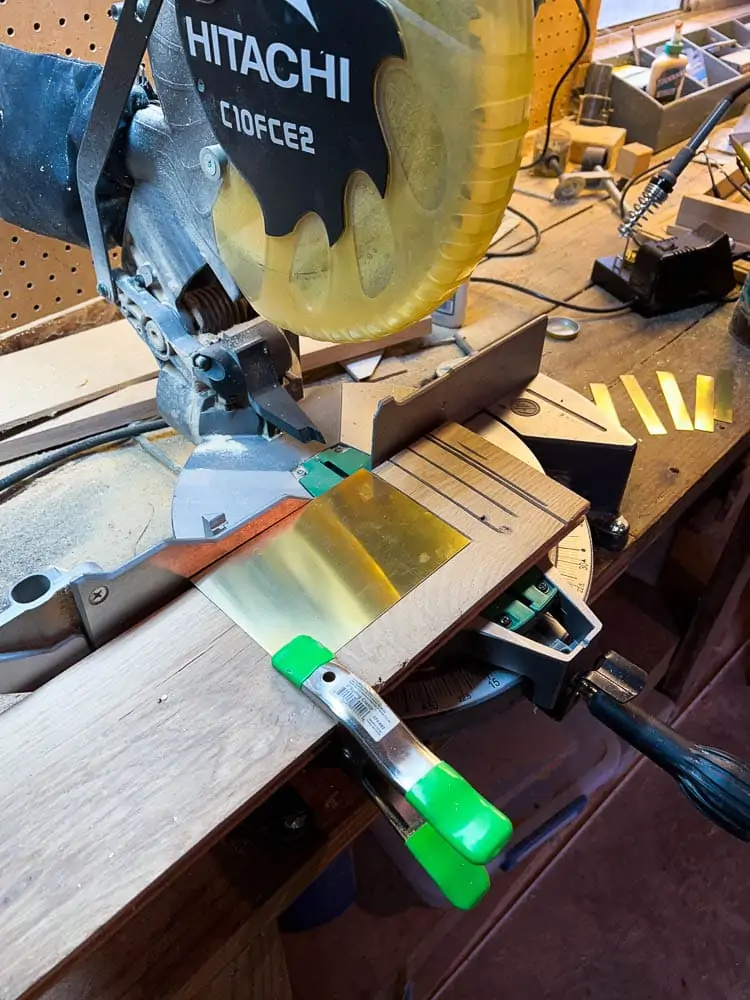
The sheet metal comes in different thicknesses. If you bought a thicker piece, you might be able to cut the craft metal without clamping it to a scrap piece of wood. When I tried to do that, my sheet metal curled and moved.
How to Cut a Brass Plate to Make a Brass Plaque
- Clamp the craft sheet metal to scrap wood
- Determine how big of brass tags you want to make (mine are 1" x 5" )
- Make a mark at the line to cut on your brass sheet
- Cut with a miter saw using a normal wood blade
- Sand any rough edges with (whatever sandpaper you have)
- Repeat as needed
Cutting the brass plaques was a super simple process and saved money. All in, after I figured out that I needed to clamp the brass to the wood before cutting, the cutting part took about five minutes. It wasn't scary (just wear safety glasses because metal shavings do come off). If the edges look or feel rough, gently sand them down with sandpaper.

Engraving Brass Plaques Supplies Needed
- Blank Brass Plates (DIY or buy)
- Dremel Engraver
- Engraving Bits
How to Engrave Metal
- Practice writing what you want to say on the tags (make sure it's small enough to fit)
- Using a wipeable marker, write out your saying on each tag
- Clamp or tape tags to work surface
- Using a Dremel, go slowly and trace over your hand lettering
- Wipe away the marker marks
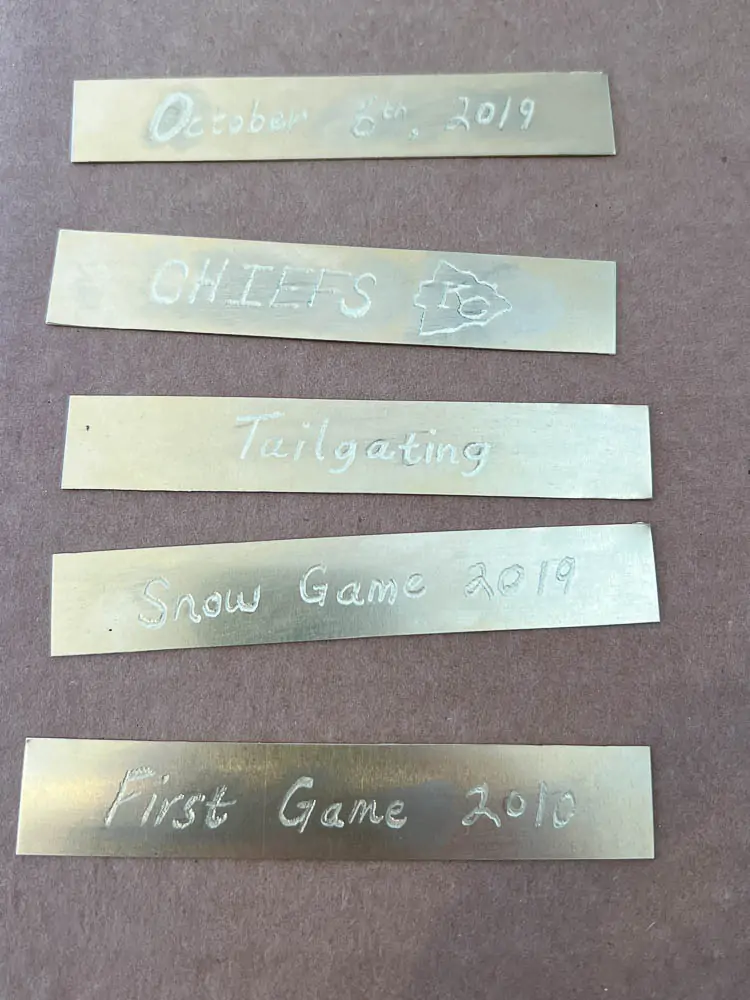
To attach the custom brass plaques to the mat board, we used super glue. Super glue lets off some sort of chemical while drying, so definitely let it completely dry before putting your frame back together.
A few questions that you might have on engraving brass at home.
Is Engraving Brass Easy?
Using a Dremel to engrave brass was pretty easy once Luke got used to it. He said that he'd definitely do it again! You can hand engrave brass but that's a totally different skillset!
Dremel Engraving Tips and Tricks
Go slow and practice on brass sheets. Try out different engraving bits to get a different look and play around with how you are holding the Dremel to the brass sheet itself. The bit will always want to pull in one direction. Experiment to get a feel for it and go slow to compensate.

I wish I could have gotten more photos of the brass name plates, but the frame glass isn't anti-glare and it was challenging to get great photos of the tags. I really love them in person. They add a tiny bit of interest and personality to the frames, which I do just adore!
Engraving Brass for Brass Name Plates with Dremel
Learn all about engraving brass at home, including: making custom brass name plates, using a Dremel to engrave brass and more!
Materials
- Thin Brass Sheet Metal for Crafts
- Scrap Wood
- Sand paper
- Super Glue
Tools
- Miter Saw
- Clamps
- Safety Glasses
- Dremel Engraver
- Engraving Bits
Instructions
- Decide if you want to cut your own brass plates or buy them. If you are cutting your own, then follow the steps below, first.
- Clamp the craft sheet metal to scrap wood.
- Determine how big of brass tags you want to make (mine are 1" x 5" )
- Mark a mark at the line to cut on your brass sheet.
- Cut with a miter saw using a normal wood blade.
- Sand any rough edges.
- Repeat at needed.
- Now, you have the brass plaques. Let's engrave them!
- Practice wrigin gwhat you want to say on the tags (make sure it's small enough to fit).
- Using a wipeable marker, write out your saying on each tag.
- Clamp or tape tags to work surface.
- Using a Dremel, go slowly and trace over your hand lettering.
- Wipe away marker marks.
Notes
To attach the custom brass plaques to the mat board, we used super glue. Super glue lets off some sort of chemical while drying, so definitely let it completely dry before putting your frame back together.
Dremel Engraving Tips:
Go slow and practice on brass sheets. Try out different engraving bits to get a different look and play around with how you are holding the Dremel to the brass sheet itself. The bit will always want to pull in one direction. Experiment to get a feel for it and go slow to compensate.




Leave a Reply