Add some curb appeal by learning how to paint a storm door and get the look of a modern storm door by updating window muntins!
I hope you all agree that, sometimes, it's worth a bit of effort to "pretty up" a piece that you already have rather than discarding it for a new piece. Don't get me wrong, I love bright and shiny new home renovation items but there's something great about making something better within your home by using your skills and being budget-friendly, too!
This project, where I'm sharing how to update a storm door, is hopefully a project that really resonates with you. I'm sure most of us have doors or windows that could use a little love and you'll see how my storm door got some much-needed love. Hopefully, you'll be inspired to tackle a similar project of your own.
This post is sponsored by HANDy Paint Products. I'm very lucky to be able partner with them on house renovation projects and hope you guys love their products as much as I do!
Before we jump right in to the how-to, let me show you a quick before/after of what our "custom storm door" now looks like! I say custom, because I customized it! =)
Decorative Storm Door Before/After
What do you think of that makeover?! It's good, right?! Seriously guys, I want you to know that there are tons of mini projects that you can do around your house that can have these same results.
In the past, I've modernized my wrought iron handrails and replaced my doorknobs to give spaces a fresh new vibe. Don't just think about the big renovations (I mean those are great, but not always realistic), think about the little things that can add value, style or just put a smile on your face.
This project is about aluminum storm doors but you can take the tutorial and make it your own depending on what type of storm door you have! Also, I knew I wanted a black storm door that felt more modern so I'm sharing how I changed up the muntin bars to help modernize it a bit!
p.s. If you want to see more of the how-to in a video format, you are in luck! At the bottom of this post, I've included the how-to for the storm door makeover that we shot as I was doing the project. Just promise not to judge my outfits or lack of makeup. 😉
How to update a storm door by changing the muntins
Determine how your window grille frame is attached. If it is decorative and attached by screws (like ours was), unscrew the window muntin frame to remove.
Look at window muntins and decide what type of modernizing you can do with the current grille that you have.
If you want the look that I have, I cut the horizontal bars with the bolt cutters. Then, I used a mallet to tap the vertical bars out (you can see more of this process in the video below).
Now, the frame pieces are out. Next, measure from left to right on the window frame.
Using your measurement from the previous step, use a hack saw with a metal blade to cut the remaining two aluminum bars to size.
Now, slip the aluminum bars back in to your window frame.
Attach frame to aluminum storm door AFTER painting it.
Now, let's transform it with paint!
Painting a black storm door
Use an all-purpose cleaner to clean your door really well. Let dry.
Prime the door using an exterior primer.
After following dry time for the primer, apply a light coat of your exterior enamel.
Follow dry time and apply coats of paint as needed.
That's it! Let's get to the video and more progress photos and explanations in you case you are confused on the muntin part of this project!
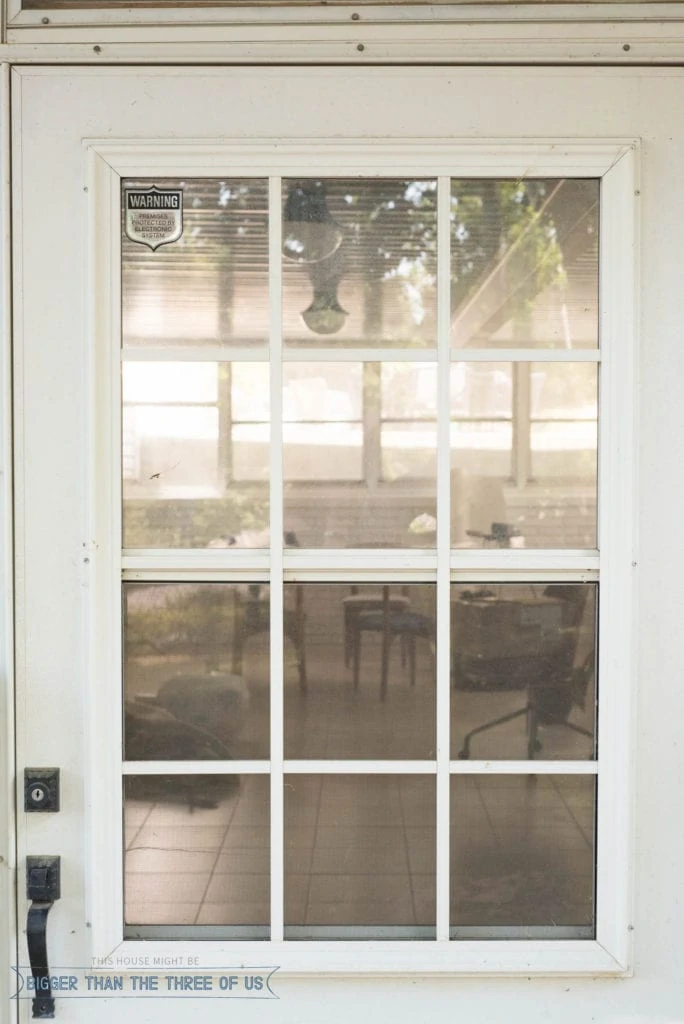
Old aluminum door before
Let me just say that, in this image, it was bright and sunny and the door looks 85% better in the picture than it did in real life.
Starting with muntin bars and how they attached
For this particular storm door, the muntins looked to be attached to a frame and the frame looked to be attached to the storm door itself.
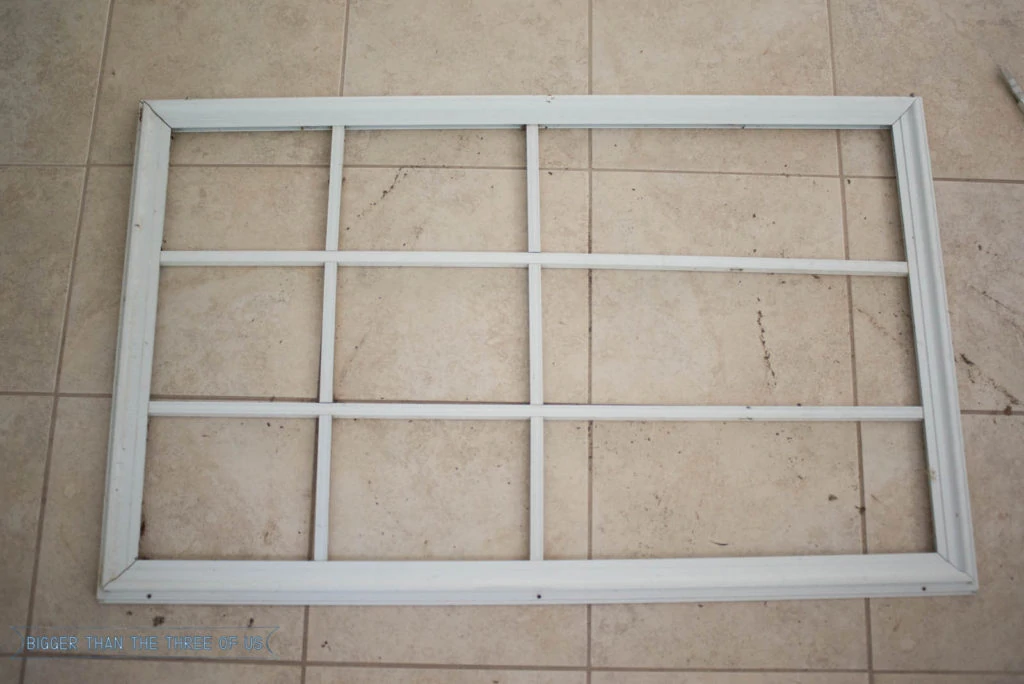
Unscrewing the frame was really easy. The next step was to figure out how to get the bars out of the frame. To be honest, they really didn't want to come out! I knew the general design of the bars that I wanted (I wanted to replicate the window grilles on our front doors).
Here's a picture of our front doors for reference:
After a bit of trial and error, I ended up using bolt cutters to cut the muntin bars that were originally going horizontal on the window frame. The reason I did this was because those bars were connected to the longer vertical bars and, where they were connected, they weren't seamless pieces of aluminum. I was careful to not damage the two vertical bars because I knew that I was going to use them in my makeover.
Ok, now that you have the frame pieces out, you want to measure from left to right on the window frame. We are going to turn the vertical bars into new, horizontal bars. Use that dimension and then use a hack saw with a metal blade to cut the remaining two aluminum bars to size. From there, all you have to do is slip them back in the frame.
Paint Storm Door (the fun part!)
I'd recommend painting the door and frame separate and, once they are dry, adding the frame back to the door. I was going to do it all together until I realized that if I put my frame across my screen in the door then I'd have to be VERY careful not to get paint on my screen. So, save yourself the trouble, just paint the frame and the door separately.
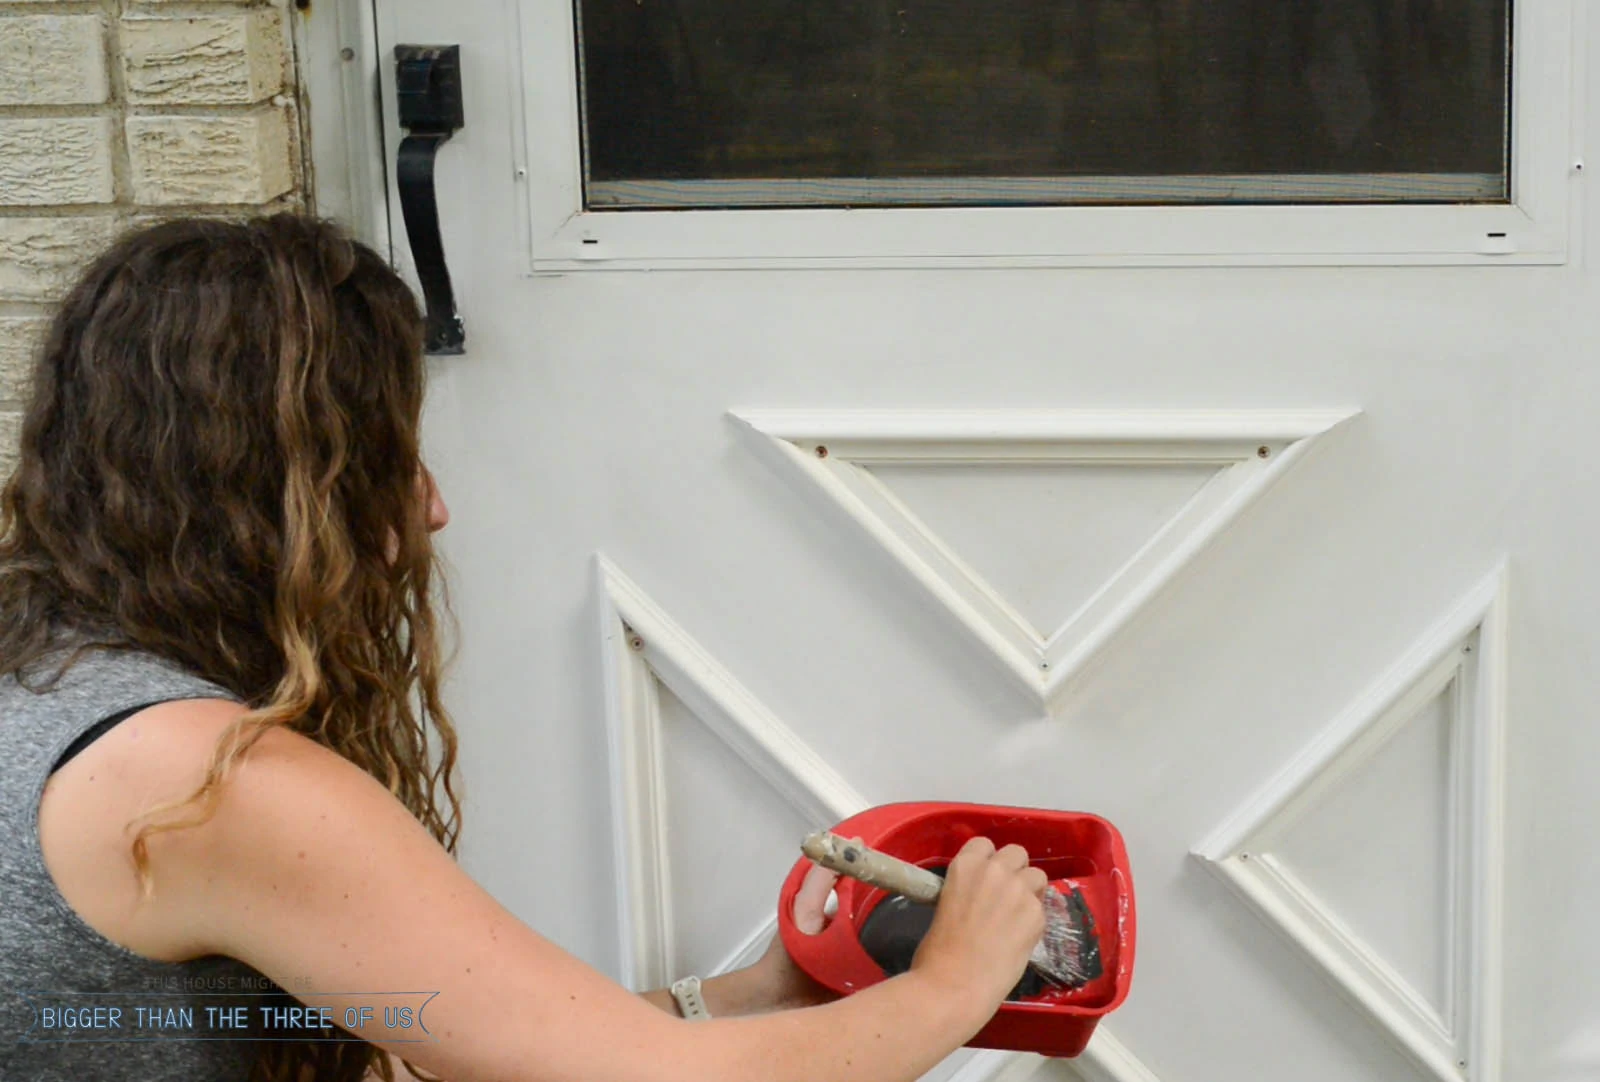
I used a good exterior primer, a HANDy Craft Tray (which was so perfect for this job) and a small paint brush for this project.
Brushing on primer
Look (or don't look - it's kinda gross) at this close-up!
After priming, I went for painting the storm door. I used an outdoor enamel paint and the same HANDy Craft Tray and brush just like I did with the primer.
Let the paint dry and attach the storm door grille! That's it! I seriously can't get over the difference this project made for this space.
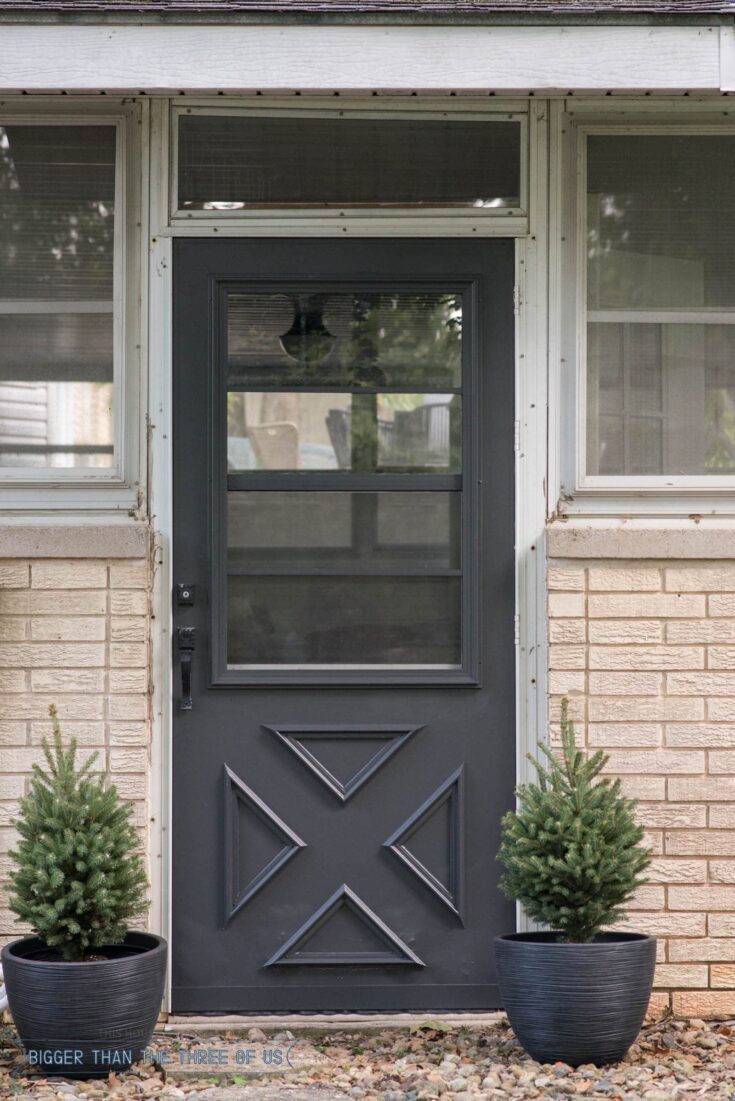
Decorative Storm Door Makeover
I just love this color! I did a full review and explanation of how/why I use Cracked Pepper so make sure to check it out!
It looks so good, right? I love the pop of color.
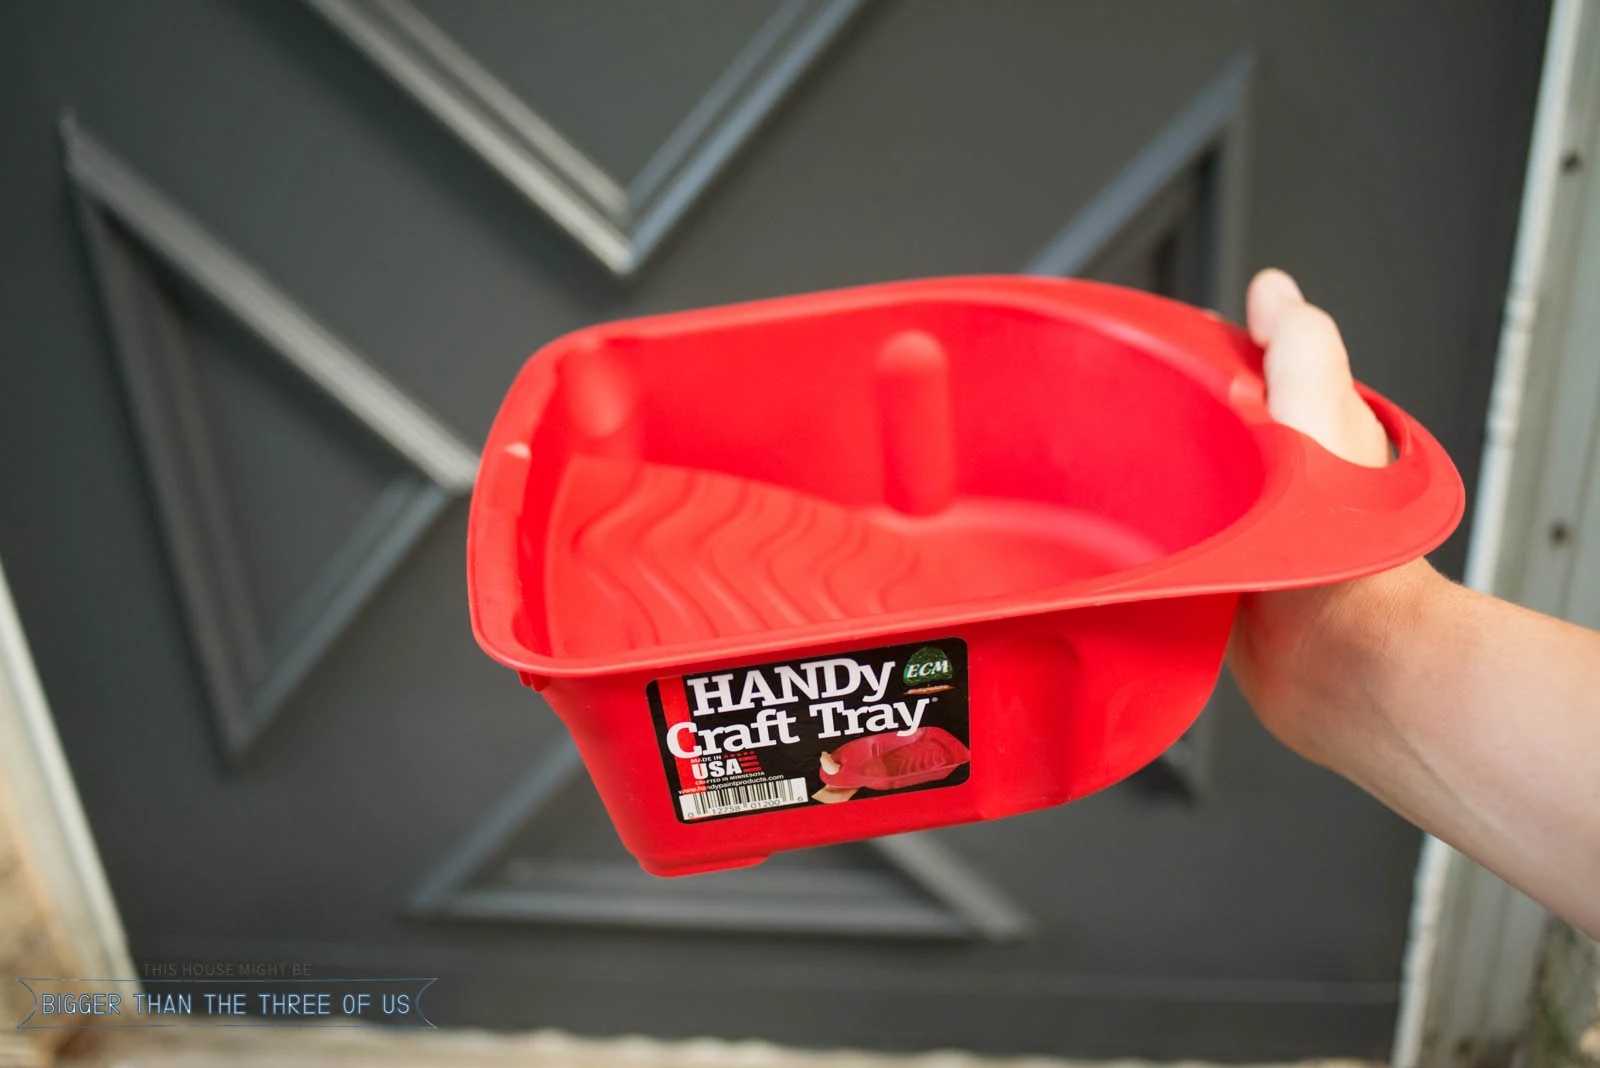
With all DIY Projects, having the right products can make all the difference. The smaller size of the HANDy Craft Tray (it can hold up to a ½ pint of paint) and ergonomic thumb-thru handle were amazing for this project. I could have easily used a mini roller on most of this door too because HANDy Craft Tray has a built-in roller grid that fits up to a 4" mini roller. But silly me, it didn't even cross my mind 'till the last coat of paint!
Do yourself a favor and pick one of these up. I have a few of them, which is great because I can slip them in a ziplock bag (with paint in the tray) and keep it in the fridge until my next job!
If you loved this project, then you'd probably love seeing:
Add some curb appeal by learning how to paint a storm door and get the look of a modern storm door by updating window muntins!
Prep Time10 minutes
Active Time3 hours
Additional Time4 hours
Total Time7 hours10 minutes
DifficultyEasy
Materials
Exterior primer
Exterior paint
All purpose cleaner
Tools
Drill
Bolt Cutters
Mallet
HANDy Craft Tray
Paint Brush
Hack Saw
Instructions
Use an all-purpose cleaner to clean your door really well. Let dry.
Prime the door using an exterior primer.
After following dry time for the primer, apply a light coat of your exterior enamel.
Follow dry time and apply coats of paint as needed.
Notes
I'd recommend painting the door and frame separate and then, once they are dry, adding the frame back to the door. I was going to do it all together until I realized that, if I put my frame across my screen in the door then I'd have to be VERY careful not to get paint on my screen. So, save yourself the trouble. Just paint the frame and the door separately.
After priming, I went for painting the storm door. I used an outdoor enamel paint and the same HANDy Craft Tray and brush just like I did with the primer.
Let the paint dry and attach the storm door grille! That's it! I seriously can't get over the difference this project made for this space.
You definitely need to toot your own horn! That door looks so great now...the gray is just a perfect color and so smart to change up that grid on the window. And those Handy Craft Trays are...well...just so handy! so much better than lugging around a can of paint.
Yay! Happy you love it! To be honest, I'm not 100% sure if the door is aluminum or steel BUT prep work is pretty much the same. You want to use an oil-based primer OR a latex primer that is meant for your door. Then, the enamel top coat (on most brands) can be applied over the top. I'd love to see your carport makeover if you give it a go!
Thank you for sharing this! They look new!!!
My next project is our front door. I would like to know WHERE you got your front doors? Did they come with the house?
Thank you for sharing this! They look new!!!
My next project is our front door. I would like to know WHERE you got your front doors? Did they come with the house? I'm buying those trays for everyone in my family!!!! Great idea
Hi Mary, Hope you have fun with it! Our front doors were purchased locally through a mill here in town. I told them what I wanted and they were able to mock it up and make them. It was pretty easy.
Hi I love the door and the color. I recently painted my front door and sidelights, avoided the storm door the entire time. Did you have to sand it before the primer? And does enamel paint go over the oil based primer? Inspired!
Thank you! I actually used Kilz Latex as the primer! I did the project about two years ago and it still looks amazing. I didn't sand but you could if your door was perfectly smooth and you wanted the primer to have something else to adhere to.


Robin
Looks so good, Ashley! Night and day difference. I love those HANDy Paint Products too - we use them too - makes it so much easier!
Ashley Mayes
Thanks Robin! I'm so thrilled with the outcome and yes!! Their products are seriously so great!
Lynn B Spencer
You definitely need to toot your own horn! That door looks so great now...the gray is just a perfect color and so smart to change up that grid on the window. And those Handy Craft Trays are...well...just so handy! so much better than lugging around a can of paint.
Well done my friend...really looks lovely.
Ashley Mayes
Haha! Thanks Lynn! I'd been wanting to change the grid over the windows for quite some time and glad that I just went for it!
Jessica
Love it! Is your door aluminum? Trying to figure out if the exterior paint would work on my aluminum carport door. Thanks!
Ashley Mayes
Yay! Happy you love it! To be honest, I'm not 100% sure if the door is aluminum or steel BUT prep work is pretty much the same. You want to use an oil-based primer OR a latex primer that is meant for your door. Then, the enamel top coat (on most brands) can be applied over the top. I'd love to see your carport makeover if you give it a go!
Chelsea Pepperman
Looks wonderful!!! May I ask what color paint you used? Thank you for sharing!
Ashley Mayes
Thanks Chelsea! It's Cracked Pepper by Behr.
mary
Thank you for sharing this! They look new!!!
My next project is our front door. I would like to know WHERE you got your front doors? Did they come with the house?
mary
Thank you for sharing this! They look new!!!
My next project is our front door. I would like to know WHERE you got your front doors? Did they come with the house? I'm buying those trays for everyone in my family!!!! Great idea
Ashley Mayes
Hi Mary, Hope you have fun with it! Our front doors were purchased locally through a mill here in town. I told them what I wanted and they were able to mock it up and make them. It was pretty easy.
Em
Hi I love the door and the color. I recently painted my front door and sidelights, avoided the storm door the entire time. Did you have to sand it before the primer? And does enamel paint go over the oil based primer? Inspired!
Ashley Mayes
Hi Em,
Thank you! I actually used Kilz Latex as the primer! I did the project about two years ago and it still looks amazing. I didn't sand but you could if your door was perfectly smooth and you wanted the primer to have something else to adhere to.